body { background:#fff url("http://www.blogblog.com/dots/bg_dots.gif") 50% 0; margin:0; padding:0 10px; text-align:center; font:x-small Verdana,Arial,Sans-serif; color:#333; font-size/* */:/**/small; font-size: /**/small; } /* Page Structure ----------------------------------------------- */ @media all { #content { background:url("http://www.blogblog.com/dots/bg_3dots.gif") no-repeat 250px 50px; width:700px; margin:0 auto; padding:50px 0; text-align:left; } #main { width:450px; float:right; padding:50px 0 20px; font-size:85%; } #main2 { background:url("http://www.blogblog.com/dots/bg_dots2.gif") -100px -100px; padding:20px 10px 15px; } #sidebar { width:200px; float:left; font-size:85%; padding-bottom:20px; } #sidebar2 { background:url("http://www.blogblog.com/dots/bg_dots2.gif") 150px -50px; padding:5px 10px 15px; width:200px; width/* */:/**/180px; width: /**/180px; } } @media handheld { #content { width:90%; } #main { width:100%; float:none; } #sidebar { width:100%; float:none; } #sidebar2 { width:100%; } } html>body #main, html>body #sidebar { /* We only give this fade from white to nothing to browsers that can handle 24-bit transparent PNGs */ background/* */:/**/url("http://www.blogblog.com/dots/bg_white_fade.png") repeat-x left bottom; } /* Title & Description ----------------------------------------------- */ @media all { #blog-title { margin:0 0 .5em; font:250%/1.4em Georgia,Serif; color:#353; } #blog-title a { color:#353; text-decoration:none; } #description { margin:0 0 1.75em; color:#996; } #blog-mobile-title { display:none; } #description-mobile { display:none; } } @media handheld { #blog-title { display:none; } #description { display:none; } #blog-mobile-title { display:block; margin:0 0 .5em; font:250%/1.4em Georgia,Serif; color:#353; } #blog-mobile-title a { color:#353; text-decoration:none; } #description-mobile { display:block; margin:0 0 1.75em; color:#996; } } /* Links ----------------------------------------------- */ a:link { color:#488; } a:visited { color:#885; } a:hover { color:#000; } a img { border-width:0; } /* Posts ----------------------------------------------- */ .date-header { margin:0 0 .75em; padding-bottom:.35em; border-bottom:1px dotted #9b9; font:95%/1.4em Georgia,Serif; text-transform:uppercase; letter-spacing:.3em; color:#663; } .post { margin:0 0 2.5em; line-height:1.6em; } .post-title { margin:.25em 0; font:bold 130%/1.4em Georgia,Serif; color:#333; } .post-title a, .post-title strong { background:url("http://www.blogblog.com/dots/bg_post_title.gif") no-repeat 0 .25em; display:block; color:#333; text-decoration:none; padding:0 0 1px 45px; } .post-title a:hover { color:#000; } .post p { margin:0 0 .75em; } p.post-footer { margin:0; text-align:right; } p.post-footer em { display:block; float:left; text-align:left; font-style:normal; color:#996; } a.comment-link { /* IE5.0/Win doesn't apply padding to inline elements, so we hide these two declarations from it */ background/* */:/**/url("http://www.blogblog.com/dots/icon_comment.gif") no-repeat 0 .25em; padding-left:15px; } html>body a.comment-link { /* Respecified, for IE5/Mac's benefit */ background:url("http://www.blogblog.com/dots/icon_comment.gif") no-repeat 0 .25em; padding-left:15px; } .post img { margin:0 0 5px 0; padding:4px; border:1px solid #cca; } /* Comments ----------------------------------------------- */ #comments { margin:0; } #comments h4 { margin:0 0 10px; border-top:1px dotted #9b9; padding-top:.5em; font:bold 110%/1.4em Georgia,Serif; color:#333; } #comments-block { line-height:1.6em; } .comment-poster { background:url("http://www.blogblog.com/dots/icon_comment.gif") no-repeat 2px .35em; margin:.5em 0 0; padding:0 0 0 20px; font-weight:bold; } .comment-body { margin:0; padding:0 0 0 20px; } .comment-body p { margin:0 0 .5em; } .comment-timestamp { margin:0 0 .5em; padding:0 0 .75em 20px; color:#996; } .comment-timestamp a:link { color:#996; } .deleted-comment { font-style:italic; color:gray; } .paging-control-container { float: right; margin: 0px 6px 0px 0px; font-size: 80%; } .unneeded-paging-control { visibility: hidden; } /* More Sidebar Content ----------------------------------------------- */ .sidebar-title { margin:2em 0 .75em; padding-bottom:.35em; border-bottom:1px dotted #9b9; font:95%/1.4em Georgia,Serif; text-transform:uppercase; letter-spacing:.3em; color:#663; } #sidebar p { margin:0 0 .75em; line-height:1.6em; } #sidebar ul { margin:.5em 0 1em; padding:0 0px; list-style:none; line-height:1.5em; } #sidebar ul li { background:url("http://www.blogblog.com/dots/bullet.gif") no-repeat 3px .45em; margin:0; padding:0 0 5px 15px; } #sidebar p { margin:0 0 .6em; } /* Profile ----------------------------------------------- */ .profile-datablock { margin:0 0 1em; } .profile-img { display:inline; } .profile-img img { float:left; margin:0 8px 5px 0; border:4px solid #cc9; } .profile-data { margin:0; line-height:1.5em; } .profile-data strong { display:block; } .profile-textblock { clear:left; } /* Footer ----------------------------------------------- */ #footer { clear:both; padding:15px 0 0; } #footer hr { display:none; } #footer p { margin:0; } /* Feeds ----------------------------------------------- */ #blogfeeds { } #postfeeds { padding-left: 20px }

Prudent Baby

Get sewing how to, sewing tutorials, and sewing help to learn sewing. We offer sewing tutorial for sewing moms.

Tuesday, September 20, 2011

Jacinda's Craft Cave: BEFORE


A few weeks ago I was debating "aloud" on Facebook whether or not I should tidy up the Craft Cave before I shared "before" photos so as not to humiliate myself and my family and destroy any credibility I may have. In an effort to build up my courage, I asked you to show me your messy craft spaces and the emails came in. I realized I wasn't alone! I guess not everyone's craft space looks like Heather Bailey's or Anna Maria Horner's (swoon, I want that.) So here goes... if you are ready to see a big hot mess and offer your advice on how to make my space tidy, functional and beautiful, read on. Eeeeek, I'm nervous and ashamed!!! And just so you are fully prepared, the above photo is the only shot that won't make you feel like bathing. I wanted to ease you in. Don your hard-hats mamas, let's do this!
Read more »

Labels: , ,

Monday, August 29, 2011

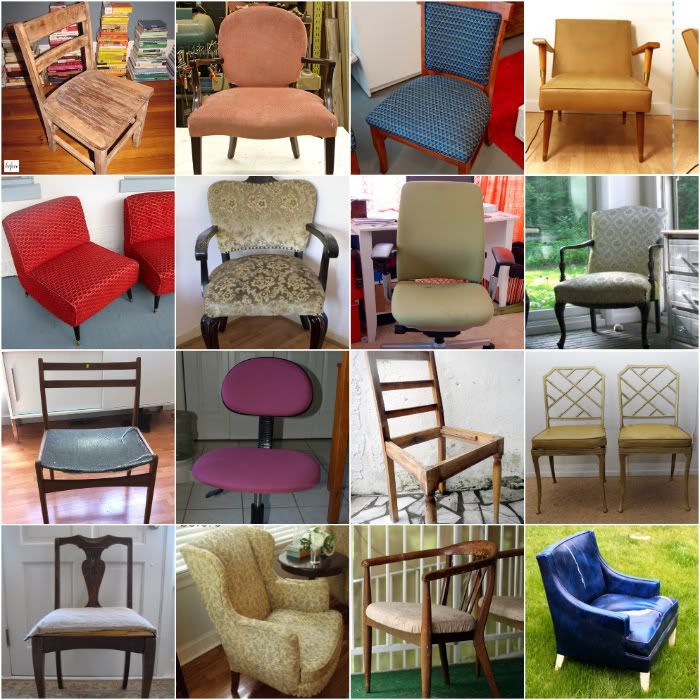
Chairs Before and After: 20 Inspiring Chair Makeovers


I love a good before and after! I also love chairs. So what could be better than checking out 20 inspiring before and after chair makeovers? There's nothing more satisfying than taking a thrifty find and turning it into a stunning new piece of furniture for your home. See all those before chairs up there? Don't you want to see what they look like now? Take a look at 20 Beautiful Before and After Chair Makeovers and get inspired.

Labels: , ,

How to Make Painted Cushions


Ever since I saw these pillows from Wary Meyers I've been itching to try some painted accents for the home. As I mentioned in my recent Patio Low-Down, I had to get creative with one corner of my courtyard when I ran out of money. I loved the look of these chairs from Anthro and was inspired to put these old weather-worn folding chairs to work. Here's how I made my own painted chair cushions.


Read more »

Labels: , , , , , ,

Tuesday, August 23, 2011

The Patio Low Down


Last week I shared some pics of my newly made-over patio but now I want to share the nitty-gritty of the process. We refinished a few pieces that were destined for the curbside, made a few pieces with basic carpentry, found some cool stuff to buy with American Express Membership Rewards Points (of course) and DIYed the rest. I'm excited to give you the scoop.

If you happened to read my "before" post, you know that one of our biggest challenges was the big gray cement floor in the courtyard. We considered many excellent suggestions from staining cement to area rugs to decking...
Read more »

Labels: , ,

Monday, August 15, 2011

How to Make a God's Eye


When Jaime and I were brainstorming ideas for our patio makeovers we talked a lot about embracing the southwest but with a modern twist. I love how these Native-American-inspired elements contribute to a stylish yet relaxed and approachable space. One of the DIY project that took on the southwest more literally is this giant God's Eye that I made for over my bench. I was out of cash for the patio but needed something large and eye-catching(ha). This did the trick coming in at $3.98 for the two wooden dowels. If you have some nice straight sticks you can make this with materials you already have at home! Your yarn choices can help pull the colors of your entire space together. On a personal level, this project makes me really happy because we had a similar God's Eye that my mother had made, in our house growing up.

I'm not sure how long we will keep this outside. Although it's a covered area, I know this is too fragile for the winds of the wild west. Although since it was so inexpensive I can always make another when it starts to look tired. Want to learn how to make your own yarn-stash-busting God's Eye?
Read more »

Labels: , , , , , , ,

Thursday, August 11, 2011

The Courtyard Makeover REVEAL!


Back in May I asked you to advise me on making my courtyard a lovely entry to my home and a place to entertain (prudently). I gave you a whole rundown of the scenario and a bunch of before pics and you offered up fantastic suggestions that had me all excited to redecorate (or, umm, just actually decorate). Since then I've been diligently working away, parsing out my American Express Membership Rewards points to avoid spending cash and DIYing just about every detail. I'll share all of the sources, a few DIYs, and a behind the scenes peek at my renovation projects. NOTHING got tossed, not that there was much there to begin with. Until then, here it is! We have already been enjoying it like it's a new room in our home!


Read on to see more photos of my DIY courtyard and our first outdoor brunch!
Read more »

Labels: , ,

Thursday, July 7, 2011

To My New Backyard (A Love Letter)


Back in May I asked you for help turning my patio into a place of relaxation and beauty (prudently). I gave you a whole rundown of the scenario and a bunch of before pics and you offered up fantastic suggestions that had me all excited to redecorate (or, umm, just actually decorate). Since then I've been diligently working away, parsing out my American Express Membership Rewards points to avoid spending cash and DIYing just about every detail. I can't wait to share my source list, show you how to build a pallet daybed (with arms!), block print your own fabric, make fabric tassel garlands, sew embroidered seat cushions, ombre dye bedding, and more. You can learn a little more about the elements on Design Sponge today too. But for now, I just wanted to share the transformation with you in this little time lapse video. I can't wait to hear what you think.

P.S. If you watch closely you can see me toasting the Prudent Mamas with a glass of champagne at one point. XO

P.P.S. That amazing song is by Twin Sister.

UPDATE: See the photo spread and source list here.

Labels: , , , , ,

Monday, May 23, 2011

Help! A Courtyard in Which to Hold Court!

Last week, Jaime introduced you to our exciting Summer project. Each of us are giving a social space in our home a makeover using gifted American Express Membership Rewards Points. Lucky!!! Jaime chose her back patio and I chose my front-entry courtyard-type space. It's one of my favorite spots in the house but also one of the most neglected. It has so much potential but I just haven't done anything with it. Let me take you for a little tour and tell you what I have in mind. I could really use your advice and ideas! Thanks Prudent mamas! Oh, and I should mention that all the kiddo stuff and grill is in the backyard so this is really a space for beauty and adult relaxation ie. drinking sangria with my girlfriends. Where were we? Back to the tour...

This is the path to my front door. So far, so good. Then you walk in the gate and see...

Cement. Lots of cement. So what do we do?...
Read more »

Labels: , , , , ,

Tuesday, March 8, 2011

Two Minute T-Shirt Dress


OK, so here's a dress you can sew out of an old t-shirt in literally two minutes (even faster then our most-popular-tute-ever the Ten Minute Onesie Dress). I showed this to you awhile back as part of a bigger post on doing more with less, but I wanted to share it with you again because it is Scarlet's MOST FAVORITE DRESS EVER and it took two minutes to make.

You guys seemed to like the Recycled Ruffle Sleeve Bubble T, and a bunch of you mentioned adding some old tees to the sewing pile.  I have the same pile so I tried to use one of them to make the quickest, easiest, simplest possible dress.  It seriously doesn't get any easier than this, it doesn't even involve any cutting. Also, this unicorn t-shirt was from Wal Mart, it's pretty cute right?Get the Two Minute T-Shirt Dress Tutorial after the jump...

And remember, leave a comment on this or any post this week and you could be the proud new owner of a yard of Jacinda's pom pom trim in any color you like!
Read more »

Labels: , , , , , , , ,

Tuesday, May 25, 2010

Guest Post: DIY Bulletin Board Alternative

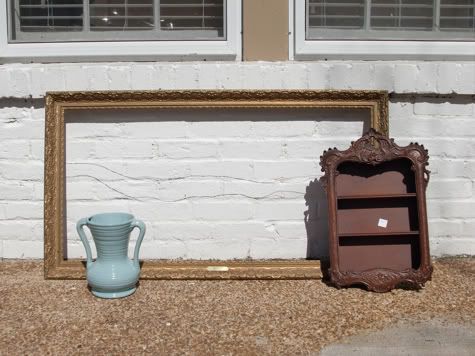
BEFORE:

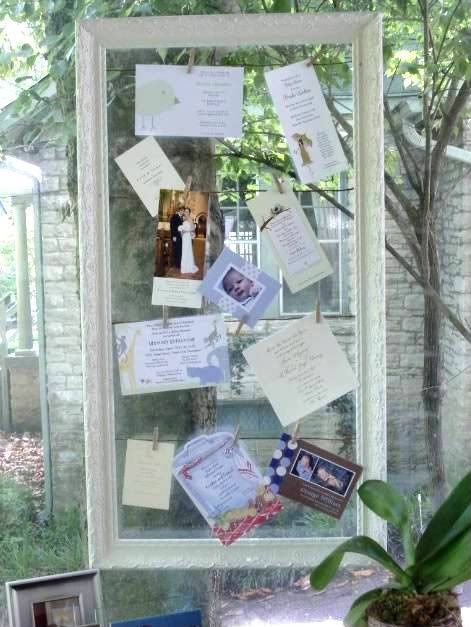
AFTER:

Julia at I Steal Good Ideas cooked up this alternative to a traditional bulletin board from a flea market frame and some mod podge, and she's going to show you how to make one too. Here's the scoop from Julia herself:

I'm a certified idea thief. If I see something I like but know I could make it and get something I LOVE, then the rip off is on. So it goes with this DIY project. My home office is on my sun porch and while I needed a bulletin board to keep up with all of the birth announcements, wedding invites, photos and general merriment that arrives in the mail, I didn't want one that would block the view or the light. When I saw a chicken-themed note-holder frame on Wisteria, I knew I could make a more elegant version that would be perfect for my cozier-by-the-day home office. With a flea market frame, some spray paint, floral wire, and tacks from a home supply store, it came together in no time flat. But the coupe de grace is the custom decoupaged mini clothespins made especially to fit the look of my new creation. Yes, I said decoupage. I honestly can't believe I decoupaged either ... but I really enjoyed it and I think the Wisteria rip-off was a success. I hope you think so too!
Get the full DIY Bulletin Board Alternative Tutorial at I Steal Good Ideas!

Labels: , , , , ,

Thursday, May 13, 2010

Fabric Wrapped Recycled Bath Accessories


I ate a $16 jar of nuts from a hotel minibar at 2 am on a recent business trip. In the morning, I was angry at the jar. I wanted it to do more for me than just sit there empty, taunting me with its salty fattening expensiveness.
With the beauty of Jacinda's Fabric Vase in mind, I brought the jar home, found another glass canister, and with the help of a fabric scrap from my collection, repurposed them into cotton ball and q-tip holders for the bathroom. So there jar, the joke's on you!
Get the full Fabric Wrapped Recycled Bath Accessories tutorial after the jump...
Read more »

Labels: , , , , , , , , , ,

Monday, May 3, 2010

DIY Duvet Cover Tutorial


If you bought a crib set you probably have an unused comforter lolling about in a closet somewhere.  Now that Scarlet is in her toddler bed I deem the comforter safe for her, so I sewed a sweet duvet cover using this beloved fabric: Alexander Henry Bird Seed in Yellow that I picked up at favorite fabric resource Fabricworm.

Making a duvet cover is a simple beginner sewing project with an added bonus: when your child moves into a big-girl bed you can re-use the fabric for some other cuteness.  If you want to sew a duvet for a twin, full, queen, or king size bed, this same method applies and I'll share the measurements with you and the full DIY Duvet Cover Tutorial after the jump...
Read more »

Labels: , , , , , , , ,

Thursday, March 11, 2010

Quick tip: Crawling dress fix


My older daughter had a closet full of unworn dresses through her crawling stage. I hated to see her get all tangled up in the length. But this time, I was determined to find a solution. Get the quick fix after the jump.
Read more »

Labels: , , , , ,

Tuesday, February 9, 2010

DIY Strap Cover

My musician friend Erin (of Mix Tape) celebrated the big 3-0 this weekend. I made her a little gift so she can coordinate outfit to instrument on stage.

I like the fact that it's functional (a guitar strap for her fancy-schmancy guitar) but also homemade (a cover made with a teensy bit of a gorgeous fabric she actually gave me for my birthday).

This simple DIY works for camera straps, guitar straps, or any sort of strap. I think it would even work for a BELT!  Think of it, you could have ONE belt with a bunch of covers to match all your cute outfits.  How prudent.

Get the full Guitar / Camera Strap Cover DIY after the jump...
Read more »

Labels: , , , , , , , ,

Thursday, February 4, 2010

GUEST POST: DIY Baby Legwarmers from a pair of socks!


My sister-in-law Stevee sent this awesome DIY all the way from Nashville (modeled by my adorable niecey, baby Jojo!) and I had to share it with you!  Take a cute pair of ladies' socks and turn it into legwarmers for your little one in just a few minutes.  
Get the full DIY Baby Legwarmers tutorial after the jump...
Read more »

Labels: , , , , , , , , , ,

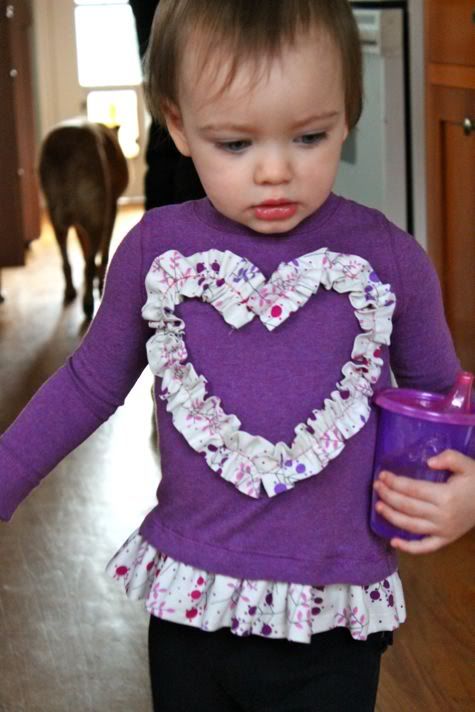
Ruffle Heart T-Shirt


Scarlet loved this plain purple t-shirt, but she is freakishly tall, so alas it had grown too short.  I thought I'd add a ruffle to lengthen it and a little heart for some valentine's day cuteness.

Super simple, get the Ruffle Tee how-to after the jump...
Read more »

Labels: , , , , , , , , , ,

Monday, February 1, 2010

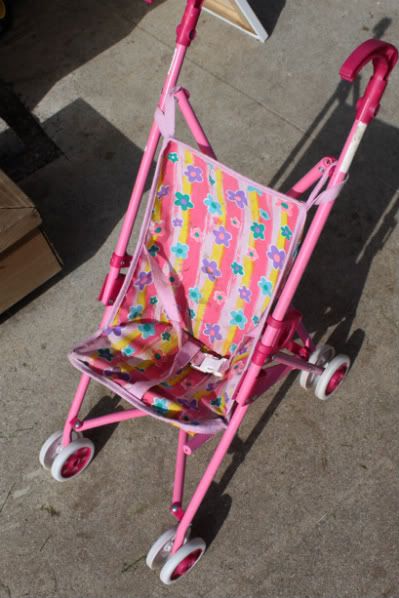
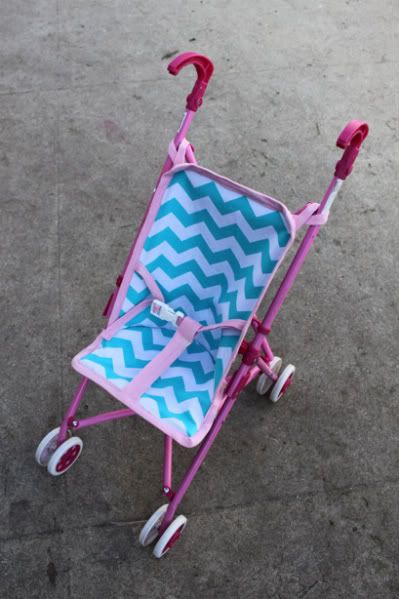
DIY Doll Stroller Liner

BEFORE:
AFTER:
"Meema" bought Scarlet this doll stroller for $1 at a garage sale.  Scarlet LOVES it, but the liner has seen better days, so I decided to create a DIY doll stroller liner tutorial.  Also, if you have a boy who likes doll strollers but not so much the pink they usually come in, this would be your chance to throw some planets or truck fabric on it.  Or make him a new pink one and tell him this isn't 1954, real men love pink.  


Get the full DIY Doll Stroller pattern and how-to after the jump...
Read more »

Labels: , , , , , , , ,

Tuesday, January 26, 2010

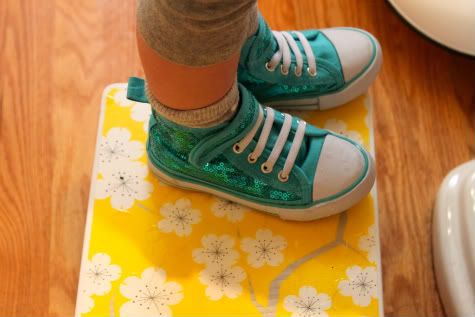
DIY Children's Bathroom Step Stool

BEFORE:
AFTER:
Well, I didn't make the stool itself.  I bought it forever ago, I think at Target, for under $10.  But it was plain white, so after the fun I had with the DIY Matryoshka and Owl Coasters I decided to spruce it up with some mod podge and pretty paper to match the bathroom!

Make your own kid's step stool personalized or give a gift stool that will be the hit of the shower by using their name, their favorite words, or just some pretty paper.  It's SO EASY and has such fun results!

Get the full DIY Kids Bathroom Stool tutorial after the jump...
And thanks for the post OhDeeDoh!
Read more »

Labels: , , , , , , , , ,

Friday, January 22, 2010

DIY Fabric Storage

LADIES!  Look what i did!  I'm beyond excited to share this with you!  While I figured out how to store fabric scraps awhile back, I really wanted a solution for storing/displaying the mounds of beautiful designs I've been collecting.  When Jacinda came to visit a few months ago she suggested using the wall of my converted garage/workshop, so yesterday I headed out to the hardware store and poked around for a simple, low-cost solution.
BEFORE:

AFTER:

You will not believe how easy this was.  Now I can see my fabrics AND I have more drawer space for all my yarn and other goodies.  Seeing the beautiful designs on the wall is inspirational and gives a whole new vibe to my workroom.  If I ironed them i think this would look awesome in my living room, hallway, or on the wall behind the dining table! Get thee to the hardware store and get to hanging!

Full details after the jump...

Read more »

Labels: , , , , , , , ,

Monday, January 4, 2010

Handmade King Size Headboard

One of my new year's resolutions is to get our bedroom decorated.  I will take you all on the journey with me, revealing the change bit by bit.  We just bought a new king size bed so step one is a new headboard.  I was inspired by Grace of Design Sponge and her gorgeous DIY otomi headboard so I made one of my own!  Her video tutorial is here, and mine is after the jump.  The only difference is that my headboard is King size and I had to make it with pieces of wood that would fit in my car.  And I have a small car.  Get the full how-to after the jump!

Update:  Check out pictures of the headboard hanging in our bedroom here.
Read more »

Labels: , , , , , , , ,