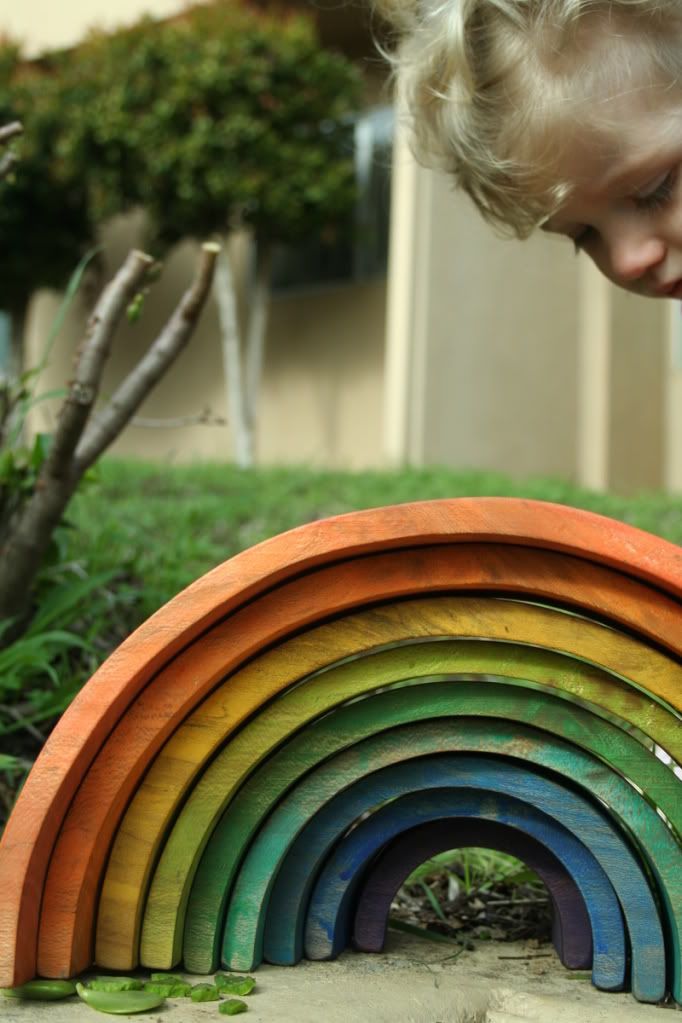
Wooden Rainbow Arches

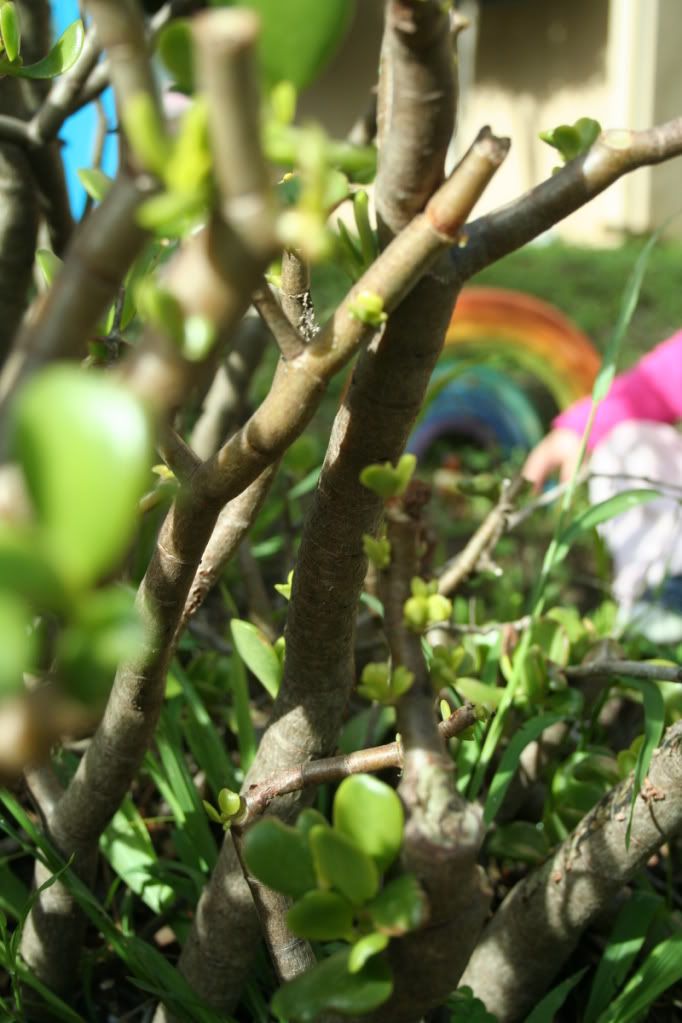
Lately I have been a total sucker for wood craft tutorials. I loved the child-size ironing board and when I saw these rainbow arches I knew I was hooked. Jennie and Allyson from Shape of a Spoon are two very talented women that find and create art in their everyday lives. Whether it is capturing the adventurous spirit of their kids through photography, sewing up a new dress or knitting the best sweater ever these ladies will try it all. Their Etsy shop 3Three is full of their handmade treasures where you can find such products as the Skirt + Satchels.
Enough of me chatting up a storm, let's get to learning how to make these Wooden Rainbow Arches...
Wooden Rainbow Arches
My post on the wooden rainbow arches generated quite a few requests for a tutorial. But as I am thousands of miles from my dad's woodshop, this will be a tutorial without the aid of photos. This is a straightforward project but does require special tools and a fair amount of patience. But the end result is a gorgeous, versatile heirloom toy.
These can be stacked in endless combinations.
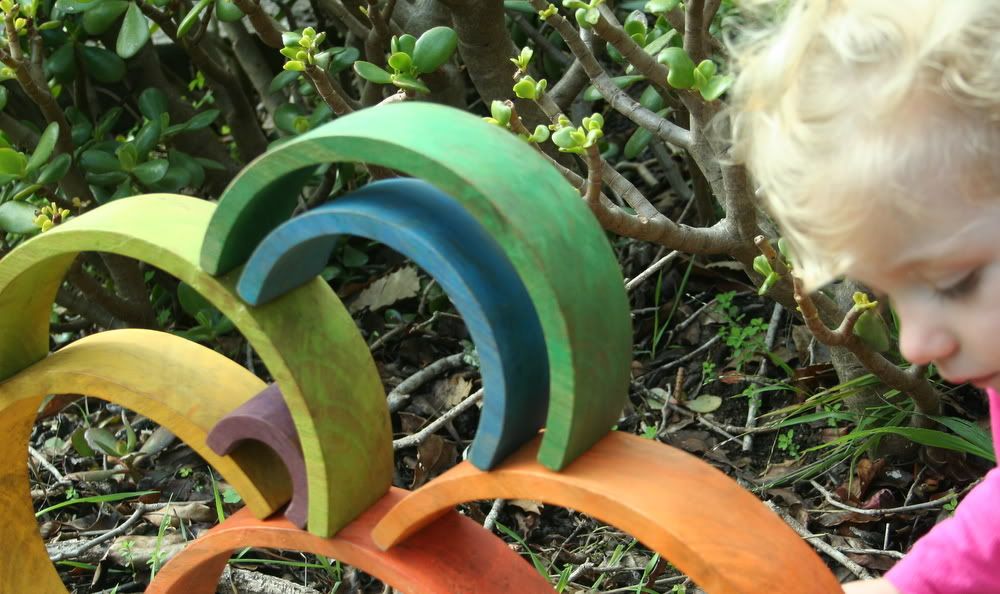
They can be a spectacular play structure for tiny toys.
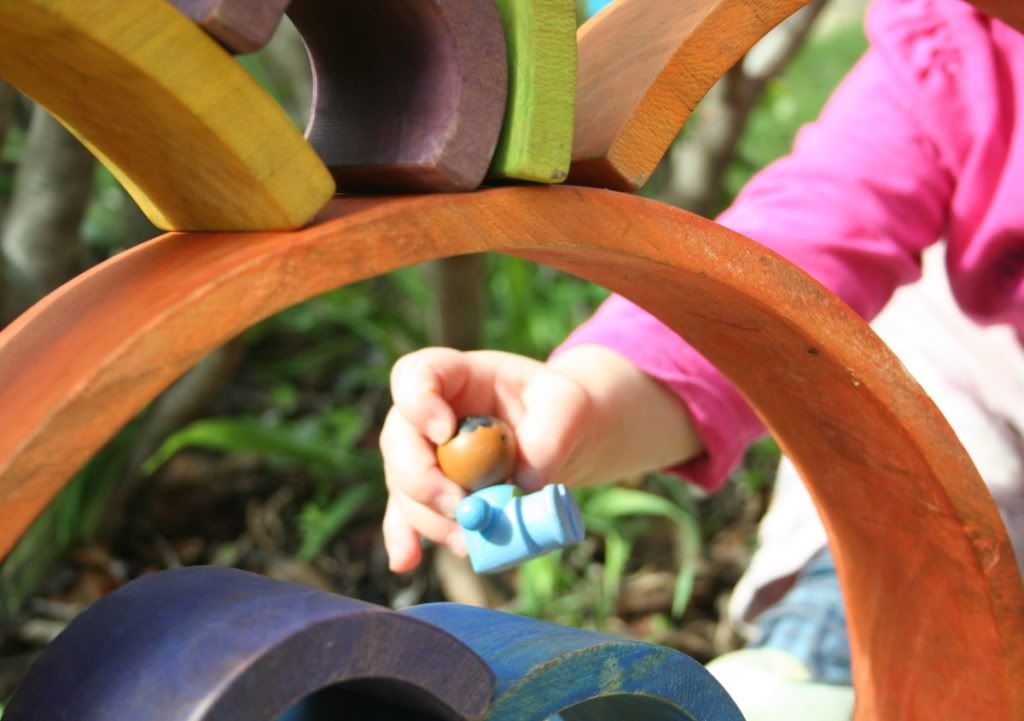
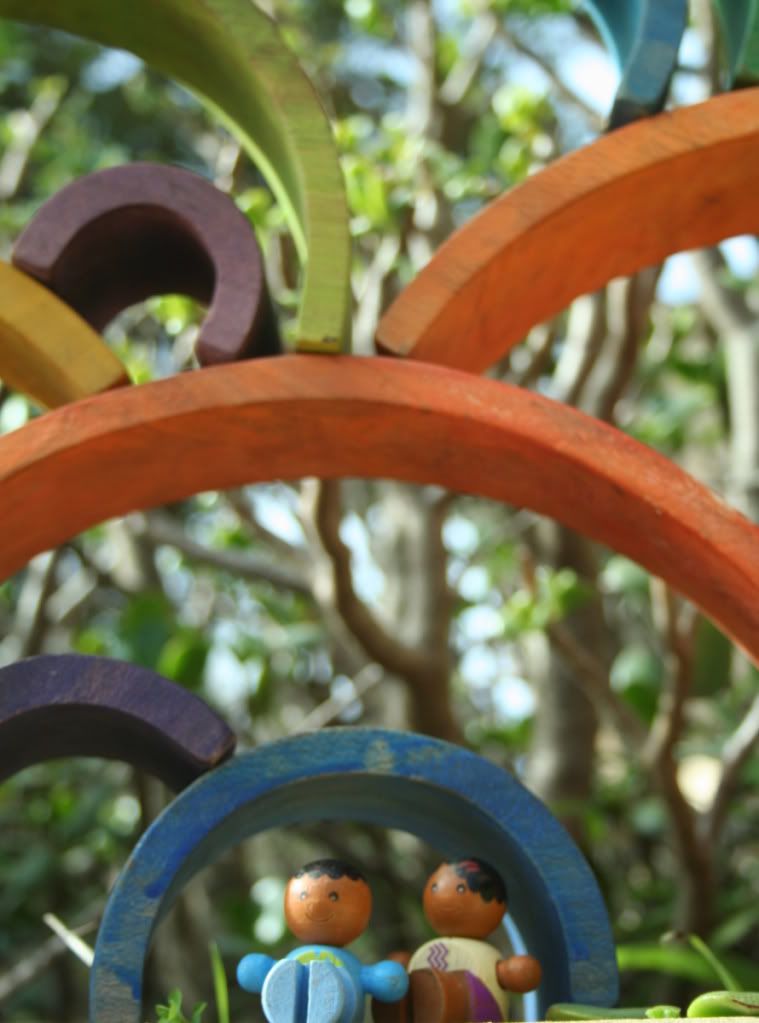
They can be used as tunnels, boats, to create mazes... so many possibilities!
Materials for a 12 arch rainbow:
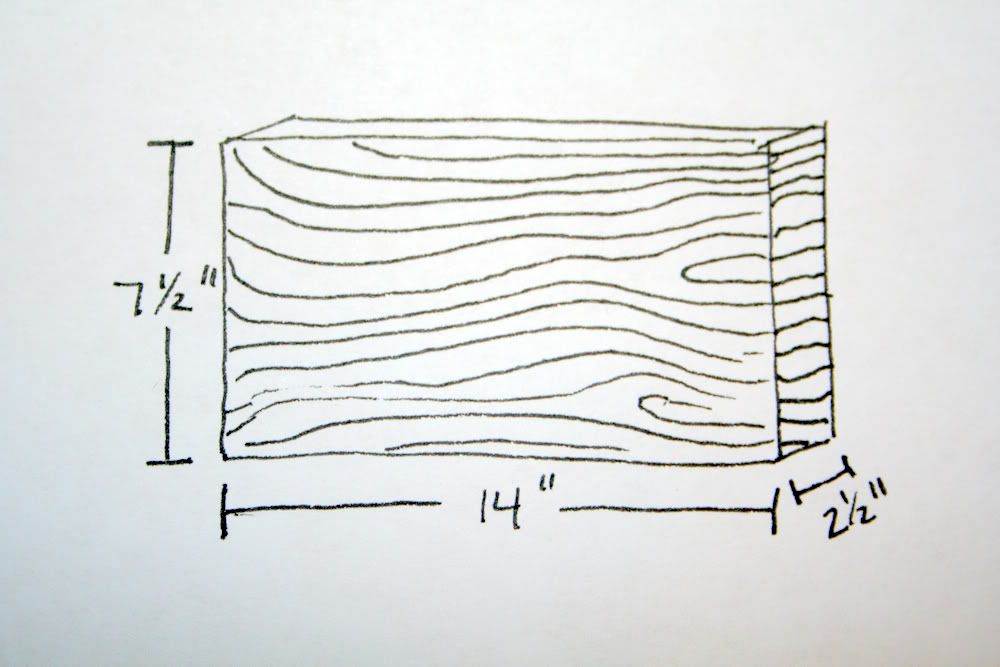
- A 14" x 7 1/2" piece of hardwood, about 2 1/2" thick. Oak, Elm or Sycamore are some suitable options.
- A drawing compass.
- A Bandsaw. I asked my dad if a jigsaw could be used if one didn't have access to a bandsaw. He said that jigsaws typically wouldn't be powerful enough to make smooth cuts through such a thick piece of wood - the blade would bend and result in a slanted cut.
- Sanding equipment. I used an Oscillating Spindle Sander and a Belt Sander, but plain old sandpaper will accomplish the same thing, just a lot more slowly.
- Craft paintbrush.
- Non-toxic liquid paints such as liquid watercolors.
- Beeswax Polish. I purchased mine here.
Safety: Wear safety goggles and proper ear protection when using the bandsaw and sanders. Make sure they are in proper working order to ensure safe use.
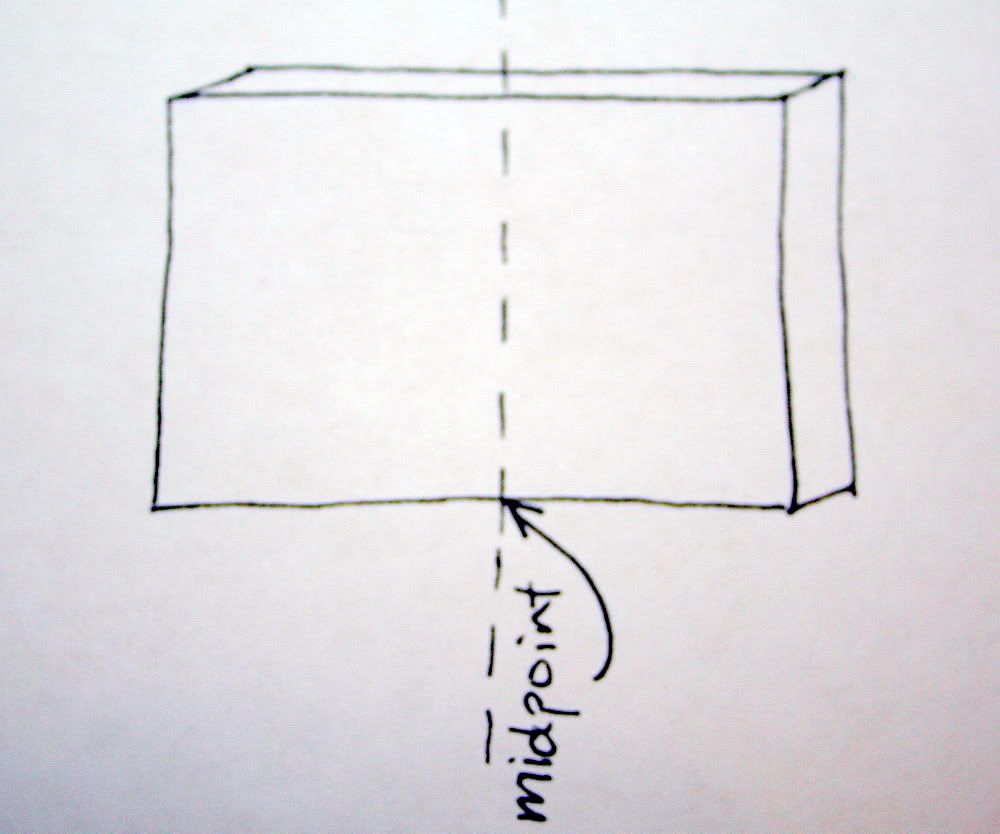
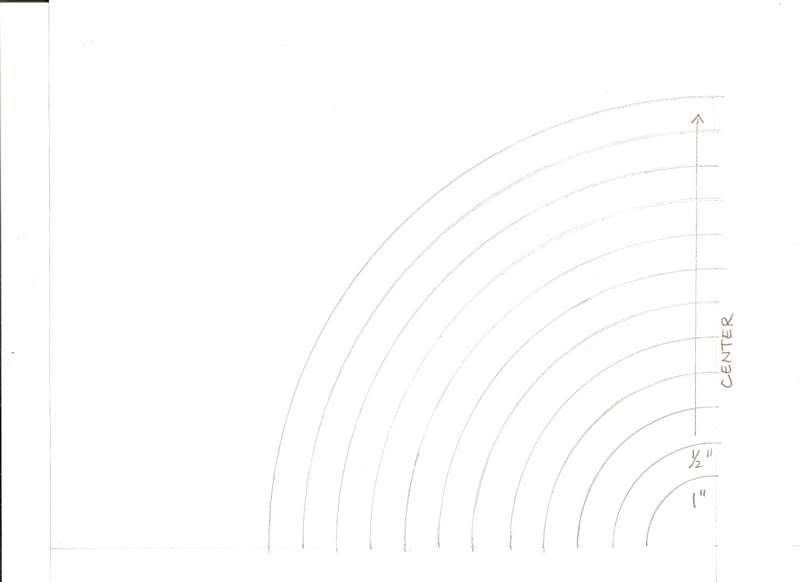
Step 1. Use the drawing compass to draw a template of the arches on your wood.
Mark where the midpoint of the bottom of your board is.
Place the point of the compass on the midpoint and draw a semi-circle with a 1" radius.
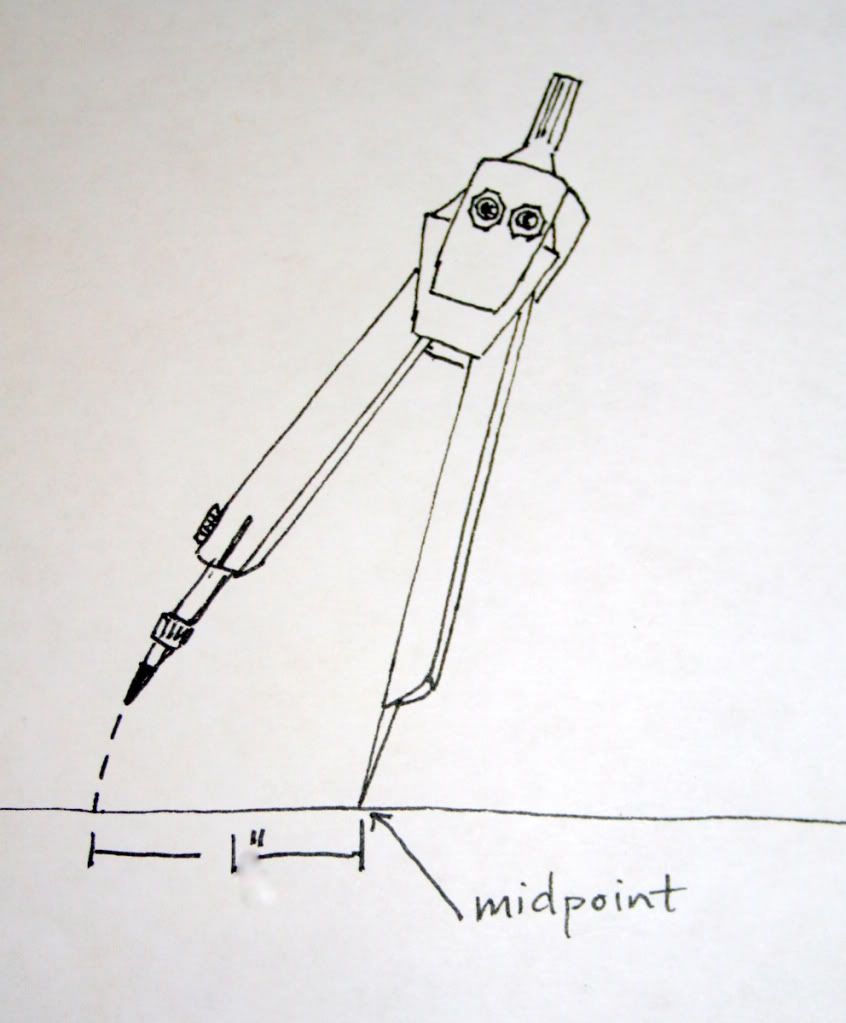
Keeping the compass on the midpoint, increase the distance 1/2" at a time and draw a series of arcs, 12 total.
Step 2: Cut along the arches using the bandsaw.
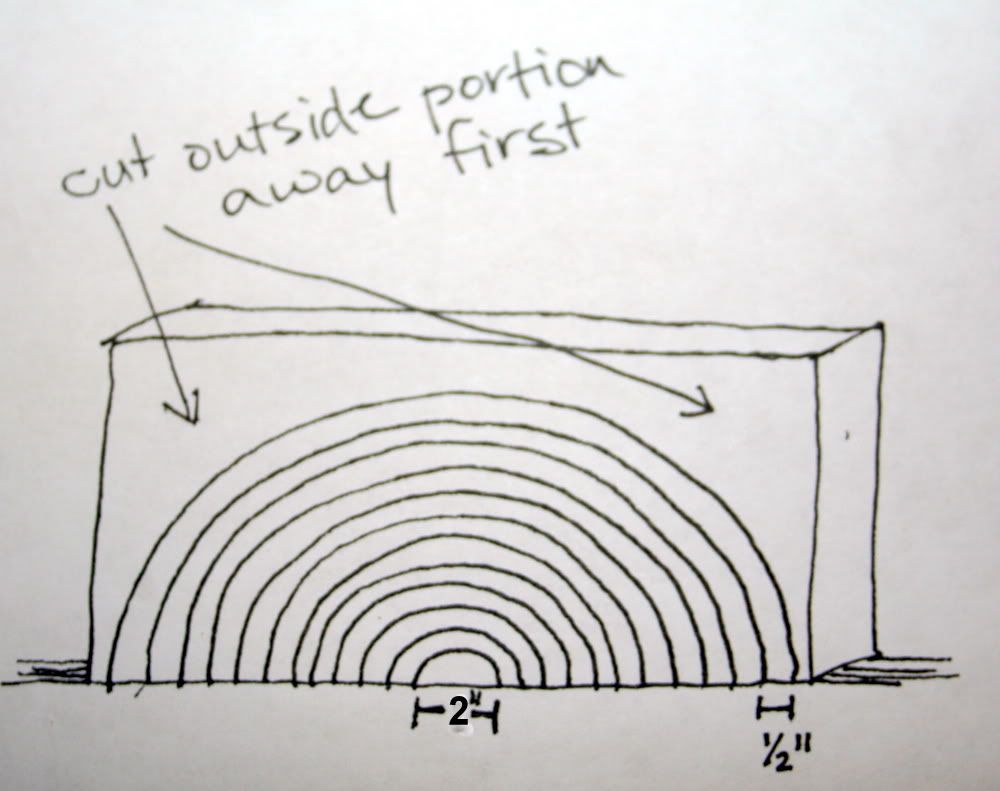
- Cut away the outside portion first.
- Go slowly and steadily for smooth cuts.
- Instead of simply pushing the wood through the blade, think of yourself as rotating the wood around the blade. This will help your cuts be smooth and your arches be uniform.
- Start with the largest arch and work your way down to the smallest arch.
- If using power sanders, gently and evenly rotate the arches along the sander.
- Use a table belt sander to sand the outside of each arch.
- Use an oscillating spindle sander to sand the inside of each arch.
- If using sandpaper
- Start with the coarsest grit (60) and sand all surfaces of the arches.
- Use progressively finer grit (higher number) sandpaper on all the arches up to at least 220 grit.
- Wipe the sawdust off the arches
- If I had more time and more know how, I would have attempted to dye the arches using natural substances (e.g. berries, roots, etc.). I found some interesting tidbits about dyeing wood online, but decided to go the easy route and use paint in the interest of actually finishing this project!
- I wanted the wood grain to show through the paint, so I thinned it a bit with water before applying it to the wood. I applied paint and let it dry, then applied more layers as needed to get the look I wanted. The colors were somewhat muted because I allowed the grain to show through, but I liked the end result. Using more opaque paint would ensure brighter colors.
- Apply beeswax with a soft cloth, working it into the wood.
- Let dry.
- Apply additional coats as desired
- To maintain your arches, periodically reapply beeswax.

posted by Prudent Baby @ 5:51 AM
![]()

3 Comments:
Amazing, I absolutely love these! This project is definitely on my to do list. Thanks for sharing!
Well written. The sketches are very helpful. One more thing for my DH's "Honey-do" list. Thanks bunches!!
Love this!
Post a Comment
Subscribe to Post Comments [Atom]
<< Home