body { background:#fff url("http://www.blogblog.com/dots/bg_dots.gif") 50% 0; margin:0; padding:0 10px; text-align:center; font:x-small Verdana,Arial,Sans-serif; color:#333; font-size/* */:/**/small; font-size: /**/small; } /* Page Structure ----------------------------------------------- */ @media all { #content { background:url("http://www.blogblog.com/dots/bg_3dots.gif") no-repeat 250px 50px; width:700px; margin:0 auto; padding:50px 0; text-align:left; } #main { width:450px; float:right; padding:50px 0 20px; font-size:85%; } #main2 { background:url("http://www.blogblog.com/dots/bg_dots2.gif") -100px -100px; padding:20px 10px 15px; } #sidebar { width:200px; float:left; font-size:85%; padding-bottom:20px; } #sidebar2 { background:url("http://www.blogblog.com/dots/bg_dots2.gif") 150px -50px; padding:5px 10px 15px; width:200px; width/* */:/**/180px; width: /**/180px; } } @media handheld { #content { width:90%; } #main { width:100%; float:none; } #sidebar { width:100%; float:none; } #sidebar2 { width:100%; } } html>body #main, html>body #sidebar { /* We only give this fade from white to nothing to browsers that can handle 24-bit transparent PNGs */ background/* */:/**/url("http://www.blogblog.com/dots/bg_white_fade.png") repeat-x left bottom; } /* Title & Description ----------------------------------------------- */ @media all { #blog-title { margin:0 0 .5em; font:250%/1.4em Georgia,Serif; color:#353; } #blog-title a { color:#353; text-decoration:none; } #description { margin:0 0 1.75em; color:#996; } #blog-mobile-title { display:none; } #description-mobile { display:none; } } @media handheld { #blog-title { display:none; } #description { display:none; } #blog-mobile-title { display:block; margin:0 0 .5em; font:250%/1.4em Georgia,Serif; color:#353; } #blog-mobile-title a { color:#353; text-decoration:none; } #description-mobile { display:block; margin:0 0 1.75em; color:#996; } } /* Links ----------------------------------------------- */ a:link { color:#488; } a:visited { color:#885; } a:hover { color:#000; } a img { border-width:0; } /* Posts ----------------------------------------------- */ .date-header { margin:0 0 .75em; padding-bottom:.35em; border-bottom:1px dotted #9b9; font:95%/1.4em Georgia,Serif; text-transform:uppercase; letter-spacing:.3em; color:#663; } .post { margin:0 0 2.5em; line-height:1.6em; } .post-title { margin:.25em 0; font:bold 130%/1.4em Georgia,Serif; color:#333; } .post-title a, .post-title strong { background:url("http://www.blogblog.com/dots/bg_post_title.gif") no-repeat 0 .25em; display:block; color:#333; text-decoration:none; padding:0 0 1px 45px; } .post-title a:hover { color:#000; } .post p { margin:0 0 .75em; } p.post-footer { margin:0; text-align:right; } p.post-footer em { display:block; float:left; text-align:left; font-style:normal; color:#996; } a.comment-link { /* IE5.0/Win doesn't apply padding to inline elements, so we hide these two declarations from it */ background/* */:/**/url("http://www.blogblog.com/dots/icon_comment.gif") no-repeat 0 .25em; padding-left:15px; } html>body a.comment-link { /* Respecified, for IE5/Mac's benefit */ background:url("http://www.blogblog.com/dots/icon_comment.gif") no-repeat 0 .25em; padding-left:15px; } .post img { margin:0 0 5px 0; padding:4px; border:1px solid #cca; } /* Comments ----------------------------------------------- */ #comments { margin:0; } #comments h4 { margin:0 0 10px; border-top:1px dotted #9b9; padding-top:.5em; font:bold 110%/1.4em Georgia,Serif; color:#333; } #comments-block { line-height:1.6em; } .comment-poster { background:url("http://www.blogblog.com/dots/icon_comment.gif") no-repeat 2px .35em; margin:.5em 0 0; padding:0 0 0 20px; font-weight:bold; } .comment-body { margin:0; padding:0 0 0 20px; } .comment-body p { margin:0 0 .5em; } .comment-timestamp { margin:0 0 .5em; padding:0 0 .75em 20px; color:#996; } .comment-timestamp a:link { color:#996; } .deleted-comment { font-style:italic; color:gray; } .paging-control-container { float: right; margin: 0px 6px 0px 0px; font-size: 80%; } .unneeded-paging-control { visibility: hidden; } /* More Sidebar Content ----------------------------------------------- */ .sidebar-title { margin:2em 0 .75em; padding-bottom:.35em; border-bottom:1px dotted #9b9; font:95%/1.4em Georgia,Serif; text-transform:uppercase; letter-spacing:.3em; color:#663; } #sidebar p { margin:0 0 .75em; line-height:1.6em; } #sidebar ul { margin:.5em 0 1em; padding:0 0px; list-style:none; line-height:1.5em; } #sidebar ul li { background:url("http://www.blogblog.com/dots/bullet.gif") no-repeat 3px .45em; margin:0; padding:0 0 5px 15px; } #sidebar p { margin:0 0 .6em; } /* Profile ----------------------------------------------- */ .profile-datablock { margin:0 0 1em; } .profile-img { display:inline; } .profile-img img { float:left; margin:0 8px 5px 0; border:4px solid #cc9; } .profile-data { margin:0; line-height:1.5em; } .profile-data strong { display:block; } .profile-textblock { clear:left; } /* Footer ----------------------------------------------- */ #footer { clear:both; padding:15px 0 0; } #footer hr { display:none; } #footer p { margin:0; } /* Feeds ----------------------------------------------- */ #blogfeeds { } #postfeeds { padding-left: 20px }

Prudent Baby

Get sewing how to, sewing tutorials, and sewing help to learn sewing. We offer sewing tutorial for sewing moms.

Monday, January 16, 2012

Make a Football Jersey from a T-shirt


Last weekend we had Gordon's First Birthday. It was a football themed party so, of course, he needed a tiny #1 jersey. I took to a plain white t-shirt with a pair of scissors and crafted one up quick and cheap. With the playoffs this weekend, it's the perfect time to show some spirit without shelling out big bucks for team jerseys. Here's how you do it!


Read more »

Labels: , , , , , , , , ,

Wednesday, December 21, 2011

Under-an-Hour Jersey Hat


A few weeks ago, I made an Under An Hour Silkscreened Scarf. While I was at it, I whipped up a little jersey hat. Clare loves that the silkscreened pattern makes her hat and scarf a matching set, but this is also a great t-shirt project. The best part is that you still have time to make a bunch of these for Christmas gifts!

So easy, check it out...
Read more »

Labels: , , , , , , , , , ,

Wednesday, December 14, 2011

Put A Serger in My Stocking Slideshow


Holy difficult task Santa! Since Jacinda, Colleen, myself and all of our illustrious guest judges are busy scoring these amazing entries, we thought we'd brighten your morning by sharing a selection of the hundreds of beautiful stockings made for this contest. Gah, they are all so wonderful! Imagining the Prudent Mamas working away at their machines during naptimes and bedtimes making these treats for their family warms our hearts, so thank you to everyone who entered the Put A Serger in My Stocking contest to win a Brother Project Runway™Limited Edition  5234PRW Serger! Stay tuned for the winner announcement soon...

If you don't see your stocking in the slideshow, don't worry. This is just a random taste of the gorgeous selections that came in!

Labels: ,

Thursday, November 17, 2011

Prudent Baby Put a Serger in My Stocking Contest


THIS CONTEST IS NOW CLOSED STAY TUNED FOR WINNER ANNOUNCEMENT!
You can't always count on Santa to make your crafty Christmas wishes come true. Time to take things into your own hands with a little help from Prudent Baby and Brother. Create the winning Christmas stocking using knit fabric in some way and you will find a Brother 523 PRW Serger under the tree. Use jersey (even old t-shirts!) to create braids, fringe, trim, patches or even an entire quilted stocking! Take a look at our stocking tutorials like the Patchwork Baby Onesie Christmas Stocking and Jaime's Quilted Stocking (with free pattern) or maybe our Granny Square Stocking or Super Last Minute Felt Stocking will inspire your creation. Just remember to incorporate knit/jersey fabric! Stay tuned as we post more knit stocking tutorials over the next week! Visit Sewing with Knits 101 for a refresher course and jump into designing the winning entry. You've got this!

We will collect all of your droolicious entries and our panel of judges will select a winner! Stay tuned as we announce our judges and more lovely prizes!

The Prize: The new Project Runway™Limited Edition  5234PRW is the first serger to be introduced into the Project Runway collection of machines. This new serger will add a professional look to  your next project with serged seam finishes. Garment seams lie flatter and look better with an overlock stitch. Plus, home décor projects often suggest the use of a serger for rolled hems and secure seams and differential feed. Choose from a 2, 3 or 4 thread look and enjoy the new easy one-touch needle threader for threading two needles. The 5234PRW  features two needles with a differential feed ratio of 0.7 to 2.0 for  improved stitch quality. Create stitches from 2.0mm to 4.0mm in length  and 5.0mm to 7.0mm in width. The included large extension table adds  extra space for handling large projects and the free arm makes it easier to sew sleeves, trouser legs and other hard to reach places.  For more details on this luscious sewing & embroidery machine and its wide range of crafty capabilities, visit Brother US.

How to Enter: Simply create a Christmas stocking using knit/jersey fabric in some capacity. The entire stocking must be made by you and be your design. You are welcome to use the Prudent Baby Christmas stocking tutorials. The project has to be a new project created specifically for the contest. Take pictures of your entry. Email the pictures (at least 500 pixels wide and under 1mg) to contest@prudentbaby.com. Include a two-sentence description of your project mentioning things like: What inspired you, techniques used, and what material and supplies you used, made, or purchased. You have until Wednesday, December 7th Sunday, December 11th at 11:59 p.m. PST to send us your entry. The prize can only be shipped to an address within the contiguous United States. We will select one winner to take home the Project Runway™Limited Edition  5234PRW Serger based on the judges' love for their creation. Our scoring system will give 25% weight to each of the following: Originality, Style, Worksmanship, and Presentation. The winner will be revealed on Prudent Baby the week of December 12th. Click here for complete contest terms & conditions.

Labels: ,

Wednesday, November 16, 2011

Patchwork Baby Onesie Christmas Stocking

Do you have trouble parting with those adorable tiny clothes? Turn some into a keepsake Christmas stocking for baby! Inspired the gorgeous new Martha Stewart Craft Paint that I was invited to try out, I stenciled, patchworked and stitched up a stocking that will always remind me of when he was a sweet lil' dumpling. Want to make one? Here's what I did...

Read more »

Labels: , , , , , , , ,

Monday, November 14, 2011

Coming this Week: Prudent Baby & Brother Serger Contest!


Are you ready to sew for a serger? We will announce what you have to do to enter our new contest this week, but first let's take a look at this glorious prize. The Brother 523 PRW Serger is the machine that Jaime and I both have at home and adore. Available at authorized Innov-ís dealers only and retailing for $829.95, this serger is a dream. So you want to win one right? Read on to hear more and stay tuned this week for our contest announcement!


The new Project Runway™ Limited Edition 5234PRW is the first serger to be introduced into the Project Runway collection of machines. This new serger will add a professional look to your next project with serged seam finishes...
Read more »

Labels: ,

Wednesday, August 17, 2011

The Laziest DIY Cushion Slipcover


After much research, I came to the conclusion that no fabric cushion was going to survive the soul-draining afternoon sun of my Texas Patio. Plan B - Disposable slipcovers. I set out to make the simplest possible covers for my existing cushions from inexpensive {but fun} fabric with the full intention of replacing them next season. Do you have a box cushion that you want to cover in a jiff? Here's how to make the Laziest DIY Cushion Slipcover.

And actually, I'm loving the way the black is fading (yes, it is already fading after a month) so maybe we will keep these around even longer than planned.


Read more »

Labels: , , , , , ,

Tuesday, July 12, 2011

Make for Baby BOY: 25 of the Cutest & Coolest Free Tutorials for Boys Clothing


One thing we hear all-the-time here at Prudent Baby is "WE WANT MORE BOY STUFF!" It's true in our brood girls outnumber boys 3 to 1, so sometimes it seems like the ladies get all the home-sewn love. Well, now let's hear it for the boy!

First we rounded up free tutorials for all your basic baby needs here: Make for Baby: 20 Easy Projects to Make Your Own Bedding, Gear, and Nursery Stuff. Then we rounded up the cutest free tutes for girls' dresses here: Make for Baby: 25 Free Dress Tutorials for Babies & Toddlers. Today, by popular demand, we went ahead and gathered the best free tutorials for boys from around the web so you can make the absolute cutest and coolest boy clothing and accessories. These free boys clothing tutorials are so adorable I could faint. Get the links to the 25 best free tutorials for making boy clothing here: Make for Baby BOY: 25 of the Cutest & Coolest Free Tutorials for Boys Clothing.

And now that you're inspired to start sewing for your little lad, check out this lovely round up: 10 Fabulous Fabrics for Boys.

Labels: , , , ,

Wednesday, July 6, 2011

Make for Baby: 25 Free Dress Tutorials for Babies & Toddlers


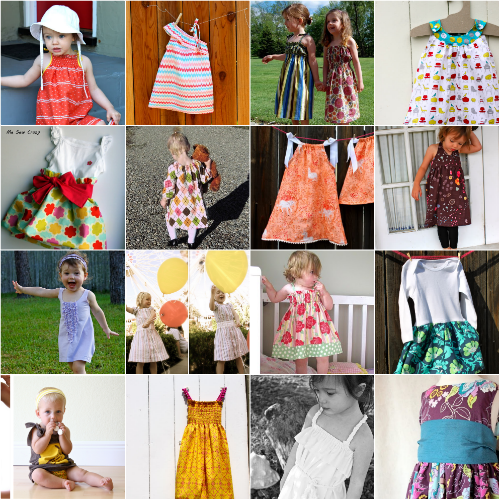
Nothing is sweeter than a little girl all dolled up in a homemade dress. Last week we shared a round up of how to make all your baby and nursery basics here: Make for Baby: 20 easy Projects to Make Your Own Bedding, Gear, and Nursery Stuff. Now we've rounded up the most popular dress tutorials from Prudent Baby as well as some of our favorites from around the crafty web. Most of these dresses are ideal for beginning sewers; all will make you feel like the crafty mom superstar that you are. From pinafores to party dresses to dress-up tutus, these 25 free dress tutorials will have you and you little one smiling from ear to ear. Take a look and get the links to the sweetest free baby dress patterns here: Make for Baby: 25 Free Dress Tutorials for Babies & Toddlers. Then go ahead and share links to your favorite free baby dress tutorials we missed in the comments so we can do another round up soon.

Labels: , , , ,

Tuesday, June 7, 2011

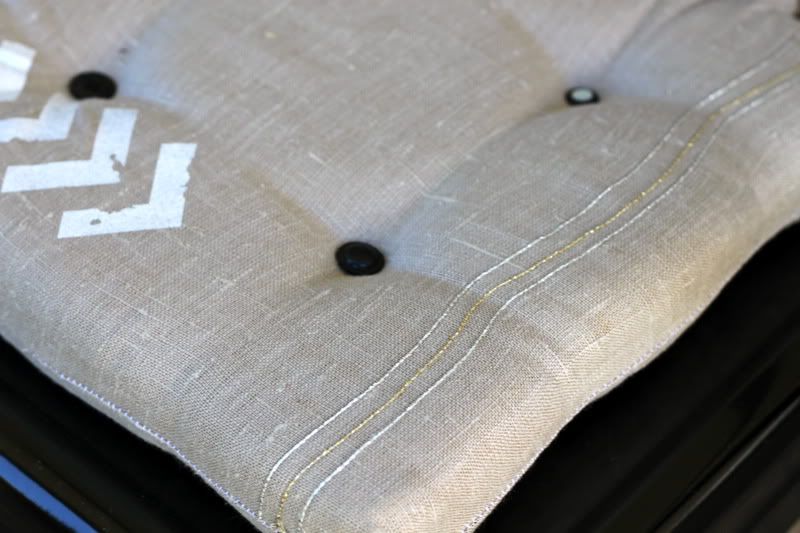
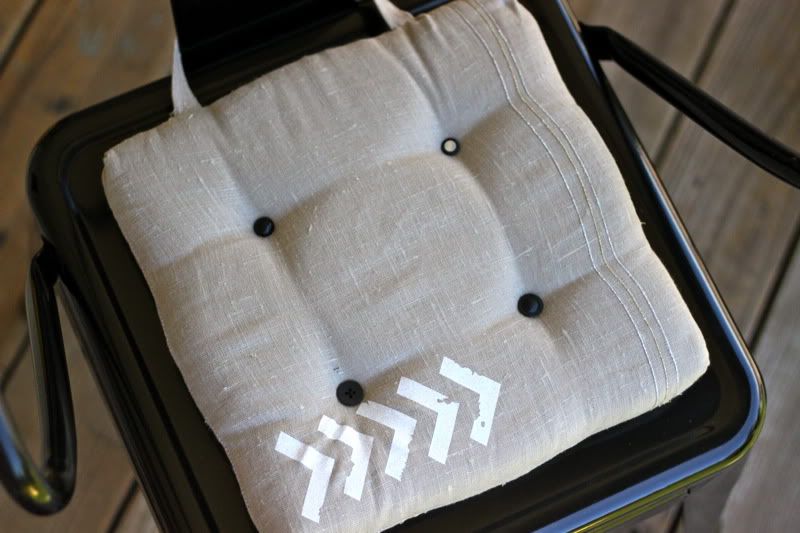
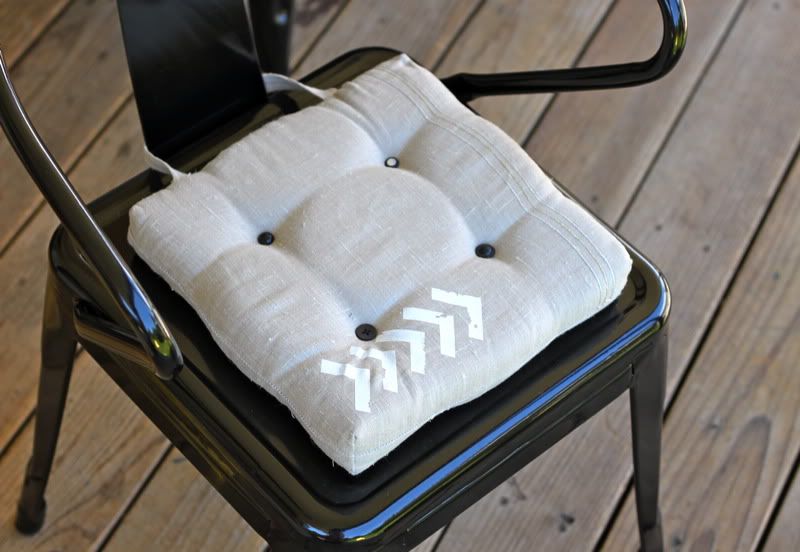
How to Make Dining Chair Cushions with Bonus Embellishment Goodness


So I've been redecorating the patio with my Membership Rewards points. I found some great chairs on superdeal, but the funky backs don't work for normal dining chair cushions. Because they are metal, my booty requested some coziness. Guess I'll have to make them!

Guess that's also why I am in my pajamas at 2 p.m, having been in a sewing frenzy all day. I added a little sparkly thread and heat transfer arrows to match my new ace-hotel inspired patio look.

Let me show you how to make Dining Chair Seat Cushions after the jump...
Read more »

Labels: , , , , , , ,

Tuesday, May 24, 2011

The Narrow Hem Foot & 5 Minute Tank Tunic Part 2


Way back when, we showed you the 5-Minute T-shirt Tunic. Here is a new version that I made using a narrow hem foot, my newest obsession for doing vast amounts of skinny seams quickly. Want to make a speedy voile scarf? This is your gal...

Read on for the 5 Minute Tank Tunic Part 2!
Read more »

Labels: , , ,

Tuesday, April 26, 2011

Drawstring Soccer Backpack - Made from a Placemat!


Today is the last day to take advantage of the Silhouette Rhinestone Promotion so we have a fun little project to share. Here in suburban land, all the tots carry their soccer ball to practice in a drawstring backpack like this. Since I'm a big-time high-roller, I gave Quinn a soccer ball of her own for her birthday yesterday and made her this fun DIY drawstring backpack to go with it. This is a GREAT boy-friendly gift despite my choices above. The best part is that it's made from a fabric placemat so it comes together right-quick. It's like the Easiest. Pillow. Ever. but you can wear it on your back!

Read more to find out how to make your own DIY drawstring backpack...
Read more »

Labels: , , , , , ,

Wednesday, April 6, 2011

The Lazy Quilter: Easy Half Square Triangle Trick


I do so love the idea of quilting. But in actuality, the precision is not something I naturally excel at. I'm all about pretty fabrics and quick projects. Therefore I deem myself the lazy quilter.

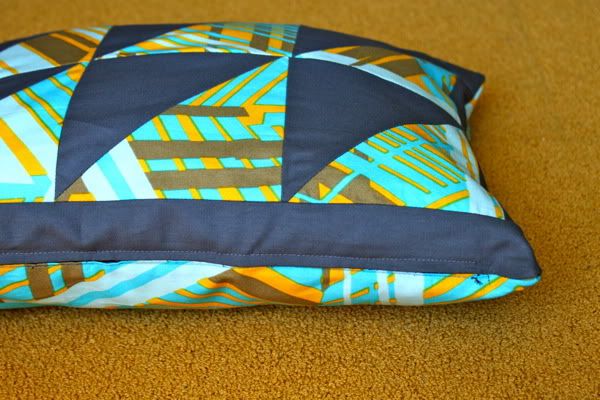
I whipped up this pieced pillow for the Craft Room Redesign Project in about an hour and a half, and I want to share with you the secret for making half square triangles in a jiff. I don't even have a 1/4" presser foot or any fancy quilting paraphernalia. You can use half square triangle units to make pinwheels, which are adorbs and very trendy right now. You can also make sailboats and lots of other cuteness with them. Give it a shot, it's a good first-quilting-step.

Get the Easy Half Square Triangle Trick after the jump. And tell us, are you a lazy quilter? Do you have any lazy quilting tips for us? Your comment could win you a gorg Belle & Blue Chair.
Read more »

Labels: , , , , , , ,

Monday, March 14, 2011

How to Sew A Sham Pillow with Zipper Closure


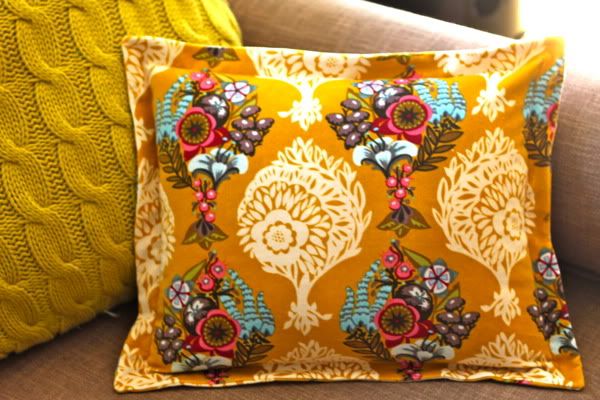
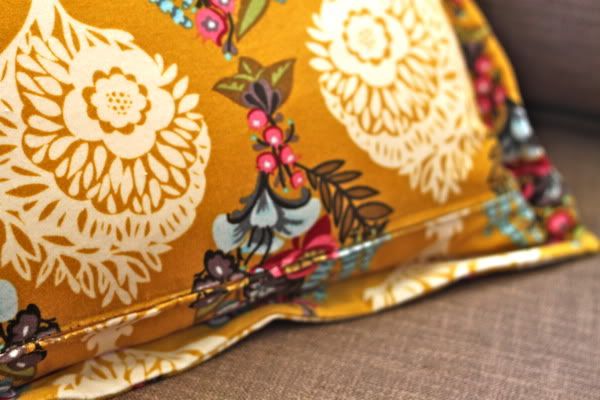
I have such lust in my heart for Anna Maria Horner's Innocent Crush velveteen fabrics, I just want to rub them on my cheeks all day long. So of course a pillow for my redesigned craft room had to be made. The velveteen lends itself perfectly to a sham with nice stiff edges, so I combined elements of Jacinda's Sham Style Pillowcase tutorial and the How to Sew a Zipper Pillow tutorial to create a pillow with both a zipper closure AND a sham edge.

It is much easier than you would imagine, and it will allow you to take the zipper off of the very edge of the pillow so you can add decorative trim and other fun goodness without having to use an envelope closure (like we did for the pom pom pillow tutorial). Find out how to sew a Sham Pillow with a Zipper Closure after the jump...

I'm making about ten thousand pillows for my new office, so I'll be sharing how to use zippers with trim and ruffles and whatnot soon. Is there a kind of pillow you want to know how to make? I'm on a pillow-roll so let me know in the comments. You could also win that skull-tastic fat quarter!
Read more »

Labels: , , , , , , ,

Monday, March 7, 2011

How to Sew a Zipper Pillow

STOP! Do not turn away. You are going to conquer your fear of zippers right now.

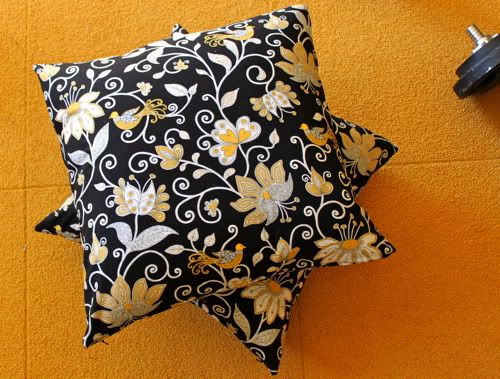
I'm going to show you how to sew a pillow with a zipper closure and you are going to like it. It is VERY easy, a complete beginner project, and the results are polished goodness. Look at that pic above, you can barely see the zipper even though it's right up in your face.

You can use vintage fabrics like these, new fabrics, old sheets, a sweater, tea towels, a dirty t-shirt, something fabulous from Fabricworm, anything your heart desires - but when we are done you will be sewing zippers like a pro.

Learn How to Sew a Zipper Pillow after the jump...

Tell us the truth: do you fear the zipper? And do you fear it a little less after reading this tutorial? This week's favorite comment walks away with a fancy yard of pom pom trim!
Read more »

Labels: , , , , , ,

Monday, February 14, 2011

Top Knot Baby Hat Tutorial


I highly recommend having your babies during a season other than Winter. All this bundling, sigh... Mostly I have been hiding at home but on occasion I venture out to scare the public with my dark circles and lack of personal grooming. On such occasion, I cover Gordon's baldy-bean with a soft little cap, so this weekend I made him a few of these little Top Knot Baby Hats.

They were super easy and quick! A perfect little gift for a new babe and a great use for an old t-shirt or sweater.

Get the Top-Knot Baby Hat Tutorial...

Read more »

Labels: , , , , , , , ,

Monday, February 7, 2011

Pretty Party Dress with Free Downloadable Pattern!


So I showed you a tease of this dress awhile back on the Prudent Baby Facebook Page (we have so much fun over there, why don't you join us: facebook.com/prudentbaby) It took me a minute to get it to you because I was waiting to give it to miss Dove. Umm, how cute is she?

Adorbs. So this is a bit more work then some dresses, but I am really happy with how it turned out.

If you think you're ready for it, get the full Pretty Party Dress Tutorial with Free Downloadable Pattern after the jump.

And remember to leave me or Miss Dove a comment, because any comment you leave could win you this week's surprise prize!
Read more »

Labels: , , , , , , , , ,

Wednesday, February 2, 2011

Keep Raw Fabric Edges From Fraying


Is your fabric stash falling to pieces after a spin in the dryer? Mine was. Look at those poor tangled beauties! Get a quick fix to keep raw fabric edges from fraying after the jump.
Read more »

Labels: , ,

Thursday, January 27, 2011

Crib Sheet Tutorial: Part 2


Back when Prudent Baby was in it's umm... infancy, Jaime did an awesome tutorial for a crib sheet that rocked our world. Beautiful designer crib sheets for a fraction of the cost of the pricey sets without all the stuff you don't end up using like bumpers and comforters!?! Her version used elastic only at the corners and was the perfect quick project, especially and if you have a narrower width fabric - 45/45." But some of you have asked for a version with elastic all the way around for a more polished look and more snug fit so here it is. Get the fitted crib sheet tutorial: part 2 after the jump.

Don't you love Gordon's Sock Croc? He was a gift from The Nesting Spot. There are no crocs in stock (har) but she will make you one if you message her. He is seriously awesome, like 2 feet long.Read more »

Labels: , , , , ,

Tuesday, January 25, 2011

How to Sew A Twin Duvet Cover


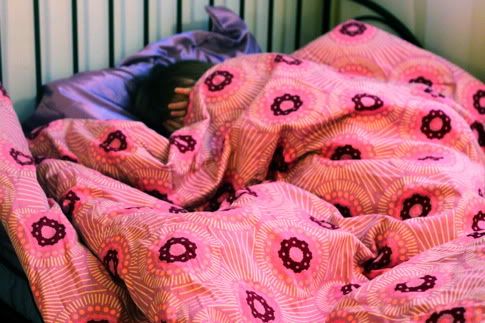
First we showed you How to Sew A Duvet Cover and gave you measurements for all different sizes.  Well, Scarlet outgrow the crib size duvet I made, so it was time for a twin.

How much fabric do you need to sew a twin duvet cover? This question is so hard to find an answer to out there on the Internets - so much conflicting info.

So, I was left to my own devices to figure it out, and because I love you, I will tell you how much fabric you need to sew a twin duvet cover, and how I pieced it together to get the most of my yardage.

Check out How to Sew a Twin Duvet Cover after the jump...

This week your comments could win you some pretty potholder fabric & bias tape.
Read more »

Labels: , , , ,