body { background:#fff url("http://www.blogblog.com/dots/bg_dots.gif") 50% 0; margin:0; padding:0 10px; text-align:center; font:x-small Verdana,Arial,Sans-serif; color:#333; font-size/* */:/**/small; font-size: /**/small; } /* Page Structure ----------------------------------------------- */ @media all { #content { background:url("http://www.blogblog.com/dots/bg_3dots.gif") no-repeat 250px 50px; width:700px; margin:0 auto; padding:50px 0; text-align:left; } #main { width:450px; float:right; padding:50px 0 20px; font-size:85%; } #main2 { background:url("http://www.blogblog.com/dots/bg_dots2.gif") -100px -100px; padding:20px 10px 15px; } #sidebar { width:200px; float:left; font-size:85%; padding-bottom:20px; } #sidebar2 { background:url("http://www.blogblog.com/dots/bg_dots2.gif") 150px -50px; padding:5px 10px 15px; width:200px; width/* */:/**/180px; width: /**/180px; } } @media handheld { #content { width:90%; } #main { width:100%; float:none; } #sidebar { width:100%; float:none; } #sidebar2 { width:100%; } } html>body #main, html>body #sidebar { /* We only give this fade from white to nothing to browsers that can handle 24-bit transparent PNGs */ background/* */:/**/url("http://www.blogblog.com/dots/bg_white_fade.png") repeat-x left bottom; } /* Title & Description ----------------------------------------------- */ @media all { #blog-title { margin:0 0 .5em; font:250%/1.4em Georgia,Serif; color:#353; } #blog-title a { color:#353; text-decoration:none; } #description { margin:0 0 1.75em; color:#996; } #blog-mobile-title { display:none; } #description-mobile { display:none; } } @media handheld { #blog-title { display:none; } #description { display:none; } #blog-mobile-title { display:block; margin:0 0 .5em; font:250%/1.4em Georgia,Serif; color:#353; } #blog-mobile-title a { color:#353; text-decoration:none; } #description-mobile { display:block; margin:0 0 1.75em; color:#996; } } /* Links ----------------------------------------------- */ a:link { color:#488; } a:visited { color:#885; } a:hover { color:#000; } a img { border-width:0; } /* Posts ----------------------------------------------- */ .date-header { margin:0 0 .75em; padding-bottom:.35em; border-bottom:1px dotted #9b9; font:95%/1.4em Georgia,Serif; text-transform:uppercase; letter-spacing:.3em; color:#663; } .post { margin:0 0 2.5em; line-height:1.6em; } .post-title { margin:.25em 0; font:bold 130%/1.4em Georgia,Serif; color:#333; } .post-title a, .post-title strong { background:url("http://www.blogblog.com/dots/bg_post_title.gif") no-repeat 0 .25em; display:block; color:#333; text-decoration:none; padding:0 0 1px 45px; } .post-title a:hover { color:#000; } .post p { margin:0 0 .75em; } p.post-footer { margin:0; text-align:right; } p.post-footer em { display:block; float:left; text-align:left; font-style:normal; color:#996; } a.comment-link { /* IE5.0/Win doesn't apply padding to inline elements, so we hide these two declarations from it */ background/* */:/**/url("http://www.blogblog.com/dots/icon_comment.gif") no-repeat 0 .25em; padding-left:15px; } html>body a.comment-link { /* Respecified, for IE5/Mac's benefit */ background:url("http://www.blogblog.com/dots/icon_comment.gif") no-repeat 0 .25em; padding-left:15px; } .post img { margin:0 0 5px 0; padding:4px; border:1px solid #cca; } /* Comments ----------------------------------------------- */ #comments { margin:0; } #comments h4 { margin:0 0 10px; border-top:1px dotted #9b9; padding-top:.5em; font:bold 110%/1.4em Georgia,Serif; color:#333; } #comments-block { line-height:1.6em; } .comment-poster { background:url("http://www.blogblog.com/dots/icon_comment.gif") no-repeat 2px .35em; margin:.5em 0 0; padding:0 0 0 20px; font-weight:bold; } .comment-body { margin:0; padding:0 0 0 20px; } .comment-body p { margin:0 0 .5em; } .comment-timestamp { margin:0 0 .5em; padding:0 0 .75em 20px; color:#996; } .comment-timestamp a:link { color:#996; } .deleted-comment { font-style:italic; color:gray; } .paging-control-container { float: right; margin: 0px 6px 0px 0px; font-size: 80%; } .unneeded-paging-control { visibility: hidden; } /* More Sidebar Content ----------------------------------------------- */ .sidebar-title { margin:2em 0 .75em; padding-bottom:.35em; border-bottom:1px dotted #9b9; font:95%/1.4em Georgia,Serif; text-transform:uppercase; letter-spacing:.3em; color:#663; } #sidebar p { margin:0 0 .75em; line-height:1.6em; } #sidebar ul { margin:.5em 0 1em; padding:0 0px; list-style:none; line-height:1.5em; } #sidebar ul li { background:url("http://www.blogblog.com/dots/bullet.gif") no-repeat 3px .45em; margin:0; padding:0 0 5px 15px; } #sidebar p { margin:0 0 .6em; } /* Profile ----------------------------------------------- */ .profile-datablock { margin:0 0 1em; } .profile-img { display:inline; } .profile-img img { float:left; margin:0 8px 5px 0; border:4px solid #cc9; } .profile-data { margin:0; line-height:1.5em; } .profile-data strong { display:block; } .profile-textblock { clear:left; } /* Footer ----------------------------------------------- */ #footer { clear:both; padding:15px 0 0; } #footer hr { display:none; } #footer p { margin:0; } /* Feeds ----------------------------------------------- */ #blogfeeds { } #postfeeds { padding-left: 20px }

Prudent Baby

Get sewing how to, sewing tutorials, and sewing help to learn sewing. We offer sewing tutorial for sewing moms.

Thursday, December 9, 2010

DIY Fabric Clothespin Gift Tags
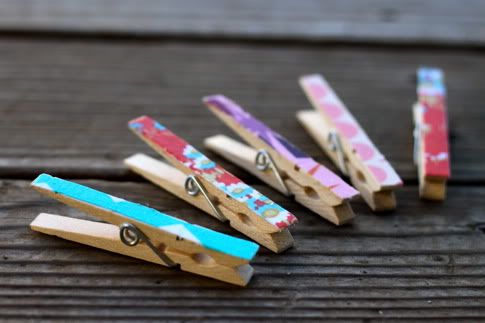

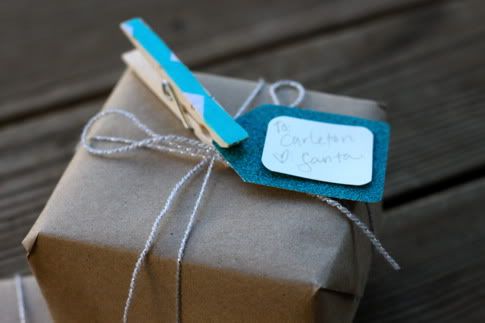
The mod podge fabric clothespin is such a cute and quick project to bust through scraps with, and so useful. I was thinking about gift wrapping this year and it occurred to me it could be cute to clip the gift tag on each present with a cute fabric clothespin.
 Then it occurred to me to glue a magnet to the back of it, so the giftee could use it on their fridge later on.
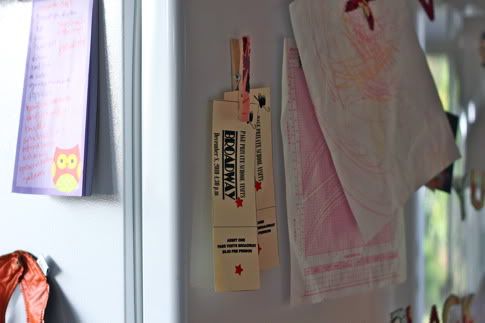
This is a great little project to use up some fabric (or paper) scraps as well.

Get the Mod Podge Clothespin Gift Tag Tutorial after the jump...

Is this worth the effort?  What are you doing for gift tags this year?  Let us know in the comments and you might win those five amazing embroidery patterns!
Read more »

Labels: , , , , , , , , , , ,

Thursday, November 4, 2010

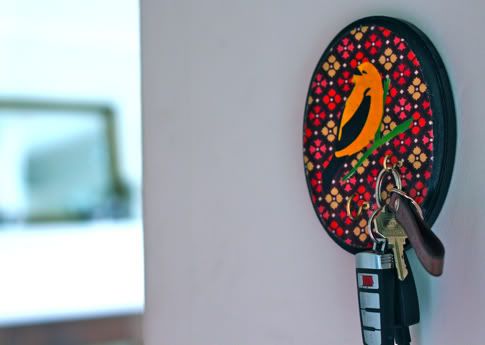
DIY Decoupage Key Holder


I lose my keys, I don't know, like five or six times a day. So I decided it was time to create something to hang them from, right by the front door. I grabbed a wood plaque from Michael's, some screw-in hooks, a little paint, fabric, and mod podge, and here's what I came up with. I even added an extra hook for the Prudent Dad, though he is usually the one finding my keys, which are usually buried in my purse. But that's not the point: The point is that you can make one of these very easily!

You know what was really funny, was that Carleton totally loved this thing, and immediately hung his keys on it, then when we went to leave the house to go trick or treating, we could not find his keys anywhere. It took us ten minutes to realize they were hanging on the keyholder, HA.

Anyhoo, Get the full DIY Key Holder Tutorial after the jump...

And this week's prize for fave comment is a little starter set of mod podge, fabric, and sponge brush so you can take a go at making your own. Just leave a fabulous comment and you could win it!
Read more »

Labels: , , , , , , ,

Monday, November 1, 2010

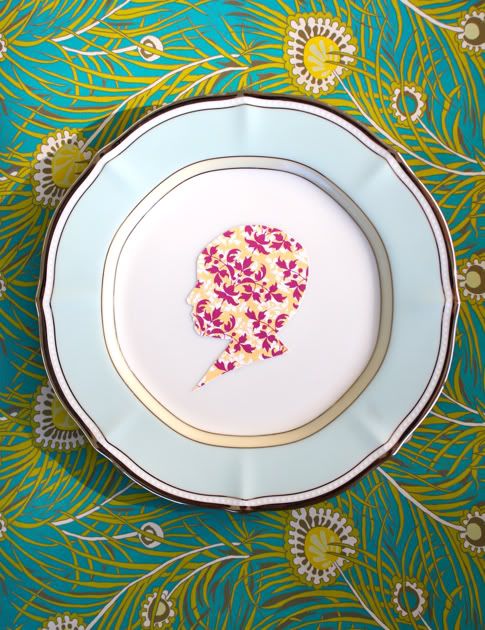
DIY Cameo Plate Part 2


I whipped up another one of these silhouettes on a vintage plate yesterday. They are so easy & quick and make for a great little gift. You can hang them on the wall or use them for your keys or other trinkets. All it takes is a plate, some paper, and some mod podge. I used a patterned paper for this one, but maybe I like the traditional black I used in the original tutorial better? Get the tutorial here: Vintage Cameo Plate Hanging.
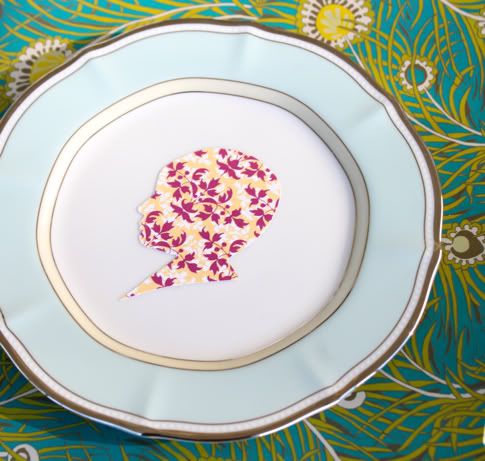
And remember, any comment you leave this week could win you a little mod podge of your own so you can give it a try...

Labels: , , , , , , , ,

Wednesday, July 14, 2010

No-Sew Powder Bath Makeover


Last night I used a few of my favorite Prudent Baby DIYs to give our powder bathroom a little personality. First I stretched a piece of Lourdes Sanchez Botanica Leafy Stripe Dove over a store bought canvas for a quick and inexpensive piece of large wall art (click for Wall Art DIY). And as I've mentioned before, I don't nail a hole in my wall for just anything.

Then I whipped up YET ANOTHER of Jaime's Mod Podge Stools, this time with Lourdes Sanchez Botanica Large Floral Cream fabric (isn't this entire collection gorg?!). I can't get enough of these stools. I still want like three more. Apparently I love to torture myself by enabling Clare's mischief. But I guess she is going to find her way on up on the counter regardless, so it might as well be on a pretty stool, right?

I still have some bathroom accessories to Mod Podge and trimmed hand towels on my to-do list for this space but I was too excited not to share my little decorating project. Both DIYs are so quick and easy with high impact! You should totally make some.

Labels: , , , , ,

Tuesday, June 22, 2010

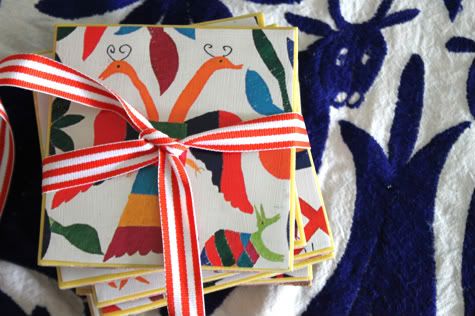
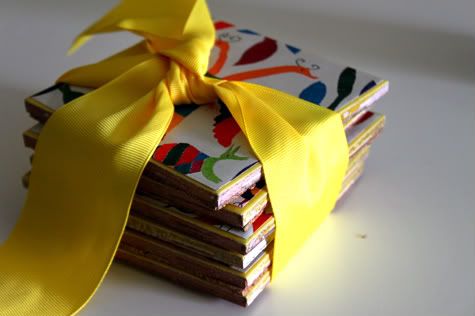
Recycled Calendar Coasters


Remember when I made our headboard and I told you how I found that beautiful otomi fabric on ebay?  Well the seller also sent me a calendar with all kinds of gorgeous images of otomi fabric.  It was so pretty I didn't want to throw it away, but a girl only needs so many paper calendars.  Since I've been working on prettying up my home office with exotic fabrics like otomi and suzanis, I thought recycling the images onto some coasters would be a nice touch.

I know I showed you how to do this once before with the Matryoshka and Owl Coasters, but I'll show you How to Make Mod Podge Coasters again after the jump.  It's so crazy easy!

Read more »

Labels: , , , , , , , ,

Tuesday, May 25, 2010

Guest Post: DIY Bulletin Board Alternative

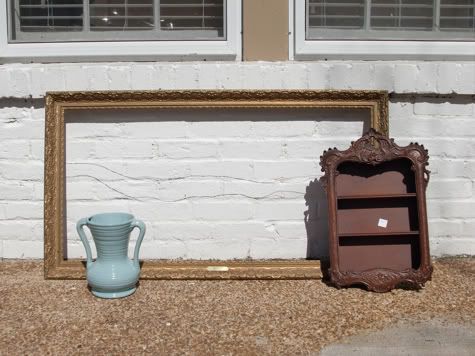
BEFORE:

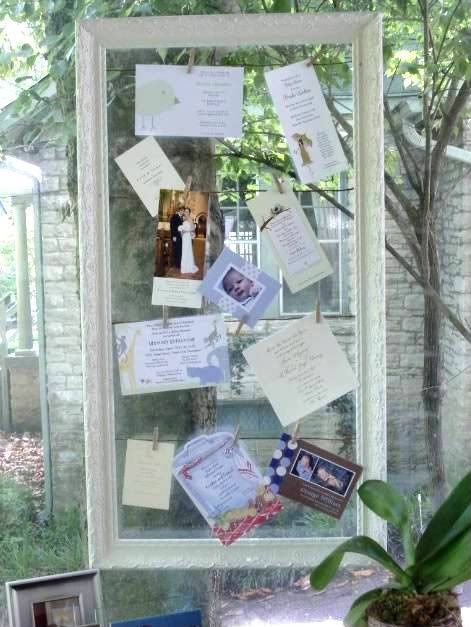
AFTER:

Julia at I Steal Good Ideas cooked up this alternative to a traditional bulletin board from a flea market frame and some mod podge, and she's going to show you how to make one too. Here's the scoop from Julia herself:

I'm a certified idea thief. If I see something I like but know I could make it and get something I LOVE, then the rip off is on. So it goes with this DIY project. My home office is on my sun porch and while I needed a bulletin board to keep up with all of the birth announcements, wedding invites, photos and general merriment that arrives in the mail, I didn't want one that would block the view or the light. When I saw a chicken-themed note-holder frame on Wisteria, I knew I could make a more elegant version that would be perfect for my cozier-by-the-day home office. With a flea market frame, some spray paint, floral wire, and tacks from a home supply store, it came together in no time flat. But the coupe de grace is the custom decoupaged mini clothespins made especially to fit the look of my new creation. Yes, I said decoupage. I honestly can't believe I decoupaged either ... but I really enjoyed it and I think the Wisteria rip-off was a success. I hope you think so too!
Get the full DIY Bulletin Board Alternative Tutorial at I Steal Good Ideas!

Labels: , , , , ,

Thursday, May 13, 2010

Fabric Wrapped Recycled Bath Accessories


I ate a $16 jar of nuts from a hotel minibar at 2 am on a recent business trip. In the morning, I was angry at the jar. I wanted it to do more for me than just sit there empty, taunting me with its salty fattening expensiveness.
With the beauty of Jacinda's Fabric Vase in mind, I brought the jar home, found another glass canister, and with the help of a fabric scrap from my collection, repurposed them into cotton ball and q-tip holders for the bathroom. So there jar, the joke's on you!
Get the full Fabric Wrapped Recycled Bath Accessories tutorial after the jump...
Read more »

Labels: , , , , , , , , , ,

Wednesday, March 31, 2010

Revamped Perfume Tray


You may remember this adorable pattern from the DIY Matryoshka and Owl Coasters.  I can't get enough of it, so I remade my boring old perfume tray with a little mod podge.  Ahh mod podge, is there anything you can't make prettier?  No, there is not.  This is a crazy-easy 3-step project, get the full Perfume Tray Revamp after the jump...
Read more »

Labels: , , , , , ,

Friday, March 5, 2010

DIY Mod Podge Children's Bathroom Stool Part 2


Thanks Ohdeedoh for featuring Jaime's step stool DIY Part 2! We have now added the little deer as a free downloadable template!
 --
I gave Jaime's bathroom stool project a go last night and I'm loving the results of our made-over stool! The new stool has had more of a positive effect on Clare's potty training than the sticker chart, plus it makes your bathroom pretty! You should make one, seriously. My faux bois base paper is from Martha Stewart/Michaels and the deer is a cut-out from white paper layered on top.

Labels: , , , ,

Wednesday, February 3, 2010

DIY Gift: Kid Art Trivet


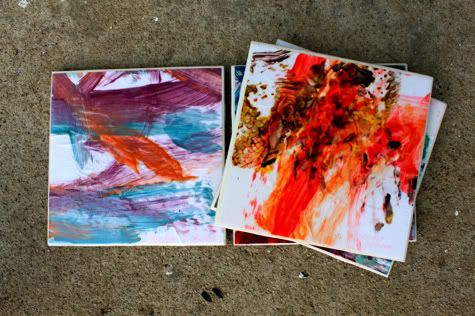
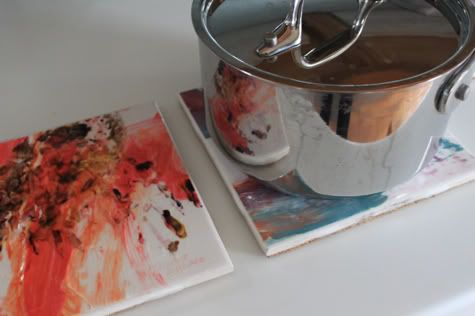
Here's a gift I think even the coolest childless Uncle would appreciate: a trivet featuring your kid's artwork!  It's kid-cuteness in a modern and useful package.  And just as an aside, Scarlet is obviously so talented, right?  You thought I bought these at the MOMA didn't you?

But no, I made them from some of her paintings to send off to her three grandmas and two grandpas for Valentine's day.  And she's so proud of them, the look on her face was priceless when she saw the finished product!
Get the full Kid Art Trivet How-to After the jump...
Read more »

Labels: , , , , , , , , , , ,

Wednesday, January 27, 2010

DIY Vintage Plate Cameo Hanging

We've given you the Cameo Silhouette Plaque DIY and the Cameo Silhouettes 3 Ways DIY, but now that I'm in love with mod podge I think I've created the easiest silhouette tutorial ever.  The vintage plate makes for a beautiful frame and the whole project took about 15 minutes.  This project falls into both our Under $5 and Under an Hour categories, and I think it would make a great gift, do you agree?


Get the full Hanging Vintage Plate Cameo DIY after the jump...
Read more »

Labels: , , , , , , , , , ,

Tuesday, January 26, 2010

DIY Children's Bathroom Step Stool

BEFORE:
AFTER:
Well, I didn't make the stool itself.  I bought it forever ago, I think at Target, for under $10.  But it was plain white, so after the fun I had with the DIY Matryoshka and Owl Coasters I decided to spruce it up with some mod podge and pretty paper to match the bathroom!

Make your own kid's step stool personalized or give a gift stool that will be the hit of the shower by using their name, their favorite words, or just some pretty paper.  It's SO EASY and has such fun results!

Get the full DIY Kids Bathroom Stool tutorial after the jump...
And thanks for the post OhDeeDoh!
Read more »

Labels: , , , , , , , , ,

Thursday, January 21, 2010

DIY Matryoshka & Owl Coasters


I know DIY mod podge coasters have been done a million times, but I needed some new coasters so I thought I'd share. Maybe you haven't tried it yet, if not you really should.  These are SO easy and so professional-looking that they make an ideal gift, and they cost less then $5 for a whole set.  You just need some cheap tiles, some paper, a little felt and mod podge.  Get the full DIY after the jump...

Read more »

Labels: , , , , , , ,