body { background:#fff url("http://www.blogblog.com/dots/bg_dots.gif") 50% 0; margin:0; padding:0 10px; text-align:center; font:x-small Verdana,Arial,Sans-serif; color:#333; font-size/* */:/**/small; font-size: /**/small; } /* Page Structure ----------------------------------------------- */ @media all { #content { background:url("http://www.blogblog.com/dots/bg_3dots.gif") no-repeat 250px 50px; width:700px; margin:0 auto; padding:50px 0; text-align:left; } #main { width:450px; float:right; padding:50px 0 20px; font-size:85%; } #main2 { background:url("http://www.blogblog.com/dots/bg_dots2.gif") -100px -100px; padding:20px 10px 15px; } #sidebar { width:200px; float:left; font-size:85%; padding-bottom:20px; } #sidebar2 { background:url("http://www.blogblog.com/dots/bg_dots2.gif") 150px -50px; padding:5px 10px 15px; width:200px; width/* */:/**/180px; width: /**/180px; } } @media handheld { #content { width:90%; } #main { width:100%; float:none; } #sidebar { width:100%; float:none; } #sidebar2 { width:100%; } } html>body #main, html>body #sidebar { /* We only give this fade from white to nothing to browsers that can handle 24-bit transparent PNGs */ background/* */:/**/url("http://www.blogblog.com/dots/bg_white_fade.png") repeat-x left bottom; } /* Title & Description ----------------------------------------------- */ @media all { #blog-title { margin:0 0 .5em; font:250%/1.4em Georgia,Serif; color:#353; } #blog-title a { color:#353; text-decoration:none; } #description { margin:0 0 1.75em; color:#996; } #blog-mobile-title { display:none; } #description-mobile { display:none; } } @media handheld { #blog-title { display:none; } #description { display:none; } #blog-mobile-title { display:block; margin:0 0 .5em; font:250%/1.4em Georgia,Serif; color:#353; } #blog-mobile-title a { color:#353; text-decoration:none; } #description-mobile { display:block; margin:0 0 1.75em; color:#996; } } /* Links ----------------------------------------------- */ a:link { color:#488; } a:visited { color:#885; } a:hover { color:#000; } a img { border-width:0; } /* Posts ----------------------------------------------- */ .date-header { margin:0 0 .75em; padding-bottom:.35em; border-bottom:1px dotted #9b9; font:95%/1.4em Georgia,Serif; text-transform:uppercase; letter-spacing:.3em; color:#663; } .post { margin:0 0 2.5em; line-height:1.6em; } .post-title { margin:.25em 0; font:bold 130%/1.4em Georgia,Serif; color:#333; } .post-title a, .post-title strong { background:url("http://www.blogblog.com/dots/bg_post_title.gif") no-repeat 0 .25em; display:block; color:#333; text-decoration:none; padding:0 0 1px 45px; } .post-title a:hover { color:#000; } .post p { margin:0 0 .75em; } p.post-footer { margin:0; text-align:right; } p.post-footer em { display:block; float:left; text-align:left; font-style:normal; color:#996; } a.comment-link { /* IE5.0/Win doesn't apply padding to inline elements, so we hide these two declarations from it */ background/* */:/**/url("http://www.blogblog.com/dots/icon_comment.gif") no-repeat 0 .25em; padding-left:15px; } html>body a.comment-link { /* Respecified, for IE5/Mac's benefit */ background:url("http://www.blogblog.com/dots/icon_comment.gif") no-repeat 0 .25em; padding-left:15px; } .post img { margin:0 0 5px 0; padding:4px; border:1px solid #cca; } /* Comments ----------------------------------------------- */ #comments { margin:0; } #comments h4 { margin:0 0 10px; border-top:1px dotted #9b9; padding-top:.5em; font:bold 110%/1.4em Georgia,Serif; color:#333; } #comments-block { line-height:1.6em; } .comment-poster { background:url("http://www.blogblog.com/dots/icon_comment.gif") no-repeat 2px .35em; margin:.5em 0 0; padding:0 0 0 20px; font-weight:bold; } .comment-body { margin:0; padding:0 0 0 20px; } .comment-body p { margin:0 0 .5em; } .comment-timestamp { margin:0 0 .5em; padding:0 0 .75em 20px; color:#996; } .comment-timestamp a:link { color:#996; } .deleted-comment { font-style:italic; color:gray; } .paging-control-container { float: right; margin: 0px 6px 0px 0px; font-size: 80%; } .unneeded-paging-control { visibility: hidden; } /* More Sidebar Content ----------------------------------------------- */ .sidebar-title { margin:2em 0 .75em; padding-bottom:.35em; border-bottom:1px dotted #9b9; font:95%/1.4em Georgia,Serif; text-transform:uppercase; letter-spacing:.3em; color:#663; } #sidebar p { margin:0 0 .75em; line-height:1.6em; } #sidebar ul { margin:.5em 0 1em; padding:0 0px; list-style:none; line-height:1.5em; } #sidebar ul li { background:url("http://www.blogblog.com/dots/bullet.gif") no-repeat 3px .45em; margin:0; padding:0 0 5px 15px; } #sidebar p { margin:0 0 .6em; } /* Profile ----------------------------------------------- */ .profile-datablock { margin:0 0 1em; } .profile-img { display:inline; } .profile-img img { float:left; margin:0 8px 5px 0; border:4px solid #cc9; } .profile-data { margin:0; line-height:1.5em; } .profile-data strong { display:block; } .profile-textblock { clear:left; } /* Footer ----------------------------------------------- */ #footer { clear:both; padding:15px 0 0; } #footer hr { display:none; } #footer p { margin:0; } /* Feeds ----------------------------------------------- */ #blogfeeds { } #postfeeds { padding-left: 20px }

Prudent Baby

Get sewing how to, sewing tutorials, and sewing help to learn sewing. We offer sewing tutorial for sewing moms.

Tuesday, January 24, 2012

Wooden Rainbow Arches


Lately I have been a total sucker for wood craft tutorials. I loved the child-size ironing board and when I saw these rainbow arches I knew I was hooked. Jennie and Allyson from Shape of a Spoon are two very talented women that find and create art in their everyday lives. Whether it is capturing the adventurous spirit of their kids through photography, sewing up a new dress or knitting the best sweater ever these ladies will try it all. Their Etsy shop 3Three is full of their handmade treasures where you can find such products as the Skirt + Satchels.

Enough of me chatting up a storm, let's get to learning how to make these Wooden Rainbow Arches...

Read more »

Labels: , , ,

Wednesday, January 11, 2012

Child-Size Ironing Board


It is not very often that we have tutorials involving wood, drills, and hammers here on Prudent Baby but when the chance comes, we love to share them with you. Who is totally loving this child-size ironing board right now? Me too! Over at Duo Fiberworks sisters Laura and Katie are making all sorts of wooden and felt toys for their little ones. Today they will walk you through the process of making this adorable ironing board. Make sure to stop by their blog to check out their many other tutorials like felted milk and juice bottles, carved carrots, and felted knit boats. Take it away ladies...

Read more »

Labels: , ,

Wednesday, August 3, 2011

How to Make a Paper Mache Table (for under $20)!


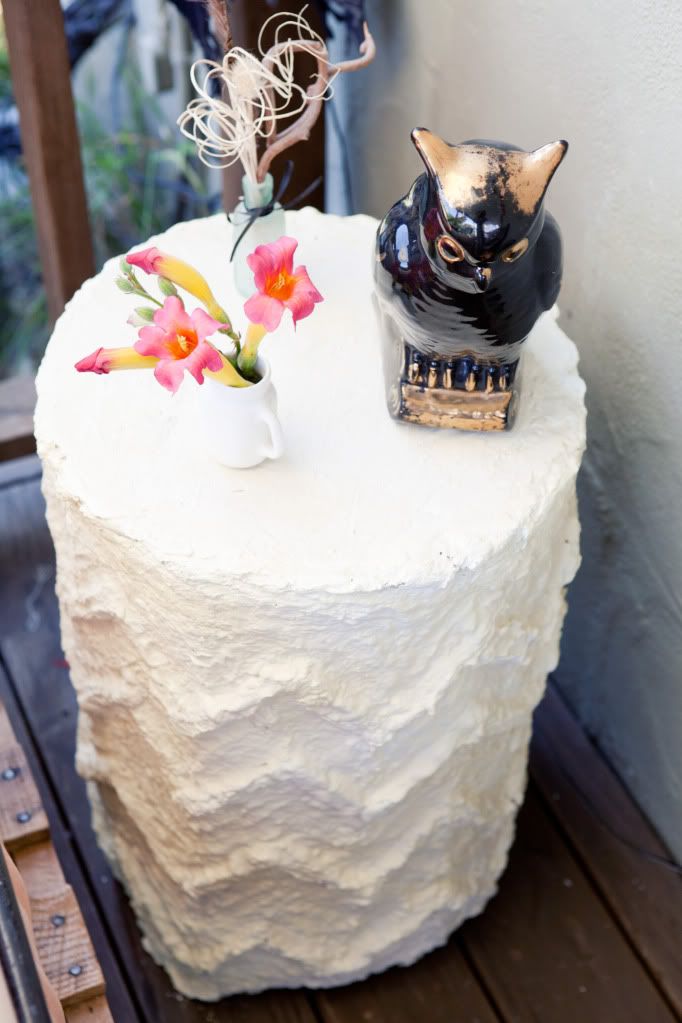
As part of My New Backyard, I decided to make a little paper mache table after spotting this one at West Elm. Paper mache is probably not the best idea for an outdoor table, but since this was made with recycled cardboard and newspapers, it cost me all of $10. Why not? I also sealed it up pretty well, and I'll show you how.

You could make a paper mache table in any style for indoor use and it would cost you a fraction of store bought furniture. And bonus: it was a really fun project to do with the kid. Learn how to make a paper mache table after the jump!
Read more »

Labels: , , , , ,

Monday, July 25, 2011

How to Build a Pallet Daybed


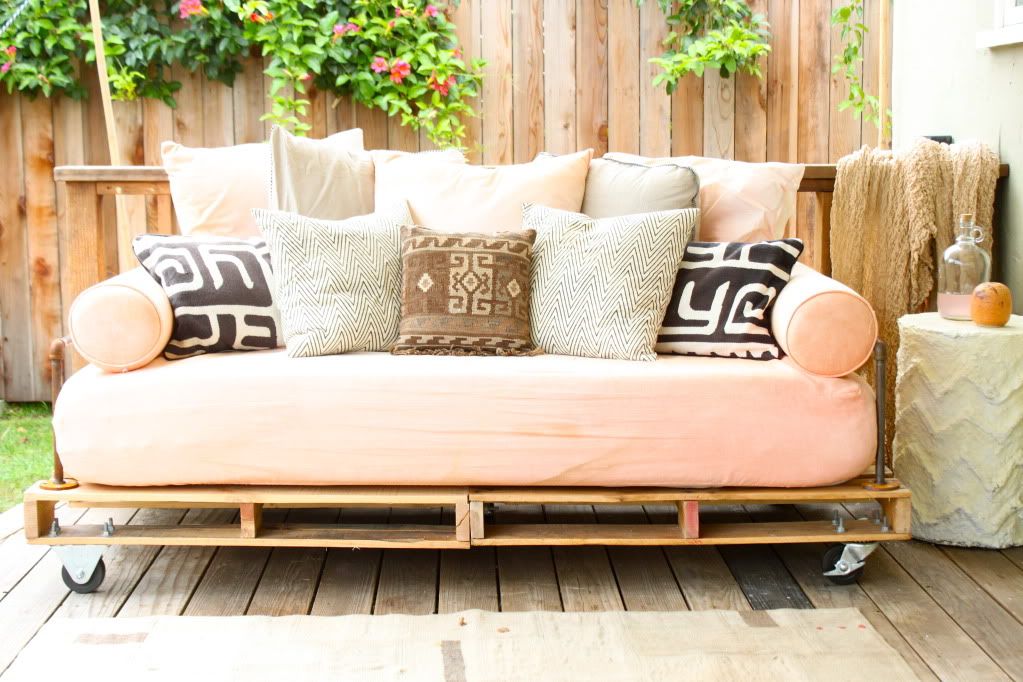
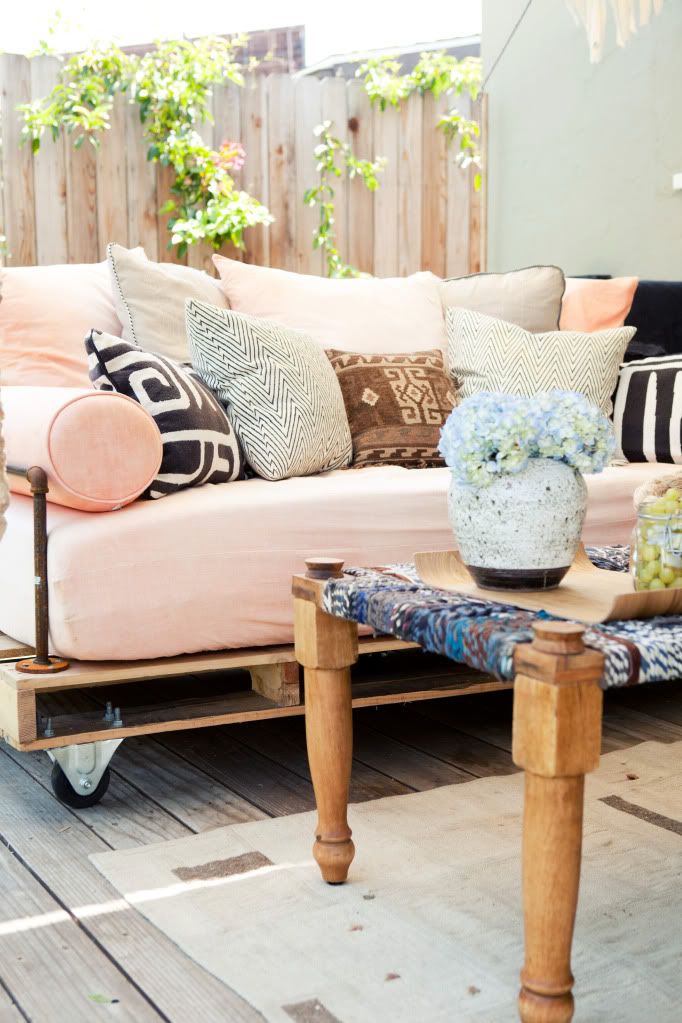
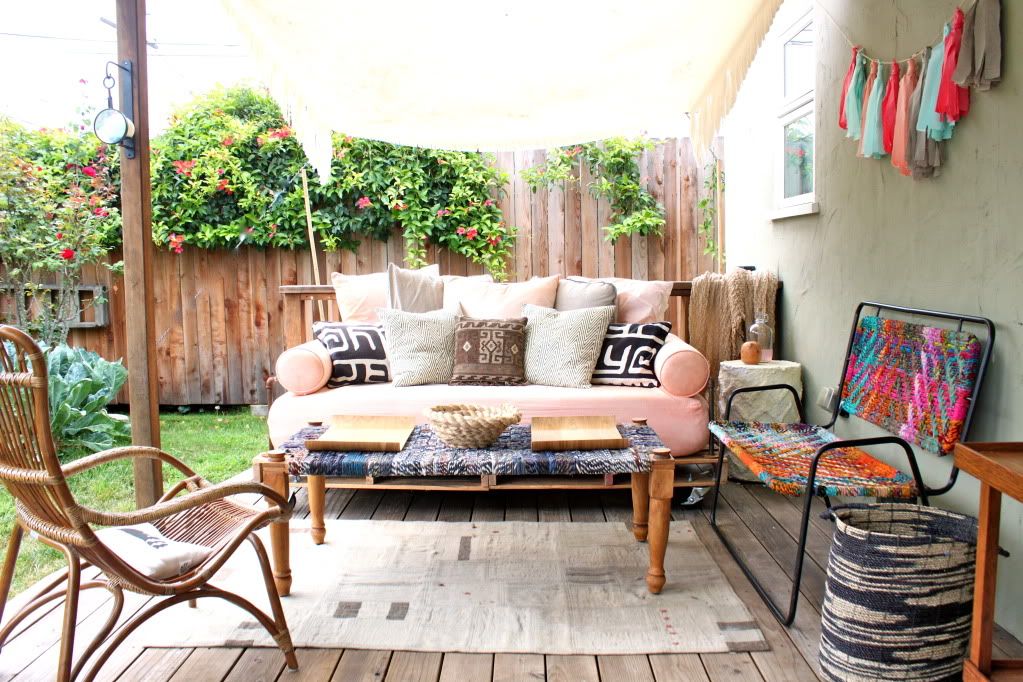
The highlight of My New Backyard patio redecorating scheme has most definitely been this pallet daybed. I really wanted a place to sleep outside with my daughter, and a comfy couch to relax on with friends. I didn't have the funds to invest in a fancy piece of outdoor furniture, and I knew that with the weather as it is in Los Angeles, I could leave this outside pretty much all summer. I also knew that I would, at some point, need to move it under the awning to keep it dry, so I put it on wheels. And finally, I knew I would need arms, because I'm just not comfy on a couch without arms. So here is the DIY Pallet Daybed I came up with.


I built this myself, with no help at all, in just a few days. I'm a crafty person and comfortable with tools, but I'm not an advanced woodworker by any stretch of the imagination, and this project was simple enough for me, so I know you can do it if you want to. Let me show you how to make your own DIY Pallet Daybed after the jump.
Read more »

Labels: , , , ,

Wednesday, June 1, 2011

The Craft Room Redesign Project: DIY Sewing & Cutting Tables

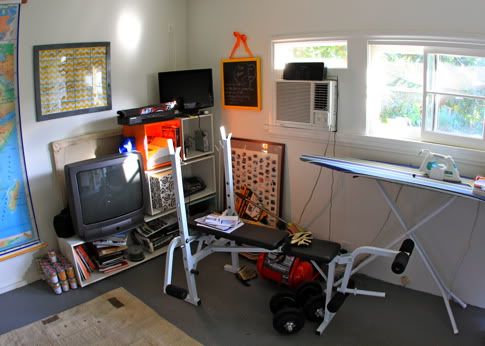
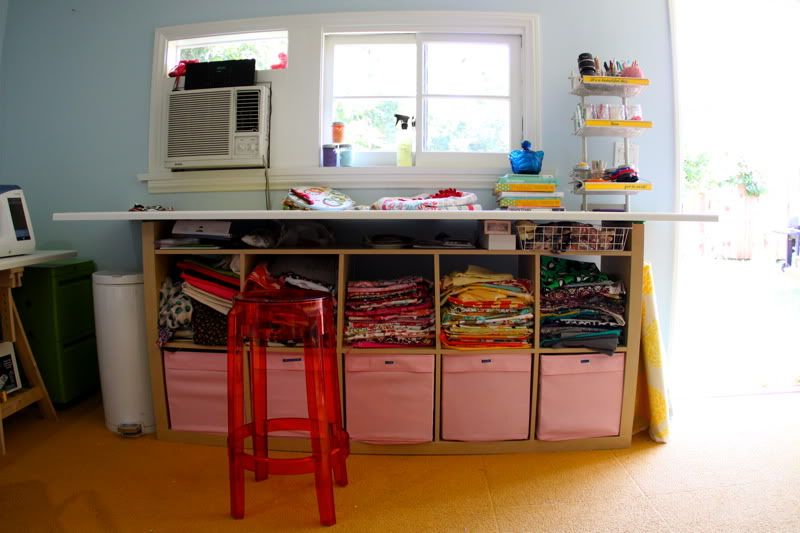
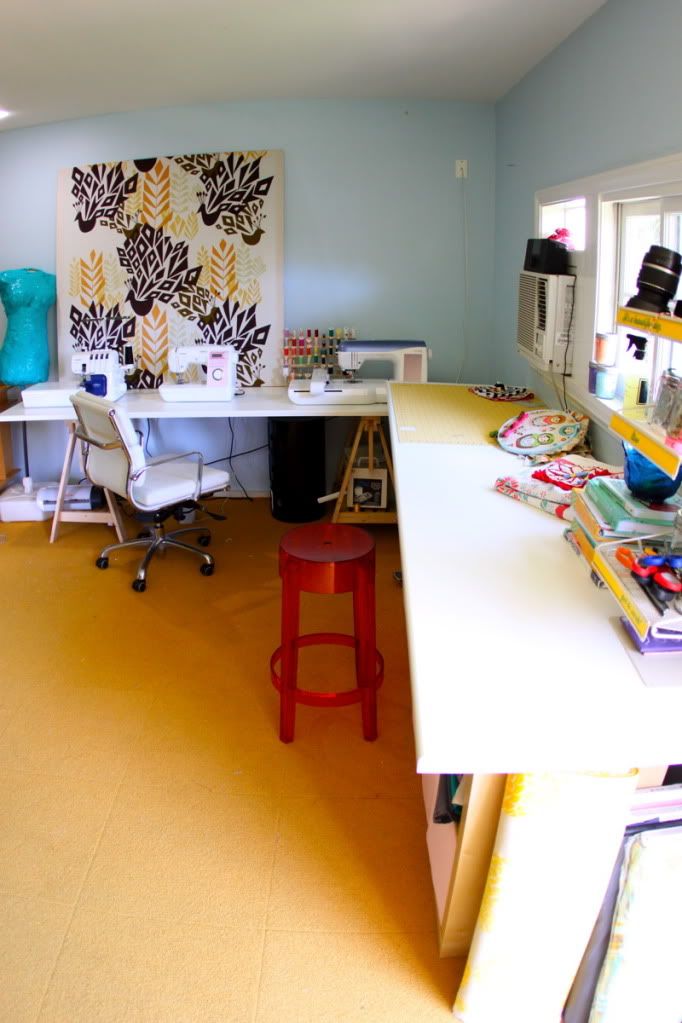
The next step in The Craft Room Redesign Project you all have been helping me with was to create a bigger & better cutting table, and to try to find a place for my embroidery machine, without spending a lot of money. I think I succeeded.
So here's before:


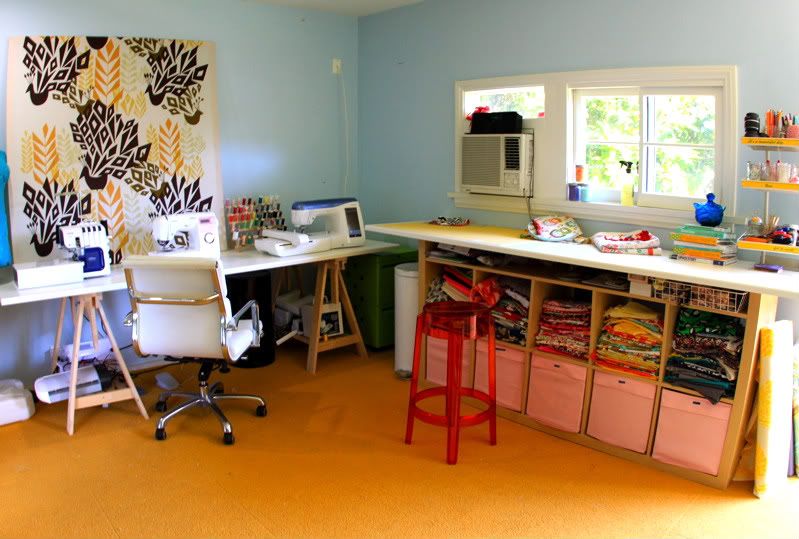
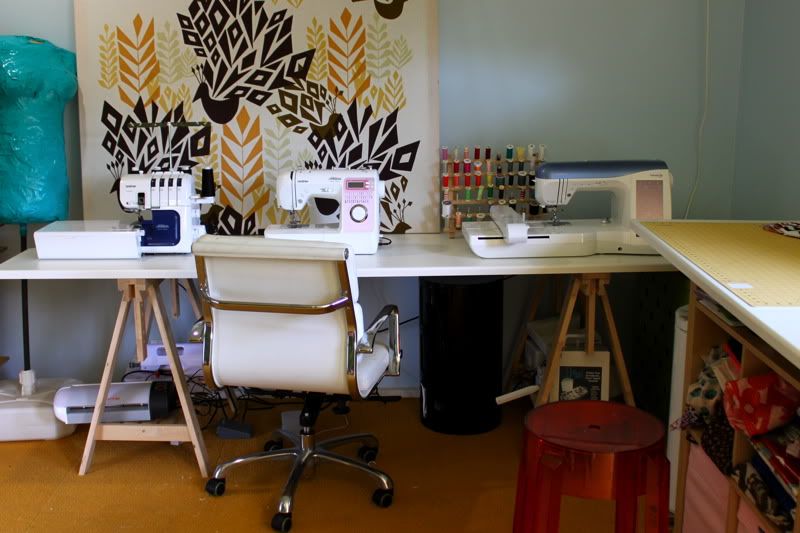
And after:


What do you think? Before you answer, consider that it only cost me $80. I had this expedit bookshelf from Ikea, which I purchased purely for function. I accidentally grabbed a birch-finish one, instead of the white that I wanted (really though, it's not my fault-the sign said white, but once it was in my house I wasn't going back with that giant beast). Point being, I liked the way it looked even less then I thought I would, and I didn't think I would like it very much. But I did like the way it could hold a ton of stuff and only cost $129. After creating the hidden workstation, I thought I'd get a bunch of baskets, organize the shelves & hide the clutter away, and be satisfied with the look. But after doing all this work to spiff the room up, it was really bugging me to see this wall 'o stuff in an Ikea bookshelf. It was dominating the room. I couldn't justify buying a beautiful new shelving system, so I asked my production designer friend Charlotte to come over and help me out. And help me out she did.

My old cutting table:


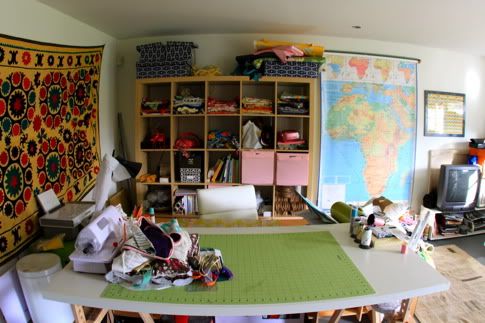
My new cutting table:


I like that when you walk in (as seen in pic right above) you no longer see the giant bookshelf, since it's now under a table and against the front wall. The whole room feels cleaner and more organized. Check out how we made these sewing and cutting tables for under $100 after the jump...
Read more »

Labels: , , , ,

Tuesday, March 8, 2011

How to Build a Raised Garden Bed


Inspired by Jaime's beautiful garden and childhood memories of eating sun-ripened heirloom tomatoes straight from the vine, we have started planning our own "backyard farm." This will be a major experiment for us. Will it survive the Texas heat? Will my children pluck all of the seedlings out of the dirt? Will the critters come and carry away my bounty? We are learning as we go with the help of our (more garden experienced) friends Drew and Brookes, the interweb and hopefully you, oh wise gardening Prudent Mamas.

This weekend the men-folk build two 4x8' raised beds. This is how they did it...
Read more »

Labels: , ,

Thursday, November 4, 2010

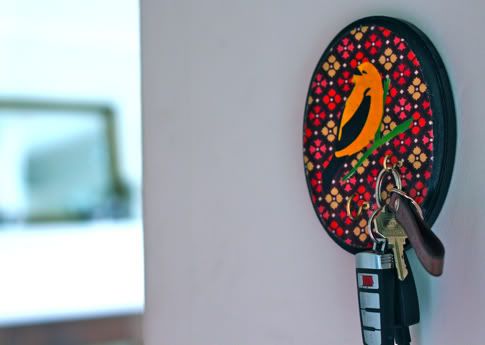
DIY Decoupage Key Holder


I lose my keys, I don't know, like five or six times a day. So I decided it was time to create something to hang them from, right by the front door. I grabbed a wood plaque from Michael's, some screw-in hooks, a little paint, fabric, and mod podge, and here's what I came up with. I even added an extra hook for the Prudent Dad, though he is usually the one finding my keys, which are usually buried in my purse. But that's not the point: The point is that you can make one of these very easily!

You know what was really funny, was that Carleton totally loved this thing, and immediately hung his keys on it, then when we went to leave the house to go trick or treating, we could not find his keys anywhere. It took us ten minutes to realize they were hanging on the keyholder, HA.

Anyhoo, Get the full DIY Key Holder Tutorial after the jump...

And this week's prize for fave comment is a little starter set of mod podge, fabric, and sponge brush so you can take a go at making your own. Just leave a fabulous comment and you could win it!
Read more »

Labels: , , , , , , ,

Thursday, October 7, 2010

I need your help

Dear prudent people who read Prudent Baby, I need your advice. During my trip to Canton, I acquired these two adorable rocking chairs. What should I do with them?

Should I leave this one as is, maybe just give the wood a dark stain? Or re-upholster?

I definitely want to reupholster this one. It has a crazy 1976 bicentennial fabric. You remember, it was on your grandpa's recliner? But should I keep the box pleat style at the bottom? It needs some type of skirt. Should I paint the wood? What color scheme? I want it to work for a boy down the road, is that not realistic? Any fabric ideas?

I have plans to actually get to some of these thrifting makeover projects this month because (1) they are starting to pile up and it's embarrassing and (2) I'm going to have my third child in January and will never have time to do anything ever, ever again. What do you think? Make it good and you will win that pretty Alexander Henry fat quarter up there.

Labels: , , , ,

Monday, April 19, 2010

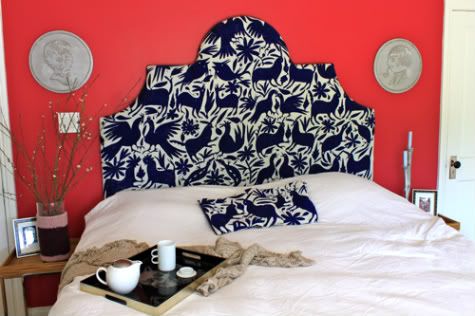
Our DIY Bedroom Takes Shape...


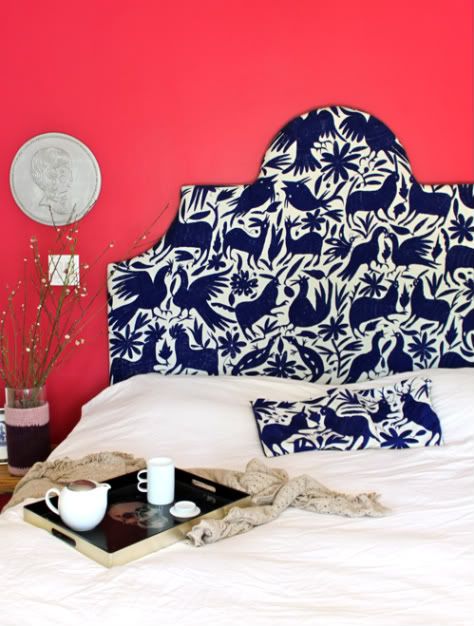
A few weeks back Hubby and I threw (and by threw I mean carefully painted five torturous layers) a coat of bright paint on the wall (color chosen because of its name: Frankly Scarlet) and finally hung our DIY King Size Headboard!

Get the full tutorial on how to make your own headboard, including free downloadable template, here.  And because I know you're going to ask, those awesome playful ceramic hangings were a Jonathan Adler splurge (he was there to sign them! how could i say no?).
So what do you think?  Time to sew a new duvet, right?

Labels: , , , , , ,

Monday, January 4, 2010

Handmade King Size Headboard

One of my new year's resolutions is to get our bedroom decorated.  I will take you all on the journey with me, revealing the change bit by bit.  We just bought a new king size bed so step one is a new headboard.  I was inspired by Grace of Design Sponge and her gorgeous DIY otomi headboard so I made one of my own!  Her video tutorial is here, and mine is after the jump.  The only difference is that my headboard is King size and I had to make it with pieces of wood that would fit in my car.  And I have a small car.  Get the full how-to after the jump!

Update:  Check out pictures of the headboard hanging in our bedroom here.
Read more »

Labels: , , , , , , , ,