body { background:#fff url("http://www.blogblog.com/dots/bg_dots.gif") 50% 0; margin:0; padding:0 10px; text-align:center; font:x-small Verdana,Arial,Sans-serif; color:#333; font-size/* */:/**/small; font-size: /**/small; } /* Page Structure ----------------------------------------------- */ @media all { #content { background:url("http://www.blogblog.com/dots/bg_3dots.gif") no-repeat 250px 50px; width:700px; margin:0 auto; padding:50px 0; text-align:left; } #main { width:450px; float:right; padding:50px 0 20px; font-size:85%; } #main2 { background:url("http://www.blogblog.com/dots/bg_dots2.gif") -100px -100px; padding:20px 10px 15px; } #sidebar { width:200px; float:left; font-size:85%; padding-bottom:20px; } #sidebar2 { background:url("http://www.blogblog.com/dots/bg_dots2.gif") 150px -50px; padding:5px 10px 15px; width:200px; width/* */:/**/180px; width: /**/180px; } } @media handheld { #content { width:90%; } #main { width:100%; float:none; } #sidebar { width:100%; float:none; } #sidebar2 { width:100%; } } html>body #main, html>body #sidebar { /* We only give this fade from white to nothing to browsers that can handle 24-bit transparent PNGs */ background/* */:/**/url("http://www.blogblog.com/dots/bg_white_fade.png") repeat-x left bottom; } /* Title & Description ----------------------------------------------- */ @media all { #blog-title { margin:0 0 .5em; font:250%/1.4em Georgia,Serif; color:#353; } #blog-title a { color:#353; text-decoration:none; } #description { margin:0 0 1.75em; color:#996; } #blog-mobile-title { display:none; } #description-mobile { display:none; } } @media handheld { #blog-title { display:none; } #description { display:none; } #blog-mobile-title { display:block; margin:0 0 .5em; font:250%/1.4em Georgia,Serif; color:#353; } #blog-mobile-title a { color:#353; text-decoration:none; } #description-mobile { display:block; margin:0 0 1.75em; color:#996; } } /* Links ----------------------------------------------- */ a:link { color:#488; } a:visited { color:#885; } a:hover { color:#000; } a img { border-width:0; } /* Posts ----------------------------------------------- */ .date-header { margin:0 0 .75em; padding-bottom:.35em; border-bottom:1px dotted #9b9; font:95%/1.4em Georgia,Serif; text-transform:uppercase; letter-spacing:.3em; color:#663; } .post { margin:0 0 2.5em; line-height:1.6em; } .post-title { margin:.25em 0; font:bold 130%/1.4em Georgia,Serif; color:#333; } .post-title a, .post-title strong { background:url("http://www.blogblog.com/dots/bg_post_title.gif") no-repeat 0 .25em; display:block; color:#333; text-decoration:none; padding:0 0 1px 45px; } .post-title a:hover { color:#000; } .post p { margin:0 0 .75em; } p.post-footer { margin:0; text-align:right; } p.post-footer em { display:block; float:left; text-align:left; font-style:normal; color:#996; } a.comment-link { /* IE5.0/Win doesn't apply padding to inline elements, so we hide these two declarations from it */ background/* */:/**/url("http://www.blogblog.com/dots/icon_comment.gif") no-repeat 0 .25em; padding-left:15px; } html>body a.comment-link { /* Respecified, for IE5/Mac's benefit */ background:url("http://www.blogblog.com/dots/icon_comment.gif") no-repeat 0 .25em; padding-left:15px; } .post img { margin:0 0 5px 0; padding:4px; border:1px solid #cca; } /* Comments ----------------------------------------------- */ #comments { margin:0; } #comments h4 { margin:0 0 10px; border-top:1px dotted #9b9; padding-top:.5em; font:bold 110%/1.4em Georgia,Serif; color:#333; } #comments-block { line-height:1.6em; } .comment-poster { background:url("http://www.blogblog.com/dots/icon_comment.gif") no-repeat 2px .35em; margin:.5em 0 0; padding:0 0 0 20px; font-weight:bold; } .comment-body { margin:0; padding:0 0 0 20px; } .comment-body p { margin:0 0 .5em; } .comment-timestamp { margin:0 0 .5em; padding:0 0 .75em 20px; color:#996; } .comment-timestamp a:link { color:#996; } .deleted-comment { font-style:italic; color:gray; } .paging-control-container { float: right; margin: 0px 6px 0px 0px; font-size: 80%; } .unneeded-paging-control { visibility: hidden; } /* More Sidebar Content ----------------------------------------------- */ .sidebar-title { margin:2em 0 .75em; padding-bottom:.35em; border-bottom:1px dotted #9b9; font:95%/1.4em Georgia,Serif; text-transform:uppercase; letter-spacing:.3em; color:#663; } #sidebar p { margin:0 0 .75em; line-height:1.6em; } #sidebar ul { margin:.5em 0 1em; padding:0 0px; list-style:none; line-height:1.5em; } #sidebar ul li { background:url("http://www.blogblog.com/dots/bullet.gif") no-repeat 3px .45em; margin:0; padding:0 0 5px 15px; } #sidebar p { margin:0 0 .6em; } /* Profile ----------------------------------------------- */ .profile-datablock { margin:0 0 1em; } .profile-img { display:inline; } .profile-img img { float:left; margin:0 8px 5px 0; border:4px solid #cc9; } .profile-data { margin:0; line-height:1.5em; } .profile-data strong { display:block; } .profile-textblock { clear:left; } /* Footer ----------------------------------------------- */ #footer { clear:both; padding:15px 0 0; } #footer hr { display:none; } #footer p { margin:0; } /* Feeds ----------------------------------------------- */ #blogfeeds { } #postfeeds { padding-left: 20px }

Prudent Baby

Get sewing how to, sewing tutorials, and sewing help to learn sewing. We offer sewing tutorial for sewing moms.

Tuesday, January 26, 2010

DIY Children's Bathroom Step Stool

BEFORE:
AFTER:
Well, I didn't make the stool itself.  I bought it forever ago, I think at Target, for under $10.  But it was plain white, so after the fun I had with the DIY Matryoshka and Owl Coasters I decided to spruce it up with some mod podge and pretty paper to match the bathroom!

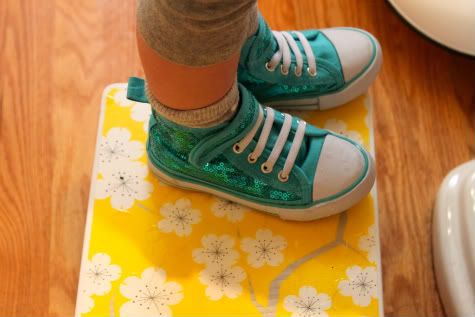
Make your own kid's step stool personalized or give a gift stool that will be the hit of the shower by using their name, their favorite words, or just some pretty paper.  It's SO EASY and has such fun results!

Get the full DIY Kids Bathroom Stool tutorial after the jump...
And thanks for the post OhDeeDoh!


DIY Mod Podge Children's Bathroom Stool

1.  Acquire one wooden stool and some paper you like.  Here's a cute one from amazonKidKraft Flip Stool - White
2.  Trace the stool onto your paper.  I used a cute wrapping paper that had been lying around forever.
Cut it down with an exacto knife so you have a little border around your paper on the stool.  Mod Podge doesn't look great when the paper goes right to the edge:
To cut the rounded corner I put my stool upside down on the paper, on my self-healing cutting mat (a great tool, get one here: Self-healing cutting mat) and cut around it with my exacto knife:

3.  Apply a coat of mod podge to the top of the stool.  I used matte mod podge this time just to be different.  Also, I learned that to avoid bubbles with mod podge a good rule of thumb is to apply a layer under the paper as thick as the layers you will put above it.
Then place your paper on it and center it.  Center it by kind of sliding it around, don't lift it or it will rip.  Push the bubbles out by smoothing from the inside out with your hand.
Let it dry all the way.  20-30 minutes at least, depending on the thickness of your mod podge layer.  Don't get impatient and put another layer on top before it's dry or you will get bubbles.

4.  Apply another coat this time on top of your paper.  I learned that you might want to make sure your mod podge was covered while you wait or a bug might fly into it and die and you might not notice and then smear the dead bug carcass on your paper.  Gross.
Let it dry, then repeat until you are satisfied.  Another note is to maybe apply it a little thicker then usual so you get a nice texture, this will help keep little feet from slipping on the stool.

Easy-peasy mod podge children's step stool!  Place in bathroom, marvel at how bright and cheery it is.  Secretly congratulate self when child is extra-eager to use stool to brush teeth!

Labels: , , , , , , , , ,

9 Comments:

Blogger Jacinda said...

That is gorgeous!! What an easy fix from drab to fab (ha!) I will think of you the next time I have half of my bum balanced on the side of the tub while bathing children and dream of your ever-growing beautiful stool collection.

January 26, 2010 at 3:32 PM  
Blogger Jacinda said...

My bathroom is aqua and rust brown if you were wondering Jaime.

January 26, 2010 at 3:32 PM  
Blogger Melissa said...

I love this! I also have that exact step stool that I had gotten from Target. I have never used Mod Podge. Can you clean the top? Does it work as a sealer? Forgive me for my ignorance. I have this small kids table and chairs from Ikea that I've been wanting to cover over the white top and I think this would be perfect but my kids eat at the table and I would need to be able to wipe it clean. Thanks!

January 29, 2010 at 6:41 PM  
Blogger Jaime said...

melissa - yes, yes and yes. it makes a hard, sealed coating you can totally wipe clean! would totally work on ikea furniture. go for it!

January 29, 2010 at 7:11 PM  
Blogger Rachel@oneprettything.com said...

I love how clear all of your directions are. The photos are fantastic. Thanks so much for this!

February 1, 2010 at 10:58 AM  
Blogger Ferretkingdom said...

Awesome! I love it! I'm gonna have to run right out tomorrow and get this stuff! LOL. I have the white 2-step stool from Target and it would look so much nicer covered in something! :-) Love your site!

May 18, 2010 at 11:43 PM  
Blogger kimpo76 said...

I have an old stool that used to sit by my washing machine and drips from laundry detergent ate away some of the dark finish on the top of it. I've always wanted to re-finish it so it wouldn't look so ugly, but this seems way easier and cuter - thanks!

June 21, 2010 at 10:10 AM  
Anonymous Anonymous said...

My daughter and I did this yesterday - and we even added an initial after the first layer to cover the whole stool. We loved it - and it was fun !!!

July 5, 2010 at 11:07 AM  
Anonymous Anonymous said...

Great idea! I can't wait to try this out for my little niece!

September 6, 2010 at 11:33 AM  

Post a Comment

Subscribe to Post Comments [Atom]

<< Home