body { background:#fff url("http://www.blogblog.com/dots/bg_dots.gif") 50% 0; margin:0; padding:0 10px; text-align:center; font:x-small Verdana,Arial,Sans-serif; color:#333; font-size/* */:/**/small; font-size: /**/small; } /* Page Structure ----------------------------------------------- */ @media all { #content { background:url("http://www.blogblog.com/dots/bg_3dots.gif") no-repeat 250px 50px; width:700px; margin:0 auto; padding:50px 0; text-align:left; } #main { width:450px; float:right; padding:50px 0 20px; font-size:85%; } #main2 { background:url("http://www.blogblog.com/dots/bg_dots2.gif") -100px -100px; padding:20px 10px 15px; } #sidebar { width:200px; float:left; font-size:85%; padding-bottom:20px; } #sidebar2 { background:url("http://www.blogblog.com/dots/bg_dots2.gif") 150px -50px; padding:5px 10px 15px; width:200px; width/* */:/**/180px; width: /**/180px; } } @media handheld { #content { width:90%; } #main { width:100%; float:none; } #sidebar { width:100%; float:none; } #sidebar2 { width:100%; } } html>body #main, html>body #sidebar { /* We only give this fade from white to nothing to browsers that can handle 24-bit transparent PNGs */ background/* */:/**/url("http://www.blogblog.com/dots/bg_white_fade.png") repeat-x left bottom; } /* Title & Description ----------------------------------------------- */ @media all { #blog-title { margin:0 0 .5em; font:250%/1.4em Georgia,Serif; color:#353; } #blog-title a { color:#353; text-decoration:none; } #description { margin:0 0 1.75em; color:#996; } #blog-mobile-title { display:none; } #description-mobile { display:none; } } @media handheld { #blog-title { display:none; } #description { display:none; } #blog-mobile-title { display:block; margin:0 0 .5em; font:250%/1.4em Georgia,Serif; color:#353; } #blog-mobile-title a { color:#353; text-decoration:none; } #description-mobile { display:block; margin:0 0 1.75em; color:#996; } } /* Links ----------------------------------------------- */ a:link { color:#488; } a:visited { color:#885; } a:hover { color:#000; } a img { border-width:0; } /* Posts ----------------------------------------------- */ .date-header { margin:0 0 .75em; padding-bottom:.35em; border-bottom:1px dotted #9b9; font:95%/1.4em Georgia,Serif; text-transform:uppercase; letter-spacing:.3em; color:#663; } .post { margin:0 0 2.5em; line-height:1.6em; } .post-title { margin:.25em 0; font:bold 130%/1.4em Georgia,Serif; color:#333; } .post-title a, .post-title strong { background:url("http://www.blogblog.com/dots/bg_post_title.gif") no-repeat 0 .25em; display:block; color:#333; text-decoration:none; padding:0 0 1px 45px; } .post-title a:hover { color:#000; } .post p { margin:0 0 .75em; } p.post-footer { margin:0; text-align:right; } p.post-footer em { display:block; float:left; text-align:left; font-style:normal; color:#996; } a.comment-link { /* IE5.0/Win doesn't apply padding to inline elements, so we hide these two declarations from it */ background/* */:/**/url("http://www.blogblog.com/dots/icon_comment.gif") no-repeat 0 .25em; padding-left:15px; } html>body a.comment-link { /* Respecified, for IE5/Mac's benefit */ background:url("http://www.blogblog.com/dots/icon_comment.gif") no-repeat 0 .25em; padding-left:15px; } .post img { margin:0 0 5px 0; padding:4px; border:1px solid #cca; } /* Comments ----------------------------------------------- */ #comments { margin:0; } #comments h4 { margin:0 0 10px; border-top:1px dotted #9b9; padding-top:.5em; font:bold 110%/1.4em Georgia,Serif; color:#333; } #comments-block { line-height:1.6em; } .comment-poster { background:url("http://www.blogblog.com/dots/icon_comment.gif") no-repeat 2px .35em; margin:.5em 0 0; padding:0 0 0 20px; font-weight:bold; } .comment-body { margin:0; padding:0 0 0 20px; } .comment-body p { margin:0 0 .5em; } .comment-timestamp { margin:0 0 .5em; padding:0 0 .75em 20px; color:#996; } .comment-timestamp a:link { color:#996; } .deleted-comment { font-style:italic; color:gray; } .paging-control-container { float: right; margin: 0px 6px 0px 0px; font-size: 80%; } .unneeded-paging-control { visibility: hidden; } /* More Sidebar Content ----------------------------------------------- */ .sidebar-title { margin:2em 0 .75em; padding-bottom:.35em; border-bottom:1px dotted #9b9; font:95%/1.4em Georgia,Serif; text-transform:uppercase; letter-spacing:.3em; color:#663; } #sidebar p { margin:0 0 .75em; line-height:1.6em; } #sidebar ul { margin:.5em 0 1em; padding:0 0px; list-style:none; line-height:1.5em; } #sidebar ul li { background:url("http://www.blogblog.com/dots/bullet.gif") no-repeat 3px .45em; margin:0; padding:0 0 5px 15px; } #sidebar p { margin:0 0 .6em; } /* Profile ----------------------------------------------- */ .profile-datablock { margin:0 0 1em; } .profile-img { display:inline; } .profile-img img { float:left; margin:0 8px 5px 0; border:4px solid #cc9; } .profile-data { margin:0; line-height:1.5em; } .profile-data strong { display:block; } .profile-textblock { clear:left; } /* Footer ----------------------------------------------- */ #footer { clear:both; padding:15px 0 0; } #footer hr { display:none; } #footer p { margin:0; } /* Feeds ----------------------------------------------- */ #blogfeeds { } #postfeeds { padding-left: 20px }

Prudent Baby

Get sewing how to, sewing tutorials, and sewing help to learn sewing. We offer sewing tutorial for sewing moms.

Tuesday, February 9, 2010

DIY Strap Cover

My musician friend Erin (of Mix Tape) celebrated the big 3-0 this weekend. I made her a little gift so she can coordinate outfit to instrument on stage.

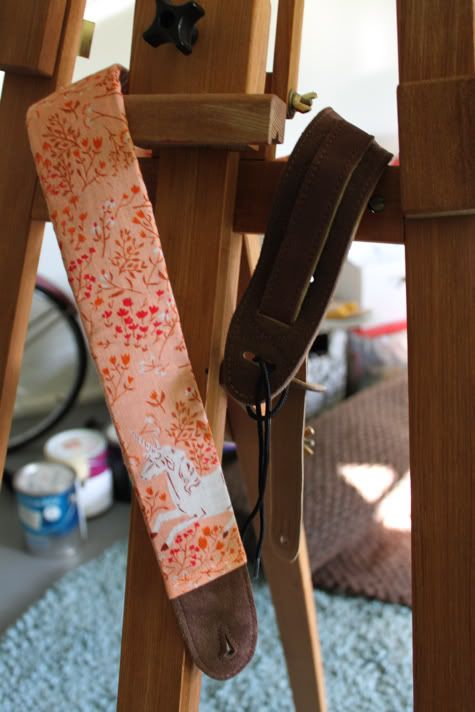
I like the fact that it's functional (a guitar strap for her fancy-schmancy guitar) but also homemade (a cover made with a teensy bit of a gorgeous fabric she actually gave me for my birthday).

This simple DIY works for camera straps, guitar straps, or any sort of strap. I think it would even work for a BELT!  Think of it, you could have ONE belt with a bunch of covers to match all your cute outfits.  How prudent.

Get the full Guitar / Camera Strap Cover DIY after the jump...

DIY Strap / Belt Cover Tutorial


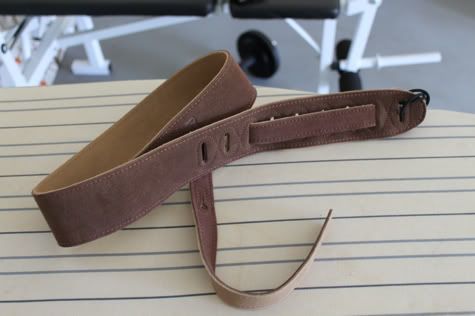
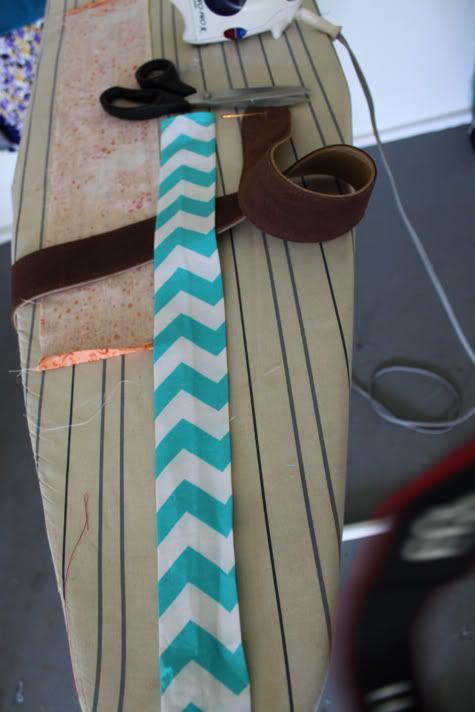
You'll need 1 strap and some fabric ( I used Heather Ross Far Far Away Unicorns in Blush).  Some fusible fleece would make it extra cozy, but I didn't have any and was unmotivated to drive around searching for it.  Here is the guitar strap I bought at guitar center:


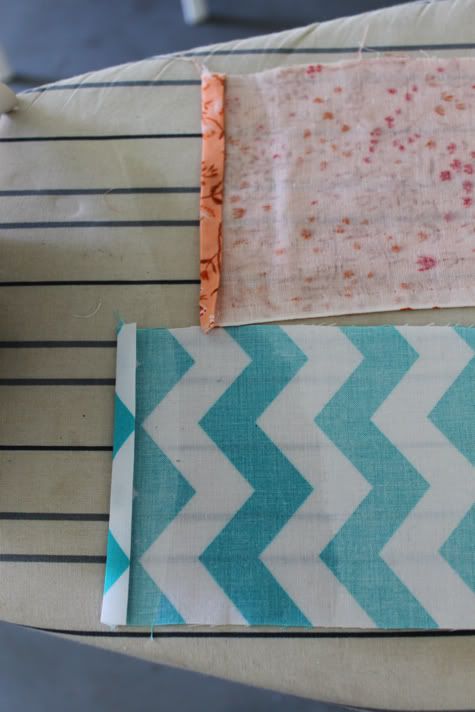
1. Wash, iron and cut your fabric.  Measure the length of your strap and add one inch, measure the width of your strap and add 1 inch.  My pieces were 24" X 5" for a final size of 23" X 4":

If you're using fusible fleece, cut pieces the same size and fuse it on now.

2.  Fold the short ends under 1/4" and iron, then another 1/4" and iron:

Then sew in place with a complimentary thread (you'll see this seam).


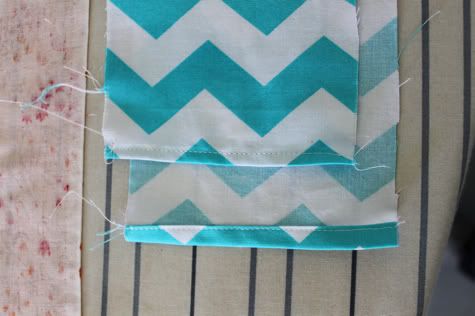
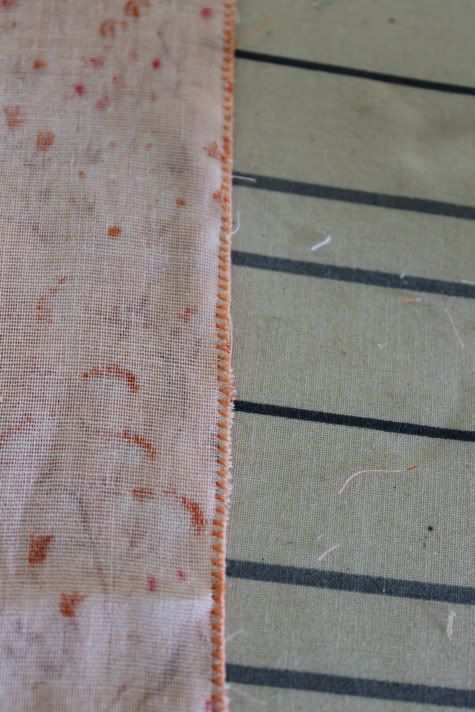
3.  Fold the strap cover in half the long way with right sides facing and sew up the side.  You can serge the edges:

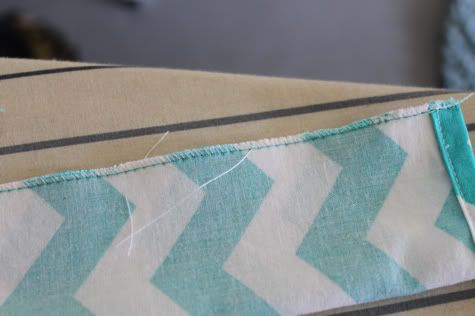
Or fake serge by using a zigzag stitch (if you are going to do this, cut your fabric 1/2" smaller for the width so you can catch both edges):


4. Turn your tube inside out (if you need help figuring out how, use the safety pin method I walk through in the DIY Booster seat post for the straps), then iron it flat with the seam in the middle of the back side:


5. Slide it over your strap.  It's going to be snug, this part is kind of a pain.  If you wrap a rubber band around the end of the strap that helps it hold this shape, which makes it easier to slide on:


You're done!

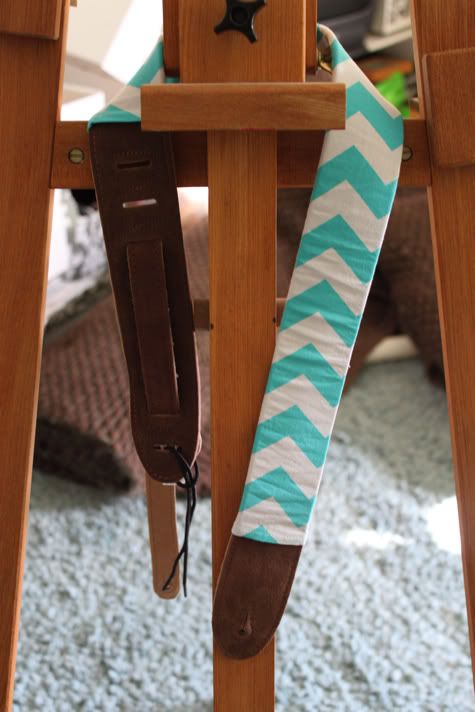
Make a few different ones:

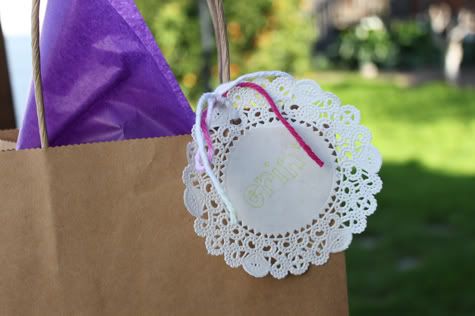
Wrap in a cute package and give to friend:

Labels: , , , , , , , ,

15 Comments:

Blogger Jacinda said...

ooooo. lucky Erin! What a perfect gift! A brilliant idea... and I covet that fabric! I want a unicorn camera strap!!
So many exclamation points!!! I must love this guitar strap!!!!!!!!!!!!!!

!

February 9, 2010 at 7:04 AM  
Blogger Jessica said...

I love exclamation points!!!!!!!!!!!!!!!!!!!!!!!!

February 9, 2010 at 7:27 AM  
Blogger erin said...

I love love love it so much!!

February 9, 2010 at 8:30 AM  
Anonymous kelly said...

i knew it would be amazing. you are crafting genius!

February 9, 2010 at 1:11 PM  
Blogger katie hanson said...

so so cute!! love it :) i wish i was crafty like you :)

February 9, 2010 at 2:56 PM  
Anonymous Anonymous said...

how fabulous! i can also use this DIY to create my DSLR camera strap! thanks for posting!

February 9, 2010 at 3:07 PM  
Blogger amesh said...

Love it, i should make one for the husband!!!

February 9, 2010 at 5:22 PM  
Blogger Anne said...

I love the idea of covering a belt!! I blogged your tutorial over at Craft Gossip Sewing:
http://sewing.craftgossip.com/tutorial-sew-a-guitar-strap-or-belt-cover/2010/02/09/

--Anne

February 9, 2010 at 6:44 PM  
Anonymous Nancy said...

So prudent!!! I want an "origami" fabric belt cover.

February 10, 2010 at 8:25 AM  
Blogger Rachel@oneprettything.com said...

That is so cute! Happy birthday to Erin. I love that fabric!!!

February 11, 2010 at 3:26 PM  
Blogger Angie - treasuresfortots@gmail.com said...

Love it! Come link your cute tute at my party: Thursday's Treasures!!
http://treasuresfortots.blogspot.com/2010/02/thursdays-treasures-week-9.html

February 11, 2010 at 6:15 PM  
Anonymous Martina said...

Where do you find all these wonderful fabrics?

February 24, 2010 at 7:41 AM  
Blogger Jaime said...

martina! that one my friend got me at Home Ec here in Silver Lake http://www.homeecshop.com/ but i also love ebay, etsy, harts fabric, purl soho and reprot depot!

February 24, 2010 at 11:31 AM  
Anonymous Mitzi said...

How do i make this to accommodate the bulk of the adjustment thing.(No idea what the name for it is...but the thing that slides up and down to adjust the length of the strap?) I love this idea and bought my sister one today to make for her birthday, but now I realize that that plastic thing is totally in the way.

February 27, 2010 at 7:17 PM  
Blogger Melissa Antolovic said...

what a great idea - i've been on the search for a perfect belt for a particular without success, you've just ended my search - I'll make a cover!
Thanks for a great website full of ideas

April 24, 2010 at 2:03 AM  

Post a Comment

Subscribe to Post Comments [Atom]

<< Home