The Craft Room Redesign Project: DIY Sewing & Cutting Tables
The next step in The Craft Room Redesign Project you all have been helping me with was to create a bigger & better cutting table, and to try to find a place for my embroidery machine, without spending a lot of money. I think I succeeded.
So here's before:

And after:
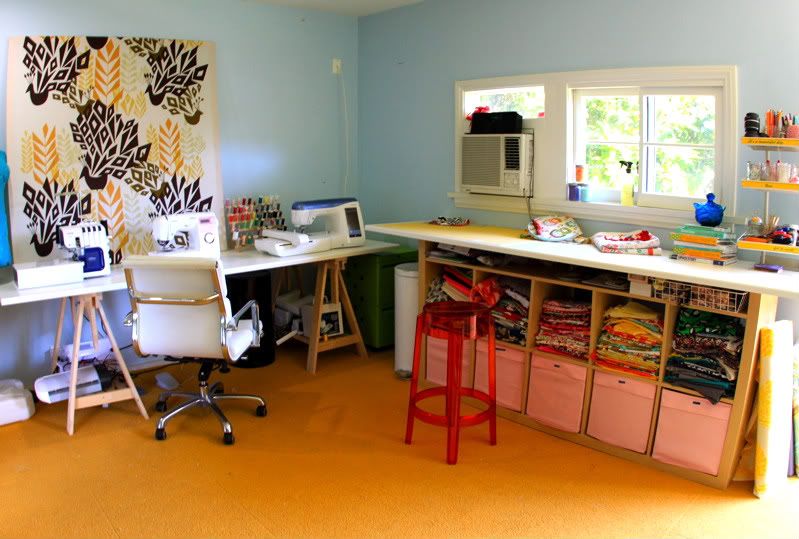
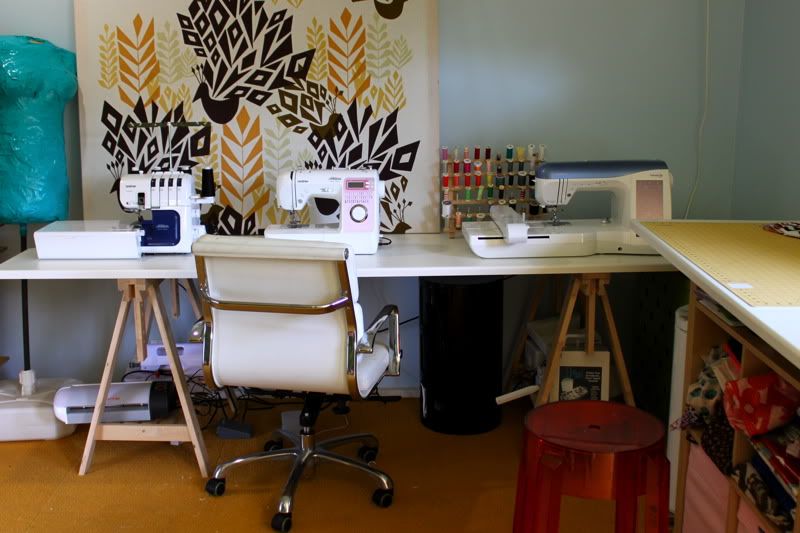
What do you think? Before you answer, consider that it only cost me $80. I had this expedit bookshelf from Ikea, which I purchased purely for function. I accidentally grabbed a birch-finish one, instead of the white that I wanted (really though, it's not my fault-the sign said white, but once it was in my house I wasn't going back with that giant beast). Point being, I liked the way it looked even less then I thought I would, and I didn't think I would like it very much. But I did like the way it could hold a ton of stuff and only cost $129. After creating the hidden workstation, I thought I'd get a bunch of baskets, organize the shelves & hide the clutter away, and be satisfied with the look. But after doing all this work to spiff the room up, it was really bugging me to see this wall 'o stuff in an Ikea bookshelf. It was dominating the room. I couldn't justify buying a beautiful new shelving system, so I asked my production designer friend Charlotte to come over and help me out. And help me out she did.
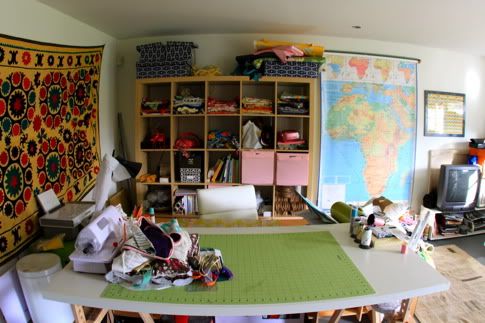
My old cutting table:
My new cutting table:
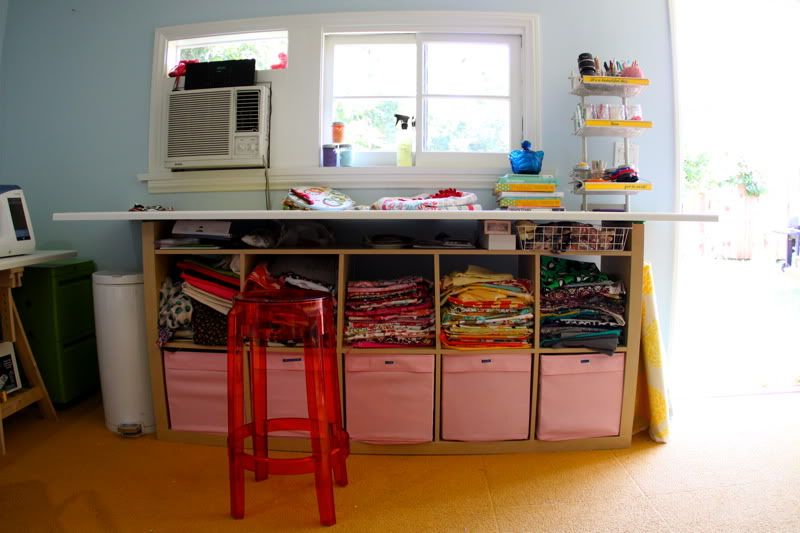
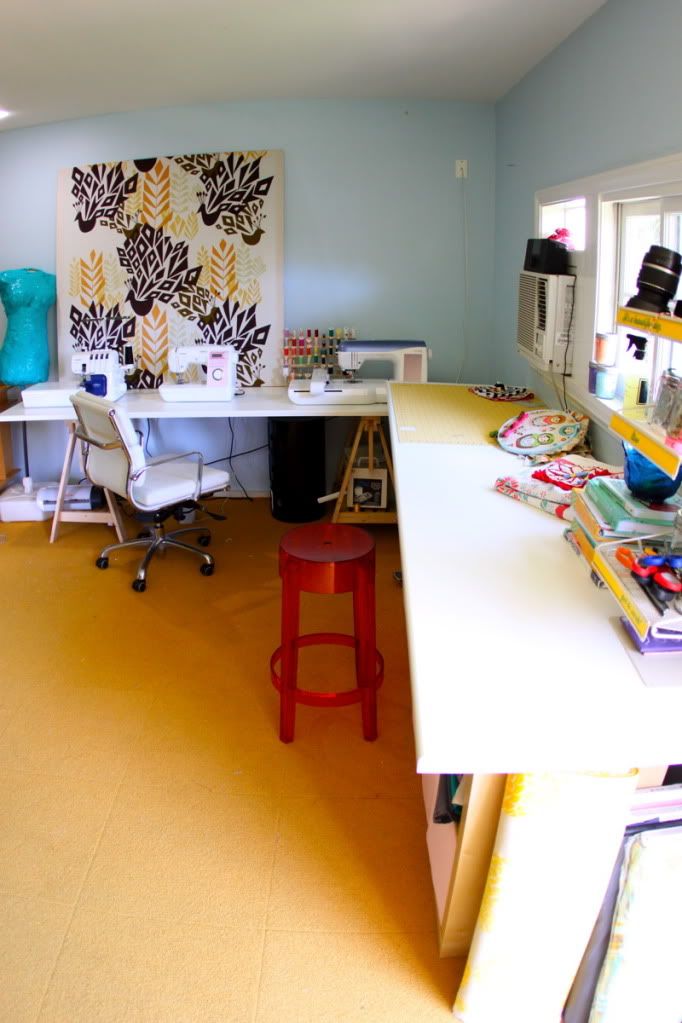
I like that when you walk in (as seen in pic right above) you no longer see the giant bookshelf, since it's now under a table and against the front wall. The whole room feels cleaner and more organized. Check out how we made these sewing and cutting tables for under $100 after the jump...
DIY Sewing & Cutting Table
Charlotte's first piece of advice? Take every single thing out of the room and start over. Oh man, I did not want to do that. I avoided it for several weeks. it seemed so pointless, like busy work I didn't have time for (and that would hurt my back). But after weeks of shuffling the furniture around and sighing everytime I thought about how to arrange everything I decided she was right.
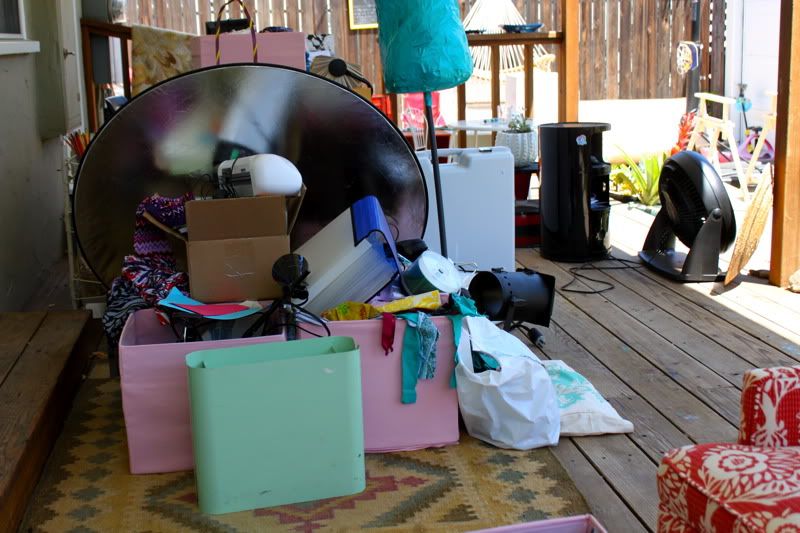
But being right isn't always the best thing is it? Because then I called her. And I said "you were right" and she said "i know" and i said "so get your butt over here and help me." lucky for me, she agreed. So we hauled every single thing onto the deck. All the furniture I had artuflly arranged and shelves I had organized. All of it out.
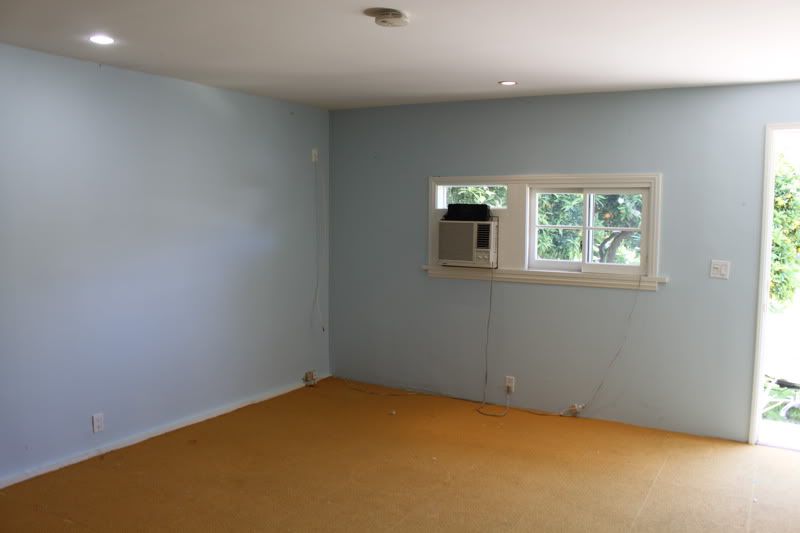
Now look at that. A CLEAN SLATE. Oh, the serenity that washed over me seeing those (almost) blank walls and that totally empty shelf.

We walked around the space, play acting all the things I would do in it, imagining what would feel right. Charlotte gave me some therapy - what is this space for? How do you want to feel when you're in it? And you know what we discovered? That you guys were right. You had all suggested a layout with the worktables by the windows and door and I just didn't want to do it. But it made sense. So with that in mind, we came up with a plan.
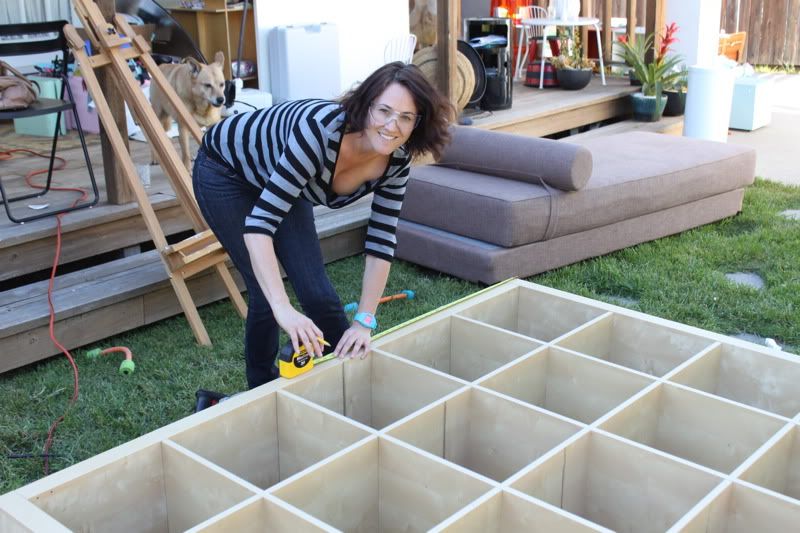
We decided to hack into that bookshelf and put a countertop on it. So we did. First Charlotte diligently measured the whole thing to counter height, taking into account our countertop and carefully measuring and marking each cut.
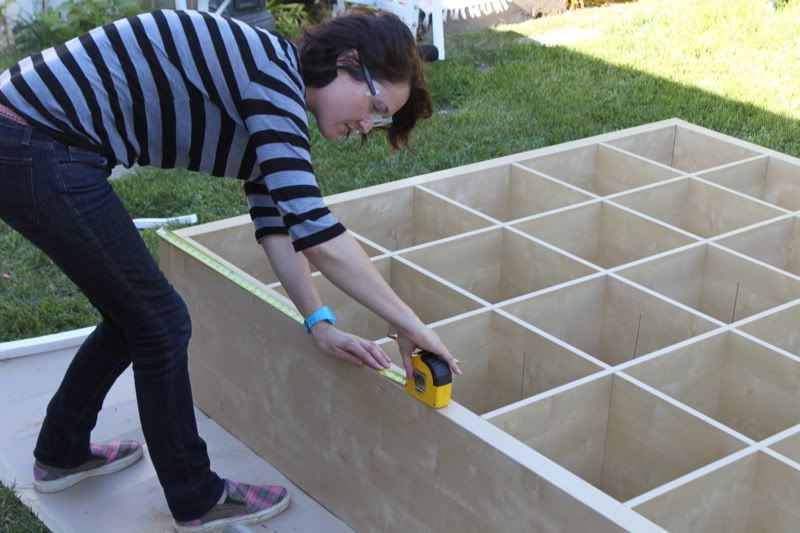
Then I grabbed the saw and all my safety gear. Charlotte even made me change out of my flip flops.

And cut.
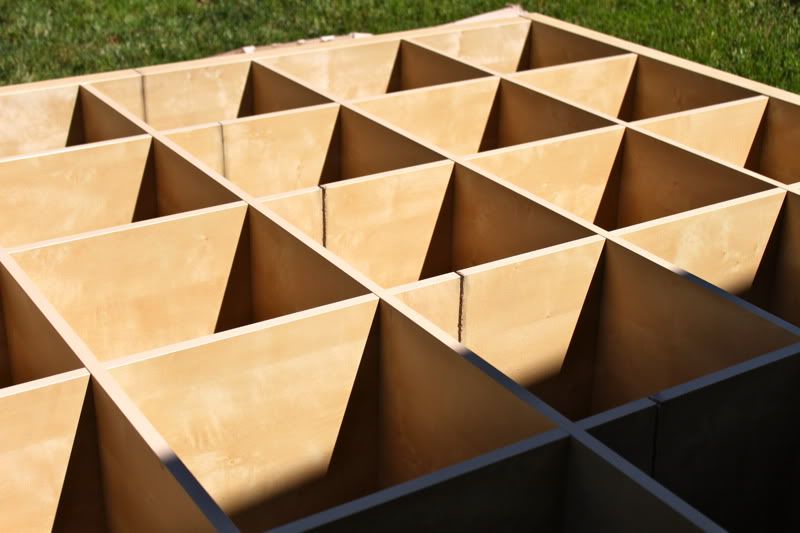
Then we turned it over and cut the other side. Then we sanded the edges.
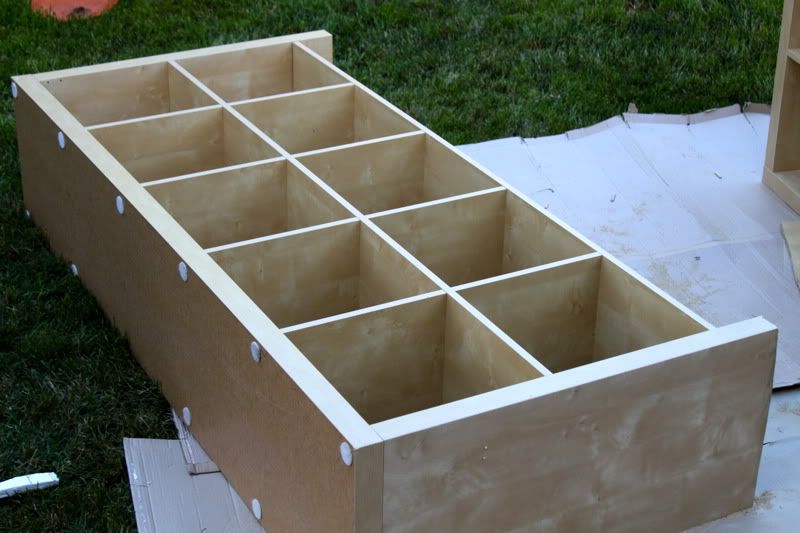
Then I bought a Lagan countertop - it's 8 feet long and ONLY $39 at Ikea. We screwed it on top.
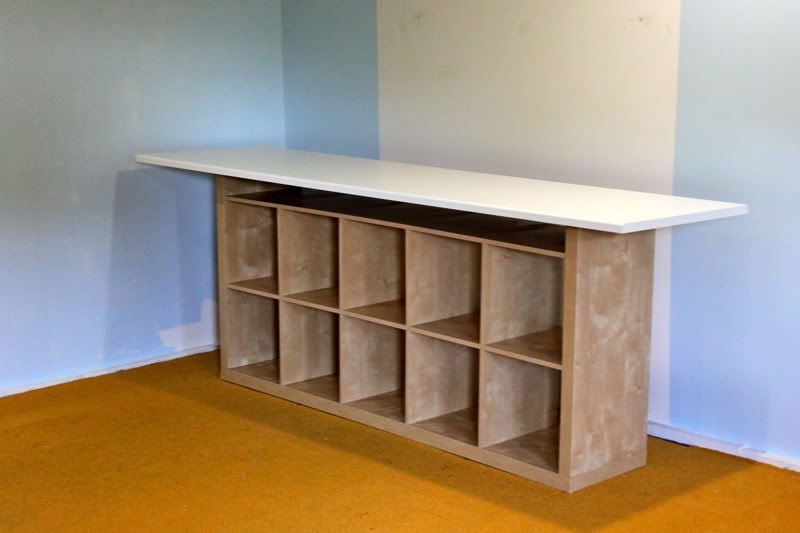
We put it under the window and I packed my fabric into it. Look at that! I love having the little bit of light the space offers pour right onto my work surface. I didn't even make any curtains because I don't want to stop the light. Do you think I should? I know the air conditioner is an eyesore, but I need it.

Next to it I bought another of the same Ikea countertop and rested it on two Ikea Vika Artur trestle bases ($30 each) that I already had. I love these because the height is adjustable, so they would be perfect for a cutting table. And the shelf is a good place to store the machines I use but not all the time (like my bias tape maker or rotary cutter
).
So this is where I kept my sewing machines before:
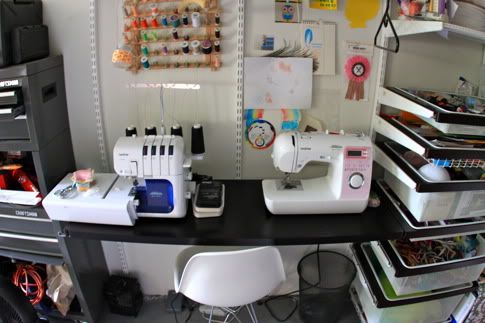
And now:
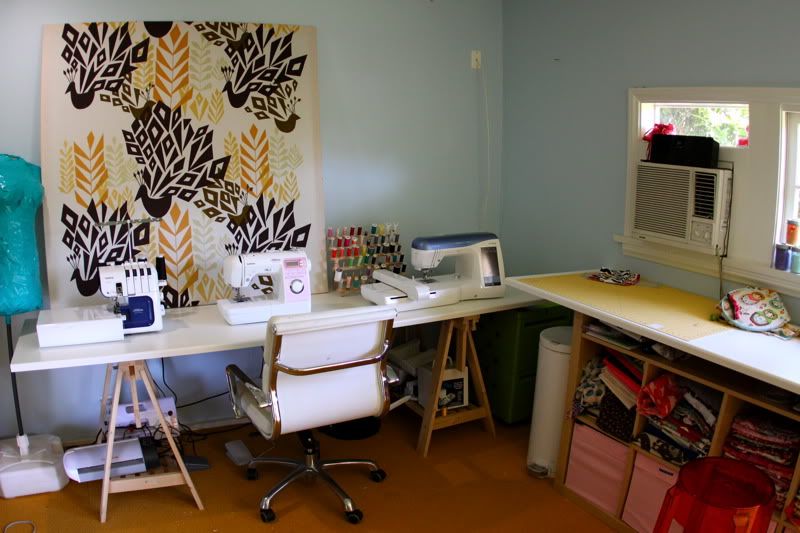
Soooo did I do ok? Oh, here are the other stops on the Craft Room Redesign Project so far...
The Craft Room Redesign Project: Help!
The Craft Room Redesign Project: The New Floor!
The Craft Room Redesign Project: Advice for My Thrifty Finds ...
A Fun Way to Organize Craft Supplies
The Craft Room Redesign Project: Hidden Workstation
How to Make Pleated Drapes
How to Paint Brass Finished Finds
The Recovered Chair!
Next up: painting. I already painted once, but it isn't working for me. That, and pillows. Lots of pillows. And finding a way for my husband's weight bench to magically disappear when I enter the room.

30 Comments:
Other than the fact that I love love love Expedit bookcases (I have a 2x4 in the living room, and my bed is resting on two 1x5s, and I would buy more in a heartbeat if I had room for them), so I take a smidge of issue with your disclaimer about why you have it :-) this is great. I cannot wait until I have a craft room of my own. I have plans to make a cutting/storage table on casters. But not only will I need a craft room, I'll need power tools. I guess it'll be a while. Sigh.
http://www.facebook.com/media/set/?set=a.10150097156171443.273383.500051442&l=98fdddbb06
I made my craft table with the shelves from Target :)
Looks good! Where is that wonderful peacock print from? Is it a fabic panel?
I'm in love. Seriously, this is awesome, especially since you worked with what you already had. I'm about to move to a smaller place (it's on a farm, so that immediately makes that little fact okay) and my mind is spinning with ideas and frustrations about how to best utilize the space while still keeping it's very open feel.
As for the weight bench, is it totally illegal to reupholster it in some manly (but eye-friendly) vinyl or something? Haha, who knows.
reupholstering the weight bench! i love it! lololol he might die. holly your table is so cute! nichmo that is a marimekko fabric panel i picked up about 6 years ago. can't remember the name of the print!
Happy father's day carleton! ha!
So cute and the $80 spent makes it even sweeter!
This looks amazing! Great work
Brilliant.
Great way to go green and reuse what you had available to you and your budget! I feel inspired to re-vamp my sewing station too...
Wow, I have some serious craft room jealousy...but no hard feelings will linger because I appreciate the motivation to make the most out of my little crafting corner. :)
I desperately need a new sewing table. Unfortunately, after baby #2 my sewing room is also our guest room and a bed is in the way. Any plans from your designer to make a Murphy bed/sewing table combo on the cheap?
LOVE that cutting table (mostly because of the great use of space with all that storage underneath!) beautiful room!
Here are DIY Murphy Bed plans from Ana-White.com, they look fairly easy.....
http://ana-white.com/2010/03/plans-a-murphy-bed-you-can-build-and-afford-to-build.html
shouldn't it be "'sew' this is where I kept my sewing machines before"... ? :) love that you re-organized after you re-organized.
I absolutely love what y'all did to the room. It gives me hope that I can possibly take what I have, and turn my chaotic mess of a sewing room and turn it into something so organized and clean. Props to y'all for achieving that great room! It looks fantastic... and I now I have a ton of ideas for what to do with mine--THANKS!
You guys are so wonderful! Look at all those AMAZING giveaways on the left there! Oh, could you have your friend Charlotte come to my new house and find a sewing/crafting space for me? One that is out of the reach/attention of the kids? I'm tempted to put them all in one room so I can have a sewing room. Hmmmmm........
Very nice. Have you googled "ikea hacks"? There's oodles of ideas out there!
And a side note from an Ikea employee- CHECK THE ITEM NUMBER ON THE BOX WITH THE NUMBER ON THE SHELF! Better yet, make sure you write down all those numbers from the pricetags in the showroom. They are there for a reason, to make it easier once you get to the warehouse to ensure you pick up the right item.
The number on the shelf for the color that you want will match the number on the box. Don't just blindly take the first box you see. Make sure the numbers match! If they don't check further down the pallet or the pallets just to the right and left. Believe me, people will put those boxes anywhere they deem convenient and it is a major pain in our butts! ;) *steps off soapbox* ;)
I have to say I am so jealous in a good way! Congratulations on your beautiful crafty space! I look forward to having my own someday when I can grow my house a bit to include an extra space for me. I can't wait to see what you create now, watch out crafty world!
Oh you crafty, prudent Mama, you. The cutting table/storage shelf extravaganza piece of furniture is absolutely the best thing I have seen. I LOVE it. It is perfect in all ways. I sit at your feet.
The tables are flippin' GENIUS. And I will be employing them in my new(to me)crafting space soon.
What happened to the other half of the expedit?
I can't tell exactly how big the room is (about 11x11 using the expedit for scale?) but in my perfect world I would use the other half of the expedit to create a cutting table twice as big. I find having a large surface facilitates better thinking for me. It is easier to lay things out and see how things go together, and still have space leftover for the inevitable 'leftover' stuff. Since it looks like you cut it almost exactly in half, it would be easy to do. And of course, that means positioning it in such a way that you can access it from all four side. If that wasn't possible, you could put the narrow end against the wall and have it out into the room and parrallel to your sewing table. This plan would also double your storage space underneath.
Pesky weight benches. They do seem to pop up in the most inopportune places.
And, I can't tell from the photos how permanent the installation of your air conditioner is. The new paradigm for portables is pretty cool. They set on the floor, vent through a much smaller window space and can be rolled out of the way when not needed. They start at around $300 but are much more efficient, quieter and unobtrusive than their predecessors. Check 'em out. This makes me want to get my creative space in tiptop shape. Thanks!
Upholstered weight bench! I love it :) Do it while he's not home lol, then it will look like some funky work of modern art instead of an eyesore.
I love the new work tables.
I wonder too - what will you do with the other half of the bookshelf... and why did you need to sand the edges? Or did you just sand where you cut?
Amazing job! Love it! I am very very jealous that you have your own sewing space...Ikea rocks! BTW, what about that awesome piece of large artwork? Where did you get it if you don't mind me asking... love! Great job!!
So did you cut differently than you showed in the picture or was that how you cut the back? Because it looks like you completely took out the part with the half shelves, which totally makes sense.
I just love that white chair - I'm looking for something like it myself. What's the source? Love the whole makeover!
I was thinking of making a table with Lagan - but the legs would be closer to the ends - do you think I would need legs for the middle too?
Since you have been having the sew table for at least 6 months now, have you noticed any warping if the Lagan counter top, from the weight of the machines on it?
Just curious...
Have you noticed any sagging of the Lagan counter top from the weight of the sewing machines?
i have not noticed any sagging yet!
Post a Comment
Subscribe to Post Comments [Atom]
<< Home