body { background:#fff url("http://www.blogblog.com/dots/bg_dots.gif") 50% 0; margin:0; padding:0 10px; text-align:center; font:x-small Verdana,Arial,Sans-serif; color:#333; font-size/* */:/**/small; font-size: /**/small; } /* Page Structure ----------------------------------------------- */ @media all { #content { background:url("http://www.blogblog.com/dots/bg_3dots.gif") no-repeat 250px 50px; width:700px; margin:0 auto; padding:50px 0; text-align:left; } #main { width:450px; float:right; padding:50px 0 20px; font-size:85%; } #main2 { background:url("http://www.blogblog.com/dots/bg_dots2.gif") -100px -100px; padding:20px 10px 15px; } #sidebar { width:200px; float:left; font-size:85%; padding-bottom:20px; } #sidebar2 { background:url("http://www.blogblog.com/dots/bg_dots2.gif") 150px -50px; padding:5px 10px 15px; width:200px; width/* */:/**/180px; width: /**/180px; } } @media handheld { #content { width:90%; } #main { width:100%; float:none; } #sidebar { width:100%; float:none; } #sidebar2 { width:100%; } } html>body #main, html>body #sidebar { /* We only give this fade from white to nothing to browsers that can handle 24-bit transparent PNGs */ background/* */:/**/url("http://www.blogblog.com/dots/bg_white_fade.png") repeat-x left bottom; } /* Title & Description ----------------------------------------------- */ @media all { #blog-title { margin:0 0 .5em; font:250%/1.4em Georgia,Serif; color:#353; } #blog-title a { color:#353; text-decoration:none; } #description { margin:0 0 1.75em; color:#996; } #blog-mobile-title { display:none; } #description-mobile { display:none; } } @media handheld { #blog-title { display:none; } #description { display:none; } #blog-mobile-title { display:block; margin:0 0 .5em; font:250%/1.4em Georgia,Serif; color:#353; } #blog-mobile-title a { color:#353; text-decoration:none; } #description-mobile { display:block; margin:0 0 1.75em; color:#996; } } /* Links ----------------------------------------------- */ a:link { color:#488; } a:visited { color:#885; } a:hover { color:#000; } a img { border-width:0; } /* Posts ----------------------------------------------- */ .date-header { margin:0 0 .75em; padding-bottom:.35em; border-bottom:1px dotted #9b9; font:95%/1.4em Georgia,Serif; text-transform:uppercase; letter-spacing:.3em; color:#663; } .post { margin:0 0 2.5em; line-height:1.6em; } .post-title { margin:.25em 0; font:bold 130%/1.4em Georgia,Serif; color:#333; } .post-title a, .post-title strong { background:url("http://www.blogblog.com/dots/bg_post_title.gif") no-repeat 0 .25em; display:block; color:#333; text-decoration:none; padding:0 0 1px 45px; } .post-title a:hover { color:#000; } .post p { margin:0 0 .75em; } p.post-footer { margin:0; text-align:right; } p.post-footer em { display:block; float:left; text-align:left; font-style:normal; color:#996; } a.comment-link { /* IE5.0/Win doesn't apply padding to inline elements, so we hide these two declarations from it */ background/* */:/**/url("http://www.blogblog.com/dots/icon_comment.gif") no-repeat 0 .25em; padding-left:15px; } html>body a.comment-link { /* Respecified, for IE5/Mac's benefit */ background:url("http://www.blogblog.com/dots/icon_comment.gif") no-repeat 0 .25em; padding-left:15px; } .post img { margin:0 0 5px 0; padding:4px; border:1px solid #cca; } /* Comments ----------------------------------------------- */ #comments { margin:0; } #comments h4 { margin:0 0 10px; border-top:1px dotted #9b9; padding-top:.5em; font:bold 110%/1.4em Georgia,Serif; color:#333; } #comments-block { line-height:1.6em; } .comment-poster { background:url("http://www.blogblog.com/dots/icon_comment.gif") no-repeat 2px .35em; margin:.5em 0 0; padding:0 0 0 20px; font-weight:bold; } .comment-body { margin:0; padding:0 0 0 20px; } .comment-body p { margin:0 0 .5em; } .comment-timestamp { margin:0 0 .5em; padding:0 0 .75em 20px; color:#996; } .comment-timestamp a:link { color:#996; } .deleted-comment { font-style:italic; color:gray; } .paging-control-container { float: right; margin: 0px 6px 0px 0px; font-size: 80%; } .unneeded-paging-control { visibility: hidden; } /* More Sidebar Content ----------------------------------------------- */ .sidebar-title { margin:2em 0 .75em; padding-bottom:.35em; border-bottom:1px dotted #9b9; font:95%/1.4em Georgia,Serif; text-transform:uppercase; letter-spacing:.3em; color:#663; } #sidebar p { margin:0 0 .75em; line-height:1.6em; } #sidebar ul { margin:.5em 0 1em; padding:0 0px; list-style:none; line-height:1.5em; } #sidebar ul li { background:url("http://www.blogblog.com/dots/bullet.gif") no-repeat 3px .45em; margin:0; padding:0 0 5px 15px; } #sidebar p { margin:0 0 .6em; } /* Profile ----------------------------------------------- */ .profile-datablock { margin:0 0 1em; } .profile-img { display:inline; } .profile-img img { float:left; margin:0 8px 5px 0; border:4px solid #cc9; } .profile-data { margin:0; line-height:1.5em; } .profile-data strong { display:block; } .profile-textblock { clear:left; } /* Footer ----------------------------------------------- */ #footer { clear:both; padding:15px 0 0; } #footer hr { display:none; } #footer p { margin:0; } /* Feeds ----------------------------------------------- */ #blogfeeds { } #postfeeds { padding-left: 20px }

Prudent Baby

Get sewing how to, sewing tutorials, and sewing help to learn sewing. We offer sewing tutorial for sewing moms.

Wednesday, January 26, 2011

DIY Blooming Heart Valentines Decoration


While I was "working" (i.e. scoping out the web for cute Valentine's day tutes) I came across this gorgeousness on Punkin Pattern. I'm so glad I discovered this site, there's so much cuteness there!

I asked the creator, Vanessa, if she would share the tute with us, and she agreed.  I see so many variations on this, I just love how it's sweet but not as saccharine as some traditional Valentines day decorations.

Get the full Blooming Heart Valentines Decoration tutorial after the jump. What are you planning for v-day decor? Let us know in the comments, you could win some pretty potholder fabric and bias tape.

Read more »

Labels: , , , , ,

Monday, January 17, 2011

Tissue Paper Flower Tutorial

Alissa from 33 Shades of Green is here to share how to make a lovely tissue paper flower, which is a perfect way to top off a gift!

If your gift will be transported, you can leave them flat while you travel and puff them up when you get to Grandma's House.

Take it away Alissa! Learn how to make a Tissue Paper Flower after the jump...
Read more »

Labels: , , , ,

Tuesday, December 7, 2010

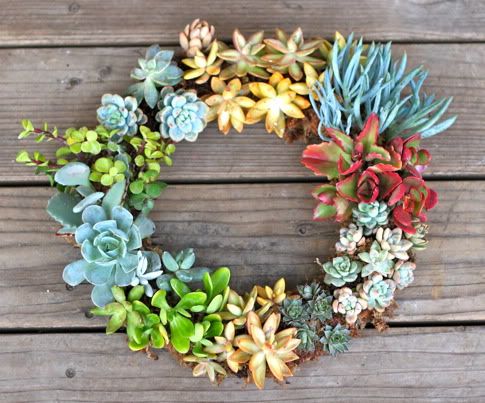
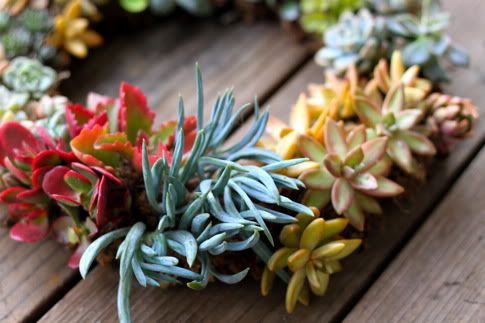
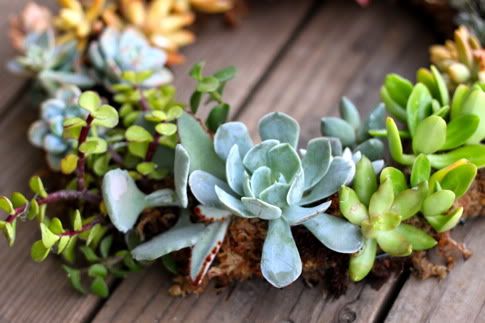
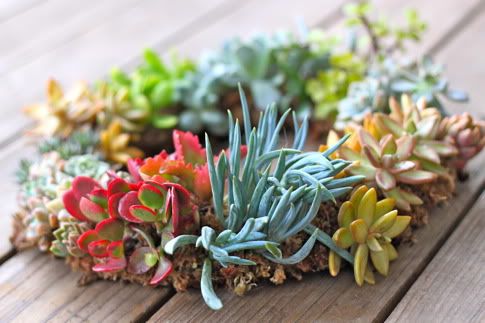
DIY: Simple & Stunning Living Succulent Wreath


This succulent wreath is so easy & inexpensive, and it stays alive all year round! I saw a gorg version on the cover of the new Viva Terra catalog and I knew I had to make one, cause I don't have $100 to spend on a plant.

My house is filled with succulents, one of the many bonuses of being a BFF of a fabulous succulent designer. She taught me that you can just chop off a bit of a living succulent and it will grow into a new plant! So that's what I did, clipped from living plants (I might have taken a few from a local park, if it doesn't kill the plant that's not stealing right?), and arranged into this living wreath.

Total cost was about $10 and once the cuttings were dry, the assembly of the wreath took one nap time (an hour and a half). I really hope you like this and give it a try.

Learn How to Make A Living Succulent Wreath after the jump...

And remember to leave a comment, because our fave commenter of the week wins five gorgeous embroidery patterns!
Read more »

Labels: , , , , ,

Monday, October 4, 2010

No-Sew Rolled Fabric Flower Baby Headband


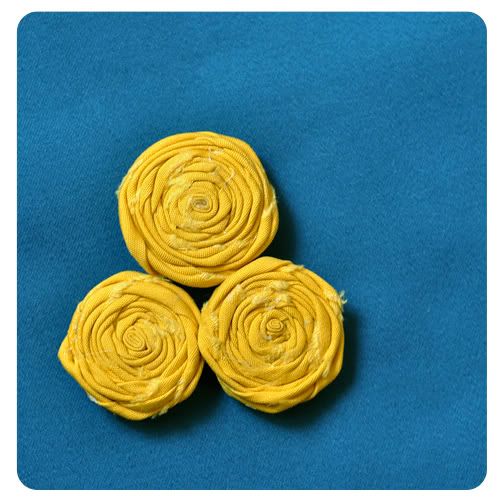
Look at that so-cute-I-could-cry baby headband! I came across this picture at Post Road Vintage while surfing the web. She made the headband using an adorable no-sew Rolled Fabric Flower tutorial she found at My Sparkle. I asked the tute author, Danielle, to share the how-to with us so we could all make adorable baby headbands too!

Take it away Danielle from My Sparkle...
So I am jumping on the bandwagon and loving all the rolled fabric flowers I've seen here and there. We decided to make some with the girls in our church youth group, but I couldn't find a great tutorial on how to make them so I played around and this is what I came up with. Enjoy!

Get the full Rolled Fabric Flower Tutorial after the jump...

And remember, leave a comment on this or any post this week and you could win that pretty Alexander Henry fat quarter.
Read more »

Labels: , , , , , , , , ,

Tuesday, June 8, 2010

DIY Tissue Garland


Y'all, this might be the best... fastest, cheapest, eye-pleasing-est party decorating trick ever. You can literally make this Tissue Garland that I made for Clare's Buggie Birthday an hour before your party starts when, eh-hem, you should be showering.

Click here to get the so easy DIY for Tissue Garland.

Read more »

Labels: , , , , , , ,

DIY Fabric Pom-Pom Flowers


When Jaime and I were at Quilt Market in Minneapolis, we saw these gorgeous Pom-Pom Hydrangeas on display at the Clover booth and quickly grabbed the DIY sheet. I knew they would be perfect for Clare's Buggie Birthday and they WERE, but they are also gorgeous and elegant enough to leave up in the house beyond any event. Or they would make a beautiful gift!

Click here and scroll down to Pom-pom Hydrangeas to download the supply list/instructions and then come back to Prudent Baby for more step-by-step photos and my 2 cents! And if you were looking for an excuse to buy the super fun Clover Extra Large Pom-Pom Maker... you're welcome.

Click here and get the scoop on Making Pom-Pom Hydrangeas.

Read more »

Labels: , , , , , , ,

Monday, June 7, 2010

Clare's Buggie Birthday


We threw Clare a Buggie Birthday Bash this weekend. She has been into Miss Spider lately (like obsessed) so we went with lots of little bugs and flowers on everything and she had a blast! Watch for the DIY scoop throughout the week.


We will also be sharing all of the party's baking and decorating tips as we kick off Prudent Baby's Summer of Fanciful Treats, sponsored by Bake it Pretty. Just try to visit their site without filling your cart with amazing baking and party supplies!

Like these adorable paper straws...

And the goods to make these...


Here is a complete list of the DIYs to create your own Buggie Birthday!

Drawstring Bags & Coloring Books
Buggie Headbands
Evil "Buttercream"/Decorator Icing
Sugar Cookie Cone
Tissue Number Birthday Sign
Tissue Garland
Making candy with Chocolate Molds
Fabric Pom-pom Flowers

Labels: , , , , , , , ,

Friday, May 28, 2010

The Scotch Tape Flower Trick


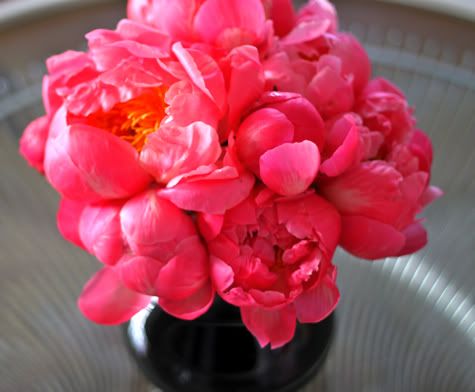
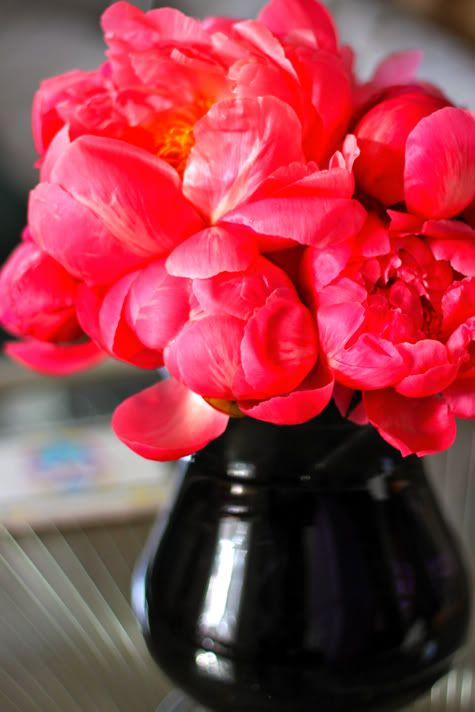
PEONIES ARE BACK IN SEASON!  SWEET SWEET JOY! I just unabashedly love peonies so much, don't you??  I grabbed a couple bunches for $6.99 at Trader Joes yesterday and used the scotch tape trick to make 'em look all nice.

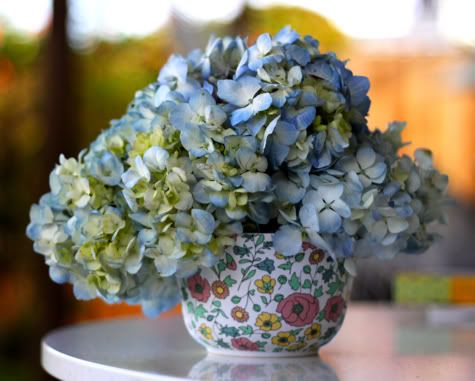
 If you didn't catch it, get the secret on our post "Making Cheapo Flowers Look Fancy"...it'll change your flower-arranging life. Also had to follow my own advice and pick up some $4 hydrangeas.

Oh, I could gaze at them all day.  What's your favorite flower ladies??  Do you have a secret to making them look extra purty?

Labels: ,

Thursday, May 6, 2010

Quinn's Farm-tastic First Birthday: The multi-use DIY hair clip!


I had every intention of making some of THESE hair clips for Quinn's Birthday party a few weeks ago but just ran out of time. When I mentioned this to my mom, she had a great idea for an easier version that used less fabric. SO clever, those moms!

Get the DIY after the jump and start clipping you DIY Hair Clips everywhere... to plants and cakes and even to hair! (But not at the same time, that would be disgusting.)


Read more »

Labels: , , , , , , , , , ,

Thursday, March 11, 2010

Quick tip: Baby's Breath Bouquet


I'm sure you stylish ladies have seen this before but I just love the way a bouquet of Baby's Breath looks all on it's own. The next time you get some flowers with tufts of this white stuff, try it in it's own vase for a modern look. Or just pick up a bunch like we did today. It's a great deal and lasts forever! Well, not forever but a really long time.

Labels: ,

Tuesday, March 9, 2010

Guest Post: Beth from Petite Planet Shares How to Grow Real Grass for Easter Baskets!


Beth says: Help the Easter Bunny go green this holiday by growing real grass to fill your Easter baskets! An eco-friendly, safe alternative to that icky, petroleum based plastic grass typically used to line baskets, real grass will look cheery and bright, and will add a really authentic touch to the big Bunny's offering this spring.

Jaime says: I love everything about this idea...i imagine how good it would smell.  Head over to Petite Planet to learn the simple steps for growing a small patch of grass... and get started now so it has plenty of time to sprout!

Labels: , , ,

Thursday, February 18, 2010

DIY Fabric Flower Hair Clip


Everything IS bigger in Texas, especially the HAIR BOWS but that doesn't mean they can't be beautiful and stylish. If you have the itch to clip an enormous "fancy" to your baby's dome, may I suggest this pretty fabric flower hair clip? It's proof that you can't even throw away the tiniest scrap of fabric because you never know when you will need to cover a button. FYI, covering buttons is just about the most fun I've had since I went to a New Years Eve party at the Playboy Mansion. No, actually covering buttons might be more fun. So much fun.

Find out how to make a fabric flower hair clip after the jump.
Read more »

Labels: , , , , , , ,

Friday, December 18, 2009

Prudent Tip: Making Cheapo Flowers Look Fancy

Here's a few tried-and-true tricks to make gorgeous last minute holiday centerpieces out of cheap bouquets.  These bouquets were less then $5 each!
Rule: Disassemble & Reassemble
Trick #1: Scotch Tape
Trick #2: Silver Spray Paint

Get the details after the jump...
Read more »

Labels: , , , , , , ,

Wednesday, December 16, 2009

Giveaway: SucculentLOVE Centerpiece!

How gorgeous is this?  Featured on Daily Candy, ReadyMade, CNBC, The Knot magazine, and at the Unique LA show, SucculentLOVE designs are all the rage.  As beautiful as flowers but they live forever, and even better, they come packaged as a cute kit -including the gorgeous planter- for you and your little one to assemble together.  A little dose of modern lovely for your home!


For the Prudent Baby Craft Bazaar and Holiday Giveaway Bonanza we are giving away one Round.About SucculentLOVE kit, including the gorgeous cement planter, the plants, the soil, and everything you need to care for your creation.  It even comes with a photo and step by step instructions on how to assemble.  And because it's designed by Kelly, you know it is stunning.  It will arrive after the holidays, a little new year's treat!

You don't need to have a green thumb to give this luscious SucculentLOVE kit a home, but you do need to live in the US.

Just leave a comment telling us your funniest black-thumb moment.  For example, once I grew a tomato.  A single tomato.  It was supposed to be cherry tomatoes on a vine.  I cared for it all season.  It grew one tiny cherry tomato and I made my husband cut it in half and eat it with me on a bed of greens.  I called it a salad.

Spread the word on Facebook, Twitter or your blog and if you do, leave another comment here letting us know for an extra chance to win!

On Tuesday, December 22nd at midnight CT we will close the entries and select a winner using Random.org.

And don't forget to enter all the current giveaways listed up there in the right corner, including the M Sartin neck cuff which ends at midnight tonight!

Labels: , , ,

Monday, October 19, 2009

Baby Food Jar Projects: Hanging Bud Vase

Most bud vases just sit on the table, but with the lightness of a baby food jar and the built in lip, why not hang one for a little pop of flowery prettiness?  It takes less then five minutes to create these hanging beauties, learn how after the jump...
Read more »

Labels: , , , , , ,