body { background:#fff url("http://www.blogblog.com/dots/bg_dots.gif") 50% 0; margin:0; padding:0 10px; text-align:center; font:x-small Verdana,Arial,Sans-serif; color:#333; font-size/* */:/**/small; font-size: /**/small; } /* Page Structure ----------------------------------------------- */ @media all { #content { background:url("http://www.blogblog.com/dots/bg_3dots.gif") no-repeat 250px 50px; width:700px; margin:0 auto; padding:50px 0; text-align:left; } #main { width:450px; float:right; padding:50px 0 20px; font-size:85%; } #main2 { background:url("http://www.blogblog.com/dots/bg_dots2.gif") -100px -100px; padding:20px 10px 15px; } #sidebar { width:200px; float:left; font-size:85%; padding-bottom:20px; } #sidebar2 { background:url("http://www.blogblog.com/dots/bg_dots2.gif") 150px -50px; padding:5px 10px 15px; width:200px; width/* */:/**/180px; width: /**/180px; } } @media handheld { #content { width:90%; } #main { width:100%; float:none; } #sidebar { width:100%; float:none; } #sidebar2 { width:100%; } } html>body #main, html>body #sidebar { /* We only give this fade from white to nothing to browsers that can handle 24-bit transparent PNGs */ background/* */:/**/url("http://www.blogblog.com/dots/bg_white_fade.png") repeat-x left bottom; } /* Title & Description ----------------------------------------------- */ @media all { #blog-title { margin:0 0 .5em; font:250%/1.4em Georgia,Serif; color:#353; } #blog-title a { color:#353; text-decoration:none; } #description { margin:0 0 1.75em; color:#996; } #blog-mobile-title { display:none; } #description-mobile { display:none; } } @media handheld { #blog-title { display:none; } #description { display:none; } #blog-mobile-title { display:block; margin:0 0 .5em; font:250%/1.4em Georgia,Serif; color:#353; } #blog-mobile-title a { color:#353; text-decoration:none; } #description-mobile { display:block; margin:0 0 1.75em; color:#996; } } /* Links ----------------------------------------------- */ a:link { color:#488; } a:visited { color:#885; } a:hover { color:#000; } a img { border-width:0; } /* Posts ----------------------------------------------- */ .date-header { margin:0 0 .75em; padding-bottom:.35em; border-bottom:1px dotted #9b9; font:95%/1.4em Georgia,Serif; text-transform:uppercase; letter-spacing:.3em; color:#663; } .post { margin:0 0 2.5em; line-height:1.6em; } .post-title { margin:.25em 0; font:bold 130%/1.4em Georgia,Serif; color:#333; } .post-title a, .post-title strong { background:url("http://www.blogblog.com/dots/bg_post_title.gif") no-repeat 0 .25em; display:block; color:#333; text-decoration:none; padding:0 0 1px 45px; } .post-title a:hover { color:#000; } .post p { margin:0 0 .75em; } p.post-footer { margin:0; text-align:right; } p.post-footer em { display:block; float:left; text-align:left; font-style:normal; color:#996; } a.comment-link { /* IE5.0/Win doesn't apply padding to inline elements, so we hide these two declarations from it */ background/* */:/**/url("http://www.blogblog.com/dots/icon_comment.gif") no-repeat 0 .25em; padding-left:15px; } html>body a.comment-link { /* Respecified, for IE5/Mac's benefit */ background:url("http://www.blogblog.com/dots/icon_comment.gif") no-repeat 0 .25em; padding-left:15px; } .post img { margin:0 0 5px 0; padding:4px; border:1px solid #cca; } /* Comments ----------------------------------------------- */ #comments { margin:0; } #comments h4 { margin:0 0 10px; border-top:1px dotted #9b9; padding-top:.5em; font:bold 110%/1.4em Georgia,Serif; color:#333; } #comments-block { line-height:1.6em; } .comment-poster { background:url("http://www.blogblog.com/dots/icon_comment.gif") no-repeat 2px .35em; margin:.5em 0 0; padding:0 0 0 20px; font-weight:bold; } .comment-body { margin:0; padding:0 0 0 20px; } .comment-body p { margin:0 0 .5em; } .comment-timestamp { margin:0 0 .5em; padding:0 0 .75em 20px; color:#996; } .comment-timestamp a:link { color:#996; } .deleted-comment { font-style:italic; color:gray; } .paging-control-container { float: right; margin: 0px 6px 0px 0px; font-size: 80%; } .unneeded-paging-control { visibility: hidden; } /* More Sidebar Content ----------------------------------------------- */ .sidebar-title { margin:2em 0 .75em; padding-bottom:.35em; border-bottom:1px dotted #9b9; font:95%/1.4em Georgia,Serif; text-transform:uppercase; letter-spacing:.3em; color:#663; } #sidebar p { margin:0 0 .75em; line-height:1.6em; } #sidebar ul { margin:.5em 0 1em; padding:0 0px; list-style:none; line-height:1.5em; } #sidebar ul li { background:url("http://www.blogblog.com/dots/bullet.gif") no-repeat 3px .45em; margin:0; padding:0 0 5px 15px; } #sidebar p { margin:0 0 .6em; } /* Profile ----------------------------------------------- */ .profile-datablock { margin:0 0 1em; } .profile-img { display:inline; } .profile-img img { float:left; margin:0 8px 5px 0; border:4px solid #cc9; } .profile-data { margin:0; line-height:1.5em; } .profile-data strong { display:block; } .profile-textblock { clear:left; } /* Footer ----------------------------------------------- */ #footer { clear:both; padding:15px 0 0; } #footer hr { display:none; } #footer p { margin:0; } /* Feeds ----------------------------------------------- */ #blogfeeds { } #postfeeds { padding-left: 20px }

Prudent Baby

Get sewing how to, sewing tutorials, and sewing help to learn sewing. We offer sewing tutorial for sewing moms.

Thursday, March 18, 2010

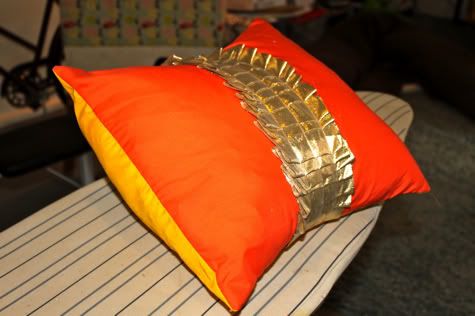
Deceptively Simple Ruffle Stripe Pillow


So I mentioned I am putting together a mystery-event-to-be-revealed-later that features a bunch of crazy bright pillows and showed you how to sew a Pouf Pillow.  Here's another one that would work great for the home in a more subtle color combo.  Get the simple Ruffle Stripe Pillow DIY after the jump...

DIY Ruffle Stripe Pillow

1.  Pre-wash and cut your fabric.  You'll need one piece the size of your pillow plus 1/2" for the front.  For the back you'll need two pieces the same length by half the width of your pillow plus 2.5".  Then you'll need one long strip of any fabric in any width and length for your ruffle.


2.  Take the top piece of your pillow and place it right side up.  Pin one end of your ruffle strip to one side, and the other end to the other side.  Find the middle and pin it somewhere in the middle.  Doesn't have to be specific.


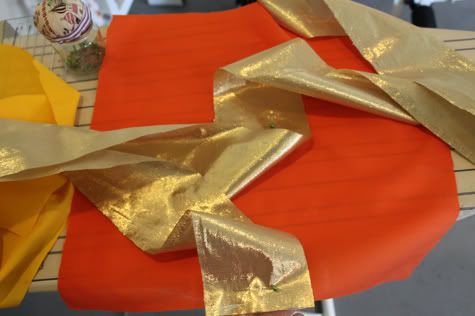
3.  Fold your ruffle up and pin it intermittently like so:

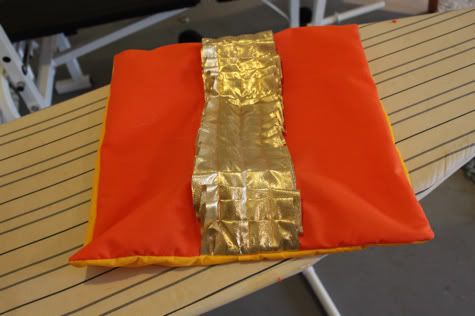
Sew with a straight stitch right up the middle:
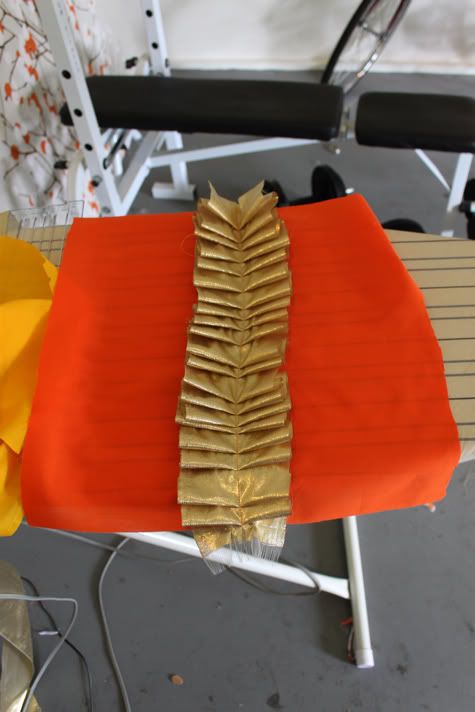
close-up:

If you want, sew a couple more lines on either side:


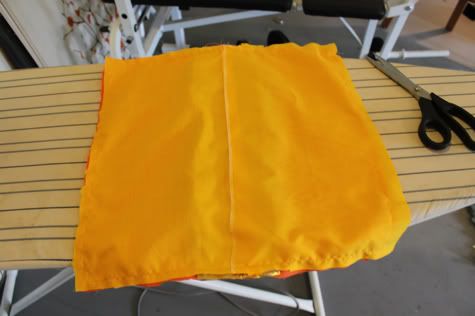
4.  Fold the inside edge of each back piece under 1/4" and iron, then another 1/4" and iron then sew in place to finish the edges (or sew the one that will show and serge the other like i did here):


5.  Lay your pillow front right side up, then lay the back piece that will show right side down, then the other back piece right side down.  They will overlap, just make sure they are all aligned on the pillow edges.

Sew it all together 1/4" from the edge all the way around:

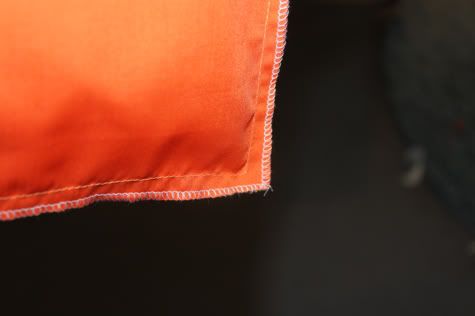
Serge your edges or cut with pinking shears:

Flip it inside out...


6.  Stuff your pillow in.  Done!

Labels: , , , , , , ,

7 Comments:

Blogger Jacinda said...

You are so mysterious with all your beautiful brightly-colored pillows! This one is my favorite so far!!

March 18, 2010 at 9:45 AM  
Blogger Beccalynn said...

Very cute!!!

March 19, 2010 at 2:21 AM  
Blogger Ms. Jasmine said...

This is just adorable and so pretty!

April 8, 2010 at 8:35 AM  
Blogger ChasingRays said...

I've never made a pillow or pillow cover before, but this was soo cute, I made 3 and posted about them here..
http://chasingraysoriginal.blogspot.com/2010/04/post-about-what-to-do-with-old-baby.html

April 10, 2010 at 9:14 PM  
Blogger Nikki Madden said...

I know this is a stupid question, but how do you keep the ruffle from fraying? Is it just your choice of fabric?

May 2, 2010 at 7:01 AM  
Blogger Jaime said...

Hi Nikki! It does fray a little if you do it this way, I kinda like that look. But if you don't want fraying just cut a wider strip, sew a tube by straight stitching up the length and loop turning inside out, iron it flat with the seam to the back, then continue as above :)

May 2, 2010 at 7:32 AM  
Blogger Nikki Madden said...

Jaime, PERFECT solution for my project! Thanks! And I LOVE your blog! ;-)

May 2, 2010 at 3:52 PM  

Post a Comment

Subscribe to Post Comments [Atom]

<< Home