body { background:#fff url("http://www.blogblog.com/dots/bg_dots.gif") 50% 0; margin:0; padding:0 10px; text-align:center; font:x-small Verdana,Arial,Sans-serif; color:#333; font-size/* */:/**/small; font-size: /**/small; } /* Page Structure ----------------------------------------------- */ @media all { #content { background:url("http://www.blogblog.com/dots/bg_3dots.gif") no-repeat 250px 50px; width:700px; margin:0 auto; padding:50px 0; text-align:left; } #main { width:450px; float:right; padding:50px 0 20px; font-size:85%; } #main2 { background:url("http://www.blogblog.com/dots/bg_dots2.gif") -100px -100px; padding:20px 10px 15px; } #sidebar { width:200px; float:left; font-size:85%; padding-bottom:20px; } #sidebar2 { background:url("http://www.blogblog.com/dots/bg_dots2.gif") 150px -50px; padding:5px 10px 15px; width:200px; width/* */:/**/180px; width: /**/180px; } } @media handheld { #content { width:90%; } #main { width:100%; float:none; } #sidebar { width:100%; float:none; } #sidebar2 { width:100%; } } html>body #main, html>body #sidebar { /* We only give this fade from white to nothing to browsers that can handle 24-bit transparent PNGs */ background/* */:/**/url("http://www.blogblog.com/dots/bg_white_fade.png") repeat-x left bottom; } /* Title & Description ----------------------------------------------- */ @media all { #blog-title { margin:0 0 .5em; font:250%/1.4em Georgia,Serif; color:#353; } #blog-title a { color:#353; text-decoration:none; } #description { margin:0 0 1.75em; color:#996; } #blog-mobile-title { display:none; } #description-mobile { display:none; } } @media handheld { #blog-title { display:none; } #description { display:none; } #blog-mobile-title { display:block; margin:0 0 .5em; font:250%/1.4em Georgia,Serif; color:#353; } #blog-mobile-title a { color:#353; text-decoration:none; } #description-mobile { display:block; margin:0 0 1.75em; color:#996; } } /* Links ----------------------------------------------- */ a:link { color:#488; } a:visited { color:#885; } a:hover { color:#000; } a img { border-width:0; } /* Posts ----------------------------------------------- */ .date-header { margin:0 0 .75em; padding-bottom:.35em; border-bottom:1px dotted #9b9; font:95%/1.4em Georgia,Serif; text-transform:uppercase; letter-spacing:.3em; color:#663; } .post { margin:0 0 2.5em; line-height:1.6em; } .post-title { margin:.25em 0; font:bold 130%/1.4em Georgia,Serif; color:#333; } .post-title a, .post-title strong { background:url("http://www.blogblog.com/dots/bg_post_title.gif") no-repeat 0 .25em; display:block; color:#333; text-decoration:none; padding:0 0 1px 45px; } .post-title a:hover { color:#000; } .post p { margin:0 0 .75em; } p.post-footer { margin:0; text-align:right; } p.post-footer em { display:block; float:left; text-align:left; font-style:normal; color:#996; } a.comment-link { /* IE5.0/Win doesn't apply padding to inline elements, so we hide these two declarations from it */ background/* */:/**/url("http://www.blogblog.com/dots/icon_comment.gif") no-repeat 0 .25em; padding-left:15px; } html>body a.comment-link { /* Respecified, for IE5/Mac's benefit */ background:url("http://www.blogblog.com/dots/icon_comment.gif") no-repeat 0 .25em; padding-left:15px; } .post img { margin:0 0 5px 0; padding:4px; border:1px solid #cca; } /* Comments ----------------------------------------------- */ #comments { margin:0; } #comments h4 { margin:0 0 10px; border-top:1px dotted #9b9; padding-top:.5em; font:bold 110%/1.4em Georgia,Serif; color:#333; } #comments-block { line-height:1.6em; } .comment-poster { background:url("http://www.blogblog.com/dots/icon_comment.gif") no-repeat 2px .35em; margin:.5em 0 0; padding:0 0 0 20px; font-weight:bold; } .comment-body { margin:0; padding:0 0 0 20px; } .comment-body p { margin:0 0 .5em; } .comment-timestamp { margin:0 0 .5em; padding:0 0 .75em 20px; color:#996; } .comment-timestamp a:link { color:#996; } .deleted-comment { font-style:italic; color:gray; } .paging-control-container { float: right; margin: 0px 6px 0px 0px; font-size: 80%; } .unneeded-paging-control { visibility: hidden; } /* More Sidebar Content ----------------------------------------------- */ .sidebar-title { margin:2em 0 .75em; padding-bottom:.35em; border-bottom:1px dotted #9b9; font:95%/1.4em Georgia,Serif; text-transform:uppercase; letter-spacing:.3em; color:#663; } #sidebar p { margin:0 0 .75em; line-height:1.6em; } #sidebar ul { margin:.5em 0 1em; padding:0 0px; list-style:none; line-height:1.5em; } #sidebar ul li { background:url("http://www.blogblog.com/dots/bullet.gif") no-repeat 3px .45em; margin:0; padding:0 0 5px 15px; } #sidebar p { margin:0 0 .6em; } /* Profile ----------------------------------------------- */ .profile-datablock { margin:0 0 1em; } .profile-img { display:inline; } .profile-img img { float:left; margin:0 8px 5px 0; border:4px solid #cc9; } .profile-data { margin:0; line-height:1.5em; } .profile-data strong { display:block; } .profile-textblock { clear:left; } /* Footer ----------------------------------------------- */ #footer { clear:both; padding:15px 0 0; } #footer hr { display:none; } #footer p { margin:0; } /* Feeds ----------------------------------------------- */ #blogfeeds { } #postfeeds { padding-left: 20px }

Prudent Baby

Get sewing how to, sewing tutorials, and sewing help to learn sewing. We offer sewing tutorial for sewing moms.

Wednesday, January 18, 2012

Shirt Sleeves into Toddler Harem Pants


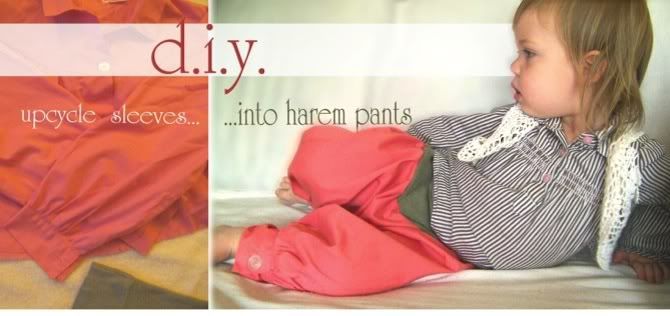
Melissa, from Needle & Nest, is an upcycling connoisseur as you can see from the DIY Sleeves into Harem Pants project she is here to share today. Inspired to turn more trash into treasures? Check out Melissa's upcycled t-shirt into harem pants, lace tablecloth into skirt, and the adorable doily vest project featured on that sweet model above.

But before you do, see the Upcycle Shirt Sleeves into Harem Pants project after the jump...

Shirt Sleeves into Harem Pants


Have a retro shirt? Have a sweet toddler who needs pants? Well you're in luck, since today we're upcycling shirt sleeves into funky harem pants for your stylin' child! Azriel here doesn't even try to model... she's just that good at posing. :o)

You'll need:
One adult dress shirt/blouse.
Waistband elastic (or a stretchy shirt sleeve as I used)
sewing machine
pins

*I used a coral coloured dress shirt that used to belong to my sweet (deceased) Grandma when she was a volunteer at the hospital. The olive green short sleeve is used as the stretchy waistband for these pants (the rest of the shirt was used in a past d.i.y project).*

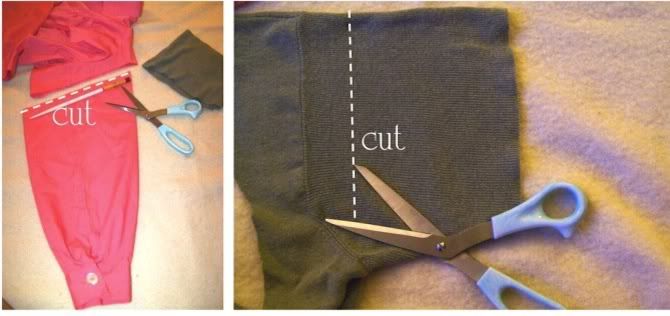
1. Measure the length of your child's legs... and cut both arms off the dress shirt to match length.
I cut the shirt at an angle to leave room for the bum side of the pants.
2. If you have an adult stretchy short sleeve - it makes a perfect waistband. Otherwise you could just thread some elastic through a hem you would make for the pants at the end.

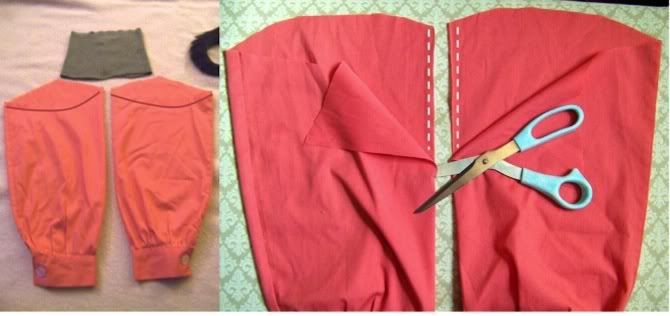
3. Already you have the basic layout of these harem pants. I like the button detail on the sleeves to be lined up at the outside of the pants - at the ankles.
4. Now you will cut 4" downward on the inside seams of the pant legs - this is where you will sew the 'crotch' of the pants together.

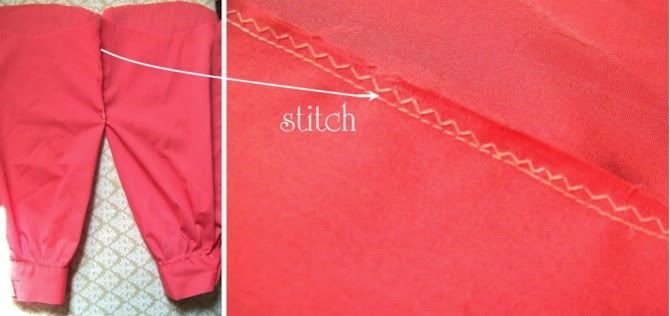
5. Flip the sleeves inside out and bring the legs together where you cut the inside slits. Sew this together to join the legs at the crotch. A great time to use a serger if you have one, since I do not I just sew a straight stitch followed by a zig-zag on the outer edge for more support

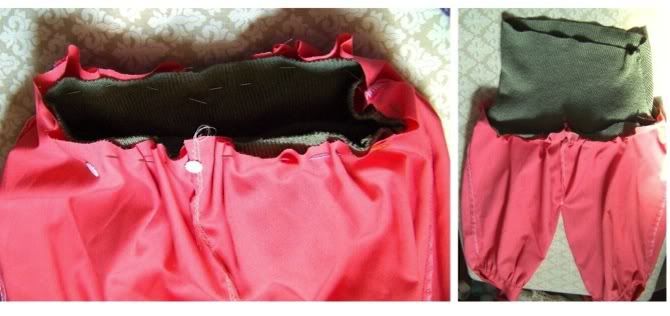
6. Tuck your 'waistband' sleeve down into the pants (right sides facing inside).
7. Gather the pants around the smaller waistband and pin.
8. Sew around the joining edges and trim off excess.

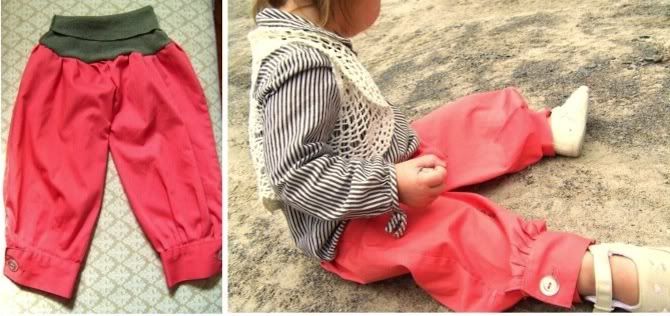
9. Flip pants back out and marvel at your latest upcycling adventure!

I hope that was clear and helpful enough to get you confidently sewing your own version(?). I am not a skilled seamstress by any stretch.. and I sort of just 'wing-it' when it comes to inventing patterns and such. I'm sure that better tutorials exist out there - but in my mind - this is a random invention of my own "sew fast.stupid easy.cheap" approach to projects!
If you have any questions on it, just comment or email me.

Happy sewing friends!
Mel :o)

Labels: , ,

8 Comments:

Blogger diapercouponshub said...

I think you have done a very neat project and I appreciate it a lot.

Diaper Coupons

January 18, 2012 at 4:21 AM  
Blogger Mel said...

I'm honoured to be part of such a wonderful.inspiring.fun website today! Thanks for the feature!
Mel ;o)
needle and nest design

January 18, 2012 at 4:57 AM  
Blogger Stephanie Wilson she/her @babysteph said...

I'm a huge fan of Melissa's! She is so creative!

Steph

January 18, 2012 at 5:40 AM  
Blogger Sarah said...

I LOVE these pants they are so cute. I like to up cycle my clothes to fit my baby so I am definitely going to try these.

http://thewinthropchronicles.blogspot.com

January 18, 2012 at 1:19 PM  
Blogger Desiree said...

Awe! I LOVE seeing a familiar face over here! <3 I'm happy to have this gal so close!

January 18, 2012 at 9:41 PM  
Blogger Looms+Loops said...

Truly adorable!

January 19, 2012 at 1:58 AM  
Blogger Unknown said...

Holy harem pants these are so cute! I love turning sweatshirt sleeves into boy pants. I must find a little girl to make these for!

January 19, 2012 at 7:11 PM  
Blogger Krista DeLeeuw said...

cuuuute! i suppose you could probably do this with any old shirt right?

January 31, 2012 at 7:49 AM  

Post a Comment

Subscribe to Post Comments [Atom]

<< Home