How to Sew a Zipper Pillow
STOP! Do not turn away. You are going to conquer your fear of zippers right now.

I'm going to show you how to sew a pillow with a zipper closure and you are going to like it. It is VERY easy, a complete beginner project, and the results are polished goodness. Look at that pic above, you can barely see the zipper even though it's right up in your face.
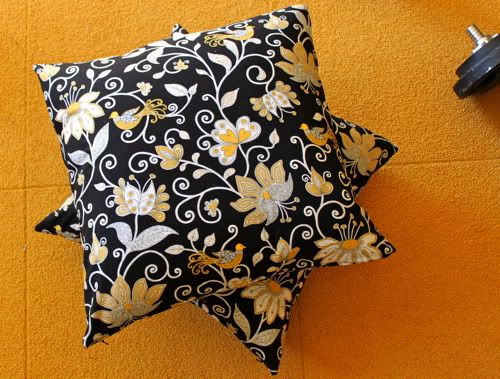
You can use vintage fabrics like these, new fabrics, old sheets, a sweater, tea towels, a dirty t-shirt, something fabulous from Fabricworm, anything your heart desires - but when we are done you will be sewing zippers like a pro.
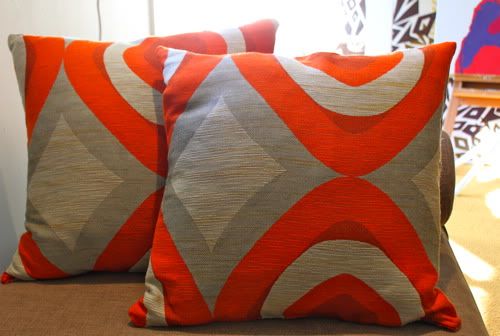
Learn How to Sew a Zipper Pillow after the jump...
Tell us the truth: do you fear the zipper? And do you fear it a little less after reading this tutorial? This week's favorite comment walks away with a fancy yard of pom pom trim!
How to Sew a Zipper Pillow
First, check the size of your pillow. Mine are 20"X20". You need to cut two squares (or rectangles, depending on the shape of your pillow) of fabric one inch bigger in length and in width, so I cut mine 21"X21". You'll need a zipper that is 2" shorter then the final length of the bottom of your pillow, so in my case 18".
Finish the bottom edge of each piece of fabric by serging, sewing with a zig zag stitch, or cutting with pinking shears. Pay attention to the direction of your pattern to determine which side is the bottom (for example, this fabric has birds that need to be right side up).

If you only have a longer zipper like I did, you can shorten it. I needed an 18" zipper so I cut this 22" zipper down to 18 1/4":

Then I sewed back and forth over the cut end to reinforce 1/4" from the edge:

Now lay your two fabric pieces right sides facing and place your zipper in the middle of the bottom piece. Mark the edges. For my pillow this was 1.5" from the edge of each side.
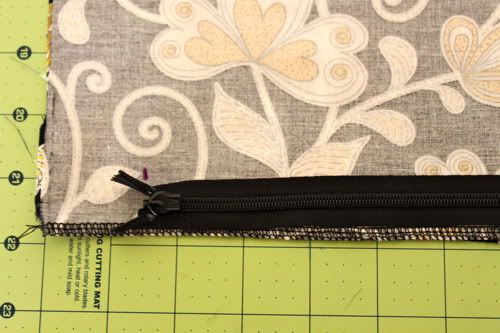
Draw a line from there to the edge the pillow 1/2" up from the bottom:
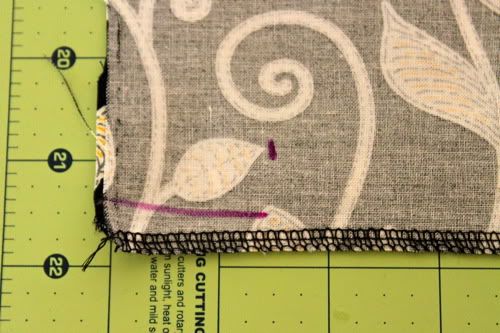
Sew in place on either side from your mark to the edge:
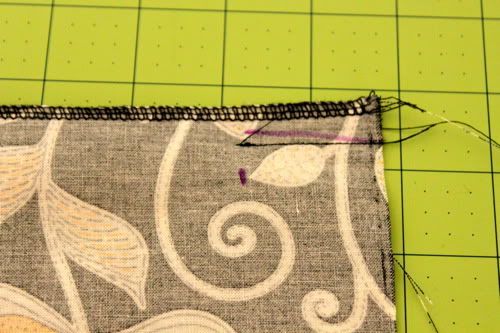
Now set your machine to basting stitch (this is just a normal straight stitch set to the widest width your machine will allow, usually a 5) and baste straight across between your two previous stitch lines:
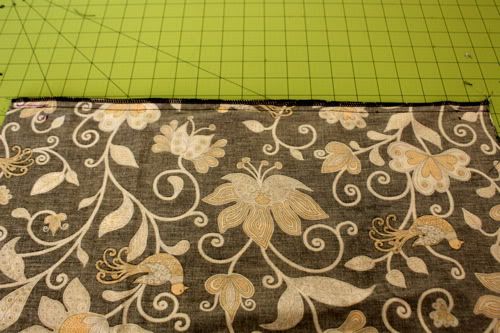
Open up the fabric and iron the seam open:
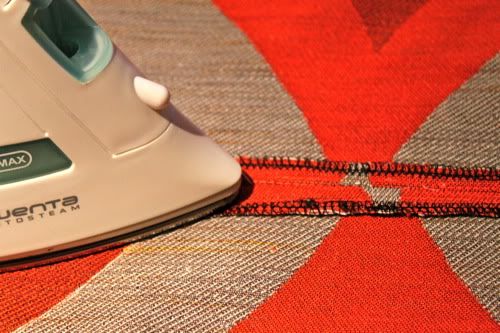
Now it looks like this:

Take your zipper and lay it in place face down on top of the seam you just sewed:
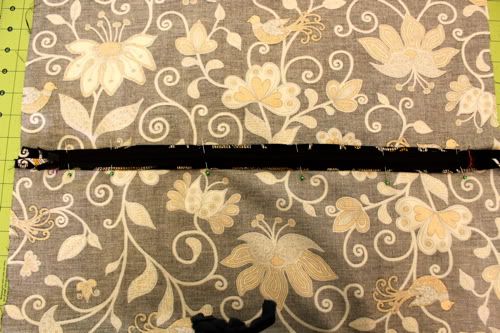
Pin it on:
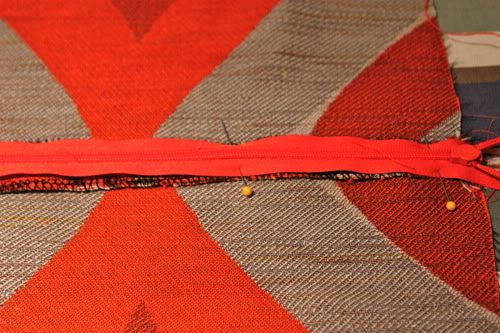
Switch to your zipper foot and stitch the zipper in place on each side (remember to set your machine back to a normal stitch width):
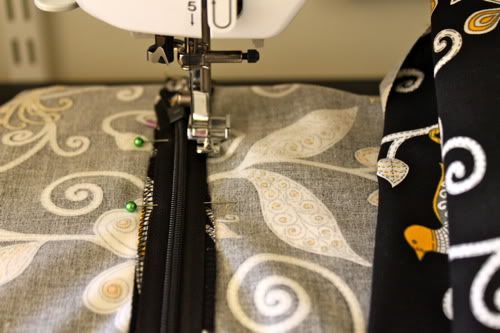
Now your zipper is attached:
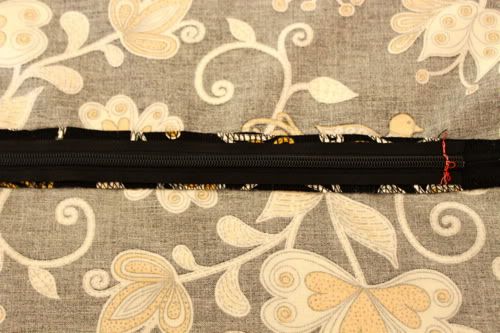
Open your fabric and flip it over to the right side:
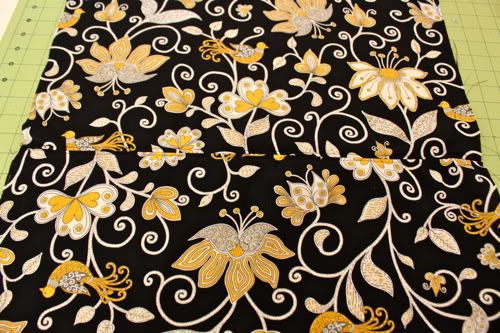
The zipper is under there:
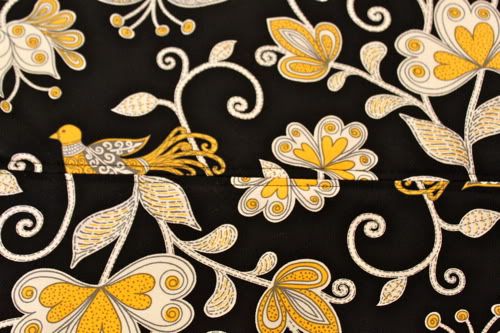
So take out your seam ripper and rip the basting stitch that we made earlier to reveal your zipper:
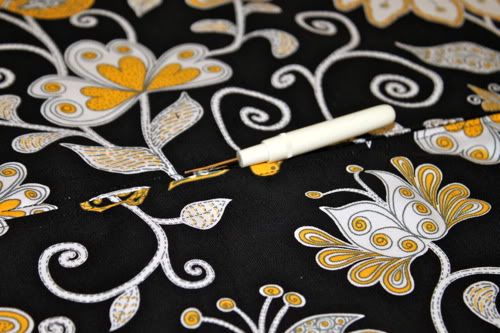
That was easy right? Now unzip it about halfway to make it easier to turn right side out later:
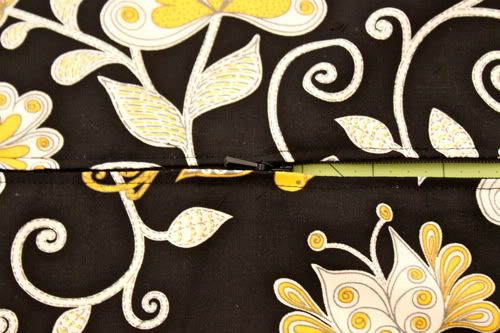
Fold your pillow into place, right sides facing with the zipper centered on top and pin the sides together along the three unfinished edges:
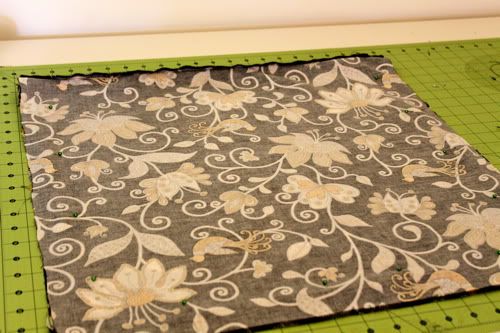
Sew in place with 1/2" seam allowance:
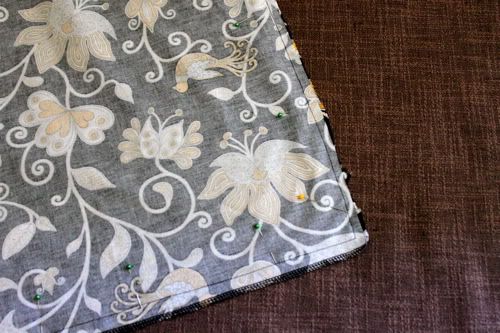
Clip the corners and finish the edges by sewing, serging, or cutting with pinking shears:

Turn right side out and stuff!
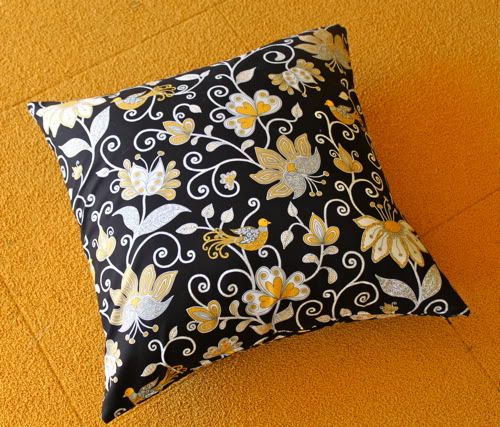
Look at how pro your zipper looks... that wasn't too bad, right?
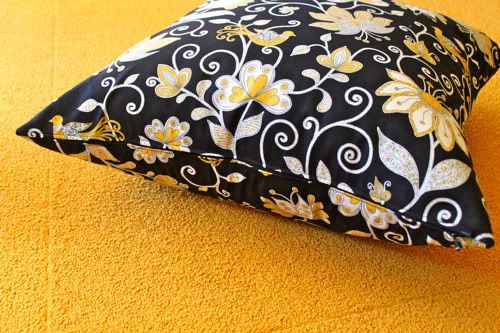
Make another if you like (usually pillows come in twos, don't they):
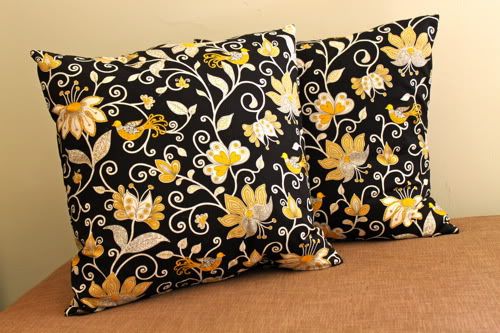
Thank your little helper.

Easy peasy! Go forth and sew zippers!
Labels: Decor, pillows, Serging, Sewing, The Season of Cozy, Under an Hour, Upholstery

72 Comments:
Gosh. Suddenly all the pillows in my house need new covers...an they will be amazing...WITH zippers! You've changed my life, truly. Watch out world, I can zip!
How have I not heard of this type of zipper installation. Easy peasy!
I really like that method! Do you think you sew zippers on skirts and dresses that same way too?
thanks!
Thanks for the great tutorial. I have definitely hacked this up before. I'm not so much afraid of zippers as I am too cheap to buy them. I also find it hard to find the right color to go with my fabric. Any tips on where to find a good selection of zippers at good prices?
Oh this is so GREAT! I don't like the look of the envelope pillows I have been doing. Off topic but, did you make Scarlet's shirt? It's so cute, if you did I hope there is a tutorial coming soon!
ooooooooooooh I love this post. It comes to me as if I have ordered this post from you he he, I have been planing on changing my pillowcases at our living room - but was totally fearing from dealing with the zippers! Hope to get the time this weekend now, to get this done =)
Thanks!
Are you SERIOUS?! I CAN DO THAT!! What have been so afraid of?!
Now, can you make my day and tell me that my fear of buttonholes is irrational, too?
I have been apprehensive about zippers since high school theatre costumes class when I sewed a zipper crooked through a dress (it was awful). I think I am going to try this one. It looks easy. Thanks
Great tutorial I love the black/yellow fabric!
I swear that you ladies have some super power channel to my thoughts because you always seem to read my mind! Just last night I said to my husband, "my next project is going to be to recover those couch pillows" and BOOM here you are with a tutorial on how to do it the next morning! With a ZIPPER no less!
I love you...I really do! Because you obviously know me without knowing me :)
Well, that's it....I have one million projects halfway done because of "zipper-fear"...After a tutorial like that...what's a girl to do but go find her zipper foot and get started!!
Thank you!! This looks super easy! I'll gave to give it a try soon as I need some new pillows for my couch.
Thank you for this tutorial! I'm in the middle of reworking all my living room pillows, and I wanted to tackle a zipper soon. How timely on your part. You have, indeed, eased any misplaced fears.
When I was four..I feared zippers. My mom had zipped my belly up one too many times with the zipper on my footie pajamas. Fast forward 30 years...I have bookmarked 8,690 projects...all with zippers. It gives me anxiety just thinking about starting one of those said projects for a different kind of fear. This evening, I'm pouring a glass of wine and facing my fear head on with this project...your directions make it sound simple..thank you so much!! here goes nuthin'!!
Yes...I fear the zipper. I pick out patterns with no zippers. It's something I need to conquer ("Take a deep breath, you can put a zipper in!") :) Thanks for the tutorial. Looking forward to trying this out!
Long long ago, in a galaxy far away...
I had tried to sew a zipper into a bag and guess what I did? I broke the machine I was using (pause for shocked expressions and asking yourself how could she have done this?)
I still have no idea how I did this!
So thank you PB for a new way to try using a zipper (this fear has very much so limited what I can make! I'm going to go attempt the quick and easy bag now :)
P.S. If I break another machine I give up!
I keep coming across wonderful projects that I feel drawn to - and then I see it has a zipper in it. Immediately, I think "Oh, no! Now I can't do it". I am almost as afraid of zippers as I am of patterns. Give me a tutorial and I can rock my new machine. Give me a pattern and my brain shuts down. I haven't even been brave enough to attempt zippers yet because of my experience with patterns. Which is a shame because my new machine comes with a cool zipper foot.
I've never seen a zipper done this way. You've blown my mind. This explains so much.
I am terrified of zippers. I have done zippers. There have been tears. There have been rude words. There have been the flinging of various sewing accessories across the room. I will try your technique but I am also terrified of it - the seam ripping scares me. Listen out for rude words coming from the UK...
this is how my mom taught me to sew a zipper - but I had a hard time when I got to where the actual zipper pull was and keeping my line straight.
Also where did you get the Vera Bradley fabric?!?!
How did you know that I need to make pillow covers AND that I am terrified of zippers? If I wasn't so happy about this tutorial, I might be a little concerned that you are stalking me.
Fear = Conquered! Thanks for yet another wonderful tutorial.
Side note - the new flooring looks fabulous in your pics! Especially love it with that fabric...did you plan that?
Yes, I have a fear of zippers. I avoid any sewing projects with zippers. I don't know why they scare me... they just seem so daunting and confusing. i've always assumed they wouldn't be that hard, but yet I still haven't mustered the courage to attack them. My daughter's backpack is falling apart, so I decided I would just make her one to get by until school gets out. BUT I knew I would need to install a zipper on it (her teacher is very particular about things), so i've been dreading it. My resolve: by the end of the week, I'll make her the backpack and MAYBE even purchase a new couch so I have pillows to recover (the ones that come with the couch, I do NOT like!)!! :D
Now, can you help me overcome my fear of making button holes??
WOW! You make zippers (and just about everything else) seem so easy. Thank you, thank you, for sharing your talents! I see many zippers in my future.
This comment has been removed by the author.
wow you actually made zippers look easy! and I have 2 VERY ugly couch pillows that need recovering. Now I just need to win fave comment so that I can have that pompom ribbon to make the pompom shirred sundress and thus get over my fear of shirring! (I'm tired of overpaying for summer fun shirred item)
Thats how i thought everyone did zippers and was wondering what the horror was. That is always the way imagined doing it. Never put in a zipper myself before.
Well, I did see a tutorial for velcro pillows and was going to make them that way. I will have to reread each Tutorial and then see. I have only installed 4 zippers in my life and 3 of them look silly.
thanks for the guidance!
mnrridgeway at gmail dot com.
ahhhh... okay, okay.... i NEED to learn how to do this. thanks for the reminder. love that fabric!
I used to associate my seam ripper with the frustration of having made a mistake. Now it would be a happy time to use the seam ripper to open up a lovely zipper! Don't Fear the Zipper!
Oooh I have always been afraid of the zipper but this looks totally doable! Thanks for the info!
Well thanks again, Prudent Baby - you have empowered me to conquer another fear of mine with this zipper tutorial! You guys also helped me conquer my fear of bias tape. With PB by my side, I think I can do anything!
This is amazing! I was just going to ask for a zipper tutorial last week, but as with everything else, I got sidetracked and forgot to. Somehow you knew and you provided a beautiful example. Can't WAIT to try it!
A. Was I afraid of zippers? Yes.
B. Did this tutorial banish those fears? Yes. You make it look so easy, and I promise I will try it on my own. Thank you!
Wow! It's like you read my mind - I just told a friend I would sew her some cushion covers with zippers and was going to have to figure out how - thanks, now i can stop sweating!
I have slowly but surely conquered my fear of zippers. Now, if I could only conquer the daunting task of finding cheap zippers, I'd be set.
frig... those zips still kinda freak me out! i'm such a beginner sewer it ain't even funny! but... BUT that tute was pretty easy peasy, lemon squeezee! i think i might have to give it a try. here goes nothing, right?
Oh my gosh!! I must make pillows now!!
Zippers do scare me a little bit. I've done one once before and it didn't go so well. But, since I'm wanting to give my living room a little makeover, i just might have to try this!! Thanks for making it so easy!!
OH MY GOSH! That looks so easy! I have been wanting to make zippered pillows for a while but I was scared of the zipper part. Can't wait to make some now. Thank you so much for your great tutorial.
cori - i guess i could have been clearer! i meant one inch bigger in length and width - clarified in the post. thanks!
Zippered cushions were the first things I made without a pattern or instructions. It's the best way to get zipper practice as the projects are so quick. My friends are probably sick to death of getting cushions as gifts now though...
I usually BS my way through a sewing project so I love your tutorials. I've made 3 of them already today and they have been really easy! Thanks so much!!!
Unreal! Thank you for demystifying the dreaded zipper! I have featured this on my new blog along with link backs. Thanks :D
http://billylid.theolthofexchange.com.au/
Ahhhh! Zippers!!! You make it look so simple. I have been wanting to give zippers a go and this really is the perfect practice/starter project for the zippa skill. Now the only time I have to fear zippers is when someones fly is down...hopefully not mine.
Whenever I have sewn zippers my zipper foot gets pushed over when I get to where the actual zipper is lying just like MelindaB. Is there a trick that I am missing?
I really feel the need for some cute pillows now!
I came sooo close to not reading this post because I am terrified of zippers. If a project included one I just didn't do it. This was very helpful with all this pictures. I just MIGHT have to try it. Thanks for the tutorial!
jocelyn and melinda b - here is the trick. sew the zipper up to the pull then remove from the sewing machine. then unzip the zipper (so you are moving the pull out of your way) and sew the rest of the way. does that make sense?
This post couldn't have come at a better time!! Thanks so much! I bought zippers that match my fabric for new pillow covers just YESTERDAY and I was planning on teaching myself how to attach them! With a 2 year old and an 8 month old my pillows get dirty FAST! This is gonna change my life! You majorly rock! Oh and I echo the fear of button holes. What is it about them that terrifies me???
I did fear the zipper...until your quick & pretty makeup bag tutorial. I made a bunch of those and have moved on to other zippered bags. I actually look forward to putting in zippers now!
Jocelyn/Melinda B - my trick is to use zippers that are at least an inch longer than you need. Then you can keep the zipper pull out of the way at all times!
Oh my gosh...this is so much easier than the way I have been doing it. Makes me feel kind of silly. Thanks for sharing!
I just discovered your blog and I love it. What beautiful pillows. I have yet to sew a zipper on anything. Looks easy enough. Maybe I should give it a try.
Confessional: I design and make handbags and I have some really cute designs that I have thrown into the back of the closet because they have zippers--I feared zippers --UNTIL NOW!
P.s my dad is an upholsterer & he uses the old school method and I could never get it- I just made him make my cushions instead!
Oh Thank you so much! I have many pillow covers that have been higgledy piggledy put together, buttons, velcro (eek) lazy folded under! I am sooooooooooo excited to really do it right. I have a bag full of zippers that have been taunting me for, gulp, years! Not any more! I will do it this weekend!!
Thank you again :)
THANK YOU! I have beautiful fabric and zippers, waiting to be used but I had to figure it out and well, it's been 6 weeks with no progress. Can't wait to try this!
Wow! I love this tutorial. First of all, it's my first visit to your website- don't know where I've been because Wow! It's great!
Secondly, I was scared of zippers for sure but this seems super easy. Thanks so much for the awesome tutorial!
And lastly, I've just started my own blog and yours is such an inspiration. I hope mine will become as great as yours one day!
These pillows look like they are very doable, the way you break down the steps is very clear. I have a little problem though- how do I work this dang sewing machine?????
Woah, took me a minute to understand (placing the fabrics on top of each other then basting), but now I get it. Thanks! This'll really help
I did it and yes I was scared! It wasn't so bad though. I'm encouraged to make more and sew more!
http://steenkbug.blogspot.com/2011/05/i-conquered-zippered-pillow.html
Thanks so much for this tutorial - I haven't sewn with zippers until this past weekend, and look what I did:
http://homeinthecountry.wordpress.com/2011/05/18/yellow-white-chevron-chair/
The throw pillow took about 20 min, based on your tutorial, and I made cushion covers with zippers, too (those took MUCH longer). Thanks again!
I made a knitting tote for my mum about 5 years ago but totally ruined it with a dodgy zip on the accessories pouch. She says it gives it character and that it's her favourite bit, even if she has to argue with it whenever she tried to get at her stitch markers (Mums are great!).
I haven't done a zip since, but after this tutorial there will be no stopping me - thank you! :0)
I've tried to make zipper pillows before and failed miserably. This looks like is might actually work! now I just have to get my mending pile down to a place where I can tackle a new project. Thanks!
Was linked to here and thank you thank you thank you!! I have been so afraid to do this but your tutorial makes it look very easy. I'll be using this to make some pillows this summer!
I definitely fear the zipper. But this tutorial gives me confidence that I can do it. Thank you!!
I finally tried this and it turned out great!! Thanks for instilling some confidence in my zipper skills!
YOU are amazing!! I was a total zipper-phobe until I found your fabulous tutorial. Just finished two lovely striped pillows for my couch. And I doted about your tutorial. Can't thank you enough!!
http://shannonsews.blogspot.com/2011/09/easy-zippered-pillows-pillow-recovering.html
Thanks so much for this great tutorial!! I just used it to make some pillow cases for a friend, so easy to follow and now I'm not scared of zippers anymore...pillow cases anyone?! I posted a link to your tutorial here: http://buzzmills.typepad.com/blog/2011/10/a-pair-of-pillowcases.html
hi just stumbled on your blog looking for a zipper/cushion tutorial. Genius. So easy and quick.
Do you mind if I put a link from my blog?
I can't believe how easy you have made the zipper go onto the pillow. I put zippers in clothes years ago, but I have stayed away them until now. With your tutorial I acually look forward to putting the next one in.
YOU ROCK! Glad you posted this!
how funny, i saw this exact tutorial on how to sew a zipper on Design Sponge....hmmmm
Post a Comment
Subscribe to Post Comments [Atom]
<< Home