How to Make a Yarn Pom Pom
Sonya is mama to an adorable little dude, blogger at Parlor: Diary of A Hairdresser, and a knitter. She's here today to give us a step by step on making poms poms from yarn, you don't need to have mad knitting skills to make them, this tute makes it simple and clear. Also, her blog is amazing, lots of great tips and tutes for having fabulous hair even with little time and kiddos to care for, so make sure to check out Parlor!
Learn How to Make A Yarn Pom Pom after the jump...and leave sonya a comment on her first tute, you could win some purty fabric and bias tape!
How to Make A Pom Pom
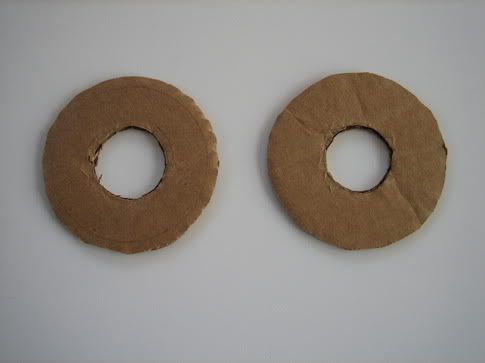
You can buy a pom pom tool but it’s just as easy to make one.
Cut two donut shapes from a piece of cardboard. Mine were 3 ½ inches in diameter with a 1 ¼ inch hole in the center. You can use a compass if you have one or just use something round with about these dimensions and trace them – it doesn’t have to be perfect.
Place both cardboard donuts together. Thread your yarn onto a yarn needle. Wrap it through the center
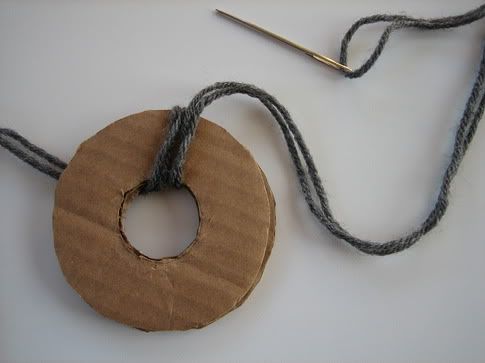
and up around both pieces of cardboard.
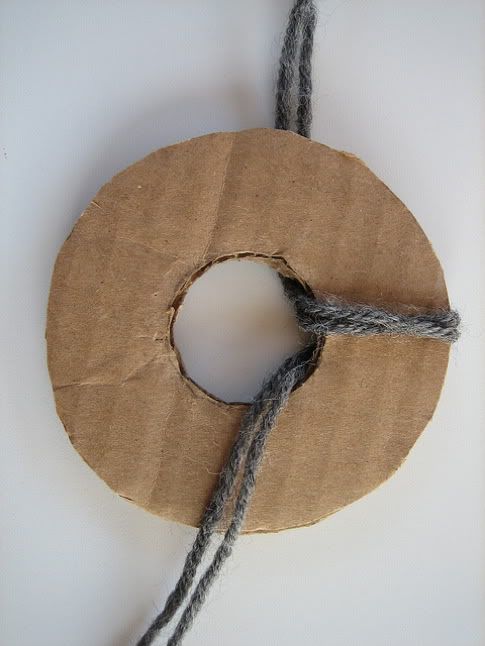
Repeat:

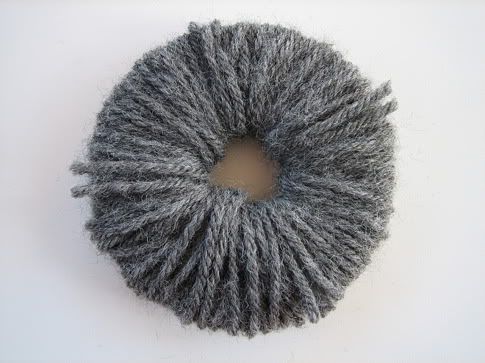
Repeat until the entire donut has been covered. The more yarn you use, the fuller your pom pom will be.
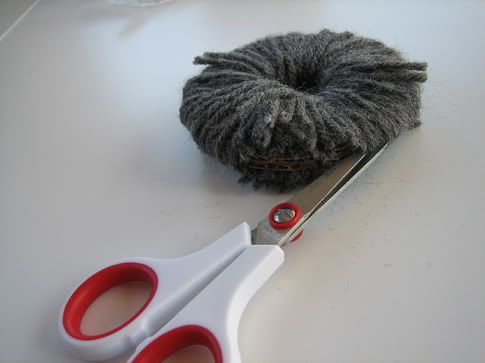
Next carefully cut the yarn around the edge (the blade of your scissors should go between the two pieces of cardboard).
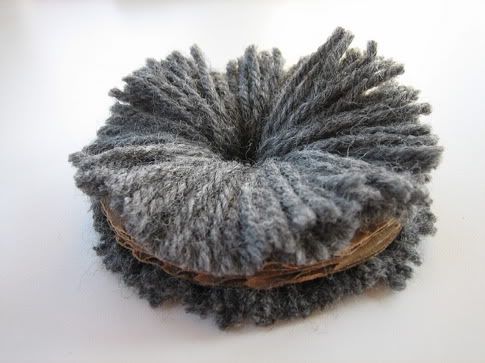
Now it looks like this.
Then wiggle another piece of yarn between the two pieces of cardboard.
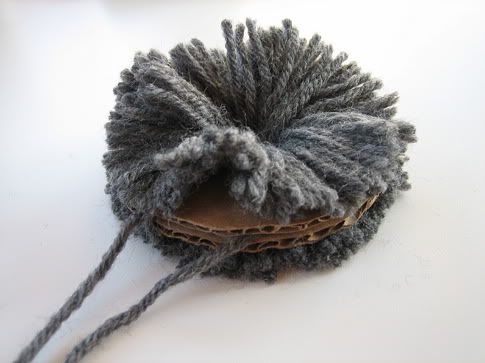
Pull it tight.
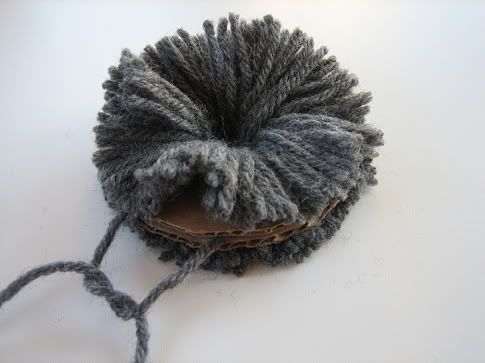
Tie.
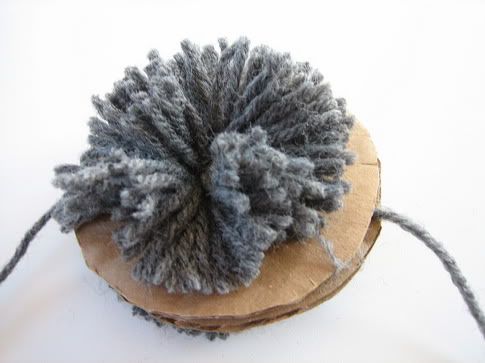
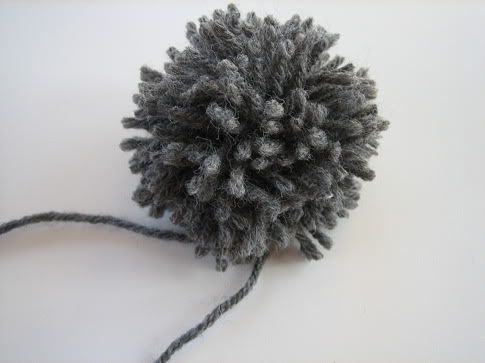
Remove the cardboard. If necessary, trim the pom pom to make it rounder, leaving the ends you used to tie it together to fasten it to your hat. Done!
Sonya will be back soon with some knitting patterns for us, but in the meantime get your hair all spiffy, check out ParlorDiary.com.
Labels: Accessories, All Things Boy, Clothing, Yarn
posted by Jaime @ 11:30 AM
![]()

18 Comments:
I LOVE making pompoms for the hats I knit....mostly because I suck at finishing the very top of a hat, so this hides it well!!! And what baby isn't ADORABLE with a giant pompom?!?!
This is a great tutorial. And your method for making pompoms is far superior to mine. Thanks so much!
i LOVE making these! i made hundreds of all colors and sizes for my wedding last summer. our guests threw them at us as we exited the reception! they made great pictures!
I read the title of this post as "How to Make a Yarn Yarn Pom Pom". It made me giggle! :) I love the easy method, too! I'll be adding pom poms to everything in sight!
This technique works great--it's how I used to make all of my pompoms. But then I invested in a set of pompom "molds" (the semicircles that snap together: http://www.amazon.com/Susan-Bates-Easy-Wrap-Maker/dp/B0019KHGL6), and my pompom-making experience has improved exponentially. A set of four different sizes of the plastic "molds" costs under $5 and are a LOT easier--and FASTER!--to use than cardboard circles. Winding yarn around a semicircle takes a fraction of the time needed to "sew" it in place with a darning needle. I shun unnecessary crafting expenses, but I consider the semicircle pompom makers to be a sanity-saving worthwhile investment. :)
That looks so simple! I think my boys and I will have fun making some. Thank you:)
I can't believe how simple! Can't wait to try it!
I am not a knitter (yet) but still find many uses for pom-poms, and I just use the finger method! Here is basic diagram:
http://nabell1.tripod.com/nppp/howtomake.html
Use 2 fingers for a small pom pom ( I wrap about 50 times) Around 3 fingers or a bigger one (I wrap about 75+ times) and so one. Vary the amount of times you wrap it to vary the fullness, and trim to the desired length. So easy!
Marsha - I've always wondered about those. I've always just made my own out of cardboard. Glad to know they are worth the investment for those who make pom poms regularly!
thanks for the refresher...I remember making these as a little girl with my cousins for our doll clothes and haven't made any since!
I love it! I see so many cute hats with the pompoms! Who knew it was so easy to make them!! :) My mother-in-law does a TON of crocheting and these would be super cute on top of her hats she makes! She's going to teach me next time we go for a visit! I'm so excited! Thanks for sharing!
Easy peasy! I will practice by making one for my cat first!
perfectly easy! i love yarn pom poms :)
embily(at)gmail(dot)com
Oooohhh!! These are so cute, they're downright dangerous! I have a feeling I'll be making way more than are necessary in the next few days to decorate the nursery. It'll be a pom pom baby room! :D
I featured this in my Weekly Favourites http://the-red-deer.blogspot.com/2011/02/weekly-favourites.html
i looove putting TWO pompoms at the top of a hat. kind of like little earss.. :)
I'll need to try this. I like the store bought, but it would be nice to be able to make pom poms in variety sizes. I've linked back to this tute:
http://rabbitandpiggie.blogspot.com/2011/04/yarn-pom-pom-garland.html
Just made my first one ever and it's soft and pink and I hot glued it to a clip. wWearing it right now. Thanks!! :)
Post a Comment
Subscribe to Post Comments [Atom]
<< Home