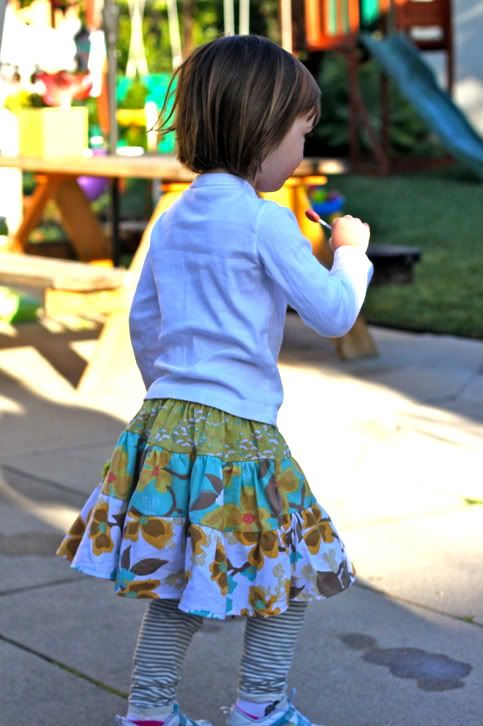
The Layer Cake Skirt
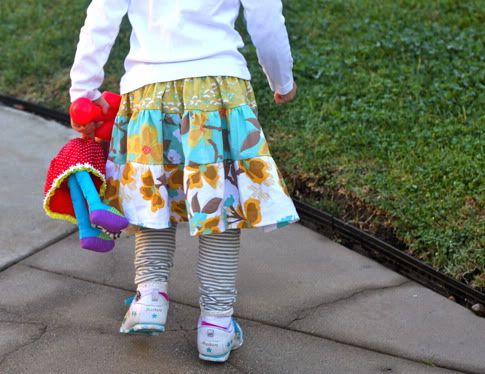
It's so warm in LA, it's total skirt weather.
These three fabrics were begging to be together forever, so I decided to whip up a deelish little layer cake skirt for my sweetie pie.
Yummy! This is a beginner project, you can totally do it.
Get the full Layer Cake Skirt Tutorial after the jump...
The Layer Cake Skirt
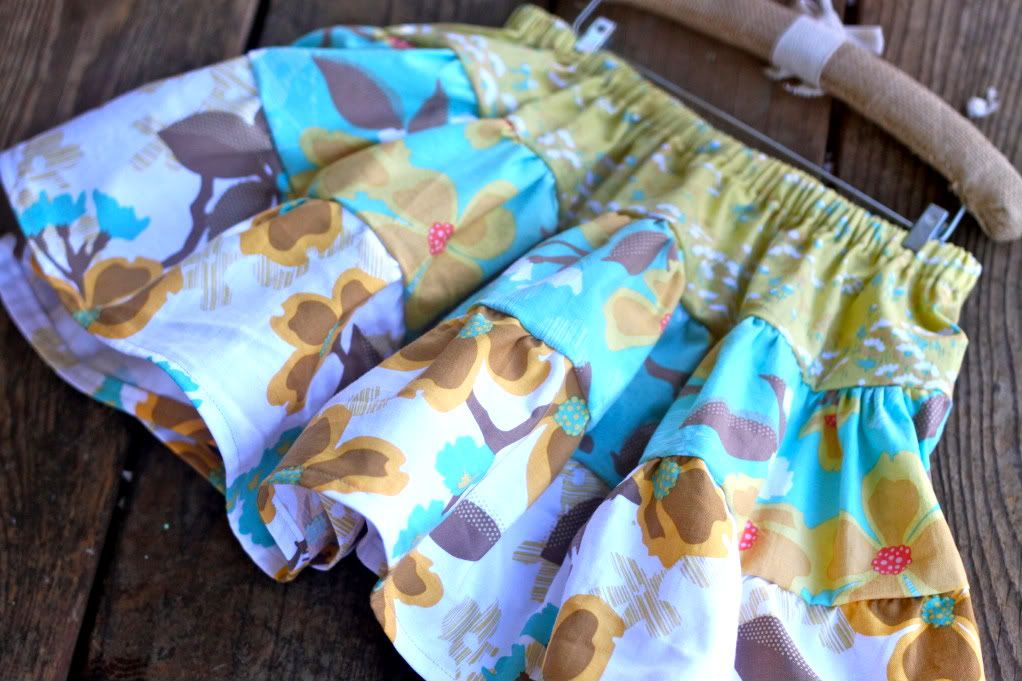
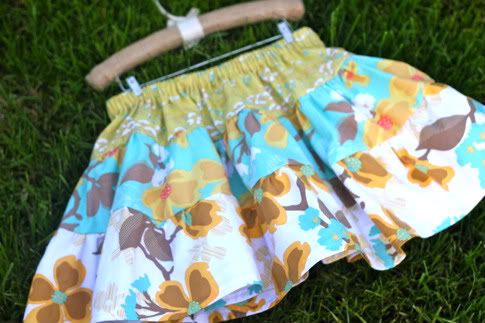
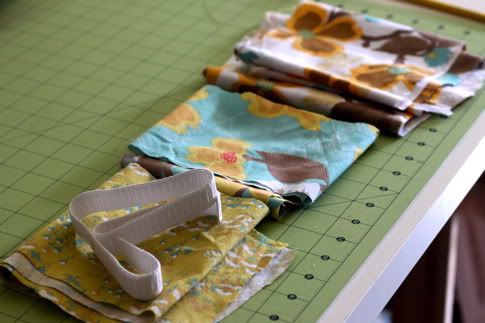
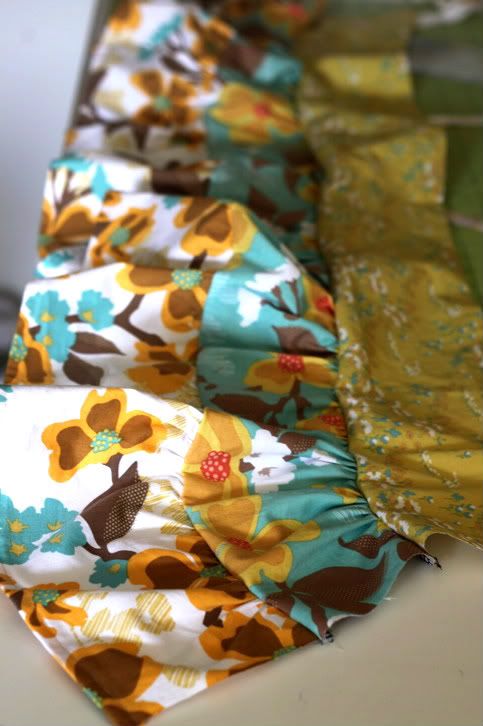
For my layer cake skirt I used these three gorgeous Joel Dewberry fabrics I picked up from Fabricworm:
Top Layer: Joel Dewberry Flower Fields in Sunglow
Middle Layer: Joel Dewberry Dogwood Bloom in Sunglow
Bottom Layer: Joel Dewberry Dogwood Bloom in Harvest
First we need to cut our fabric. Measure your kid's waist and cut a piece of 3/4" no-roll elastic 1" bigger, so mine was 19". The rest is sort of up to you, since this will be ruffled it will be forgiving. Here is how i did it...
Top Layer: One strip 44" wide, 4.5" tall
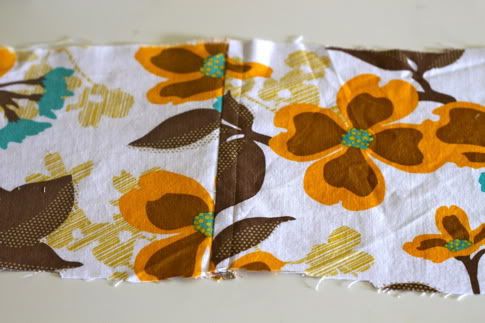
Middle Layer: One strip 44" wide, 5" tall and one strip 22" wide, 5" tall (sewn together at the 5" edges to create one long strip)
Bottom Layer: Two strips 44" wide, 6" tall (sewn together at the 6" edges to create one long strip)
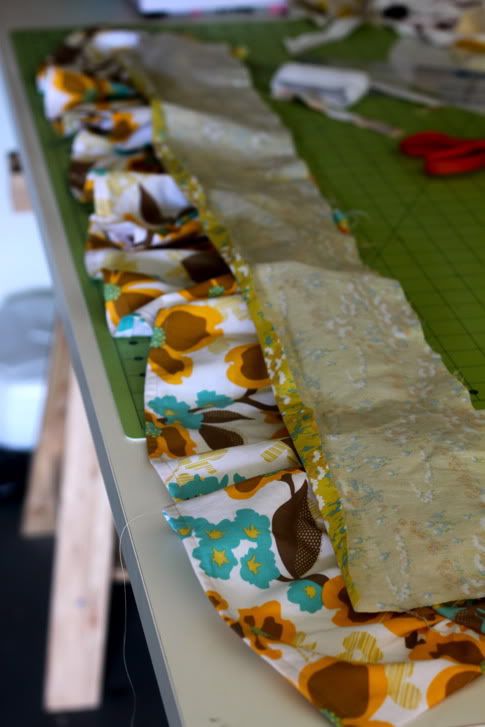
So cut out all your fabric:
Go ahead and sew the strips together for the middle layer and for the bottom layer, so you have three strips, one for each layer. I used a french seam but in retrospect I don't recommend it, it's too heavy for this skirt:
Start with the bottom layer. Fold 1/2" and another 1/2" to create a hem:
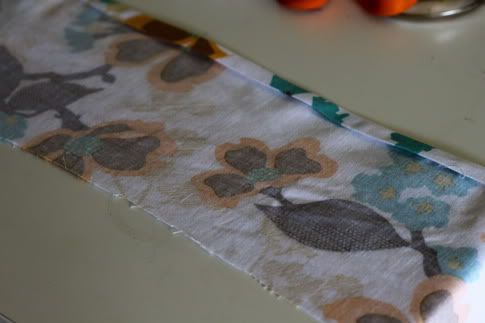
Sew in place. This is the bottom of your skirt.
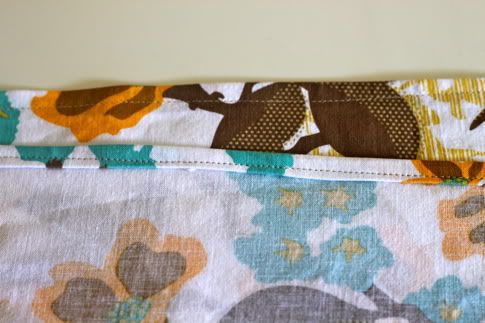
Now sew a basting stitch along the top (a basting stitch is a regular old straight stitch set to the widest width your machine will allow, usually a 5), leaving a long thread on each side so you can gather. Because I did a french seam I had to start and stop at the seam, hence my not recommending a french seam.
Lay the middle layer out flat. Pull the bobbin thread and gently push the fabric to gather the bottom layer until it is the same length as the middle layer:

Evenly distribute your ruffles/gathers. Lay the middle layer face down on top of the bottom layer so right sides are facing.
Turn it over so you can see your previous basting stitch. You could pin but I didn't because I am lazy when it comes to pinning.
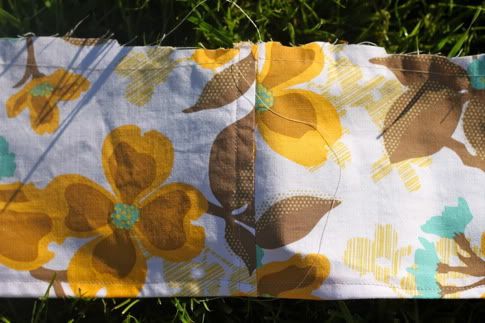
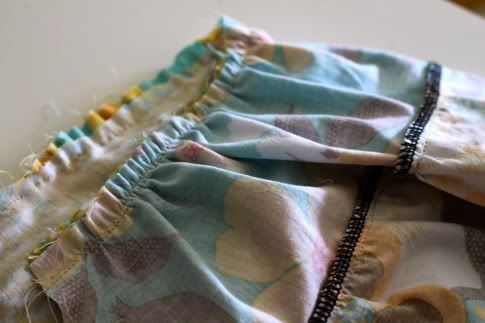
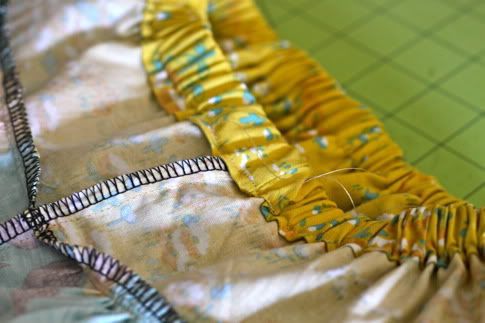
Sew in place all the way across just inside the basting stitch:
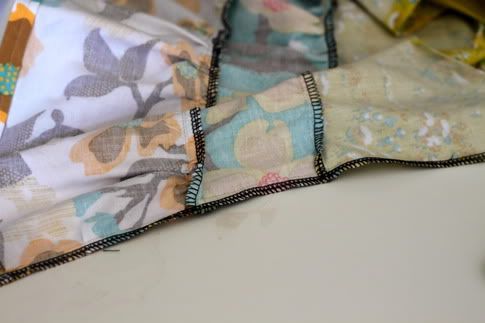
Finish the edge by serging or sewing with a zig zag stitch. I am also too lazy to change my serger thread from black to white:
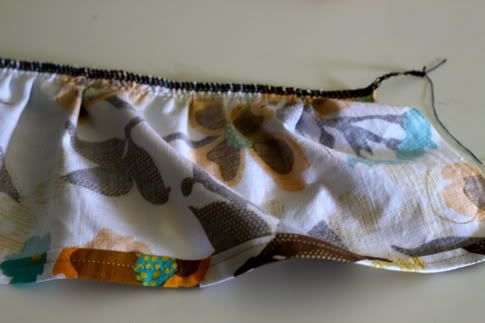
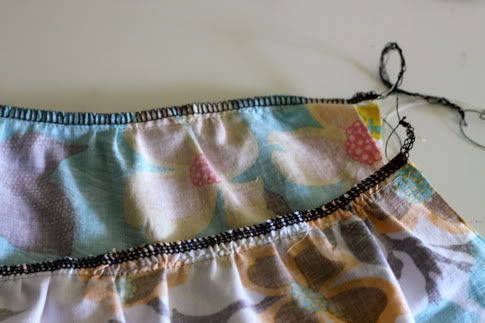
Now it looks like this, pretty.
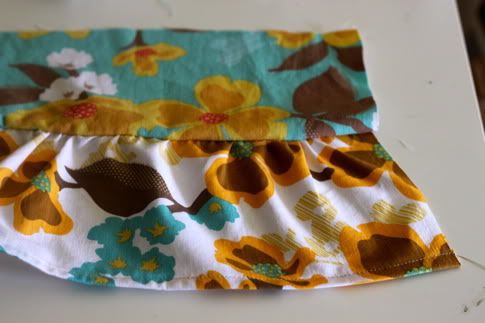
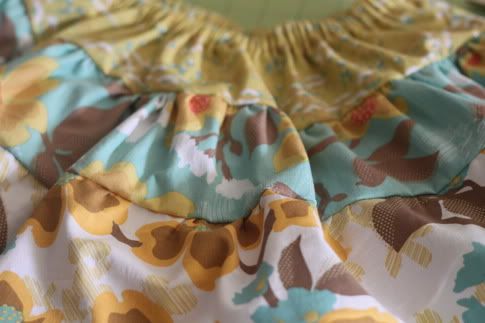
Sew a basting stitch along the top of the middle layer:
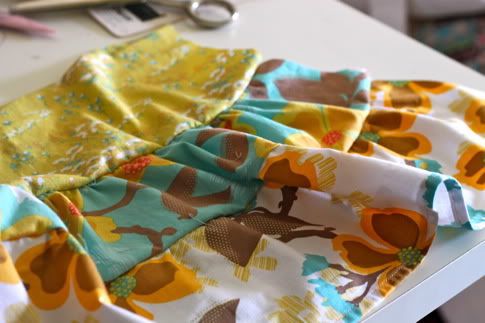
Lay the top layer out flat and gather the middle layer until it is the same length:
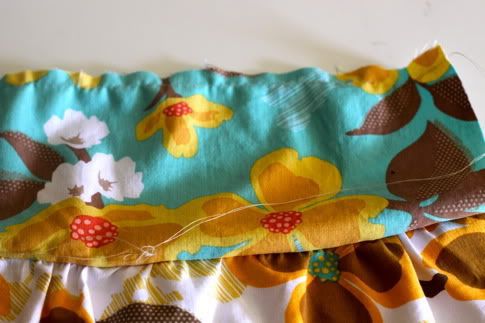
Lay the top layer flat on top with edges aligned:
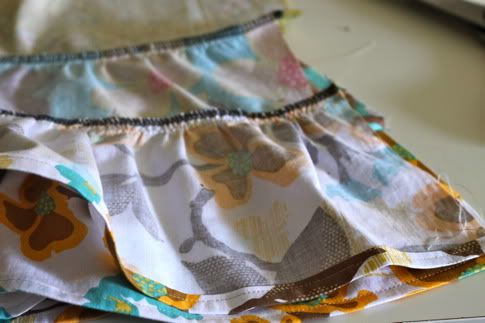
Turn it over so you can see your basting stitch, and sew in place just inside as we did before.
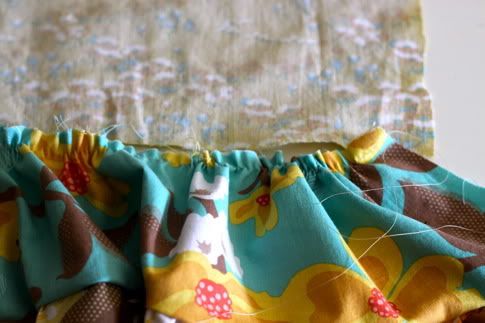
Finish the edge:
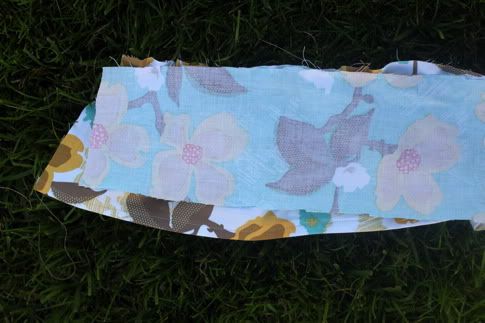
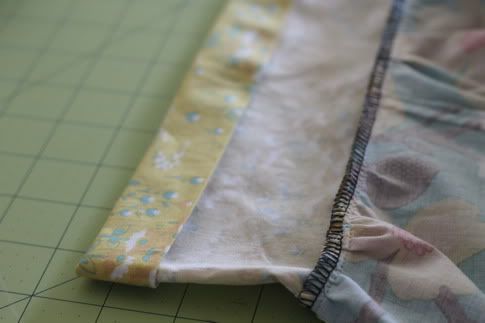
Now your skirt looks like this:
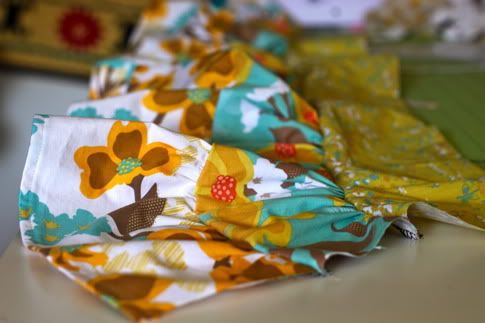
It's still pretty long, totally fine.
Lay it right side up.
Bring the two short edges together right sides facing:
Sew together and finish the edge:
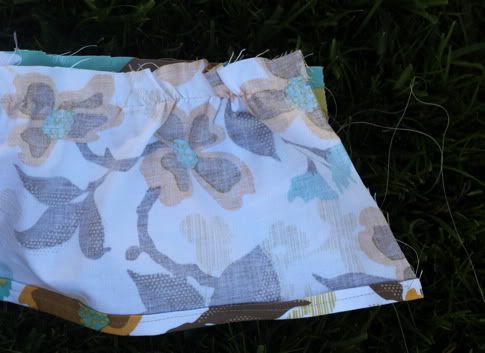
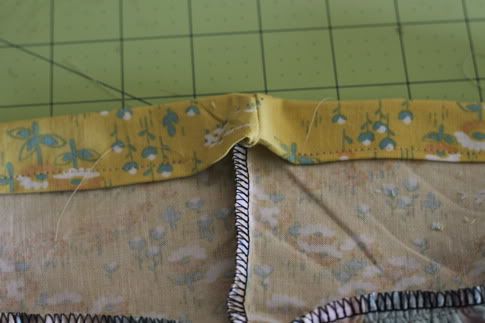
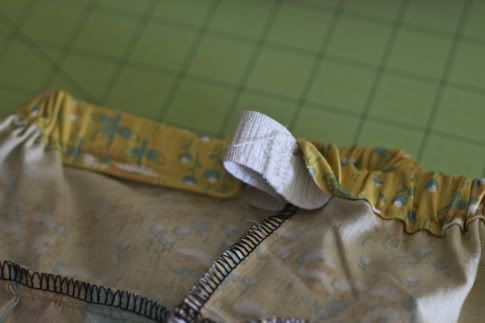
Fold the top edge in 1/2" and iron, then another 1" and iron:
Sew in place at the edge of the casing, starting on one side of the seam, leaving a hole, backstitching and the beginning and end:
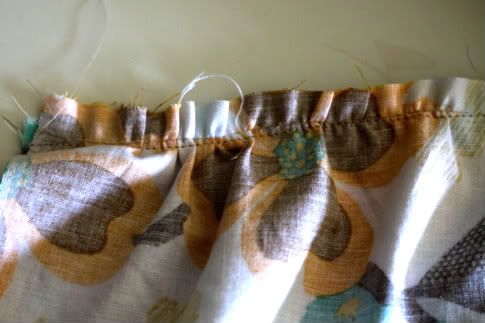
Feed your 3/4" elastic into the hole with a safety pin:
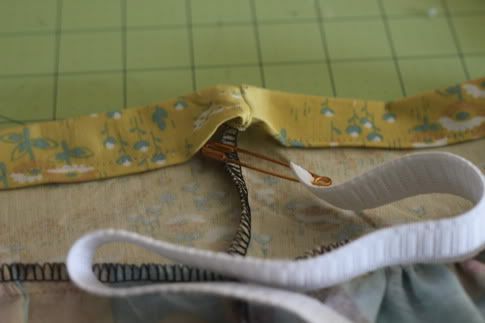
Feed it all the way around, gathering your skirt, and pull it out the other side of the hole:
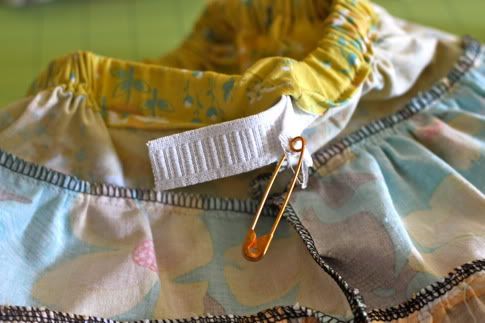
Sew the elastic together flat with a stretch or zig zag stitch:
Push it back into the casing and sew the hole closed:
Flip it inside out.
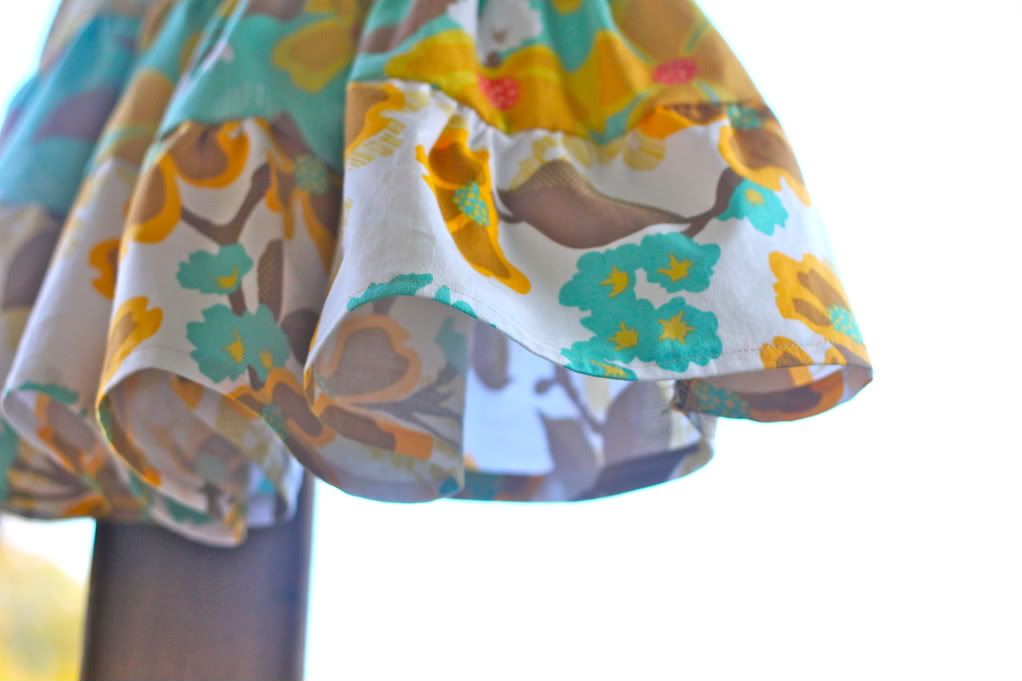
Admire your handiwork!
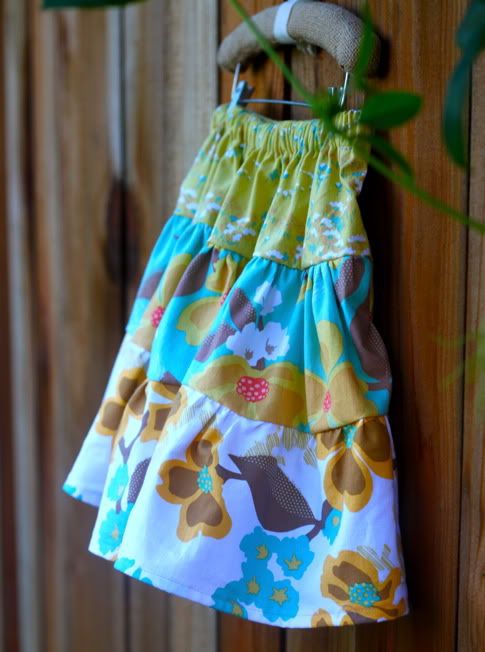
Sigh, I wish I was little enough to wear a pouffy layer cake skirt like this.
Deelish.
Labels: Clothing, Gifts, In One Evening, Kids, Serging, Sewing
posted by Jaime @ 2:00 AM
![]()

40 Comments:
Oh, my girls will love this skirt. I will have to whip some up for the spring time, at the moment it is just horrible here, grey and rain.
Very cute! I will have to make one up for the spring, thanks!
I love those fabric choices. I will have to make one for my daughter for spring or summer. I only wish it were warm enough now, but alas it is 12 degrees outside right now. A little too nippy for a cute skirt like that.
I am planning to try kids cloths for the first time. .. as soon as my pot holder is finished=) I'm going to make spring outfits for my kids. This skirt would be perfect step into cloths!
So, I'm trying to figure out if I need to make the rows wider & longer for my 4 yr old daughter who wears between a 3T & 4T usually. What size does your daughter usually wear? I'll obviously have to adjust for my 7 yr. old!
I love that fabric! So cute.
Soooo cute!!! Maybe I can get my 11 year old into skirts again.
Great tutorial! Bookmarking it for this spring!
Love this! Thanks for the tutorial!
Im totally going to make one in Voile for myself! Ive been saving some Anna Maria Horner Innocent Crush.
neubiewaters, scarlet wears a 4T so this size should work!
skirt weather?? I had to go back and check the date of this post. It's so so cold in Chicago! Bookmarking for when it gets warm ;)
Completely Yummy! I have three skirts to make now, although it won't take any time at all with your fabulous tute! Spring time is just around the corner! Yippee!
I love this skirt. I am going to try this with some fleece. I know it will be challenging, but since it's so cold here I thought I would give it a go! Wish me luck :)
Trying to make us jealous? Skirt weather where you are, parka, hat, scarf, mitten weather where I am.
Liza-Fleece is an awesome idea. Also love this with tights/leggings&boots for cold weather layering. I can also see it in a light corduroy. So many possibilities! Don't wait til spring, I say!
So pretty! I'm so jealous of warm weather. Gag. Anyway, I bet you'd look awesome in a layered skirt- one with less colors might look more grown up.
You could so make one for yourself! Just do it in color block like the top white, the middle grey, and the bottom black. It's the patterns that lend it the young look. Go for the soid colors and it will look more adult.
You could so make one for yourself! Just do it in color block like the top white, the middle grey, and the bottom black. It's the patterns that lend it the young look. Go for the soid colors and it will look more adult.
This is great. I have been meaning to make one of these for a loooong time. I will definitely be giving this a try!
Those fabrics really are darling together! I know a little girl who might need one of these... hopefully I, too, can select the perfect fabric combo.
I feel like you read my mind!! Just last night I finally began my first attempt at making my daughter her 1st birthday dress and was working on a ruffle skirt for it. I am definitely a beginner but your site has inspired me to try new things and this was my first "no pattern, wing it" project. I am so glad to now have a little direction! Miraculously I was doing everything pretty much right! Then my borrowed machine broke ! But I am so happy to have some direction now! Your site is amazing! Now to start on her tissue paper #1 for her party/birthday pictures!
i am sooo jealous of your warm weather! I have been freezing my arse off here in NC, we have had unually cold weather for us this year. I turned 38 today and I am realizing that cold and old don't go together! I love the tute and I actually bought a pattern for one similar to this for me because I too am lazy and didn't want to figure out how to do the measurements myself. Of course it is longer with more layers But I am definitley going to make this for my daughter who just happens to be the same size as yours, so thanks for figuring it out for me!
My new sewing machine came with a gathering foot and I just watched a youtube video on how to use it. So I may just have to venture away from my flat straight stitching ways. Too bad I don't know anyone with any little girls =/
I LOVE this! I've paid mucho $ for this same skirt in retail stores several times- no longer!
K so I'm a beginner with a beginner sewing machine. I have some zebra and pink fabric that would be totally cute made into this skirt. But what is a basting stitch? I dont have any ida how to gather it. : (
hi samantha! i'll add that info above. a basting stitch is a regular old straight stitch set to the widest width your machine will allow, which is usually a 5. since the stitch is so wide, it's loose, so you can pull on the bobbin thread and push the fabric to gather it. hope that helps!
Thanks so much!!!!
So, do you sew outside now? That must be wonderful! And, I don't care if I'm too big, I might need to make one of these for myself anyway. Throw away the cares of being an adult by wearing this yummy little skirt! yes.
How much should I take off of each other layer to make it a 2T? I'm afraid I'll cut the strips too short and not have enough gather/ruffle to be cute.
Bwahaha! I had no idea how to do a basting stitch either- I was totally imagining sewing that part by hand. Thanks so much for the great tutorial!
Cute skirt! Lovin' the fabrics! I linked to your tutorial on Craft Gossip Sewing:
http://sewing.craftgossip.com/tutorial-layer-cake-tiered-gathered-skirt-for-girls/2011/01/27/
--Anne
I made an adorable layer cake skirt with girly Duke fabric for adorable Raegan and her Duke loving daddy.
http://saraandspice.blogspot.com/2011/01/layer-cake-skirt-as-seen-on-prudent.html
Hi! HELP! I really want to make this with 3 fabrics I have.. the longest is 35 inches though..(for bottom tier) Can you do some backwards math for me to give me the rest of the tier lengths and elastic? I am not sure what size it will end up fitting though.. :)
So stinking adorable and AGAIN you make it look so easy. Maybe I will try this one first tomorrow. Thanks for having such great tutorials
I featured this in my Weekly Favourites post http://the-red-deer.blogspot.com/2011/02/weekly-favourites_20.html
I featured this in my post today, and since nothing for me works like its supposed to - its a little different in the end. Please go look when you have time and tell me it isn't as bad as I think. Love your site!!! www.mypetticoatisshowing.blogspot.com.
I got my gathering foot and attempted ruffles! With the tightest tension I got some really awesome ruffles along with the foot I can attach the top layer while it gathers the bottom layer.. I highly recommend buying this foot for the price it is to cut out three steps from making a layer skirt ;)
Thank you so much for posting this. I made this skirt as my first sewing project on my new sewing machine - and the first sewing I've done in over 20 years. It's not perfect but I think it is beautiful! Directions were great and your photos were inspiring. Thanks!
This was a great tutorial. I just made two skirts and blogged about it here:
http://tjasonandamy.wordpress.com/2011/10/22/birthday-cake-skirts/
So cute!
Post a Comment
Subscribe to Post Comments [Atom]
<< Home