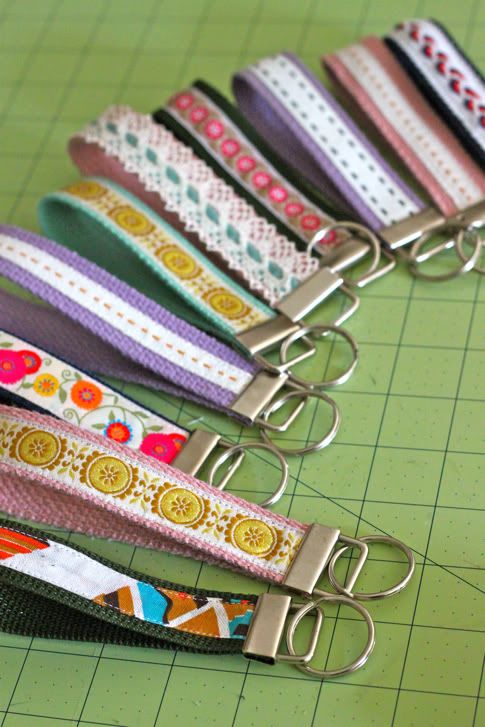
How to Make A Wristlet Key Fob
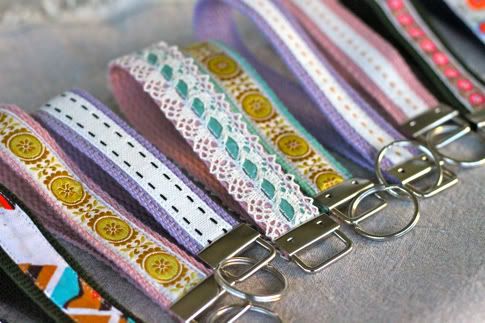
These little key fobs are such a fun way to use bits of pretty trim to make easy and VERY inexpensive stocking stuffers!
You just need a few supplies and a few minutes and you'll have little custom homemade gifts for all your favorite ladies. And also, totally an appropriate handmade man-gift if you choose the right styles.
I love pretty ribbons. It's so nice to get to use 'em and share 'em.
Learn How to Make A Wristlet Key Fob after the jump...
And remember to leave a comment on this or any/all posts this week - you could win a magical glitter assortment of joy.
How to Make A Wristlet Key Fob
-First you'll need key fob hardware. I picked mine up at Amazon - 50 sets for $19 - so that's 38 cents each.
-You'll also need some cotton webbing. Since I bought 1" key fob hardware, I picked up a few yards of 1" cotton webbing at my local fabric store in a bunch of sweet colors. You can get 3 or 4 out of a yard, and a yard was 40 cents. So that's an additional 10 cents per key fob. So we're up to 48 cents each.
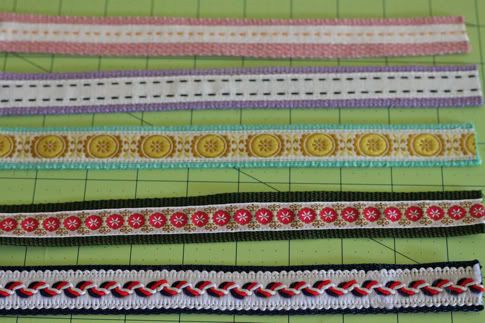
-Then you'll need some pretty ribbon. Make sure it is thinner than your cotton webbing, so 3/4" or less for me. Ribbon ranges in price but let's say it was super fancy ribbon at $2 a yard, so that's an additional 50 cents per keychain.
Total cost? 98 cents each. For a totally adorable homemade gift. Yay!
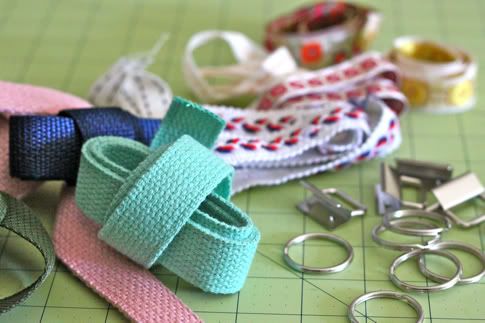
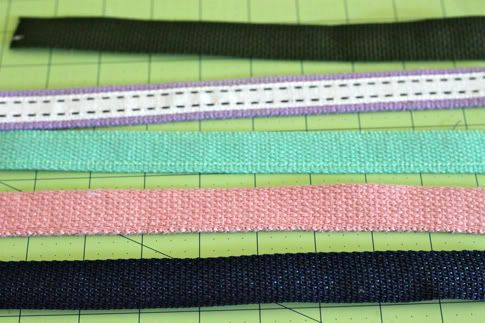
So assemble your supplies:
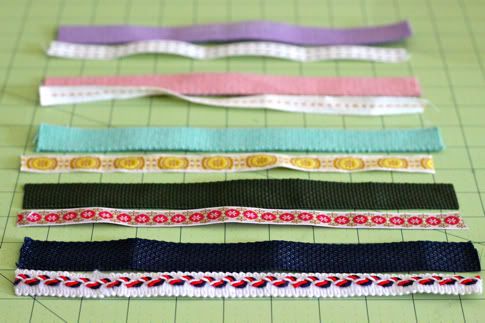
Now cut your cotton webbing and your ribbon into sections. About 10 inches is a good length for a wristlet, but I did some longer and some shorter and they're all just fine:
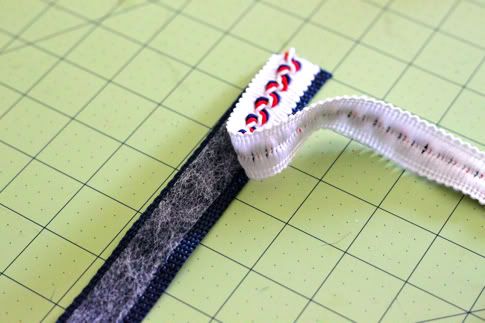
Now cut lengths of fusible tape (I used stitch witchery). You can skip this step, but it does make it a lot easier to sew the ribbon on if you do this first, especially with fancy embroidered ribbons. So iron the ribbon to the cotton webbing with the fusible tape in the middle:
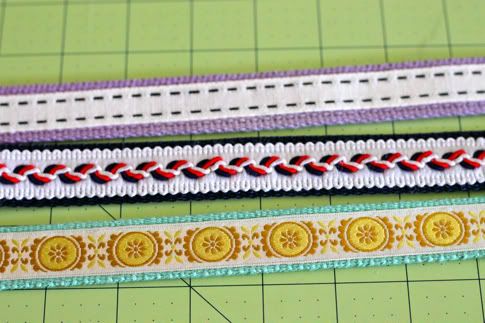
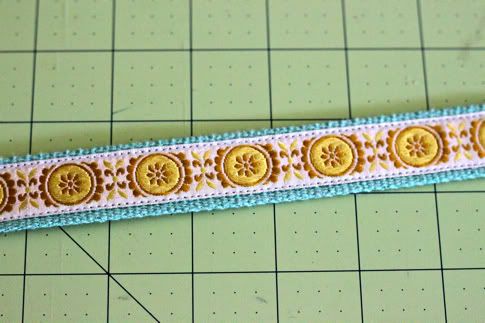
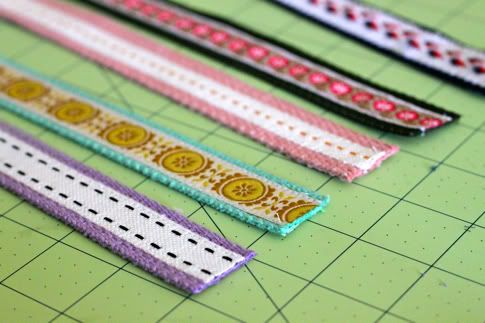
So there you have your ribbons all fused to your webbing:
Now you're going to sew them on. You can use an edging foot if you have it, but I just used my regular foot and went slowly so I didn't mess up. Was quite easy. You'll also want to use a heavy duty needle (actually your regular needle will work fine, but it will become dull from sewing through the thick cotton webbing so you'll want to change it after):
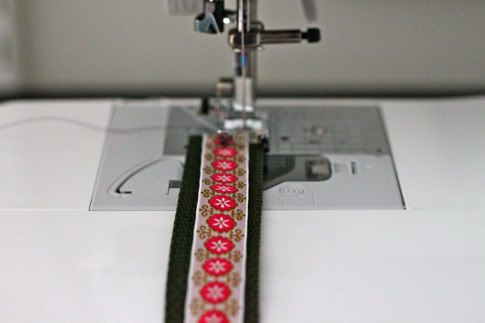
So then sew one side of the ribbon down, then the other:
Consider your thread color choices. Most of my ribbons had white edging, so i used white in my spool, then switched out my bobbin for thread that matched the cotton webbing (or as close to a match as I had in my stash) so you can't see the stitching from the other side:
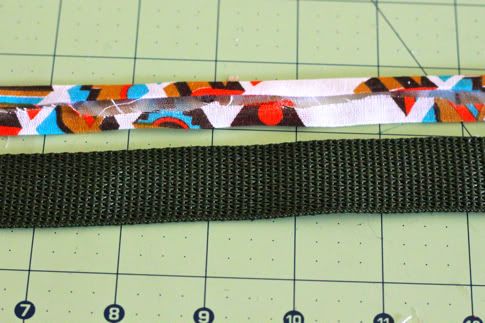
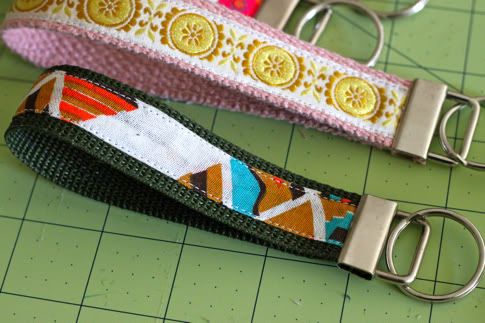
Quick note. I wanted to make one for Carleton Curtis but I did not have any ribbon I felt was sufficiently manly enough. I decided to use some fabric and ironed it into single fold bias tape, then attached as per above. Worked just as well as ribbon!
So there you have your ribbons all sewn to your webbing:
Trim the edges so they are nice and even:
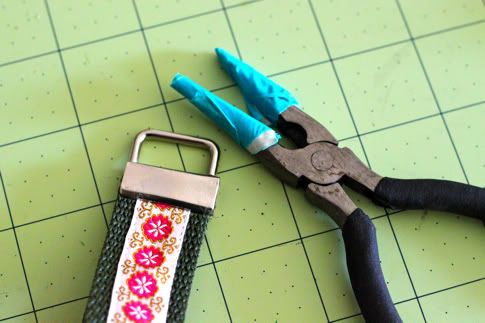
Then grab your hardware. There is a clamp piece that looks like this:
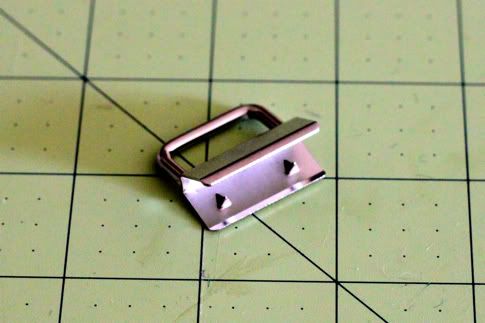
It has two little pokey things that will grab your webbing.
So fold your piece of webbing in half with the ribbon on the outside:
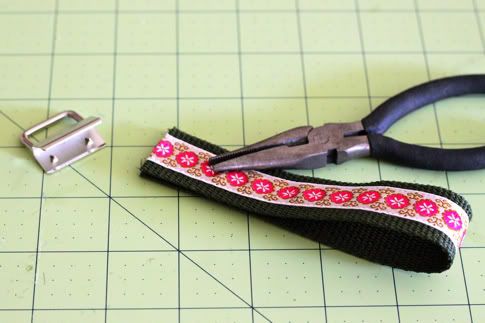
You'll notice my pliers have ridges. These left scuff marks on my fob hardware, so...
I wrapped them in duct tape (dearest duct tape, is there anything you cannot do?):
Problem solved!
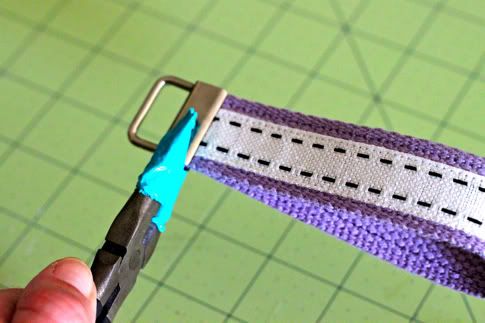
So insert the ends of your cotton webbing into the clamp. Use your pliers to mash the clamp together, starting with a big squeeze in the middle:
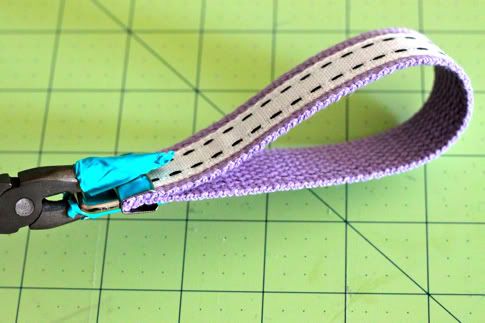
Then a big squeeze on each side:
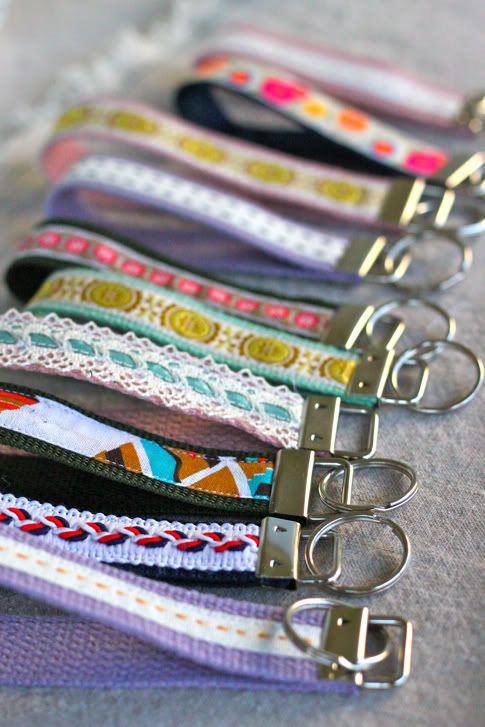
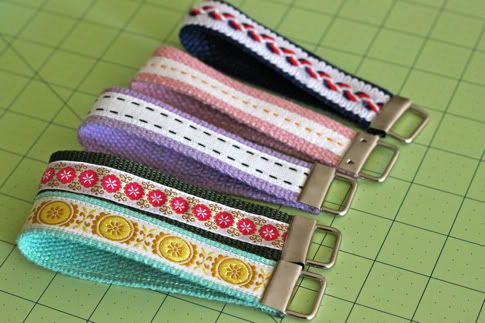
Repeat on all your key fobs:
Now the annoying part: Trying not to break your fingernail while slipping the key rings on the fobs. But carry on, I only lost one nail. Attach all your key rings:
Here is the man-version made with fabric (do you think he will like it? would your man use one?):
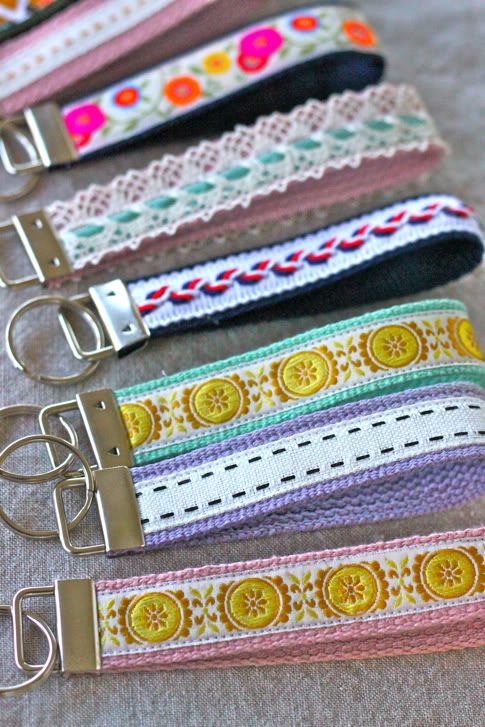
Done!
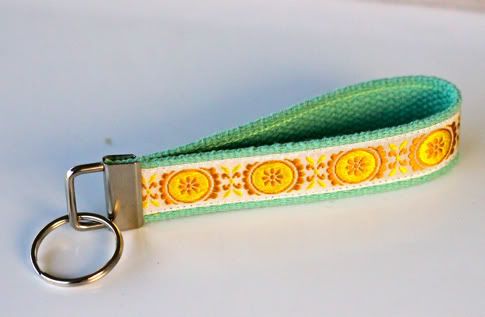
What do you think? Not bad for 98 cents right??
Labels: Accessories, DIY, Gifts, Hot Mess Mommy, Organization, Sewing, Supplies, Under $5, Under an Hour
posted by Jaime @ 2:30 AM
![]()

39 Comments:
Cute!
Wonderful tutorial! However, I'm in France and it's so difficult to find colored webbing & key fob hardware... (Most American shops/stores don't ship to Europe, or with rates that are nearly as high as the cost of the material!)
Thanks for sharing!
linedupuy(at)hotmail(dot)fr
Great tutorial! I love all the embellishments! The ones I have made in the past have just been wrapped in in fabric. Perhaps I will try these this weekend...
Your Blog,
Your Blog,
Your Blog,
Is my Drug
I said. . .
I look forward to your posts every day. Love this tutorial. You would think Duct Tape would be contacting you for projects, tips and tricks. Lovely creative ladies!!! Have a wonderful and blessed Thanksgiving!
I love them all! Beautiful! I think the aqua with the gold ribbon is my fave.
I just picked up some of this hardware, so awesome timing on your tutorial! Yay!
And as for if a guy would use one, my husband groans every time I hand him the keys on the fob. I mentioned I was making some for Christmas and asked if he wanted me to do a plain navy one for him. His reply? "Yeah, if you think I'll wake up as a chick on Christmas morning."
So maybe some guys will, but mine won't...or rather, he'll use one, but I'll hear all about it. ;)
LOOOOOOOVE this! and thank you for providing links to the hardware and webbing!
Love the duct tape idea. :) I think I might've been dwelling in a cave when these fobs became popular. What does "fob" mean?
my hubby and i always exchange something handmade for christmas (his usually comes from etsy, i always make his!) and this year i had NO idea what to sew him with my limited sewing skills, but this...THIS he would totally dig, i know it! thanks for making a dude-worthy one i can model his after! thanks!
hahaha! I had to laugh at Catherine's comment about her husband. :) My husband doesn't like them either (and I even got him a manly DMB one!). I love them though! I just don't know 50 people to make them for.
Thank you so much for this tutorial because I bought one from etsy but I really wanted more but wanted to know if I can make my own so this was perfect!!
And for those of you who can't use 50 sets there are smaller sets like 20 and 10 on Amazon as well :)
LUV these key fobs!
A cute, quick & cheap idea. Thanks for sharing it! I can see making this for quite a few of my friends.
Super cute!! Great idea for a cheap gift!
My Grandma could sooo use one of these so she will stop loosing her keys!
Might have to put a few more people on my Christmas list now!
I will definitely use this! LOOOOOVE IT!
I love this! i have been looking for a cute idea do do for the family! woohoo this is it! oh and by the way, thank y'all so very much! i read your blog?emails everyday and go back to them often! y'all have relit a fire in me and i am starting my own business! so i owe it all to yall oh and my hubby getting me a sewing machine! :)
love it. awesome idea for stocking stuffers.
Thanks for this-I have wanted to learn how to make these! Beautiful!
Just when I thought I already had a plan for Christmas gifts for all the girls at my office you give me something that's even easier and cuter. Stink! (I guess having to choose between 2 cute and easy ideas isn't the worst). Another option is using invisible thread for your top thread...it's a little squirrelly at first, but once you make some minor adjustments (loosen upper tension and increase stitch length a bit) you'd be good to go for all your trims no matter the color.
For men, I'd think that they may want it a bit shorter? BTW, there's a key chain "clapper" at my local Target - just fyi for the moms that lose keys or have kids that like to carry them and drop them into the sofa before Mommy finds them - oops, is that just me? Anyway, the keychain beeps when one whistles for it. It's definitely on my list. :)
I love them and they are such a great gift idea!
FANTASTIC!! Definitely ordering the fobby things from Amazon! Great Gift!
Lorraine
Thanks so much for sharing. I've been looking for great gift ideas and I am definitely going to use this one!
They work good in large purse you can find
them easy.I like that if I am just running in
and out it hangs on my wrist so I can get to
it for Door locks.
They hold up well I have had this one for over a year.We had a recycle Christmas theme one year 2008.
what a great idea! I would love to make these some day!!
I've been looking for a good tutorial on how to make these. Thanks!!
love it! i'm going to alter this idea (plus your D ring belts tute) into some belts for my little gal!
What a great idea! Love it :)
its perfect...i am going to try it!!
I just bought all of the stuff to make some of these. I am excited! The only bummer was that the cheapest I could find webbing was $1.99/yard, but that still makes them a pretty inexpensive gift. Thank you for the tutorial.
TFS I am so going to do this for Christmas gifts, again TFS
Those are really nice - great idea for gifts! Do I think a man would like it? Yes, if you remove the ribbon on top. Possibly if you used camouflage ribbon or fabric instead. No, not the way it is now - but what do I know?
Great Idea
Great party favor idea. Could be used to hold a gift tag on the top of a package. So many fun uses for these inexpensive goodies.
do you sell these on etsy?
It's perfect! I'd been wanting to make one of these but didn't know I was going to; now I do! Thanks!!
Thank you for this awesome tutorial!
Post a Comment
Subscribe to Post Comments [Atom]
<< Home