Crayon Apron Tutorial

Oh my, could this be any more adorable? I know Scarlet would LOVE one, I can't wait to sew it up. This tutorial is so clear and cute that I just had to ask Samantha of Bobaloo Kids to share it with you! Take it away Samantha:
Hi everyone! I’ve made quite a few of these super-cute crayon aprons for the little artists I know and they’re always a big hit. They’re also available in my Etsy store – stop by and take a look!
Get the full Crayon Apron Tutorial after the jump...
And remember to leave a comment, you could win that cozy Bamboo Ewe yarn!
Crayon Apron Tutorial
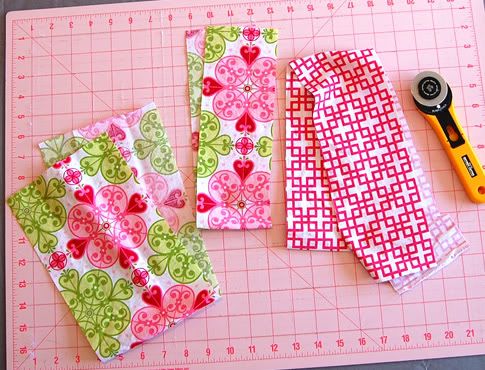
Here’s what you’ll need:
- 1/4 yard main fabric (a fat quarter works, too)
- 1/8 yard contrast fabric (for the waistband)
- thread, scissors, and pins
- a marking pencil or pen with water soluble ink
- ruler
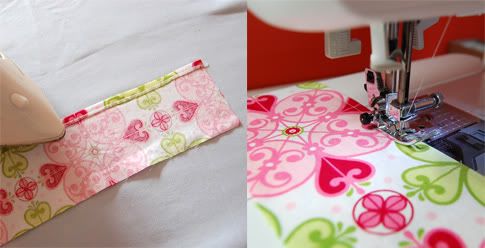
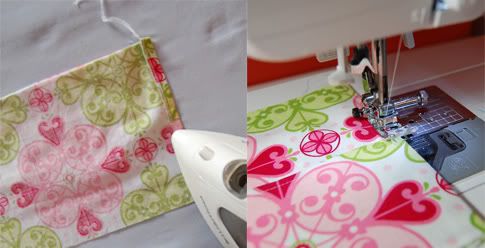
2. Finish one long edge of your pocket. I usually use my serger, but you can also just zigzag it on your regular machine. Turn the finished edge under about 1/4” and press. Topstitch close to the folded edge.
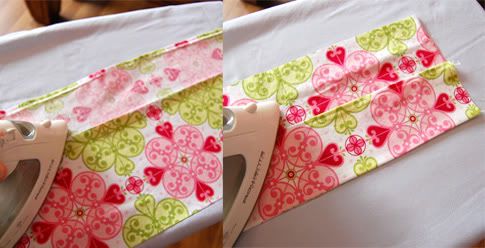
3. Lay your finished pocket right side down on the wrong side of the main apron piece, matching up the long unfinished edges. Serge (or stitch a 1/4” seam) the bottom edges together, open the pieces up, and press the whole thing flat.

Flip the pocket piece to the right side of the main apron piece and press again, enclosing the bottom seam.
4. Serge or stitch the short sides of the main apron piece, joining the pocket and main piece together. Turn both short edges under 3/8” or so to the back side of the apron and topstitch close to the folded edge.
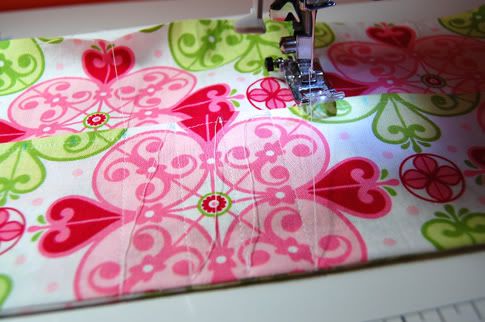
5. Now for the fun part – the little crayon pockets! Starting in the middle and working your way out to both sides, use your ruler to make little marks at the top of the pocket every 3/4”. If you’re worried about stitching straight lines, you can also mark the bottom of the pocket (and even draw in the whole stitching line if you’d like).

6. Moving top to bottom, stitch straight down the pocket through both the pocket and main piece of fabric, making 24 individual pockets (you’ll have a little space left at each end). Don’t forget to backstitch a few stitches at the top and bottom of each line of stitching to keep the pockets nice and secure. I usually don’t bother snipping the threads until the very end – it’s faster that way and easier to just lift the needle and move to the next line.
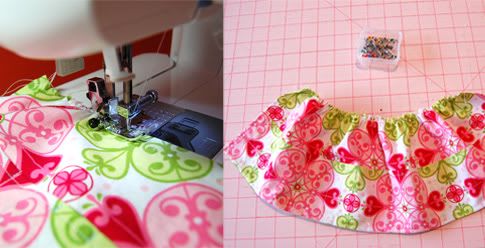
7. After trimming all those little threads, gather the top edge of the apron. I usually set my machine to the highest tension (9 on my Brother machine) and longest stitch length (5.0), but you may have to fiddle with your machine settings a little. Run a line of stitching about 1/4” from the top unfinished edge of the apron. It should gather up quite a bit on its own. Pull the bobbin thread to gather the fabric tighter if you need to – the top edge should measure about 11” once it’s all gathered up.
8. Match up the center of the apron piece and the center of one long edge of the waistband right sides together with the raw edges even. Stitch the apron piece onto the waistband with a 1/2” seam.

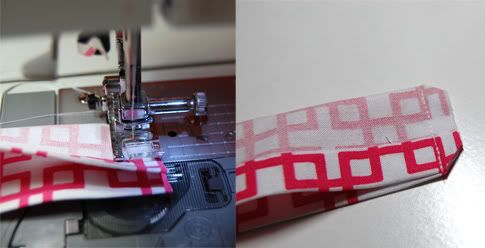
9. Now we’ll finish the ends of the waistband. Turn under both long edges of the waistband 1/2” and press flat.

Fold the waistband in half lengthwise, right sides together, and stitch a 1/2” seam at each short end. Clip the corners and flip right side out, so the waistband is folded in half lengthwise, wrong sides together, and the pressed-under edges are sandwiched inside.
10. Match up the long folded edges of the waistband and pin together, aligning the folded edge with the row of stitching on the apron piece. Stitch 1/4” away from the long edge of the waistband to join the two layers. Iron the waistband flat.

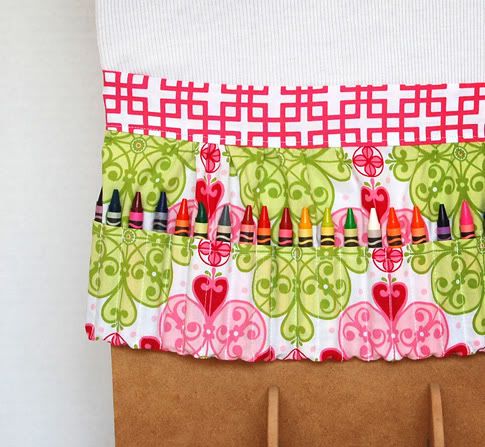
Now load that crayon apron up with a fresh box of Crayolas and put it on your favorite kiddo!
Eeeek! Don't you love it? let Samantha from Bobaloo Kids know what you think in the comments. And let's respect her copyright: Please use this tutorial to make adorable little aprons for your own kiddos or as gifts, not to sell. Thanks!
Labels: Accessories, Art, Gifts, Kid Activities, Kids, Organization, Sewing, Templates
posted by Jaime @ 3:30 AM
![]()

27 Comments:
Ack! This is a fabulous tutorial and I can't stand the girl's cuteness! I mean, she's standing there with a crayon apron in a Superman pose. Cuteness overload for sure!
This is so cute! I've got to make this one day :)
soooo cute! too bad my 4 month old baby doesn't know how to color yet. =\
what a nice idea
That's adorable. I wish my nieces were into colouring (they take the easy route - stickers). Nevertheless I love photo tutorials because I always learn something. Thanks!
Cute tutorial and gorgeous child. Love it!
So cute - I know a few little ones who would dig these!
these are so cute! Now I want what to make my friends Daughter and Son for their birthdays!!!
This is so cute!! Wish I knew how to sew!! Maybe one day.
This is so cute! I wonder if you can make an adult size to fit say...chocolate bars.
a chocolate bar apron would be beyond awesome! love it!
i love this tutorial so much! but also, i love that you are selling these for only $15 in your etsy store! major deal!
This is amazing. I kind of want one.
babe i was thinking a bacon apron might be good for you
Ha ha ha, I seriously just did a post on these a couple days ago!!
www.sheskindacrafty.blogspot.com so funny! Thanks for the actual tutorial!!
That is so cute and she looks so happy to be wearing it! Thanks so much, I'll be linking.
This is sooo cute. I have made the crayon rolls for my twin granddaughters, but I know they will love the crayon apron. I have added the apron to my "to do" list. Thank you!
my husband would TOTALLY love the bacon apron, Jaime. Maybe we have the hot Christmas gift for men on our hands. :)
So cute. I could see my children putting these on, then standing back to back taking 20 paces for a 'crayon-off'. Gotta love western movie influences! John Wayne!
Love this idea! I'm thinking of making a couple for my nephews for Christmas. Love the face the little girl is making! :)
Great idea! I linked to your tutorial over at Craft Gossip Sewing:
http://sewing.craftgossip.com/tutorial-kids-crayon-apron/2010/11/19/
--Anne
is it wrong that i'm pretending like my 5-month-old son will LOVE this, so i can make one and then use it for myself? i also just decided this is the PERFECT gift for a 4-yo friend of mine whose birthday is tomorrow, and i'll have NO PROBLEM whipping one up in 10 minutes while my baby is playing, right? RIGHT? what's that? did you say i haven't caught up with today's laundry and dishes? i can't hear you!
OMG this is so cute! The pattern is CUTE (Kudos for thinking this up!) and the kid, Oh my goodness! AH-DOH-RAH-BLE!!! And the fabric of the tutorial...I know I'm late to the party but can someone please tell me where to get it?! My daughter refuses to wear anything other than pink and this pink/green/white fabric is so cute. It's got hearts to boot! She would so love this!
Aaaw, thanks for the compliments, Marty! I like to pretend she gets her looks from me, but she's the spitting image my husband. :)
The main fabric is from Mezzanine by Patty Young. I can't remember the exact name of that print, but it's not too hard to find. And the waistband might be Dolce by Tanya Whelan... I can't remember for sure. I just wish whatever it was I would have bought more!
I (finally) got around to making 3 of these for my cousins - so cute! And after the first one, they whipped up really quickly.
cant wait to make one
That is absolutely adorable!!! My daughter got an easel for her birthday and she so needs one of these!!! Thank you for sharing!
Post a Comment
Subscribe to Post Comments [Atom]
<< Home