body { background:#fff url("http://www.blogblog.com/dots/bg_dots.gif") 50% 0; margin:0; padding:0 10px; text-align:center; font:x-small Verdana,Arial,Sans-serif; color:#333; font-size/* */:/**/small; font-size: /**/small; } /* Page Structure ----------------------------------------------- */ @media all { #content { background:url("http://www.blogblog.com/dots/bg_3dots.gif") no-repeat 250px 50px; width:700px; margin:0 auto; padding:50px 0; text-align:left; } #main { width:450px; float:right; padding:50px 0 20px; font-size:85%; } #main2 { background:url("http://www.blogblog.com/dots/bg_dots2.gif") -100px -100px; padding:20px 10px 15px; } #sidebar { width:200px; float:left; font-size:85%; padding-bottom:20px; } #sidebar2 { background:url("http://www.blogblog.com/dots/bg_dots2.gif") 150px -50px; padding:5px 10px 15px; width:200px; width/* */:/**/180px; width: /**/180px; } } @media handheld { #content { width:90%; } #main { width:100%; float:none; } #sidebar { width:100%; float:none; } #sidebar2 { width:100%; } } html>body #main, html>body #sidebar { /* We only give this fade from white to nothing to browsers that can handle 24-bit transparent PNGs */ background/* */:/**/url("http://www.blogblog.com/dots/bg_white_fade.png") repeat-x left bottom; } /* Title & Description ----------------------------------------------- */ @media all { #blog-title { margin:0 0 .5em; font:250%/1.4em Georgia,Serif; color:#353; } #blog-title a { color:#353; text-decoration:none; } #description { margin:0 0 1.75em; color:#996; } #blog-mobile-title { display:none; } #description-mobile { display:none; } } @media handheld { #blog-title { display:none; } #description { display:none; } #blog-mobile-title { display:block; margin:0 0 .5em; font:250%/1.4em Georgia,Serif; color:#353; } #blog-mobile-title a { color:#353; text-decoration:none; } #description-mobile { display:block; margin:0 0 1.75em; color:#996; } } /* Links ----------------------------------------------- */ a:link { color:#488; } a:visited { color:#885; } a:hover { color:#000; } a img { border-width:0; } /* Posts ----------------------------------------------- */ .date-header { margin:0 0 .75em; padding-bottom:.35em; border-bottom:1px dotted #9b9; font:95%/1.4em Georgia,Serif; text-transform:uppercase; letter-spacing:.3em; color:#663; } .post { margin:0 0 2.5em; line-height:1.6em; } .post-title { margin:.25em 0; font:bold 130%/1.4em Georgia,Serif; color:#333; } .post-title a, .post-title strong { background:url("http://www.blogblog.com/dots/bg_post_title.gif") no-repeat 0 .25em; display:block; color:#333; text-decoration:none; padding:0 0 1px 45px; } .post-title a:hover { color:#000; } .post p { margin:0 0 .75em; } p.post-footer { margin:0; text-align:right; } p.post-footer em { display:block; float:left; text-align:left; font-style:normal; color:#996; } a.comment-link { /* IE5.0/Win doesn't apply padding to inline elements, so we hide these two declarations from it */ background/* */:/**/url("http://www.blogblog.com/dots/icon_comment.gif") no-repeat 0 .25em; padding-left:15px; } html>body a.comment-link { /* Respecified, for IE5/Mac's benefit */ background:url("http://www.blogblog.com/dots/icon_comment.gif") no-repeat 0 .25em; padding-left:15px; } .post img { margin:0 0 5px 0; padding:4px; border:1px solid #cca; } /* Comments ----------------------------------------------- */ #comments { margin:0; } #comments h4 { margin:0 0 10px; border-top:1px dotted #9b9; padding-top:.5em; font:bold 110%/1.4em Georgia,Serif; color:#333; } #comments-block { line-height:1.6em; } .comment-poster { background:url("http://www.blogblog.com/dots/icon_comment.gif") no-repeat 2px .35em; margin:.5em 0 0; padding:0 0 0 20px; font-weight:bold; } .comment-body { margin:0; padding:0 0 0 20px; } .comment-body p { margin:0 0 .5em; } .comment-timestamp { margin:0 0 .5em; padding:0 0 .75em 20px; color:#996; } .comment-timestamp a:link { color:#996; } .deleted-comment { font-style:italic; color:gray; } .paging-control-container { float: right; margin: 0px 6px 0px 0px; font-size: 80%; } .unneeded-paging-control { visibility: hidden; } /* More Sidebar Content ----------------------------------------------- */ .sidebar-title { margin:2em 0 .75em; padding-bottom:.35em; border-bottom:1px dotted #9b9; font:95%/1.4em Georgia,Serif; text-transform:uppercase; letter-spacing:.3em; color:#663; } #sidebar p { margin:0 0 .75em; line-height:1.6em; } #sidebar ul { margin:.5em 0 1em; padding:0 0px; list-style:none; line-height:1.5em; } #sidebar ul li { background:url("http://www.blogblog.com/dots/bullet.gif") no-repeat 3px .45em; margin:0; padding:0 0 5px 15px; } #sidebar p { margin:0 0 .6em; } /* Profile ----------------------------------------------- */ .profile-datablock { margin:0 0 1em; } .profile-img { display:inline; } .profile-img img { float:left; margin:0 8px 5px 0; border:4px solid #cc9; } .profile-data { margin:0; line-height:1.5em; } .profile-data strong { display:block; } .profile-textblock { clear:left; } /* Footer ----------------------------------------------- */ #footer { clear:both; padding:15px 0 0; } #footer hr { display:none; } #footer p { margin:0; } /* Feeds ----------------------------------------------- */ #blogfeeds { } #postfeeds { padding-left: 20px }

Prudent Baby

Get sewing how to, sewing tutorials, and sewing help to learn sewing. We offer sewing tutorial for sewing moms.

Tuesday, February 23, 2010

Apple Bourbon Ice Cream & Basic Ice Cream Making Tips


Yum.  And not that hard.  And no preservatives.  Sweets i don't feel as guilty about giving my kid, without the bourbon of course. Unless we're about to get on a plane, then I add extra.  kidding.

Get the Bourbon Apple Ice Cream recipe and basic Ice Cream Making Tips after the jump...

Apple Bourbon Ice Cream Recipe

Ingredients
2 cups heavy cream
1 cup milk
3/4 cup brown sugar divided into 1/2 cup and 1/4 cup
salt
1/2 tea nutmeg
1/4 cup bourbon (optional)
2 apples peeled and diced
2 tablespoons granulated sugar
1 tablespoon lemon juice
1 egg and 2 egg yolks

1.  In a food processor puree the diced apples, 2 tablespoons of granulated sugar, and 1 tablespoon of lemon juice.  Put in a tupperware or baggie in the fridge.

You can leave a few more chunks then this if you like:


2.  In a sauce pan mix 2 cups cream, 1 cup milk, 1/2 cup brown sugar, and 1/2 tea nutmeg to a simmer (not boil)
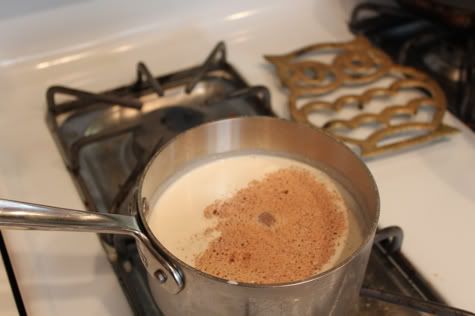

3. In a mixing bowl combine 1/4 cup brown sugar, 1/8 tea salt, 1 egg and 2 egg yolks.


4.  Pour the milk/cream mixture into the mixing bowl slowly and steadily, mixing the whole time.  This will avoid cooking the eggs right away. I should be stirring in this picture but i couldn't stir and take the pic:
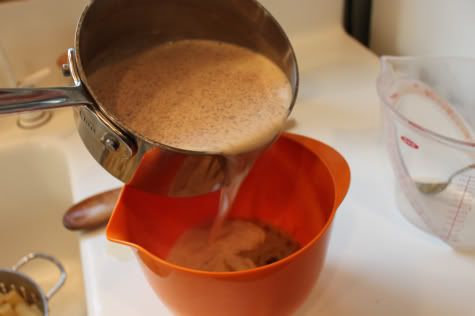


5.  Return the mixture to the sauce pan and simmer until it thickens enough to coat the back of a spoon.

Set the bowl aside and don't reuse it, it had undercooked eggs in it:


6.  Remove the custard mixture from the stove and pour it through a strainer into another bowl.

See how mine has all sorts of solids in the strainer?  That's too many globs, you don't want that.  I turned my head for one minute and the custard started to boil - that cooks the eggs too quickly.  This doesn't make your ice cream totally inedible, but it does mess with texture, it isn't as smooth.  So watch the pan and don't let it boil, let it thicken slowly.  if you see a bunch of steam coming off that means it's about to boil, so pull it off the heat and stir for a few before returning it.  In all my years of making ice cream, I still forget and look away and want to punch myself in the face when I see those bubbles popping up through my custard!

6.  Next add your 1/4 cup bourbon to the mix (or leave it out if you're serving kiddies), cover with plastic wrap and put the whole thing in the fridge and let it cool completely.  Don't be impatient here, if you mix it before it's cool your ice cream won't freeze properly.  Droplets of water in the mix won't freeze and then they will turn to ice crystals in the freezer.  that's no good.

7.  When it has cooled, remove it, stir in the apple mixture, and pour the whole thing into your ice cream maker to freeze.  Should take about 25 minutes.
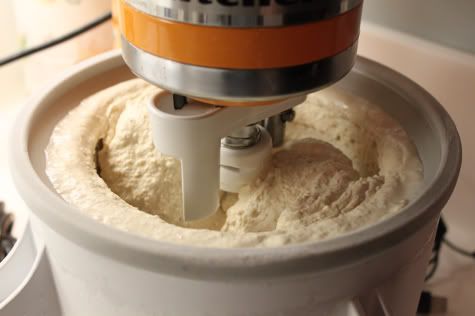
You can eat it soft like this:
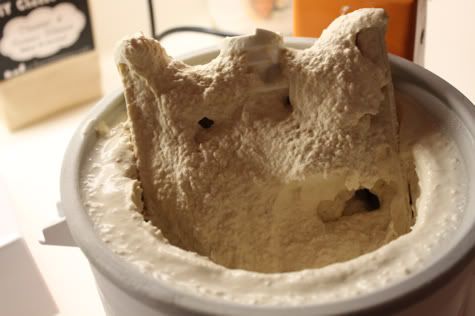
Or put it in the freezer for an hour or two to get firm:
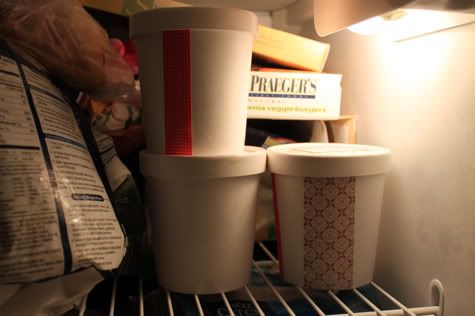

I like to package ice cream in these paper containers, which I've only ever been able to find at Smart & Final.

They are meant for take-out soup and have little venting holes on the lid, so I make sure to cover those with a label to keep the ice cream fresh.  Exposure to air=ice crystals.  I even like to add a piece of plastic wrap pressed right onto the leftover ice cream after we've started eating it. Martha Stewart stick-on ribbons make a cute trim.  Enjoy!


Also if you're curious I use (and adore) the KitchenAid ice cream maker attachment which was rated #1 inexpensive ice cream maker by America's Test Kitchen: KitchenAid Ice Cream Maker Attachment 
They also recommend the Cuisinart ice cream maker if you don't have a Kitchen Aid stand mixer: Cuisinart 1-1/2-Quart Automatic Ice Cream Makers

Labels: , , , , , ,

3 Comments:

Blogger Jacinda said...

As I have mentioned before, when Jaime and I were reunited in San Diego, she brought a few pints of homemade sorbet to my house as an after dinner treat. I will never forget it, I was so impressed.

PS. I also have the Kitchen-Aid Attachment and looove it.

February 23, 2010 at 12:14 PM  
Blogger alix said...

Is it wrong that I *literally* started drooling as I read this post??
YUM!
Also, it's freezing here...and i shouldn't be wanting ice cream.
But still. Mmmmm....

xoxo
Alix
modernkiddo.com

February 23, 2010 at 6:20 PM  
Blogger Amy said...

So happy you passed on the tip about how you package your ice cream. Can't wait to try the recipe.

February 23, 2010 at 10:39 PM  

Post a Comment

Subscribe to Post Comments [Atom]

<< Home