How to Make the Magicalest Magical Tutu Dress of Magic
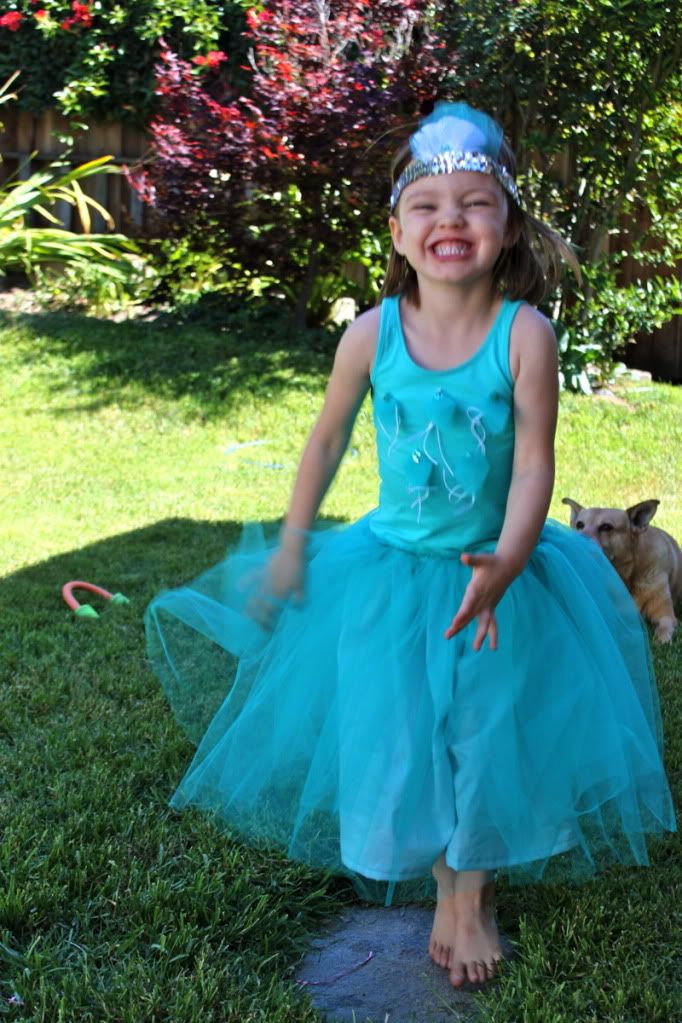
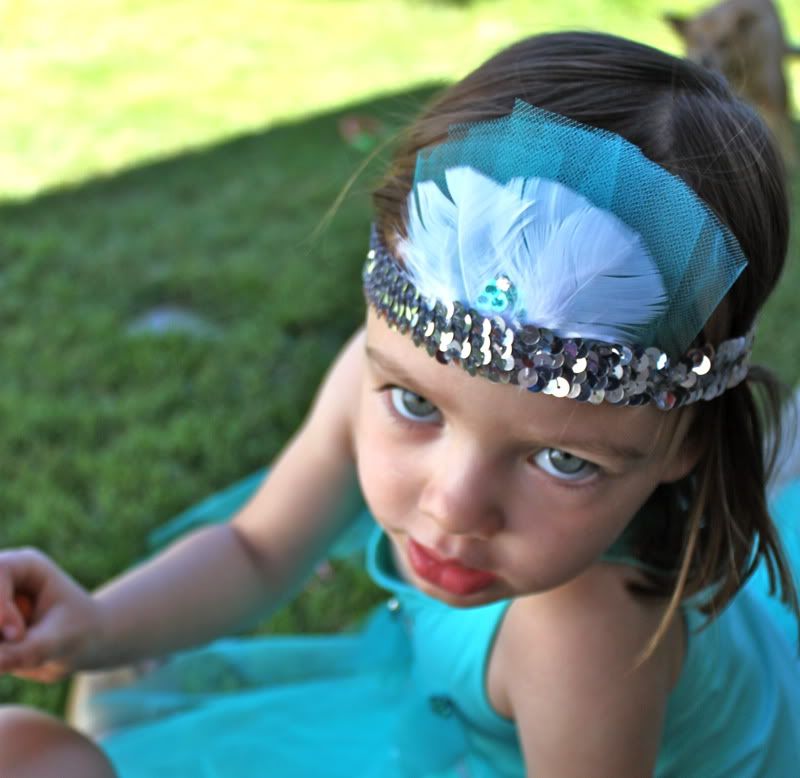
Do you want your daughter to make a face like this?
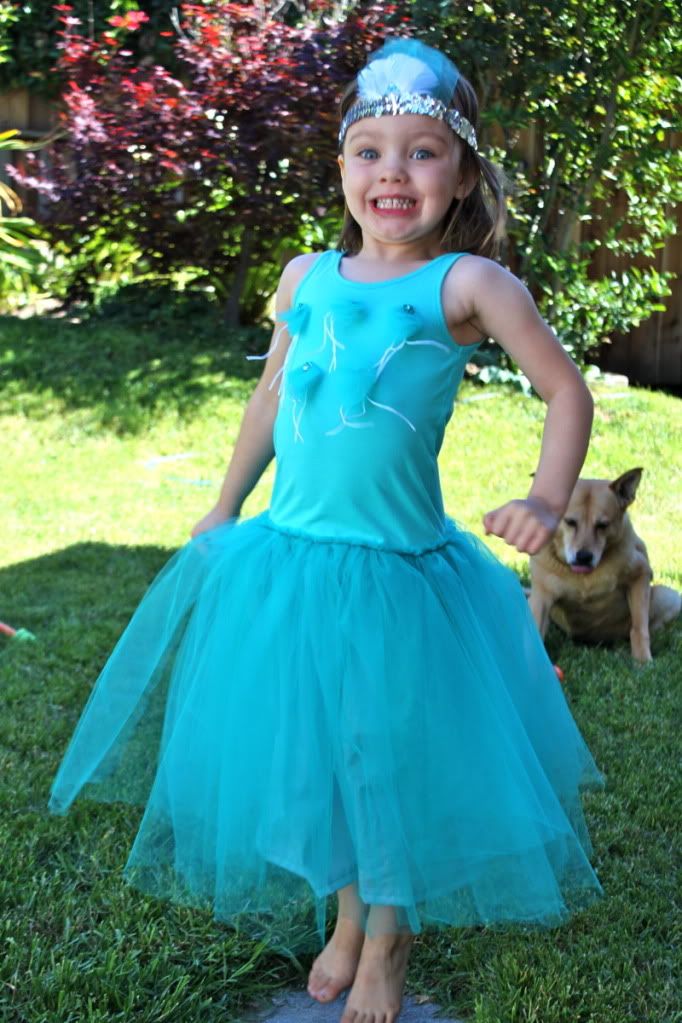
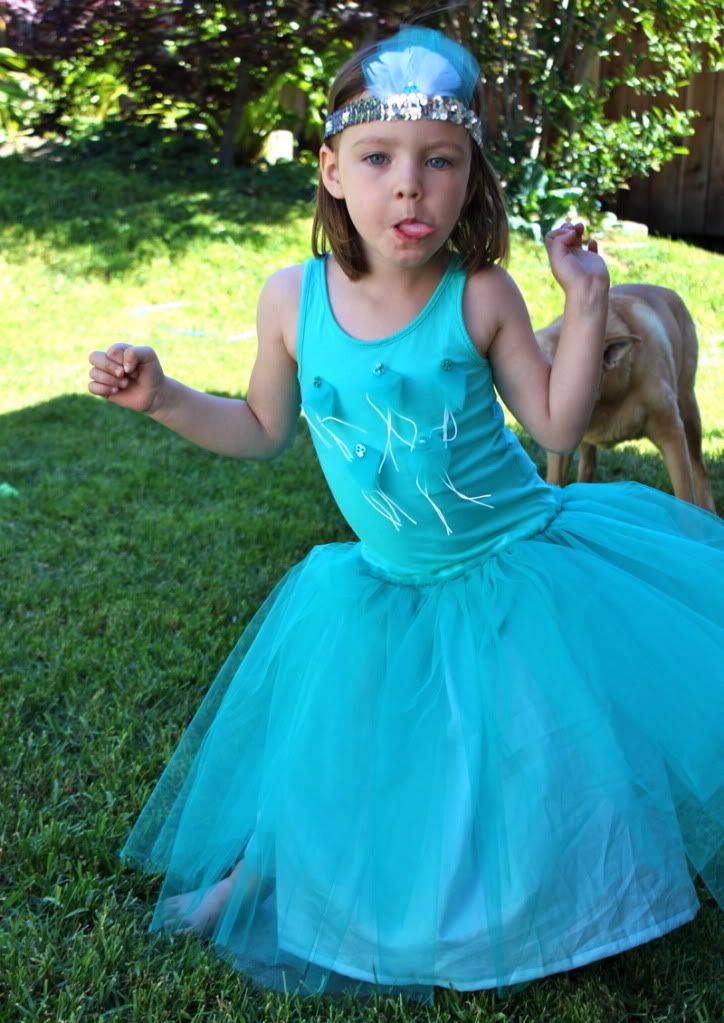
Or like that?
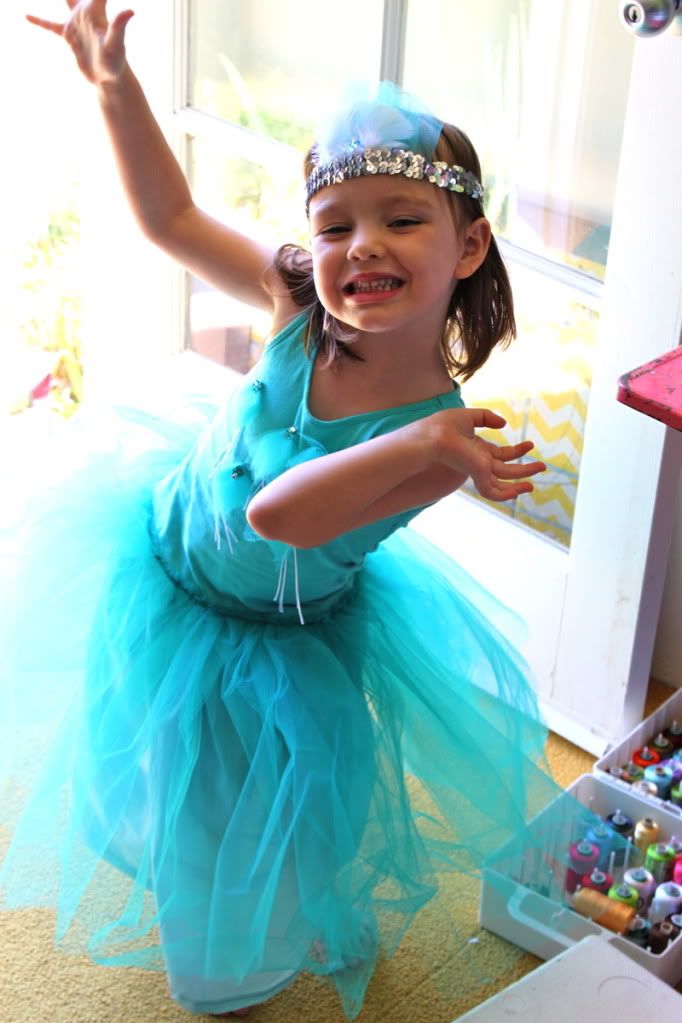
Or maybe this?
Then make her one of these magical tutu dresses of magic.
And watch her flit about the yard in fairy princess heaven. Find out how to make a magical tutu dress after the jump!
Magical Tutu Dress of Magic
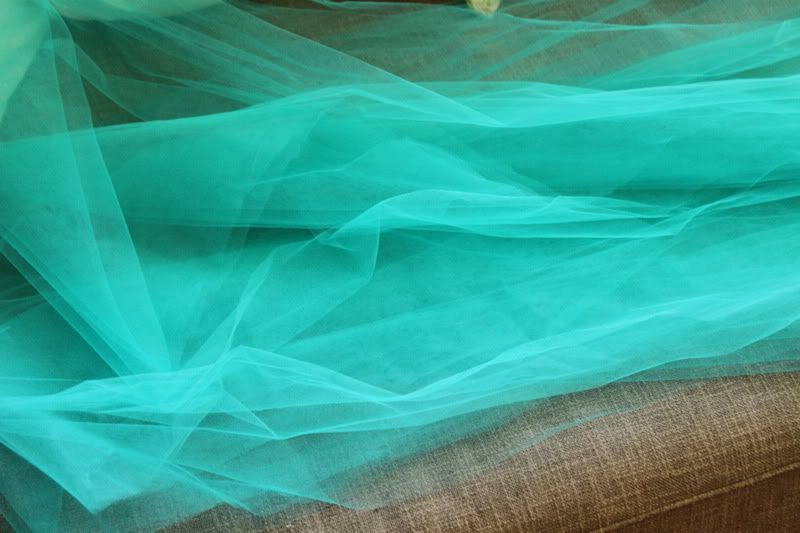
First you'll need some tulle. I used four yards of teal ($4)
, but you can use more or less, it's very flexible, you'll just have a pouffier or less pouffy dress. I cut the four yards along the length into three equal-width pieces (so three pieces 4 yards by 18").
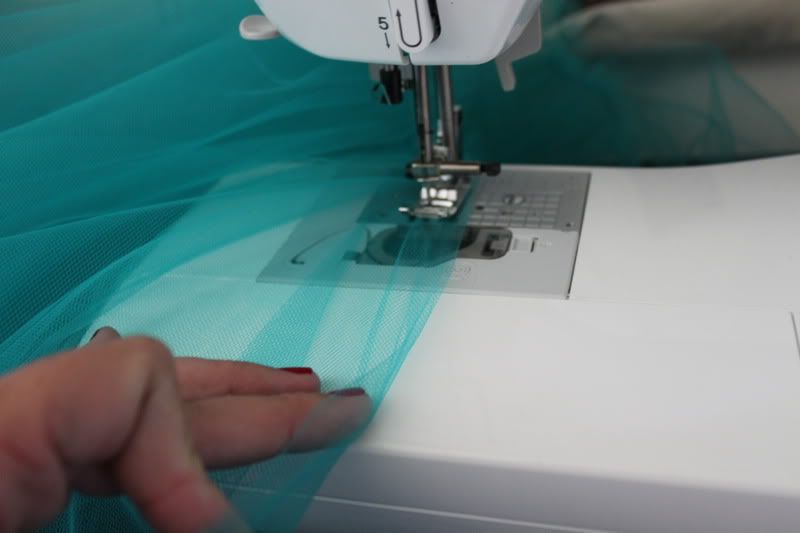
Start with one piece and run it through your sewing machine with matching thread using a basting stitch (a straight stitch set to the widest width your machine will allow, usually a 5) along the long (4 yard) side, about 1/2" in from the edge.
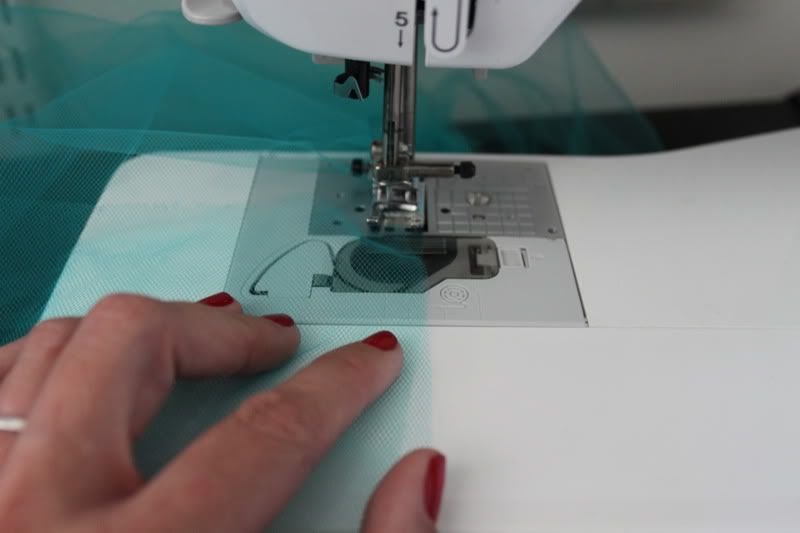
It will start to gather as you sew, that is fine/good.
When you get about halfway through the first piece, layer a second piece on top and continue to sew with a basting stitch. Now you are sewing through two layers.
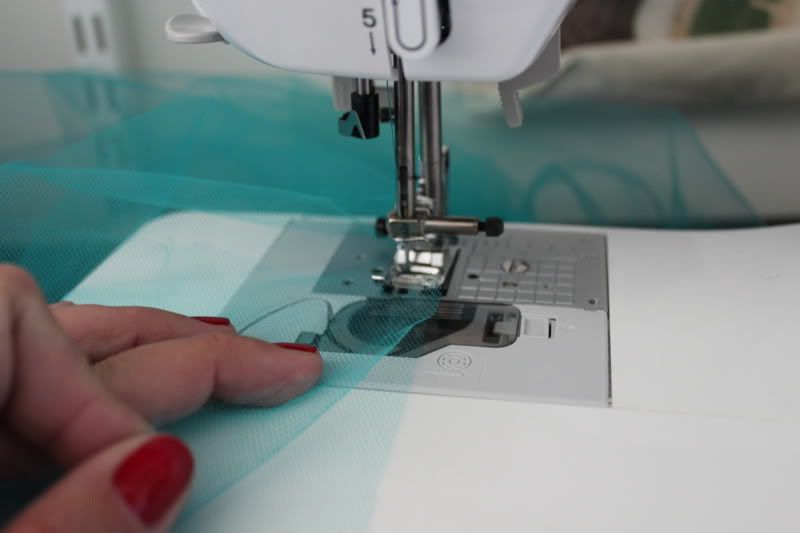
When you get about 1/3 of the way through the second piece, layer on the third piece and continue to sew with a basting stitch. Now you are sewing through three layers.
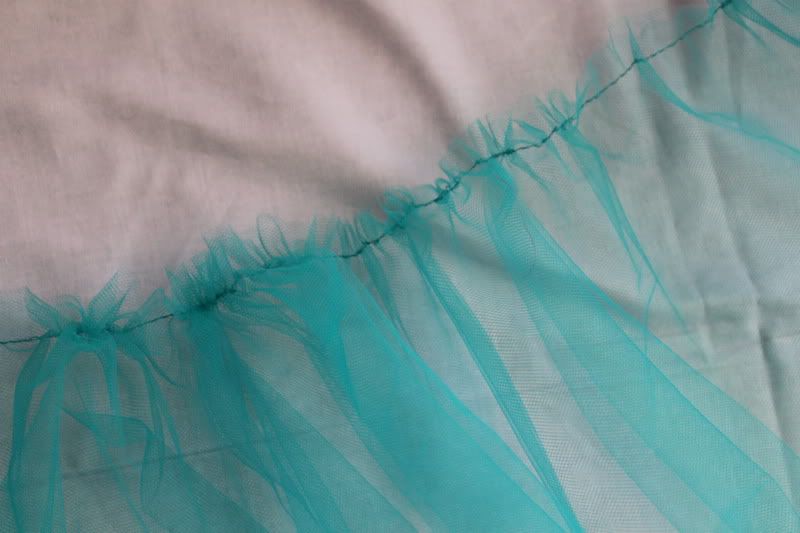
Continue to sew all the way to the end of the third piece of tulle. Leave a long thread at the end.
When you are done, take it all out of the machine and start to gather it. The reason we did it this way was to make sure there was no point on our skirt where the tulle split apart and we had an opening. This is going to allow our skirt to wrap all the way around our girl.
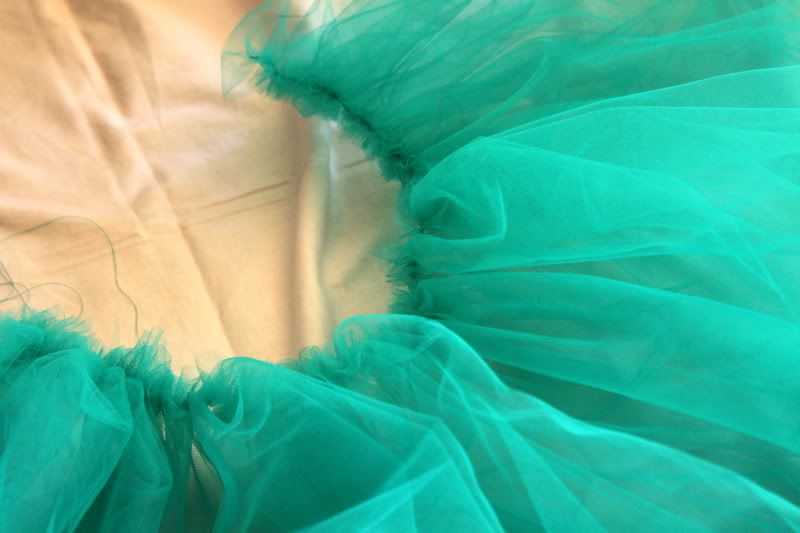
Gather all the tulle up by gently pulling on the bobbin thread and pushing the tulle to gather.
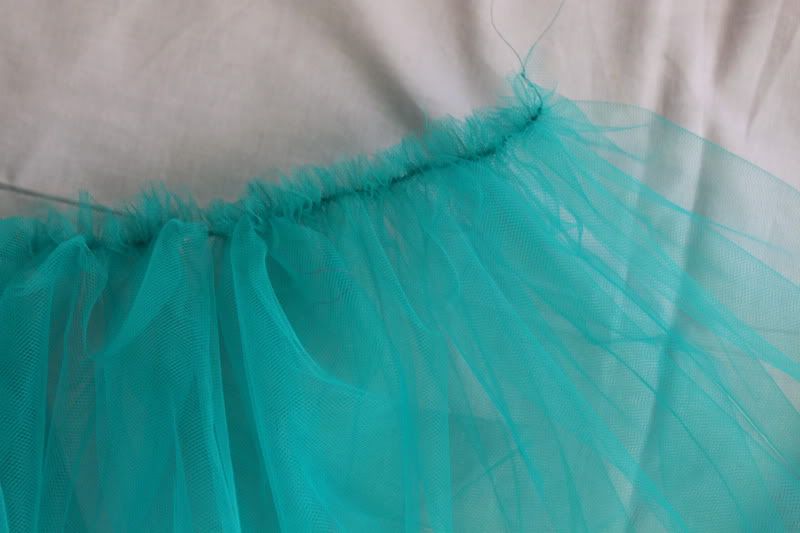
Now it looks something like this.
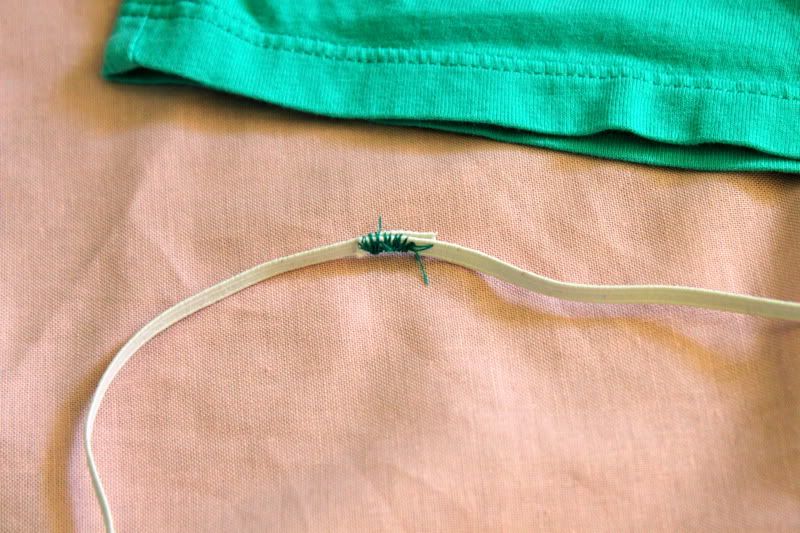
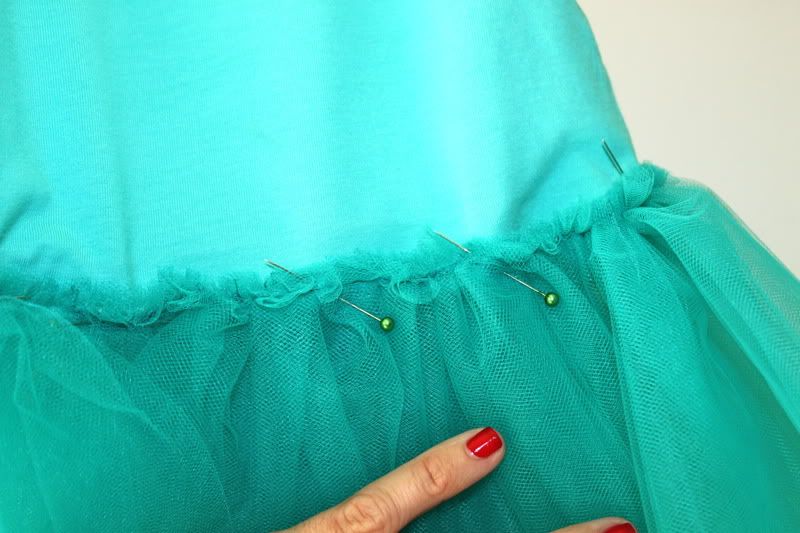
Now grab a tank top (or t-shirt) and cut a piece of 1/4" elastic to about 1/2" longer than the distance around the bottom of the tank:

Sew the ends of the elastic together flat, overlapping 1/2 an inch.
Pin the elastic to the inside of the skirt, right along the basting stitch. Overlap the ends of the skirt (where you have less than two layers of tulle). Pinning this is a bit of a pain, but worth it.

Here is what it looks like from the inside:
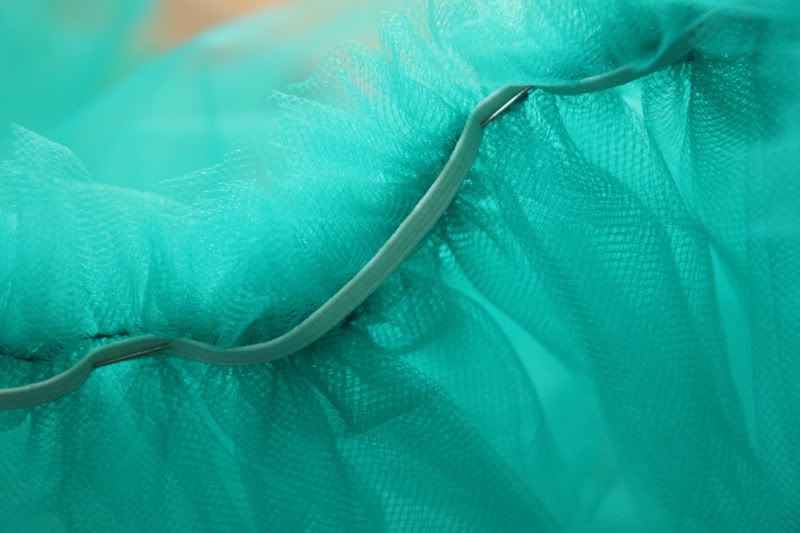
And all the way around.
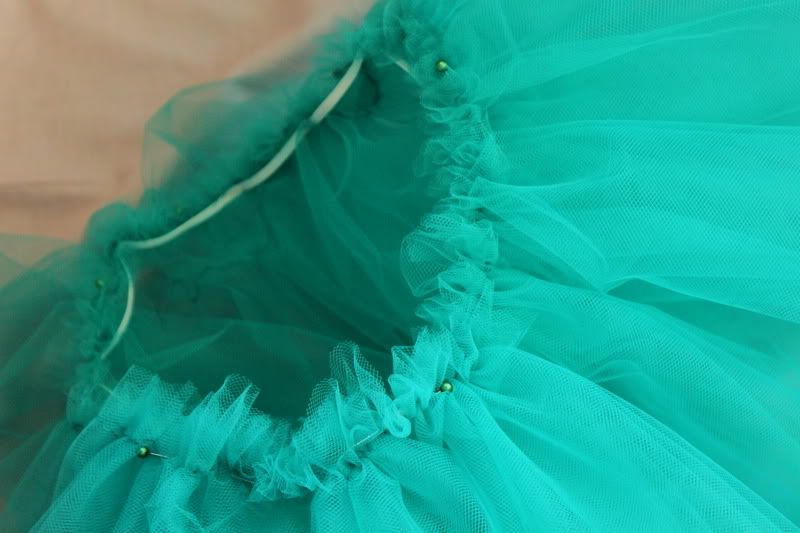
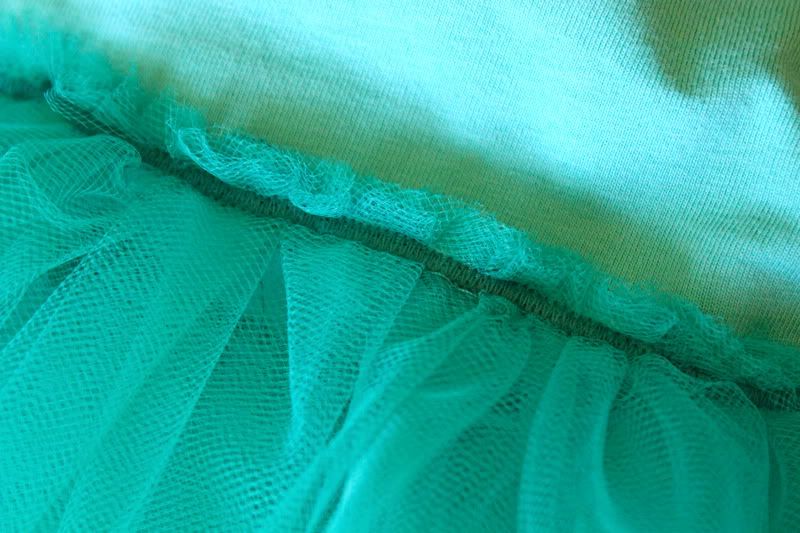
Now go back to your machine and carefully sew the skirt to the elastic along your basting stitch line with a straight stitch. The top edge may be kind of uneven, like so:
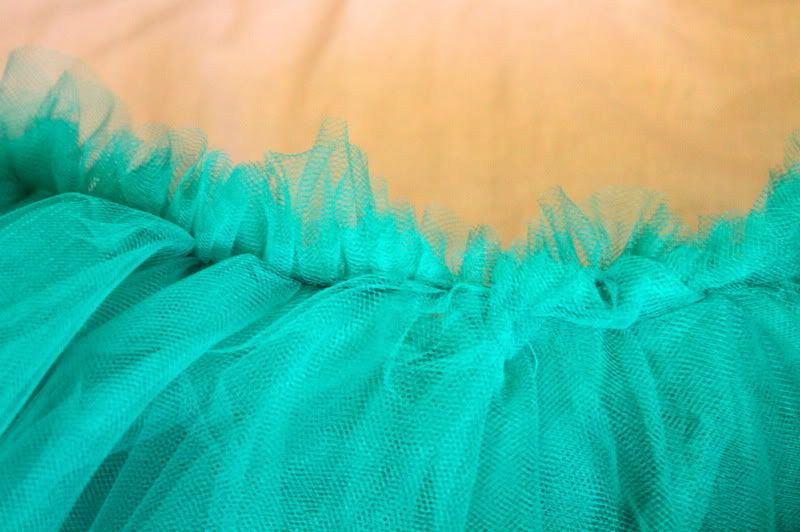
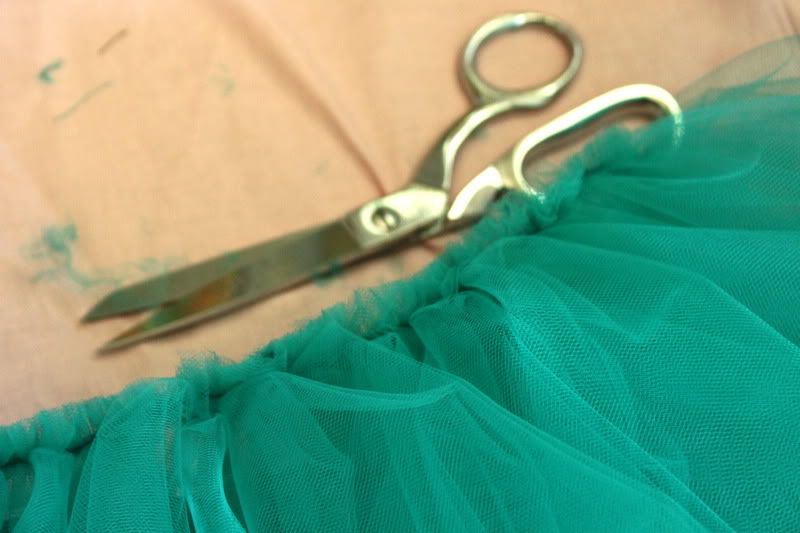
So grab your scissors and trim it so it's even:
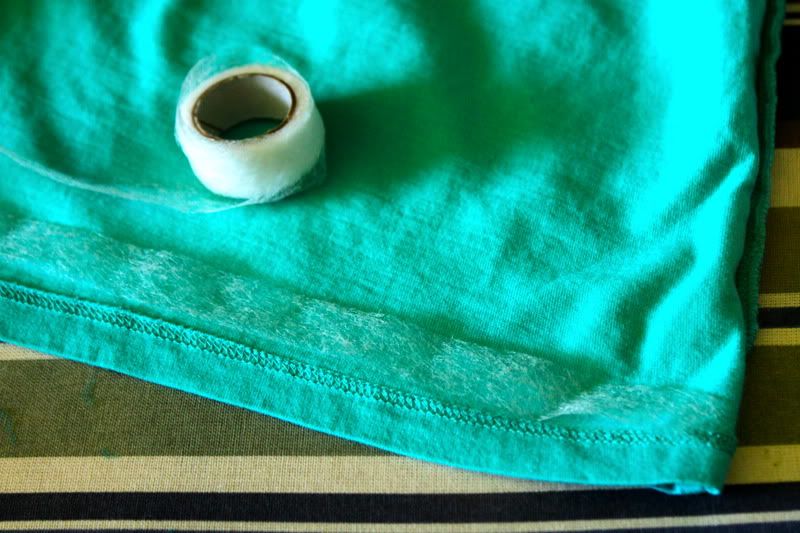
Now back to your tank. Turn it inside out. Use some stitch witchery or other fusible tape right above the bottom seam (or if you want to cut your tank shorter first, go ahead and do that):
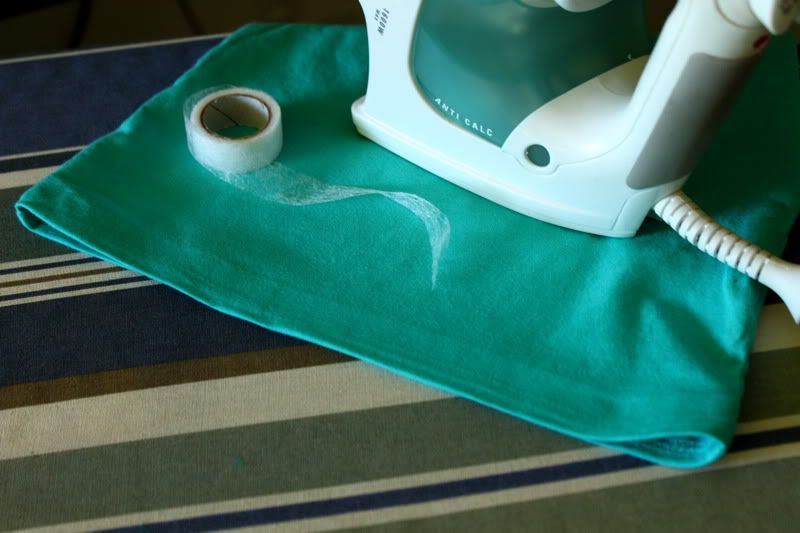
Fold the bottom of the tank up over the tape and iron it in place. This will help stabilize the jersey when we sew our skirt on.
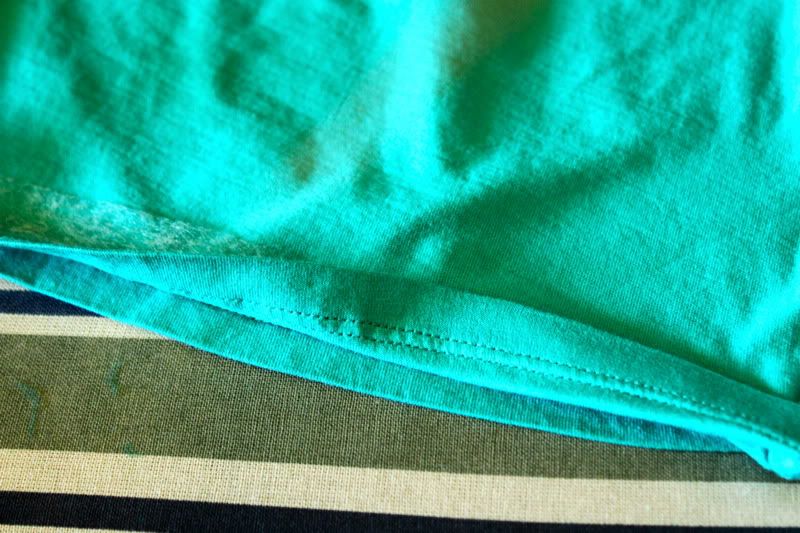
So now your tank looks like this:
Go ahead and pin your skirt to the tank on the right side, on top of the taped area:
Sew it in place with a tight zig zag stitch to cover the white elastic. Next time I am going to make the dress all white to begin with, then dye it, for an even more magical garment dyed look. But this covered the elastic quite well and gave it a polished look:
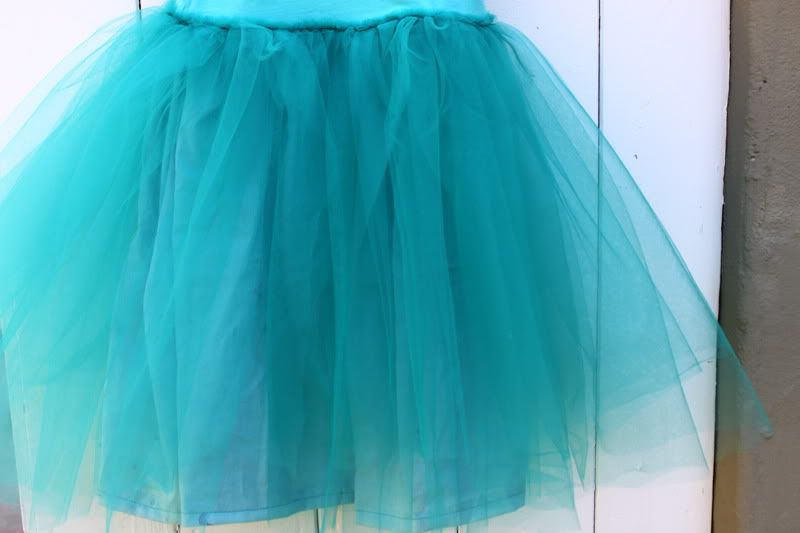
Now your dress looks like this. Pretty cute as is. Try it on your girl and trim the bottom of the tulle to the length you prefer.

I had actually planned to leave it like this, but it was a little too see-through for my tastes (cause i know this child is going to want to wear it to the grocery store and what not), so I used some blue voile from fabricworm to add a skirt inside, and sewed it to the inside of the tank under the tulle, but this is not necessary.
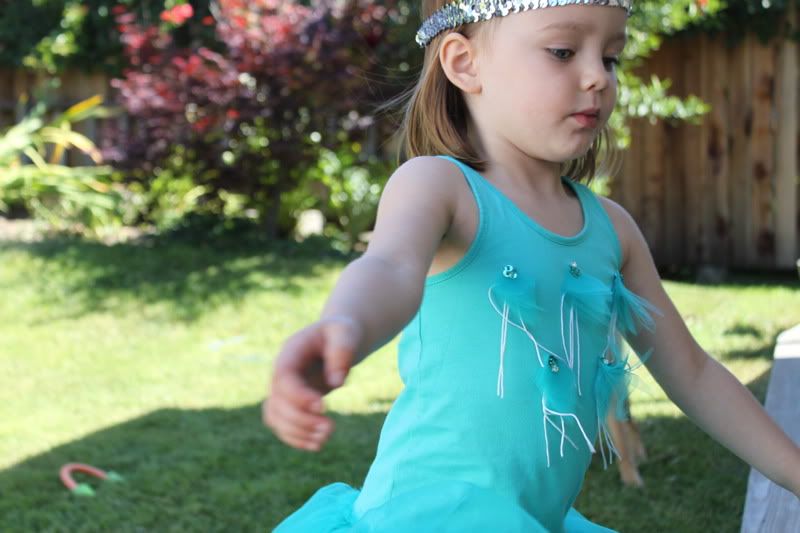
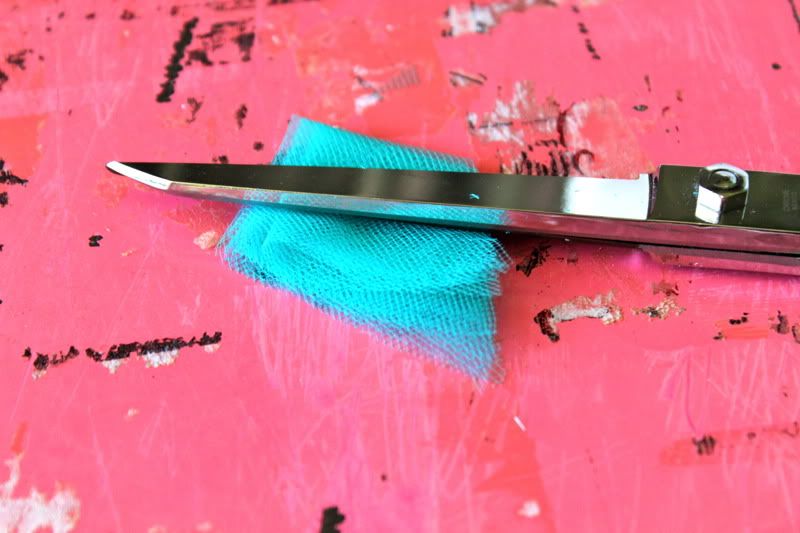
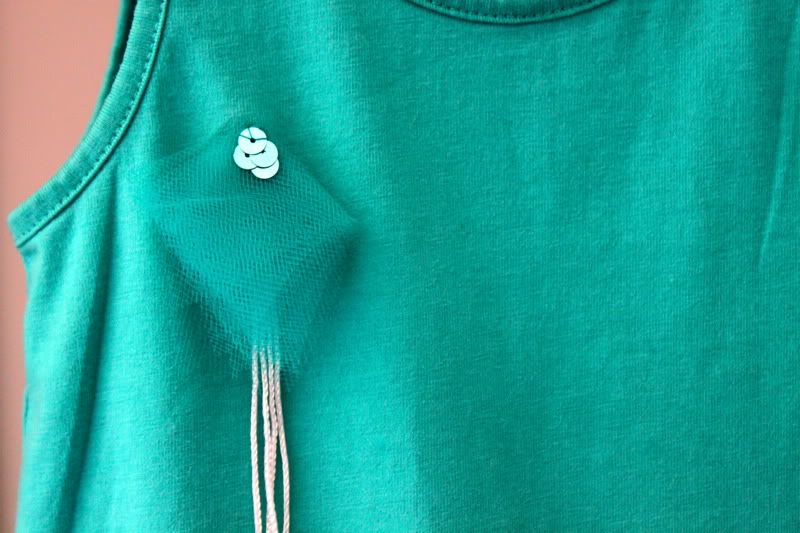
Now to fancy it up. For each of my little embellishments I cut five 3" squares of tulle:
Then folded them in half, then in half again. Then i trimmed the unfolded edges into a diamond shape:
I also cut a piece of fringe:
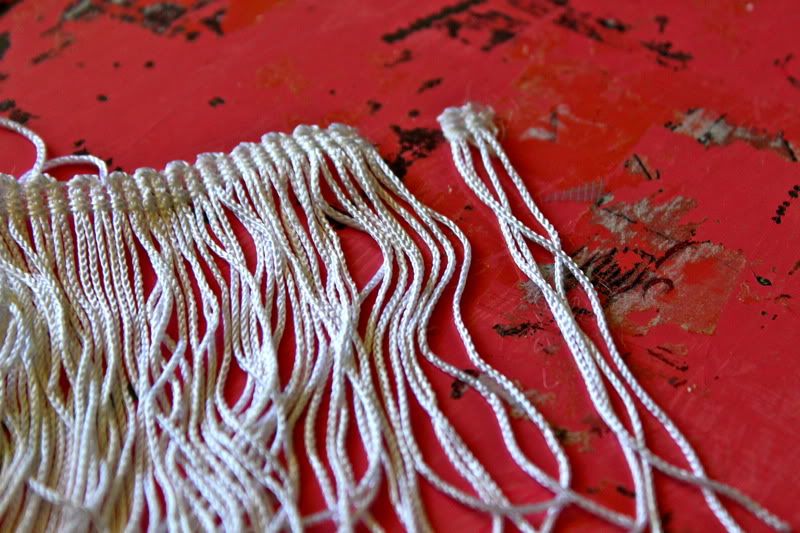
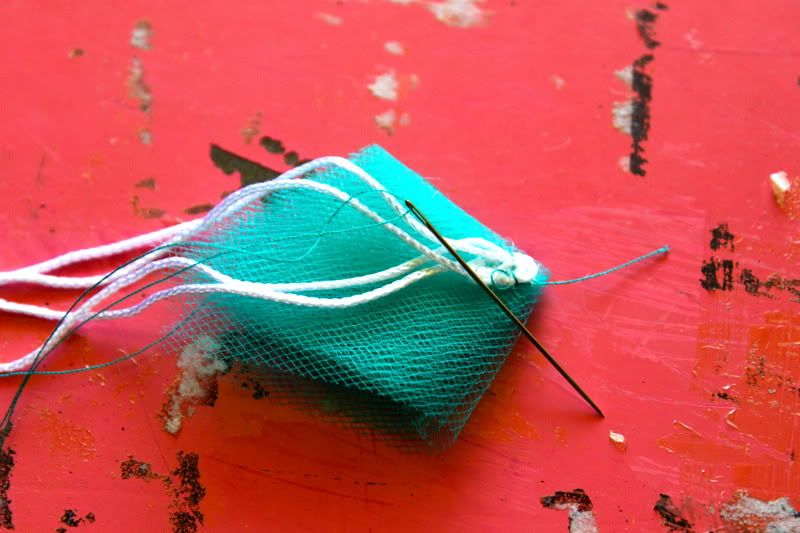
And then I hand sewed it to the top folded corner of my diamond.
On the front I sewed sequins (follow our How To Sew Sequins post):
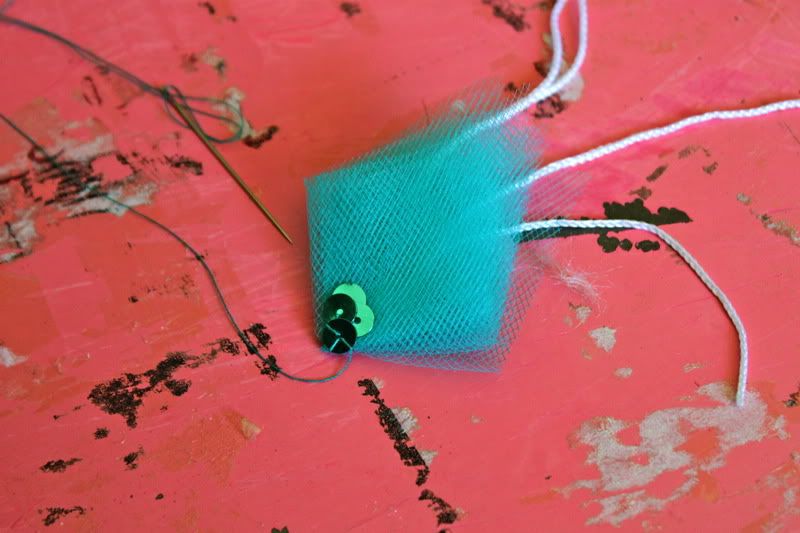
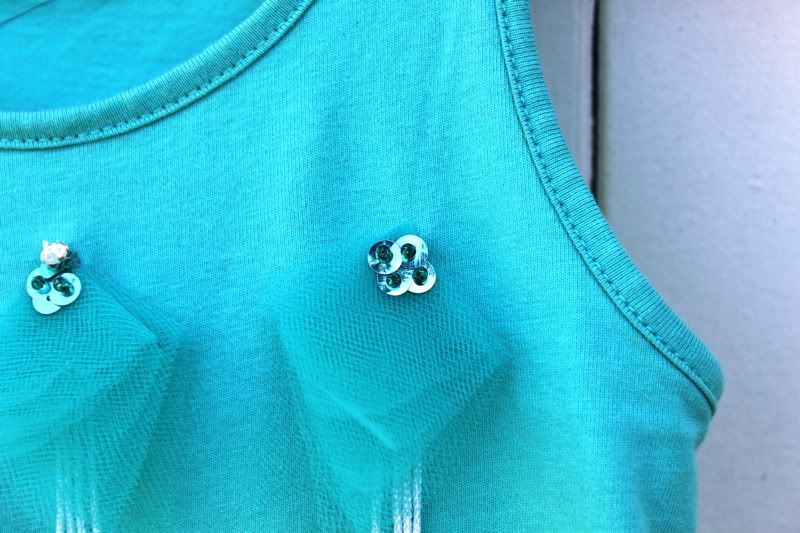
Then hand sewed the embellishment to the tee.
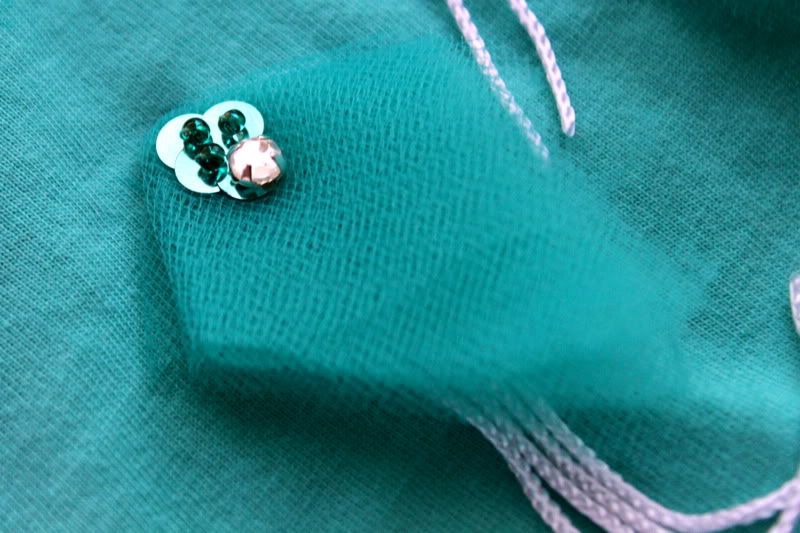
I decided that they needed a little MORE sparkle, so I added a few gemstones and seed beads to the rest of them before sewing onto the dress:
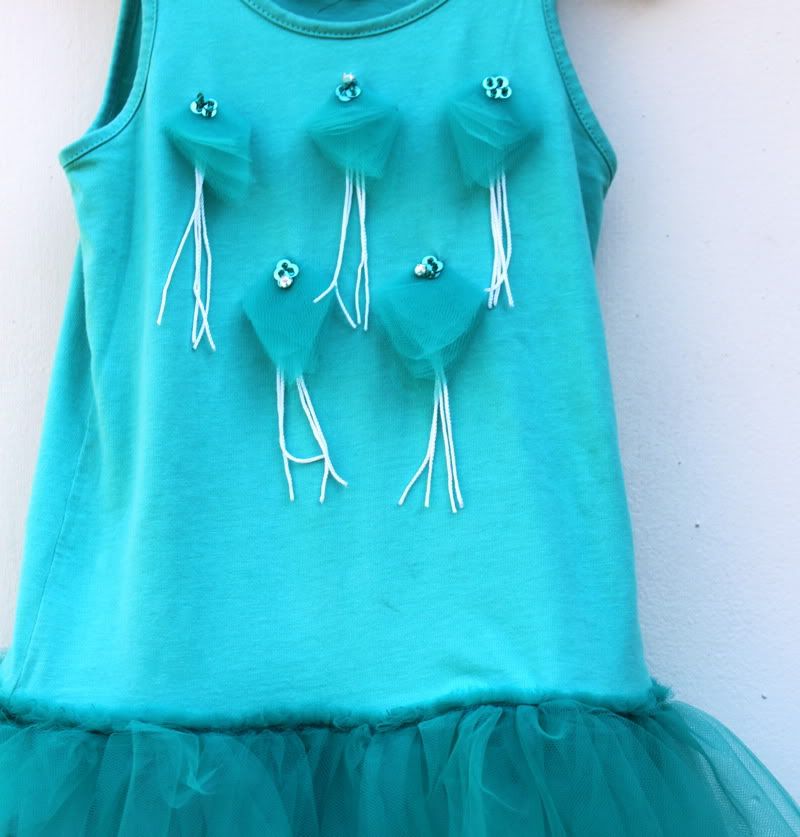
I ended up adding five of them across the chest. I wanted to do more but girly insisted on wearing it RIGHTNOW so I had to stop at five.
And that's that.
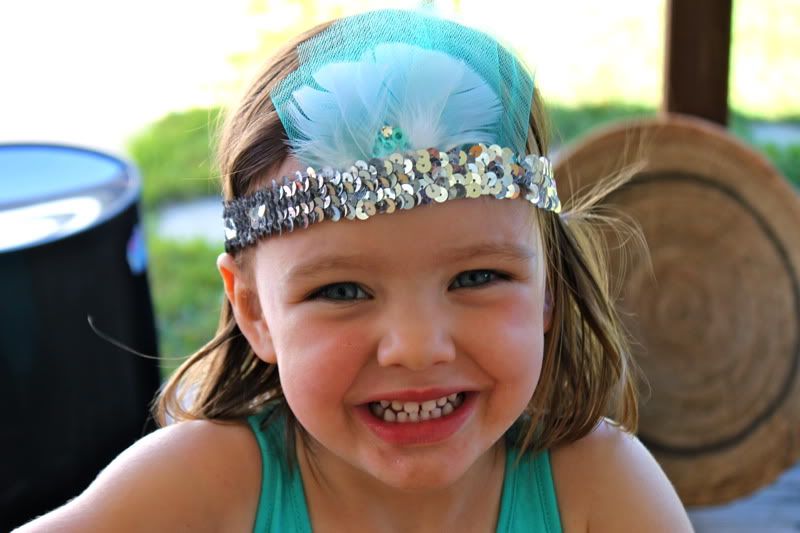
I also made her a little headdress to match, but I'll show you how to do that in another post.
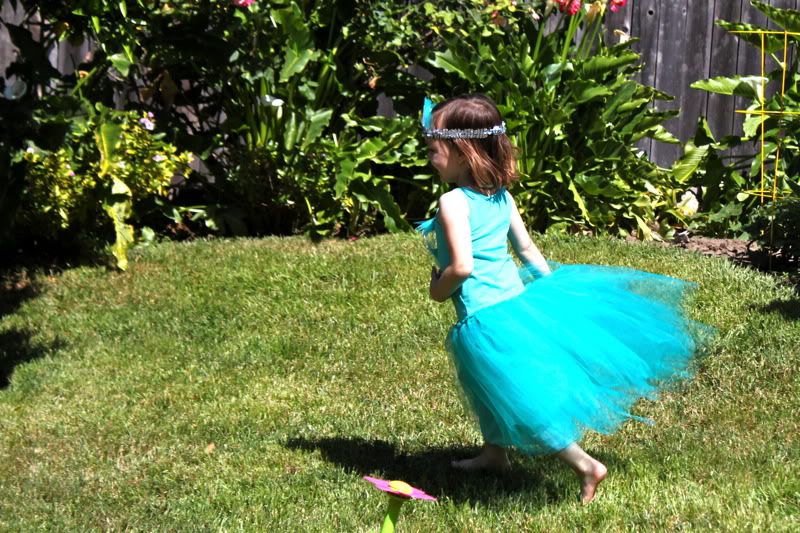
And here she is goofing off. She said MOMMY I A WATER PRINCESS!
So fancy.
You could do so many things with a tank, some tulle, and some sequins. You really can't go wrong. I hope you make one of these, just to see this joy on your kiddo's face! It made my year!
P.S. At school, Scarlet's friend asked me what my job was. Scarlet jumped in and replied "My mommy sews me dresses!" I have the best job in the world.
posted by Jaime @ 12:14 AM
![]()

19 Comments:
wow, this is fantastic! my girls would flip over something like this. Just one question that I didn't think was made clear - is it magical? :)
I don't need to make any tutus at the moment...but I HAD to click on this post....I nearly cried laughing at the title. :) Very nice tutorial. Saving for later.
So adorable!! Thanks for the tutorial!
that is so cute and I love her happy faces!
Hehe this is so cute, and I love the color! Thanks for the tute, I've been wondering how to make a cute tutu for awhile!
Looks super easy! Thanks!
So cute! I love that you added a "lining." Her face and description of your job is precious!
Your job is to make her dresses, that is AWESOME! Oh, and I love the word magicalest!
Awww.. that smile is magical.
This is beautiful!!! And I love the response your daughter gave for your job! Thanks for the post!!
Very cute!! I love to making something new using a t-shirt as the starting point. Something else to add to my to do list for my granddaughters.
love the color.would add skirt if I can before gathering and do all at once,I used to do that for multi- layer skirts on Bridesmaid dresses.
can try and dye but different colors from many types of fabric will result most likely.I would buy cotton elastic and dye(better)
Very cute dress, but.... her face was priceless!!!!
I'd so wear this...
That dress is adorable! I can't wait to make one!!! It was lucky I had a girl first because anything with tulle and sequins is a must-have for me! I only dread the age where she will no longer wear what I pick out/make for her!
That's so awesome too about what Scarlet says your job is! I'm pretty sure if my daughter could talk she'd say "She watches reruns of Dancing with the Stars and yells at her sewing machine"
i've been looking for a tutu tutorial to make for my little girl. She's worn out her dress-up on that someone got her years ago. And i'll have to make it modest too because i know she'll wear it EVERYWHERE.
Thanks for the tutorial. So cute!!
Tamra
Super cute Jaime! Scarlet is growing up before our very eyes. Such a beautiful little girl, and makes for a beautiful water princess.
-Bethany
My daughter's 2nd birthday is on June 13th, I'm making this tutu dress for her to wear during her party! I'm so excited!
Love it! Kinda wish I had a girl.... I could make it for me in my size, but 41-year-old women probably shouldn't wear something like this....
Post a Comment
Subscribe to Post Comments [Atom]
<< Home