Simple Photo Tips for Better Product Shots
I whipped up a potholder that sadly didn't turn out quite as I had hoped, BUT it will serve a purpose for us in this post, modeling some common photo errors we often make when shooting pics of our creations. Now I am no photography expert and most of the shots on Prudent Baby are taken with a fancy camera, but I do have a few tips to offer that will work with basic cameras. I whipped out the old point & shoot to show you a few common photo mistakes that you can easily address to make sure your product photos (and maybe your SEWING MACHINE DOUBLE DOWN CONTEST entries) are as good as can be, whatever camera you are working with.
Find some Simple Photo Tips for Better Product Shots after the jump...
Simple Photo Tips for Better Product Shots
The most important thing in your shots is lighting. Let me show you what I mean...
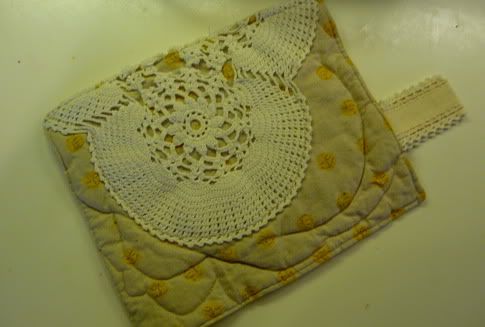
Mistake #1: Leaving the overhead lights on.
Here's what my potholder looks like with the overhead kitchen lights on in mid-afternoon. Most overhead lights make a weird color cast and should be avoided.
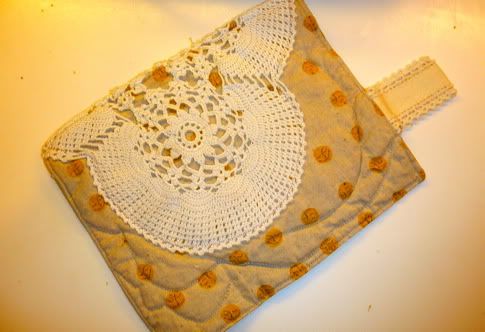
Mistake #2: Using a flash.
Here is my potholder with the flash in the kitchen in mid-afternoon. Flash makes everything ugly with harsh glares, shadows, and discoloration. Don't use it.
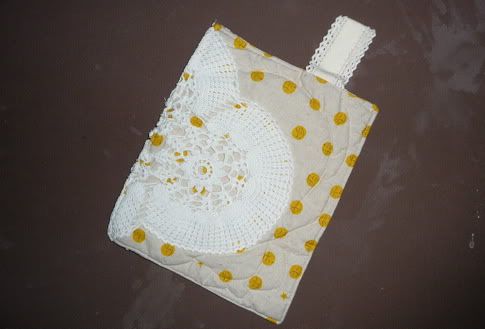
Mistake #3: Taking pictures at night.
It is just not possible to get a decent picture at night. You will need artificial lighting (most likely the dreaded flash). Here is a picture of the potholder at night using a flash.
If you absolutely must take a picture at night, there is a little trick that can help: Cover the flash with a piece of translucent white fabric or vellum. For this shot, i covered the little flash of the point and shoot with a bit of Scarlet's curtain. It's a slight improvement in reducing the glare, but it will still require photo editing and should be avoided.
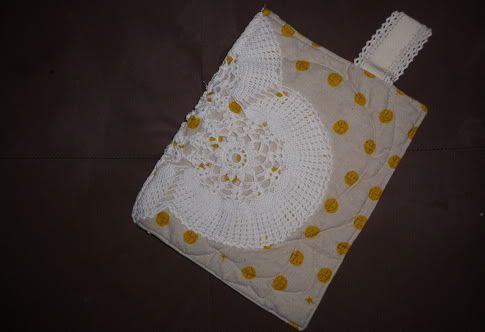
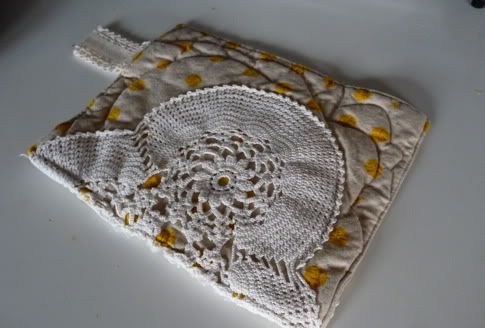
Mistake #4: Shadows.
Here is my potholder in the kitchen at mid-afternoon with all of the lights out and no flash. Much better, right? But check out the shadows, not pretty.
The solution? Take it outside. But beware of...
Mistake #5: Direct sunlight.
Direct sunlight casts a harsh glare and creates shadows no matter what camera you have.
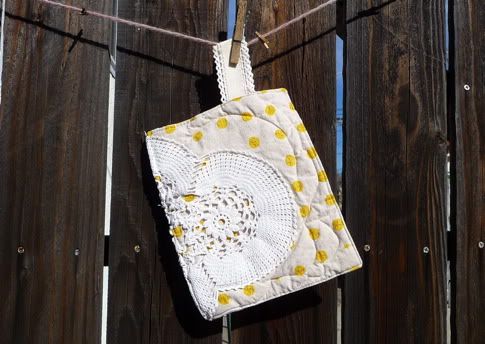
So, what you want is a photo outside with indirect sunlight and as little shadow as possible. The best times of day for this are early morning or early evening. Or maybe do it under an awning or umbrella (if there is enough light coming in) or use a piece of translucent white fabric to diffuse the sunlight. The result is a pretty decent shot with your point and shoot.
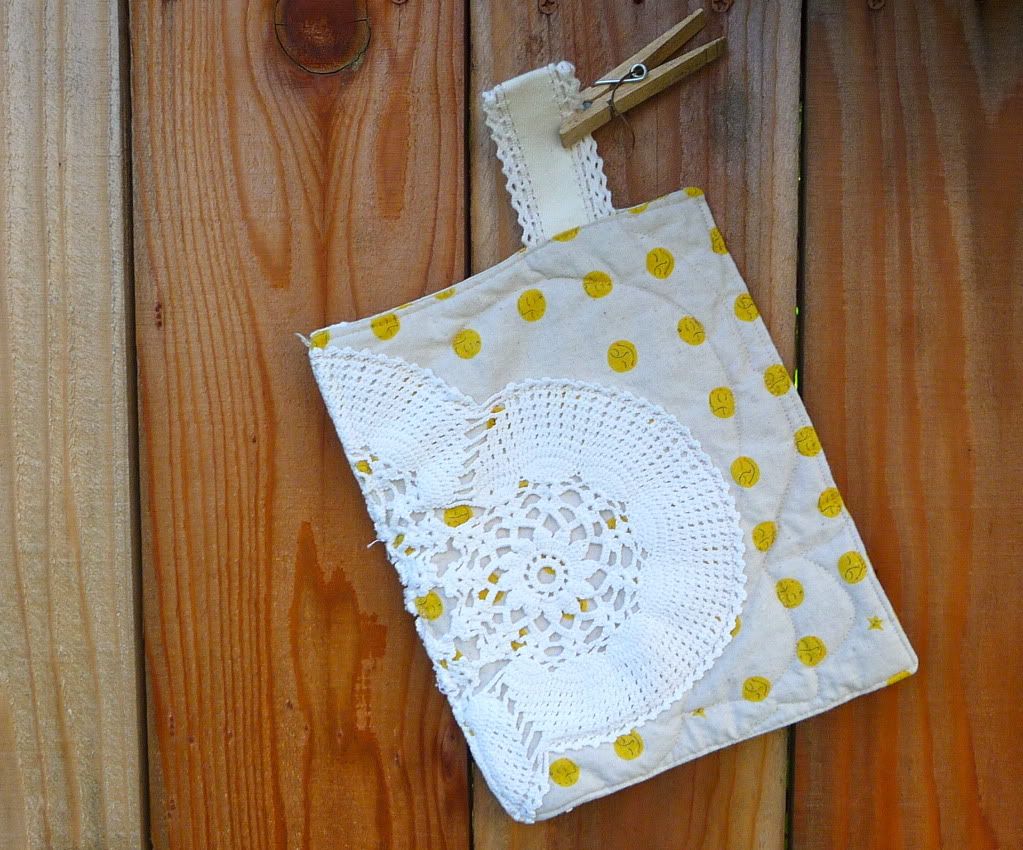
I also think it's nice to use a texture or color that contrasts with your object as a background.
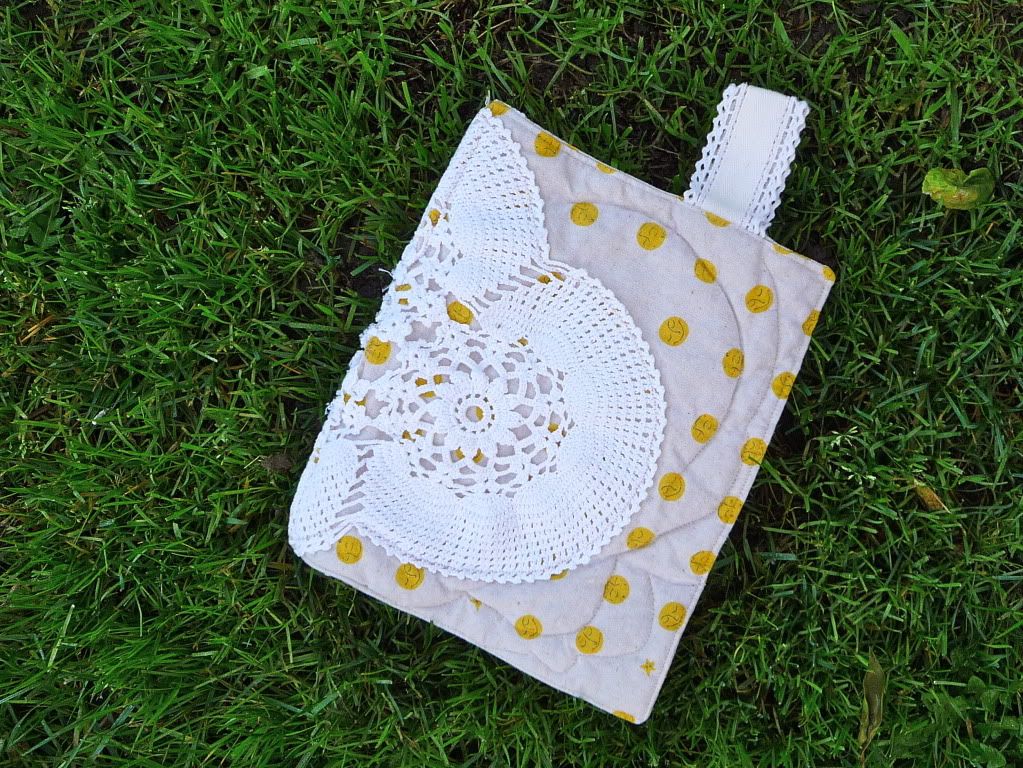
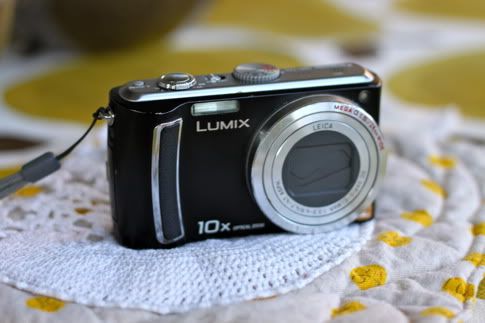
Now if you have a fancier camera, like my Canon T1 DSLR (thanks hubs), stick around for a minute. Let me give you a quick cheat for a good set up for close-up product shots, like this one I took of my Lumix point and shoot
:

A great way to get that crisp foreground and blurry background is to use a 50mm lens and manually adjust your aperture setting. Leave your ISO automatic and auto-focus on, and set your aperture somewhere between 2.2-3.5. This is harder to demonstrate with something flat like a potholder, so I will show you with the potholder, then with a 3D object.
So here is the potholder shot with the point-and-shoot on automatic settings:
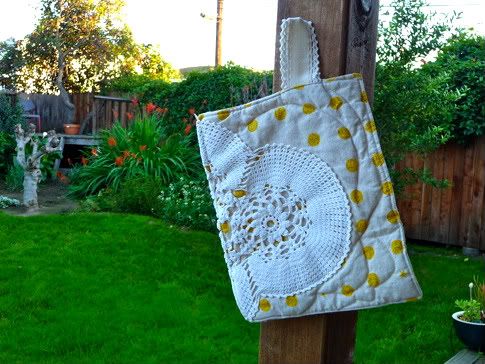
And here is the same shot using the DSLR with an aperture set to 3 and everything else automatic (this was taken during midday so it has the harsh sunlight problem, but you can see the difference aperture makes):

Let me show you with a 3D object (from our Wristlet Key Fob Tute) and a few different aperture settings. These are not great pics by any means, but they illustrate the aperture difference. So here is our 3D object photographed with the point and shoot on automatic settings following all the tips above. It's not a bad shot at all:
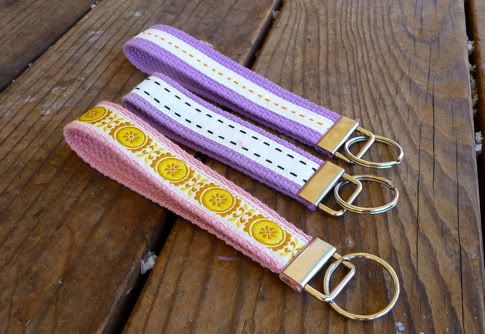
Now here it is with the DSLR on automatic settings:
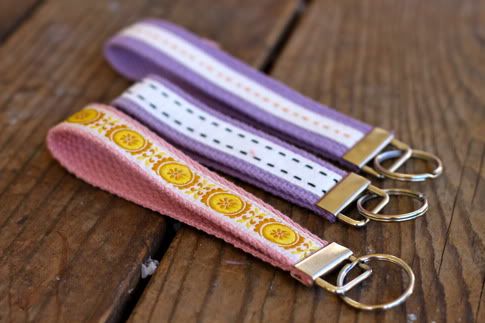
This shot is with the DSLR with the aperture set to 2. See the difference?
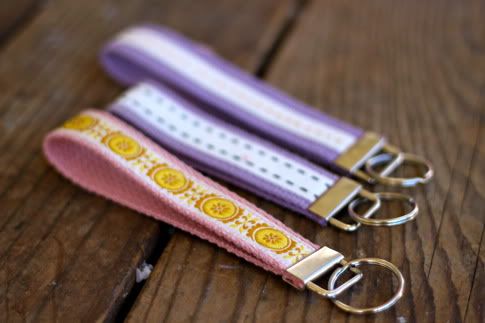
But that shot is a little too blurry, so here it is with the aperture set to 3.2. Not bad.
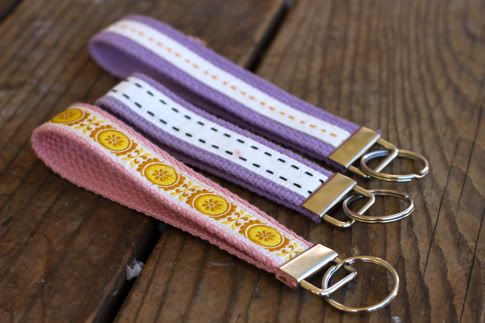
This trick also works really well if you place the object on a flat raised surface and face it head on, so you get whatever is in the distance in a nice blur, like so:

So, not a master class, but hopefully these tips help you out. Definitely read our post: 25 Tips for Taking Great Photographs (written by my brother, a pro photographer) for more details on composition and using your camera. Do you have any tips for us? We'd love to hear 'em in the comments, and you could win this week's surprise prize!
Labels: Photography, Tips

22 Comments:
Totally awesome tips! Basic & easy-I have to check out the other post too. I keep saying to myself to read the darn manual to my camera-I think I may have to now. I also cringe at many of my photos, and drool with envy at so many (like yours, of course!) that I see on blogs. I am now inspired to figure out what I am doing and make some improvements-thanks!
Thanks a ton Jamie, the tips are so helpful. I'm struggling with taking good pictures, now I know exactly where I was going wrong. I need to take pictures in my sunny balcony now. But hey I live in a flat on the 7th floor and I'm the only one who has a balcony :) but what if I cant take pictures in the balcony then I could use one of my window sills right?
This comment has been removed by the author.
I actually just read that other article for the first time about an hour ago. These were some great tips and I am eager to try them out!
Thanks for all the great product/object shooting tips. I have one tip to share that I once heard from a pro and I have had good luck with for photographing children. More of an editing tip, but mentally divide the photo into three horizontal sections & crop the photo so that the eyes are on the line between the top and middle sections.
Great tips! Foregoing flash is sage advice. Also, some of the new point and shoot cameras are giving you more manual options so make sure to check out your user manual and camera menu in depth and play around to see what you can do. I finally got really good with my little Kodak point and shoot and then lost it (*sniff*) but I'm loving getting to know my new little NIkon.
This is so very, very helpful. Thank you! I have both a point and shoot and fancy schmancy camera and sadly have no clue how to use it (and very little patience to figure out how). Do you have a direct link to the 25 Tips post?
I would say a great tip is to change your position. Get down to eye level with kiddos and move around you never know where a new perspective will take you!
Oh, I see it's now linked; thanks!
well put in a simple to understand manner!
I completely agree with your tips. Thanks for showing the "bad" pictures and showing how to fix them. I really really really want a dslr. Hey maybe that could be another prize sometime. . . .
I was feeling pretty good about my point and shoot until you got to the example pics with your DSLR...I guess I know what I'm putting on my birthday wish list!
This is such a great post! Thanks for sharing.
I moved to a different house a couple of months ago and since then it's been very hard taking pictures of my FO. I assumed it was the different lighting in the house - it faces the south (I live in SaoPaulo, Brazil -South America). Apparently it makes a lot of difference.
I will try your tips first thing tomorrow morning. Thanks again.
What's that green stuff in your pictures? Do you have any tips for getting some of that into my photos in January in New England? Lately around here, if you blink you'll miss the "adequate natural lighting"!
Great tips. I ate up every morsel of this article. :) I had been thinking about making the jump to a dslr...now I feel I have to. Just have to find time to research which one.
Thank you, thank you. I need to work on my pics!
Thanks for the great tips! Good photos of products is so super important when I'm shopping, and I always wondered how sellers managed to get such perfect images - I just assumed it was a great camera. Getting good shots of products has been a major reason that I've hesitated to try to sell anything online. Now, I just need to quit my day job so that I can do more crafting and take lovely pictures of it in the backyard. ;)
I have been trying to figure out on my own for the longest how to get better pictures for moments where I would like to put products on etsy. This is so great..Now I may feel more confident about the things I make because the pictures will look better! :) Thank you so much! Luckily I have a point and shoot AND a Dslr
I featured this on my Weekly Favourites section on my blog http://the-red-deer.blogspot.com/2011/01/weekly-favourites_30.html
I just got a DSLR for Christmas last year and I'm still trying to figure out how to best take pictures of what I make so thanks for this post! Very helpful!
Fantastic post, thank you!
thank you very much!!!! I think this is going to help me tons! You did a great job explaining this to even me! The pics are awesome to help show the difference between the settings!!!
Post a Comment
Subscribe to Post Comments [Atom]
<< Home