Beginner's Baby Blanket #3
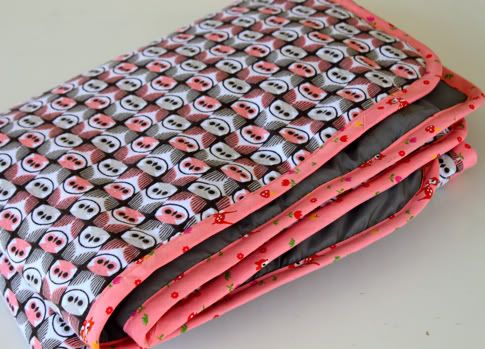
So we've shared with you the Simple Snuggly Baby Blanket Tutorial, which is a great very first blanket to try. Then we told you how to make a Silky Baby Blanket using satin and creating mitered corners with satin binding. We even showed you how to make a Swaddle Blanket. BUT Scarlet has asked me for a new blanket, so here's another style to try.
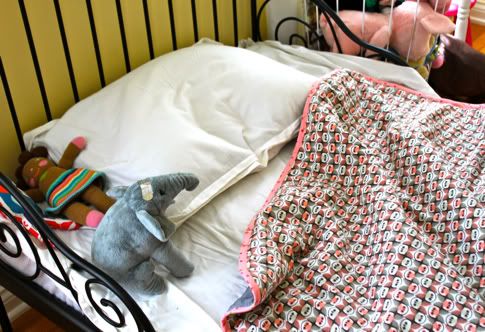
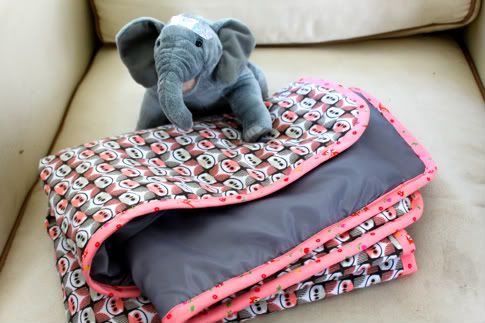
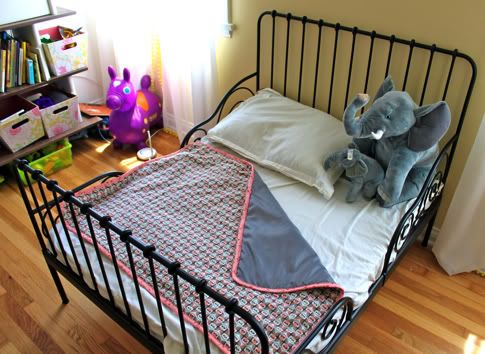
Isn't the impression your kid's head leaves on the pillow the cutest thing ever? This blanket is silky on one side (because she demands to have silkiness on her belly at every nap). The other side is lovely Cloud9 Organic Flannel Forest Friends G'Nite Owls in Shell that she picked out herself.
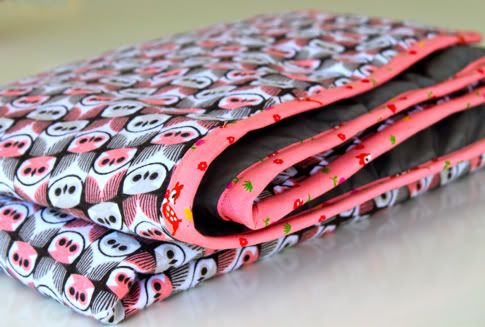
So this blanket is really like a quilt without the piecing or the quilting, because it uses a layer of batting. I thought that would be nice for the winter months ahead. It's very simple. Get the full Beginner's Baby Blanket Tutorial after the jump...
Beginner's Baby Blanket #3
1. Start by cutting your fabric. You can use two flannels, two cottons, poly satin, minkee, whatever you like. You can mix it up as you see fit. Cut a rectangle of each to 32" X 42" which is a standard crib size blanket. Also cut a rectangle of batting the same size. You can make a bigger one of course, just cut the pieces to the size you desire. You will also need 1/2" thick double fold bias tape, you can buy a few packages or make your own using our How to Make Bias Tape Tutorial. I made mine using Lecien Caramel Town Charlotte Fawn in Pink:

2. Now go ahead and lay your first fabric right side down, then your batting on top, then your second fabric right side up and pin all the way around. Baste (sew with a straight stitch with a wide width, like a 5) the three layers together 1/2" from the edge. You will have a batting sandwich:
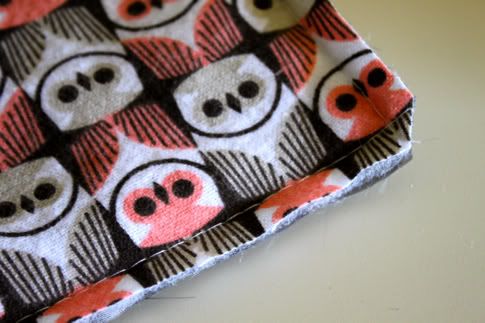
Trim the edges nice and even (if they aren't) and clip the corners:
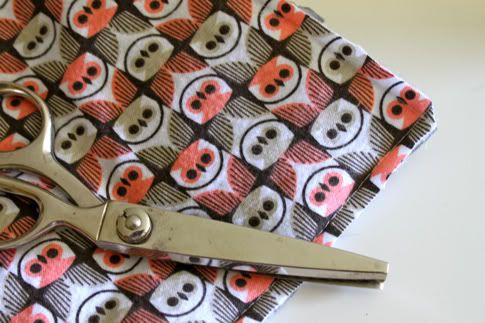
Now your blanket looks like this:
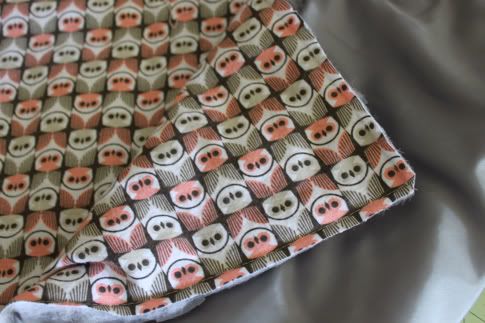
3. Open your bias tape and pin it to one side, all the way around the blanket, with edges aligned. At the corners curve it. Sew in place with a straight stitch:
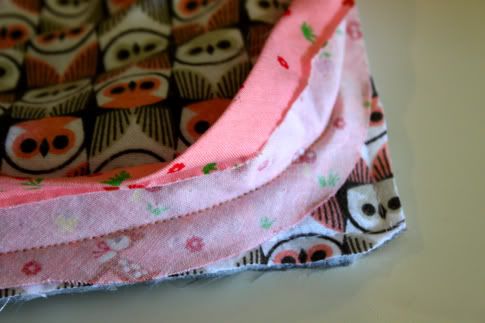
Trim the corners and cut score marks around the curves:

4. Fold the bias tape back up, flip it around to enclose the unfinished blanket edges, and pin it in place:

If you were a good/patient mother you would hand sew the other side to the blanket with a blind stitch so no stitching would show on your final blanket. If you are like me, you will carefully machine sew the bias tape in place, all the way around, being careful to catch both edges:
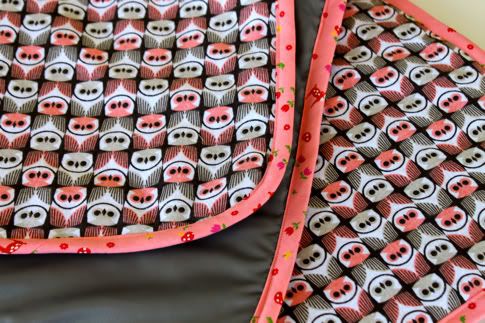
And you are done! Give to child, watch child give to elephant. Also watch child insist elephant needs a bandaid on his ouchie.
Snuggle time!
Labels: Bedroom, Decor, DIY, Gifts, In One Evening, Kids, Quilting, Sewing, The Season of Cozy

28 Comments:
WOOW IT IS SOO EASY & I liked thE FABRIC that you used:)
Such a pretty blanket and that bed is gorgeous.
I made my first homemade receiving blanket just like this, only minus the batting. It's a quick, easy and pretty project, and making a few really helps justify me buying that bias tape maker so impulsively after watching your WHAT WHAT! about it and deciding that I too needed something so fantastic in my life. Thanks for sharing!
Have been working feverishly on a quilt for a friend's baby, that's due any day now. Feverishly, I tell you! So thank for letting me know that I don't have to bind it by hand. This is the quick and easy method I'll be using. And won't even feel bad about it.
the first sewing project i ever did was a quilt, and it took, like, forever. so, i had to muster up a lot of energy to attempt a second one, that also took forever. then i found this website and learned that sewing projects can be done in a day, sometimes just an hour!
its changed my life. i thought all sewing was like quilting, and quilting is hard and long (thats what she said... teehehe...)
but not all projects are! yay for you and your ideas that help me be creative!
That's a cute blanket! I love the owls.
Love the blanket! Your daughter has good taste. I have also been in love with that bed from IKEA the moment I saw it a couple years ago. Now that she is in a bed and not the crib, did you change the frame above it or leave it there? Is there anything else you have changed in the room as she transitions to being a little girl?
oh my gosh, I love it and will be buying supplies to make one next time I go to the fabric store. It's gorgeous, and hard to find a crib sized blanket. Baby blankets are too small for my 1 year old and it will be getting cold here soon.
I'm making an heirloom quilt, out of my grandmother's clothing, for my daughter. It's so hard. Your's is much easier, and AWESOME!
Okay, I need to make my own bias tape now! Or maybe you can use some of that awesome deer tape as one of the comment giveaway prizes (and pick me as the winner)!
love the fabric! will have to try this some time....
I guess I'm going to have to finally dive in a try bias tape... I'll buy the premade kind so I don't overwhelm myself. It really does look better.
I love the squish of batting in fabric-- that extra puff is so comforting. It makes a huge difference!
Now, I need to know... where did you get that amazing bed???
FINALLY a rounded corner that makes sense!! Thank you so much. All of my girls want new blankets for christmas but get this...they want one side to be fabric and the other to be crocheted. You see, the year before last each got crocheted blankets. Last year they each got a quilt. So I'm guessing my older two girls corrupted my younger two and came up with this master plan of putting the styles of blankets together.
This tut will definately come in handy. :) Thanks again.
Love the tutorial!
You may want to consider adding a step for those with less sewing experience - how to join the edges of the bias tape, or how to fold it over and enclose the raw edges, etc. before folding the bias tape over and attaching it to the other side. :)
charlene - you're right. i will absolutely do that on the next bias tape tutorial. maybe we need a post just on sewing with bias tape that shares all of these details. adding it to the list!
genevieve- i have been planning a blanket like that! i think a fun way to do it would be with a thrifted blanket or scarves, or by sewing a bunch of awesome doilies together!
julie anita, that bed is from IKEA. i think it was $120. it expands into a twin and we love it so much.
I love the quilt. Well, I love your blog! I check it EVERY day! :0)
Great tute!
Angie S.
Thank you for the close-ups on attaching the bias tape. I could never quite figure it out from written instructions and far away photos. I think I can go and finish some of the dresses I've started. I also sooooo love that little bed.
So, I don't know how to sew. I think that if you have a girl, it's great if you know how to sew, but if you have two girls, like I do, it's a MUST!. Learning to do so is on my list of things that I want to do before 35. So anyway, my older daughter, Kayla, 2.5, has a blanket that she goes to bed with which is satiny on one side and fuzzy on the other. She calls them cold side and hot side. I always pretend to put the fuzzy side on her body when tucking her in and she gets all giggly and squirmy and screams, "Cold side, cold side." Anyway, that's my story to demonstrate that I need to learn to sew and I need to make this blanket! Thanks for the fun tutorials. I made a bunch of paper flowers and glued them to branches for centerpieces for my younger daughter's first birthday a few weeks ago.
elaine- my daughter does the same! she lift up her shirt so her belly is out and says "I NEED THAT COLD SIDE". i'm working on a satin dress so she can have "cold side" all day long, lol. kids are the cutest.
jocelyn - i didnt answer your question! so pretty much everything is the same, but we moved the easel outside (she was wanting to do messy artwork in her room) and replaced it with a tot-sized table. then we moved that table to the living room and replaced it with a mini-grand piano. we added some more stuffed animal storage (could toddler slove stuffed animals more than their parents? its possible) in the form of wire laundry baskets. otherwise, the same. oh wait, there's a lot more pink, as she's decided pink is the source of all life's joy. :)
Wonderful blog, awesome tutorial...you inspire me. Truly, you do. I think I may work on a blanket during the long weekend. Thanks!
Nice blanket! I linked to your tutorial on Craft Gossip Sewing:
http://sewing.craftgossip.com/tutorial-easy-baby-blanket-for-beginner-sewists/2010/09/06/
--Anne
i just love everything u all make on here
i live in the uk can u tell my is it possible we in the uk can enter competitions and now items featured on her ???
thank u so so much
liv xx
that was suppose to b me and other items featured on here
lol
sorry
xx
What a great tutorial, lovely clear instructions! i have linked this here http://sew-dottie.blogspot.com/2010/09/sweet-baby-blanket.html
Making a simple baby blanket is a special gift that comes from the heart and can easily be made with a few simple steps. In addition, these blankets will last years and continue to give them security and level of comfort as they grow into toddlers and beyond. Imagine your little guy or gal dragging their “blankey” around the house or falling asleep in the big chair with it in their arms.
no sew baby blankets are especially easy to make and can last them years.
I found some instructions here if interested....
http://simplebabyblanket.com/instructions.html
This is a great idea!! I think I really need to get a Bias tape maker now!!!! I love your blog!
Love this tutorial!! This is exactly what I am planning on sewing my daughter. Can you tell me if you used a walking foot on your machine? Or can I just use my regular foot?
Post a Comment
Subscribe to Post Comments [Atom]
<< Home