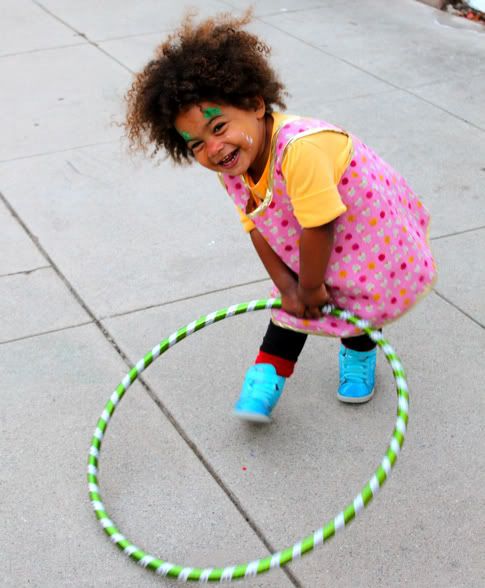
4 Season Crossover Top
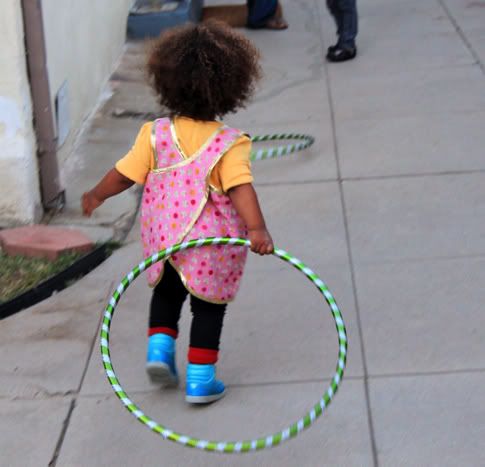
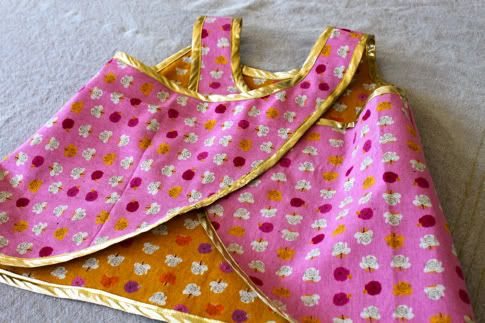
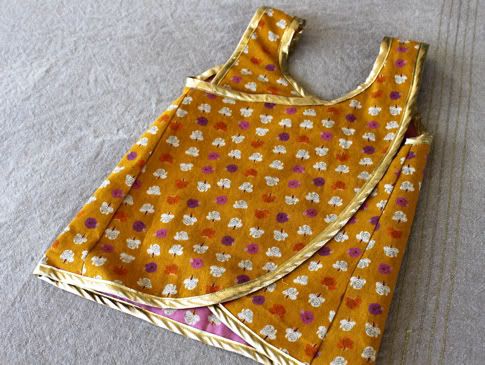
This funky little top is so fun. Your little one can wear it over shorts in the summer, or a long sleeve top and jeans in the fall. It's reversible and slips right over little heads.
I made my mine in a heavier fabric that's still breathable and I love the way it turned out, but I think it would also be adorable in a double gauze or cotton lawn or voile.
And a little gold bias tape makes it extra snazzy for little princesses.
Get the full 4 Season Crossover Top Tutorial after the jump...
4 Season Crossover Top
I used gorgeous and amazing cotton-linen blend fabric by Heather Ross for Kokka from Fabricworm. The pink side is Far Far Away 2 Roses Plum and the orange side is Far Far Away 2 Roses Gold. You'll need about a 1/2 yard for each side, and you'll have a bunch of decent size scraps leftover to play with. You'll also need about 4 yards of double fold bias tape (bias tape usually comes in 3 yard packages so you'll need two, or you can use our tutorial to make your own bias tape). I used fabulous snazzy metallic gold bias tape.
1. Check out our template here for the measurements. This top fits about a 2T-3T. My daughter is very tall though so it might be a little big, just reduce or increase the mesurements using a top that fits your kid well as a guideline. You want the flat sides to be the same length on all pieces. You can check out the picture below or view/download/print the PDF here on Google Docs: Prudent Baby 4 Season Crossover Top.
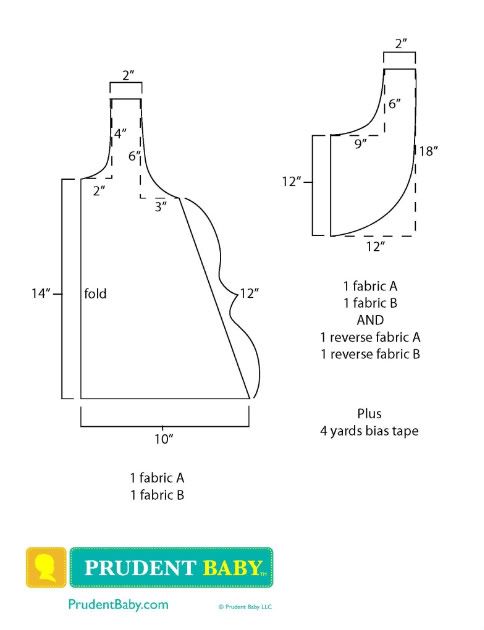
2. Cut out your fabric. I made mine all the same fabric on each side, but you can mix it up for a funkier look. Remember for the back piece you need one as drawn and one in reverse for each side of your top.
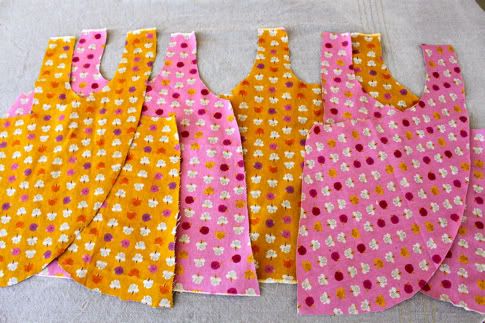
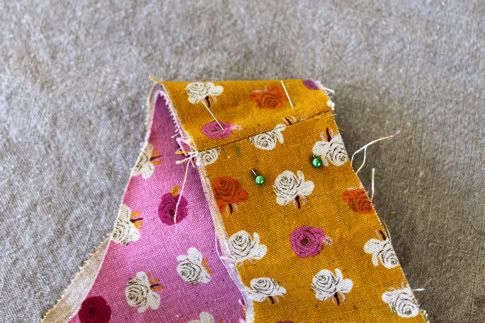
3. Pin the pices together right sides facing like so. Leave the top right shoulder of one set un-pinned.
Make sure it is the top right when you have the back of your dress facing you, here is the pic again for reference:

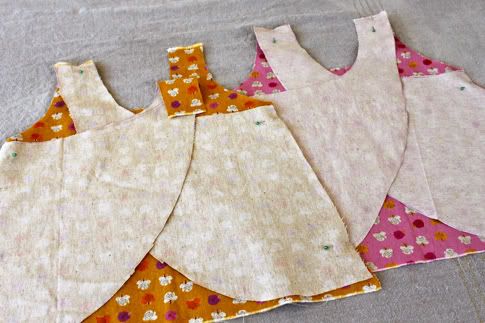
4. Sew together up the sides and the shoulders, except for that one shoulder:
5. Open all the seams and iron them flat:

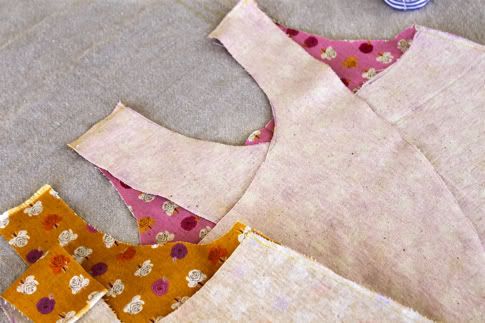
6. Turn the piece with the unsewn shoulder right side out:
7. Slip it that piece inside the right side out piece so wrong sides are facing. Pin together at the two sewn shoulder seams:
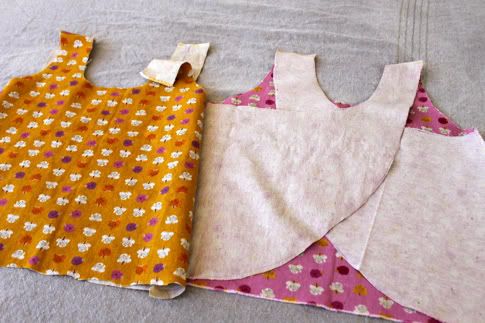
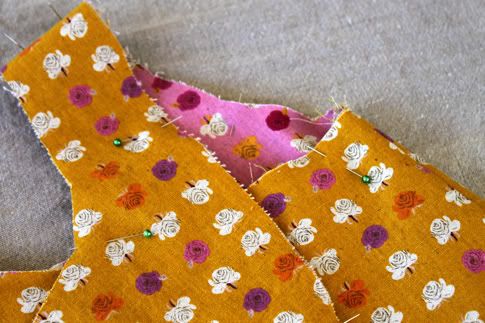
8. Continue to pin the layers together all the way around:

Back view:
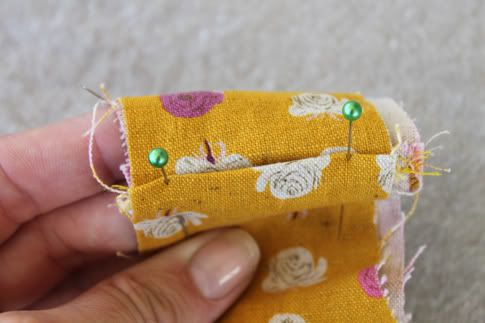
At the unsewn shoulder, fold the fabric carefully so the rough edge is hidden and pin like so:
9. Baste (sew with a straight stitch set to the widest stitch your machine will allow, usually a 5) all the way around so all sides are attached. You could skip this step and go right to the bias tape, but that would be much harder and probably result in bunching, so just take the time to baste it:

10. Pin your doube fold bias tape all the way around. Normally we would sew one side on, then flip the bias tape around, but in this case we already basted so let's just slip the bias tape around the edge and pin. Make sure the shorter side of the bias tape is on the top (the side you are going to have on top in your sewing machine) so that you catch both edges as you sew.
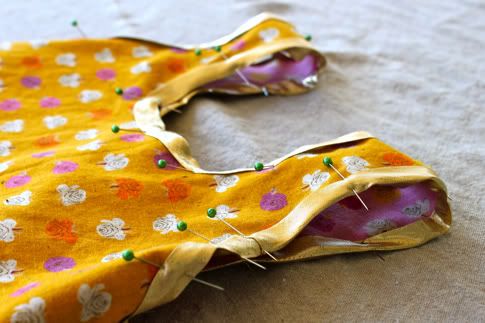
11. Sew in place all the way around.
And there it is the other side out:
Done!

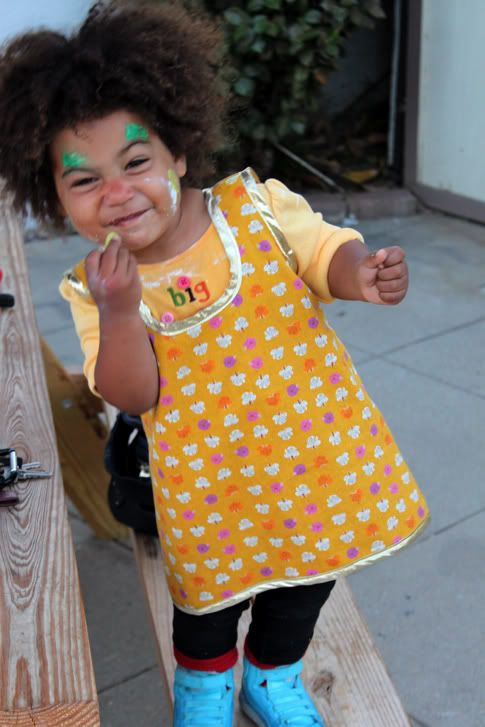
P.S. Isn't Niko the cutest ever? She loves her clown face paint so much.
Remember, leave a comment on this or any post this week and you could win the fabulous fat quarter pictured up there on the left!
posted by Jaime @ 3:30 AM
![]()

30 Comments:
Beautiful! Thanks for the tutorial!
Adorable! That gold bias tape is AWESOME!
Oh how fun, yes please, I'll take one in my size:)
The little one has a shirt just like this and now I can make another one when she's bigger! Hurray!
So cute! I have 2 boys, but I do have a 1 year old neice who's birthday is coming up! I'm so new at sewing but this would be fun to try :)
Oh yes it's adorable. Approximately 41yrs ago my mom found a pattern in the trash on Base and it was exactly like yours. She made my little girl tons of those dresses, it was hot in Hawaii. Now I have a new GD and awhile back I found Butterick 3846 which is similar. I can't wait until next Spring/Summer to make it.
Cute top, but even cuter model! She is ADORABLE!!!!!
what is it about face paint and littles?
how fun.
the gold biased tape really made this schnazy!
Fun! What a cutie!
The only thing cuter than a reversible crossover little girls top is a little girl with beautiful curls and clown paint to model said top!
Niko is adorable. I want to hug her, she is so cuddle-worthy. And the top, well you know I love the top. Perfect for adding some fun to the school "uniform" of jeans and sneakers. I must make one! Good for crawlers too at the right length, Id suspect!
So cute! I adore it =)
What a great design, I actually have a very similar top that from my childhood my daughter has been wearing, but I can't wait to make one in a new fabric! You gals are so talented, and I've been meaning to challenge you both to something that might seem impossible: can you make a fanny pack design for us moms that would not be corny? Maybe it's not worth going there(, but it would sure be handy for us moms and if anyone could pull it off...
I totally loves these tops - I want one for big girls! I have a couple of aprons made in this style and they're great since there's no pressure on the neck or shoulders.
I think it's a great craft apron too. I think I'll make a couple for my boys in robot and dinosaur fabrics to wear when we're cooking or painting.
Who is this adorable little girl? She closely resembles our daughter; the wild hair, the crazy spirit, her amazing style. I love it. I so love that gold bias tape. Anything shiny and gold is a winner for me.
I should note, not my daughter in my profile picture :)
I made my daughter a similar top, paired with bloomers, and finished with ric-rac. It was a dress this summer and I hope it will fit as a top next year. The criss-cross is too cute!
I almost buy a pattern of a same crossover top, fortunately I read your blog before I click "buy" :D
Thank you, thank you, thank you, thank you, thank you sooo much !!
I love this! After a few generations of only boys being born into my husband's side of the family we have just found out that our second baby is going to be a girl. I am so excited to make her little girly outfits and this tutorial is awesome! Also, the fabric giveaway is amazing.
I love this style for little girls! I linked to your tutorial over at Craft Gossip Sewing:
http://sewing.craftgossip.com/free-pattern-4-season-crossover-top-for-little-girls/2010/08/31/
--Anne
Thanks for sharing! Love that shiny bias tape :)
That is so cute! I have been looking for a good pattern for one of these for my girls! They LOVE leggings so those would be perfect under this in the cooler months! Thank you!
Nico is so beautiful, and the wrapover is so cute- Thank you for the idea and the pattern,
will save this, you've made something I thought would be complicated look so easy that I could try it! Your method and words are so simple and thorough- thanks again :)
Thank you! I've been wanting to make one of these kind of tops for my wee one.
This is adorable!
scottandchels.blogspot.com
I love the top. The model is adorable and the name Niko is amazing, and the fact that my son is Nico could make me a little biased :P
This top is too adorable! Might just have to attempt it soon-wonder if you made it longer if it could be a cute dress to wear over a shirt as well? Fun ideas!
just read on wright's package for that awesome bias tape - dry clean only. have you had any issues with it in the wash?? thanks! love the pattern and thank you! julie
i have to say: adorable model! so happy and flirty! Thanks for sharing the tute. I love it!
Post a Comment
Subscribe to Post Comments [Atom]
<< Home