body { background:#fff url("http://www.blogblog.com/dots/bg_dots.gif") 50% 0; margin:0; padding:0 10px; text-align:center; font:x-small Verdana,Arial,Sans-serif; color:#333; font-size/* */:/**/small; font-size: /**/small; } /* Page Structure ----------------------------------------------- */ @media all { #content { background:url("http://www.blogblog.com/dots/bg_3dots.gif") no-repeat 250px 50px; width:700px; margin:0 auto; padding:50px 0; text-align:left; } #main { width:450px; float:right; padding:50px 0 20px; font-size:85%; } #main2 { background:url("http://www.blogblog.com/dots/bg_dots2.gif") -100px -100px; padding:20px 10px 15px; } #sidebar { width:200px; float:left; font-size:85%; padding-bottom:20px; } #sidebar2 { background:url("http://www.blogblog.com/dots/bg_dots2.gif") 150px -50px; padding:5px 10px 15px; width:200px; width/* */:/**/180px; width: /**/180px; } } @media handheld { #content { width:90%; } #main { width:100%; float:none; } #sidebar { width:100%; float:none; } #sidebar2 { width:100%; } } html>body #main, html>body #sidebar { /* We only give this fade from white to nothing to browsers that can handle 24-bit transparent PNGs */ background/* */:/**/url("http://www.blogblog.com/dots/bg_white_fade.png") repeat-x left bottom; } /* Title & Description ----------------------------------------------- */ @media all { #blog-title { margin:0 0 .5em; font:250%/1.4em Georgia,Serif; color:#353; } #blog-title a { color:#353; text-decoration:none; } #description { margin:0 0 1.75em; color:#996; } #blog-mobile-title { display:none; } #description-mobile { display:none; } } @media handheld { #blog-title { display:none; } #description { display:none; } #blog-mobile-title { display:block; margin:0 0 .5em; font:250%/1.4em Georgia,Serif; color:#353; } #blog-mobile-title a { color:#353; text-decoration:none; } #description-mobile { display:block; margin:0 0 1.75em; color:#996; } } /* Links ----------------------------------------------- */ a:link { color:#488; } a:visited { color:#885; } a:hover { color:#000; } a img { border-width:0; } /* Posts ----------------------------------------------- */ .date-header { margin:0 0 .75em; padding-bottom:.35em; border-bottom:1px dotted #9b9; font:95%/1.4em Georgia,Serif; text-transform:uppercase; letter-spacing:.3em; color:#663; } .post { margin:0 0 2.5em; line-height:1.6em; } .post-title { margin:.25em 0; font:bold 130%/1.4em Georgia,Serif; color:#333; } .post-title a, .post-title strong { background:url("http://www.blogblog.com/dots/bg_post_title.gif") no-repeat 0 .25em; display:block; color:#333; text-decoration:none; padding:0 0 1px 45px; } .post-title a:hover { color:#000; } .post p { margin:0 0 .75em; } p.post-footer { margin:0; text-align:right; } p.post-footer em { display:block; float:left; text-align:left; font-style:normal; color:#996; } a.comment-link { /* IE5.0/Win doesn't apply padding to inline elements, so we hide these two declarations from it */ background/* */:/**/url("http://www.blogblog.com/dots/icon_comment.gif") no-repeat 0 .25em; padding-left:15px; } html>body a.comment-link { /* Respecified, for IE5/Mac's benefit */ background:url("http://www.blogblog.com/dots/icon_comment.gif") no-repeat 0 .25em; padding-left:15px; } .post img { margin:0 0 5px 0; padding:4px; border:1px solid #cca; } /* Comments ----------------------------------------------- */ #comments { margin:0; } #comments h4 { margin:0 0 10px; border-top:1px dotted #9b9; padding-top:.5em; font:bold 110%/1.4em Georgia,Serif; color:#333; } #comments-block { line-height:1.6em; } .comment-poster { background:url("http://www.blogblog.com/dots/icon_comment.gif") no-repeat 2px .35em; margin:.5em 0 0; padding:0 0 0 20px; font-weight:bold; } .comment-body { margin:0; padding:0 0 0 20px; } .comment-body p { margin:0 0 .5em; } .comment-timestamp { margin:0 0 .5em; padding:0 0 .75em 20px; color:#996; } .comment-timestamp a:link { color:#996; } .deleted-comment { font-style:italic; color:gray; } .paging-control-container { float: right; margin: 0px 6px 0px 0px; font-size: 80%; } .unneeded-paging-control { visibility: hidden; } /* More Sidebar Content ----------------------------------------------- */ .sidebar-title { margin:2em 0 .75em; padding-bottom:.35em; border-bottom:1px dotted #9b9; font:95%/1.4em Georgia,Serif; text-transform:uppercase; letter-spacing:.3em; color:#663; } #sidebar p { margin:0 0 .75em; line-height:1.6em; } #sidebar ul { margin:.5em 0 1em; padding:0 0px; list-style:none; line-height:1.5em; } #sidebar ul li { background:url("http://www.blogblog.com/dots/bullet.gif") no-repeat 3px .45em; margin:0; padding:0 0 5px 15px; } #sidebar p { margin:0 0 .6em; } /* Profile ----------------------------------------------- */ .profile-datablock { margin:0 0 1em; } .profile-img { display:inline; } .profile-img img { float:left; margin:0 8px 5px 0; border:4px solid #cc9; } .profile-data { margin:0; line-height:1.5em; } .profile-data strong { display:block; } .profile-textblock { clear:left; } /* Footer ----------------------------------------------- */ #footer { clear:both; padding:15px 0 0; } #footer hr { display:none; } #footer p { margin:0; } /* Feeds ----------------------------------------------- */ #blogfeeds { } #postfeeds { padding-left: 20px }

Prudent Baby

Get sewing how to, sewing tutorials, and sewing help to learn sewing. We offer sewing tutorial for sewing moms.

Monday, June 28, 2010

Easiest Softies Ever
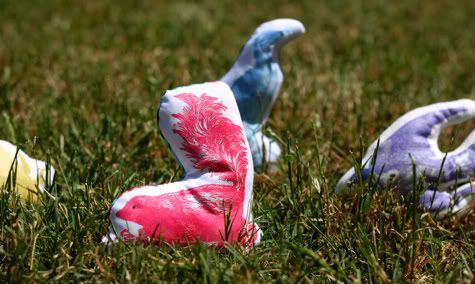

Okay so these are the easiest homemade stuffed animals ever.  I know I've mentioned my love for the blog Graphics Fairy, where you'll find a daily vintage royalty-free image of goodness.  Well, I went to her site and snagged some great animal pics, colored them, then printed them on to some iron-on transfers...AND posted the template for you after the jump.
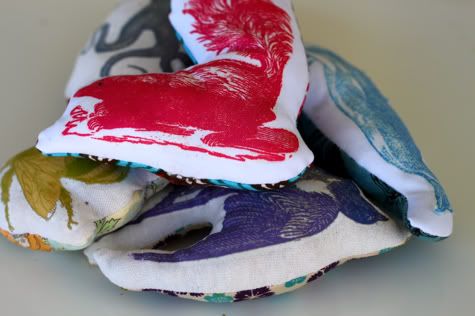
This little softie DIY is a great way to put some wayward fabric scraps to good use (as backings) and to come off like a crafty superstar with hardly any effort at all.
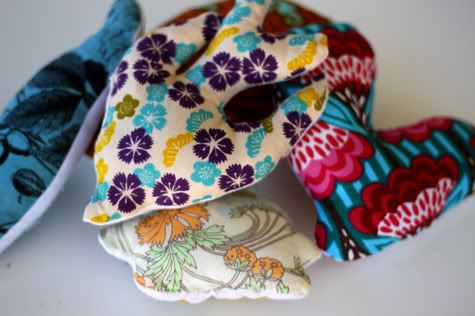
Get the full DIY for the Easiest Softies Ever after the jump...

Easiest Homemade Softies Ever

1.  Find some images you like.  Design your own, visit Graphics Fairy and get some, or download this template I made of some images recolored:
Vintage Animal Softies

2.  Print them out onto iron on transfer paper:
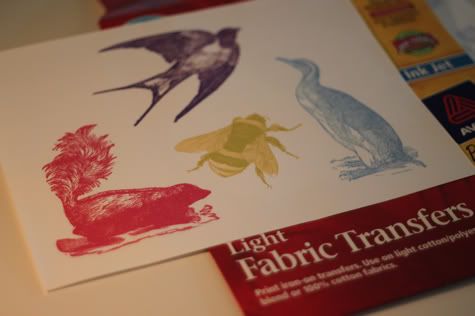

2.  Cut out your transfers close to the edges:
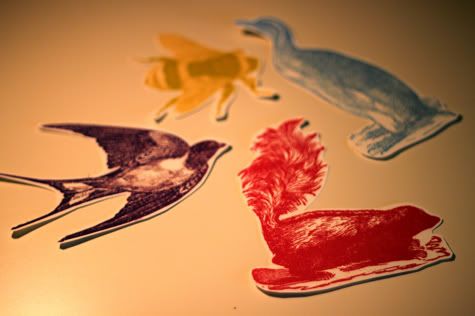

3.  Lay them on your fabric and iron those babies on:
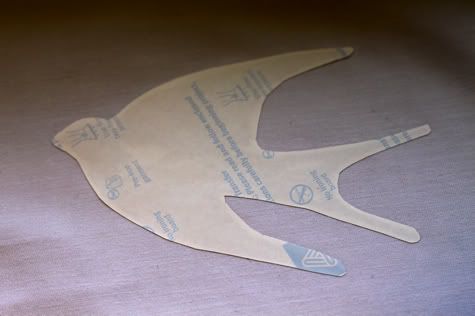

4.  I used an old t-shirt for a few of them, and some white canvas for the others.  When they're all set and cooled, peel the transfer paper off:
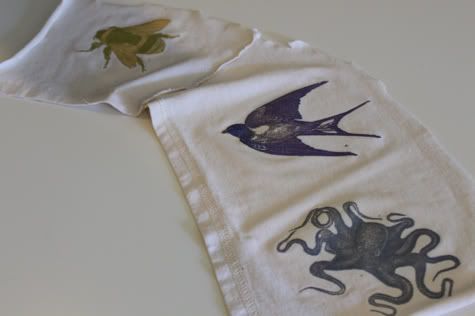

5.  Cut around your shapes with a decent amount of space:
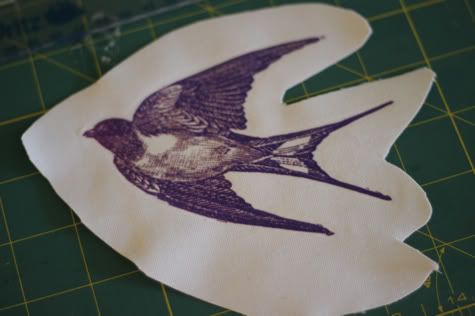

6.  Lay them right sides facing on a fabric scrap, then sew around the edge, leaving a hole for turning (and stuffing), back stitching at the beginning and end:
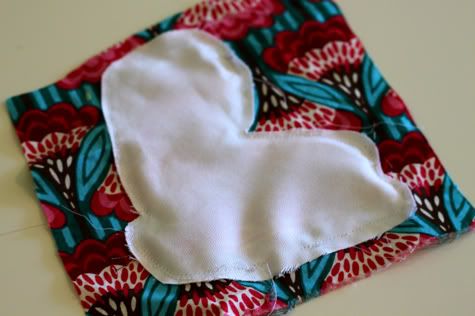

7.  Cut off the excess fabric:
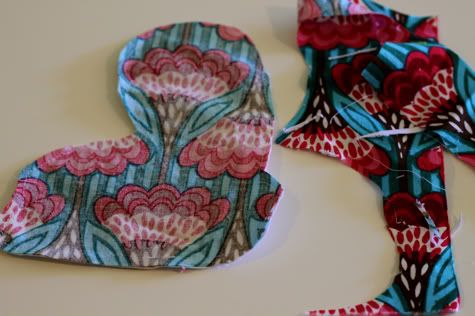

8.  Turn right side out and push the edges out:
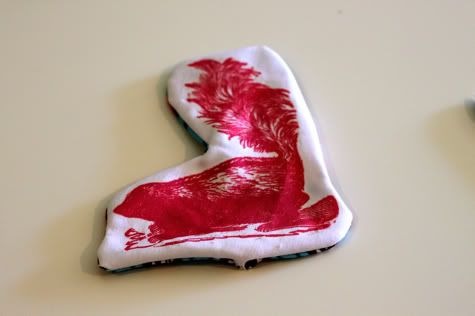

9.  Stuff with some batting.  I gave the skunk an embroidered eye with some black thread as well:
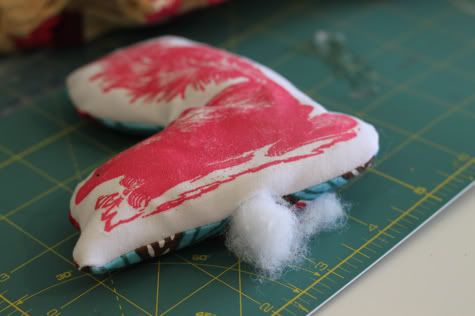

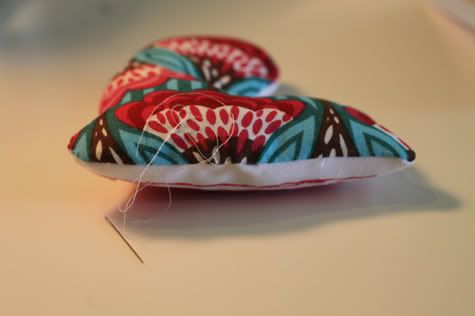
10.  Slip stitch the opening closed:

Repeat for all your shapes:


Tell me, how easy was that?  You could do a million things with a printable softie, go crazy!  No need to pay $20 for one in a store.  I can totally see printable softies made with whatever your husband is into, a bass fish or vintage cars or star wars, right?  What do you think would make a cute softie?

Labels: , , , , , , , , , ,

9 Comments:

Blogger Meg said...

I have a great love the the Graphics Fairy as well. I had this same idea as yours but you got to post it before I had the chance!! I have so many projects in mind and a few of them have to do with the vintage images from that site and using them with iron on transfer paper. I guess great minds think alike :)

June 28, 2010 at 12:19 PM  
Blogger Jocelyn said...

I have also loved this site for a long time. These softies are really cute. Can you tell us how you recolored the images?

June 28, 2010 at 6:46 PM  
Blogger Karen The Graphics Fairy said...

These are adorable!!! Such a cute idea and the colors are awesome! I love how you embroidered the eye on the Skunk, I think he's my favorite. Thanks so much for the link love, that was so sweet of you!

June 29, 2010 at 7:15 AM  
Blogger Nettie said...

These are gorgeous! I have a great-grandson and a great-nephew (both just a few months old). I'm going to have to try making some of these for them. I love the Graphics Fairy too and now I'll be following you as well.
Thank you for sharing. :-)

June 29, 2010 at 6:38 PM  
Anonymous Anonymous said...

oh, i adore these... these are getting bumped up toward the top of my long and never-ending must-make it list. i just love the idea of a basket of these for play... would also make a nice quiet time activity. thanks for the inspiration -i've shared the idea on my blog's weekly roundup, here:

http://www.camilledawn.com/2010/06/tuesday-tumblr-3.html

June 30, 2010 at 9:21 PM  
Blogger Unknown said...

These are so great. I'm off to the store to get iron on paper now!

September 26, 2010 at 11:58 AM  
Blogger Jenn Doll said...

So Stinkin cute!! These are so fun! I bet my son would love to hand these out at Christmas to all of his cousins!
Thanks for the fun idea!

October 26, 2010 at 10:31 AM  
Blogger Mallory said...

These are great!!! How did you recolor the images?

April 25, 2011 at 3:13 PM  
Anonymous Anonymous said...

Stuffed an Ewok today. These were easy peasy!

May 22, 2011 at 10:05 PM  

Post a Comment

Subscribe to Post Comments [Atom]

<< Home