body { background:#fff url("http://www.blogblog.com/dots/bg_dots.gif") 50% 0; margin:0; padding:0 10px; text-align:center; font:x-small Verdana,Arial,Sans-serif; color:#333; font-size/* */:/**/small; font-size: /**/small; } /* Page Structure ----------------------------------------------- */ @media all { #content { background:url("http://www.blogblog.com/dots/bg_3dots.gif") no-repeat 250px 50px; width:700px; margin:0 auto; padding:50px 0; text-align:left; } #main { width:450px; float:right; padding:50px 0 20px; font-size:85%; } #main2 { background:url("http://www.blogblog.com/dots/bg_dots2.gif") -100px -100px; padding:20px 10px 15px; } #sidebar { width:200px; float:left; font-size:85%; padding-bottom:20px; } #sidebar2 { background:url("http://www.blogblog.com/dots/bg_dots2.gif") 150px -50px; padding:5px 10px 15px; width:200px; width/* */:/**/180px; width: /**/180px; } } @media handheld { #content { width:90%; } #main { width:100%; float:none; } #sidebar { width:100%; float:none; } #sidebar2 { width:100%; } } html>body #main, html>body #sidebar { /* We only give this fade from white to nothing to browsers that can handle 24-bit transparent PNGs */ background/* */:/**/url("http://www.blogblog.com/dots/bg_white_fade.png") repeat-x left bottom; } /* Title & Description ----------------------------------------------- */ @media all { #blog-title { margin:0 0 .5em; font:250%/1.4em Georgia,Serif; color:#353; } #blog-title a { color:#353; text-decoration:none; } #description { margin:0 0 1.75em; color:#996; } #blog-mobile-title { display:none; } #description-mobile { display:none; } } @media handheld { #blog-title { display:none; } #description { display:none; } #blog-mobile-title { display:block; margin:0 0 .5em; font:250%/1.4em Georgia,Serif; color:#353; } #blog-mobile-title a { color:#353; text-decoration:none; } #description-mobile { display:block; margin:0 0 1.75em; color:#996; } } /* Links ----------------------------------------------- */ a:link { color:#488; } a:visited { color:#885; } a:hover { color:#000; } a img { border-width:0; } /* Posts ----------------------------------------------- */ .date-header { margin:0 0 .75em; padding-bottom:.35em; border-bottom:1px dotted #9b9; font:95%/1.4em Georgia,Serif; text-transform:uppercase; letter-spacing:.3em; color:#663; } .post { margin:0 0 2.5em; line-height:1.6em; } .post-title { margin:.25em 0; font:bold 130%/1.4em Georgia,Serif; color:#333; } .post-title a, .post-title strong { background:url("http://www.blogblog.com/dots/bg_post_title.gif") no-repeat 0 .25em; display:block; color:#333; text-decoration:none; padding:0 0 1px 45px; } .post-title a:hover { color:#000; } .post p { margin:0 0 .75em; } p.post-footer { margin:0; text-align:right; } p.post-footer em { display:block; float:left; text-align:left; font-style:normal; color:#996; } a.comment-link { /* IE5.0/Win doesn't apply padding to inline elements, so we hide these two declarations from it */ background/* */:/**/url("http://www.blogblog.com/dots/icon_comment.gif") no-repeat 0 .25em; padding-left:15px; } html>body a.comment-link { /* Respecified, for IE5/Mac's benefit */ background:url("http://www.blogblog.com/dots/icon_comment.gif") no-repeat 0 .25em; padding-left:15px; } .post img { margin:0 0 5px 0; padding:4px; border:1px solid #cca; } /* Comments ----------------------------------------------- */ #comments { margin:0; } #comments h4 { margin:0 0 10px; border-top:1px dotted #9b9; padding-top:.5em; font:bold 110%/1.4em Georgia,Serif; color:#333; } #comments-block { line-height:1.6em; } .comment-poster { background:url("http://www.blogblog.com/dots/icon_comment.gif") no-repeat 2px .35em; margin:.5em 0 0; padding:0 0 0 20px; font-weight:bold; } .comment-body { margin:0; padding:0 0 0 20px; } .comment-body p { margin:0 0 .5em; } .comment-timestamp { margin:0 0 .5em; padding:0 0 .75em 20px; color:#996; } .comment-timestamp a:link { color:#996; } .deleted-comment { font-style:italic; color:gray; } .paging-control-container { float: right; margin: 0px 6px 0px 0px; font-size: 80%; } .unneeded-paging-control { visibility: hidden; } /* More Sidebar Content ----------------------------------------------- */ .sidebar-title { margin:2em 0 .75em; padding-bottom:.35em; border-bottom:1px dotted #9b9; font:95%/1.4em Georgia,Serif; text-transform:uppercase; letter-spacing:.3em; color:#663; } #sidebar p { margin:0 0 .75em; line-height:1.6em; } #sidebar ul { margin:.5em 0 1em; padding:0 0px; list-style:none; line-height:1.5em; } #sidebar ul li { background:url("http://www.blogblog.com/dots/bullet.gif") no-repeat 3px .45em; margin:0; padding:0 0 5px 15px; } #sidebar p { margin:0 0 .6em; } /* Profile ----------------------------------------------- */ .profile-datablock { margin:0 0 1em; } .profile-img { display:inline; } .profile-img img { float:left; margin:0 8px 5px 0; border:4px solid #cc9; } .profile-data { margin:0; line-height:1.5em; } .profile-data strong { display:block; } .profile-textblock { clear:left; } /* Footer ----------------------------------------------- */ #footer { clear:both; padding:15px 0 0; } #footer hr { display:none; } #footer p { margin:0; } /* Feeds ----------------------------------------------- */ #blogfeeds { } #postfeeds { padding-left: 20px }

Prudent Baby

Get sewing how to, sewing tutorials, and sewing help to learn sewing. We offer sewing tutorial for sewing moms.

Tuesday, April 6, 2010

Fabric Silhouette Garlands


Here is another take on the ever popular garland as decor for a party or a bedroom. This is super simple - you don't even need to know how to sew. Of course ours are elephant themed but you can make any shape you want, and the whole project comes in under an hour.

I can imagine butterflies, or owls, or trains, or butterflies AND owls AND trains. Or silhouettes of your whole family lined up in a row! Get the full Fabric Silhouette Garland tutorial after the jump...

DIY Fabric Silhouette Garland


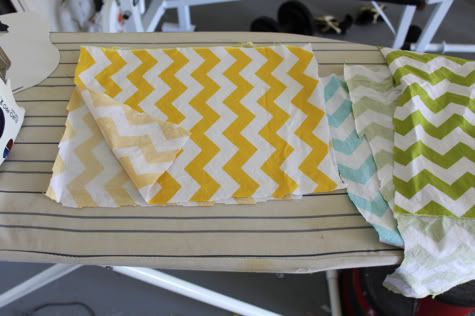
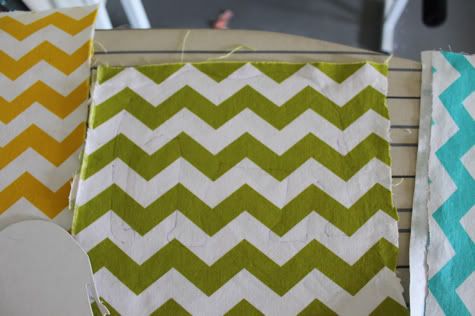
All you need to make this garland is some fabric, some Double Stick Fusible Web, and a template for your shape of choice.

1.  Start by fusing your fabric.  Just lay your fusible web between two pieces of fabric (with the fusible web on the wrong sides) and iron it in place.


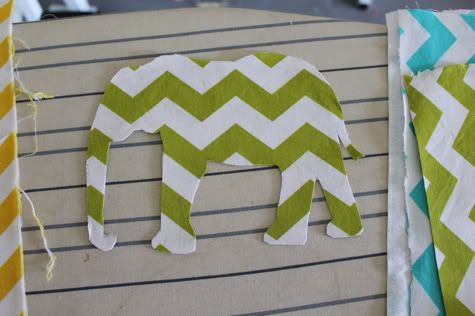
2. Trace your shape with an air-erasable marker.  I used a cardboard elephant I bought at Michael's, but you could use a stencil or any shape you like:


3.  Cut your shape out:

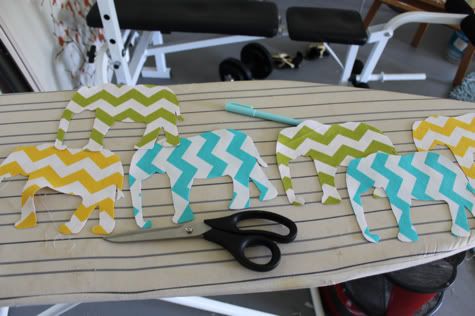
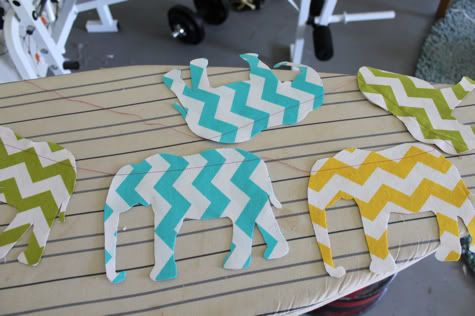
Repeat until you have as many shapes as you'd like:


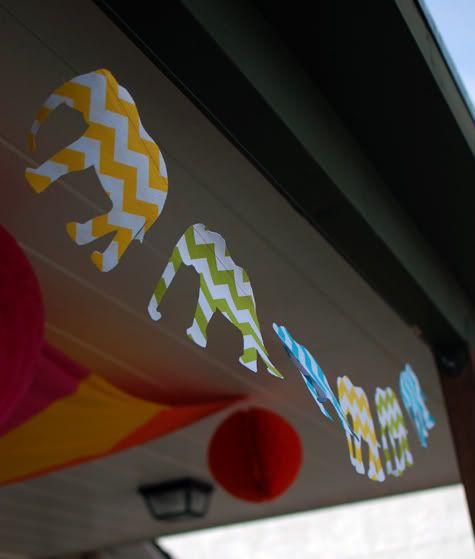
4.  String them all together. I sewed them with my sewing machine, leaving a long thread at the beginning, and just stitching empty stitches in between the shapes, but you could use yarn or string and cut holes in the shapes to attach:


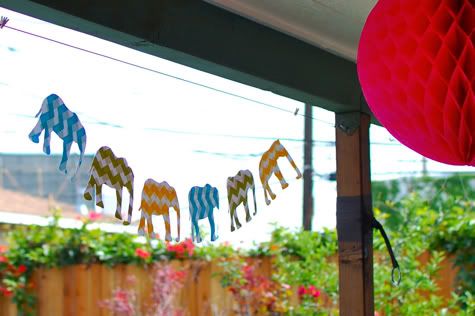
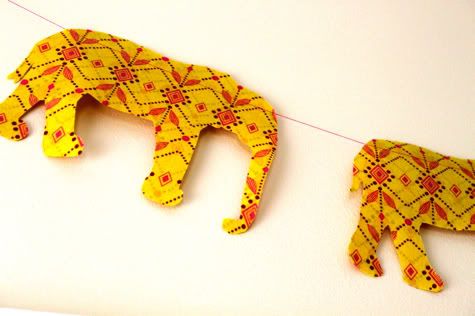
Done!  Hang as party decoration:


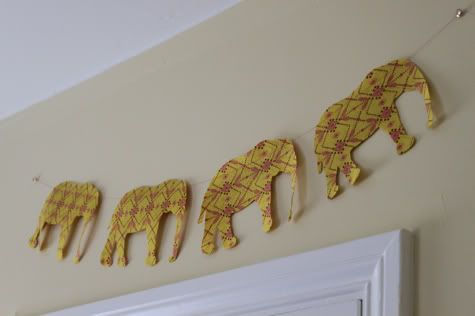
Or in the nursery.  I hung these above the closet door:


I really hope you all make some of these and email us pictures!  Such a simple and fun way to spice up a bedroom or party.

Labels: , , , , , , , , , , ,

8 Comments:

Blogger Sharon said...

so cute and super simple

April 6, 2010 at 2:48 AM  
Blogger Jacinda said...

This is genius. I'm not kidding! I HAVE to make some!

April 6, 2010 at 6:13 AM  
Blogger Jacinda said...

Oh and don't think it goes unnoticed that the Anna Maria Horner garland matches Scarlet's Party Dress. Fabulous.

April 6, 2010 at 6:20 AM  
Blogger The Cheap Chic Momma said...

What a cheap-chic way to spruce up a child's room! I love this! My next rainy day project!

April 6, 2010 at 10:58 AM  
Blogger bess said...

Adorable! Thanks for the idea!

May 12, 2010 at 10:53 AM  
Anonymous Anonymous said...

I love this so much!!! We threw a baby shower for a friend recently and stole your idea except we used a flower dicut instead of elephants. It was such a hit that some of the girls took it back to decorate the girls' side of the youth room at our church. SO cute and so cheap. A killer combo in my book. =)

September 25, 2010 at 8:33 PM  
Blogger Kelly said...

I know this post is froma while ago. But I'm just creating my nursery now. Due at the end of March. Thought I'd share my blog post where I featured my silhouettes. Thanks again for the tutorial. I'm sure it's going to look great when it's all done! http://yllek82.blogspot.com/2011/01/big-sigh.html

Kelly H.

January 18, 2011 at 12:17 PM  
Blogger Ryan & Carly said...

Where did you get the Chevron stripe fabric?? Love this idea!

June 28, 2011 at 11:49 PM  

Post a Comment

Subscribe to Post Comments [Atom]

<< Home