Quick & Pretty Makeup Bag
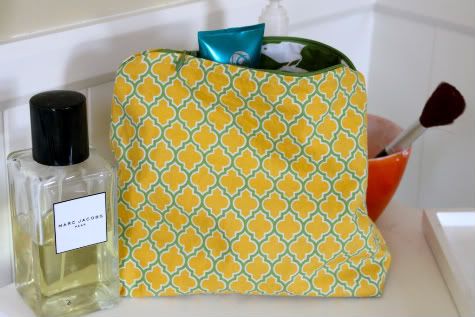
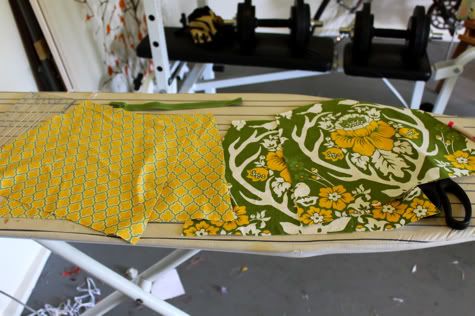
I'm very particular about my shampoo and always drag the full size bottle along on my travels. It never fits in a standard toiletry bag, so I decided to make myself a custom size and I love it! This makeup bag is a simple gusseted zip pouch with lining. If you are nervous about sewing zippers, this is a great first project.
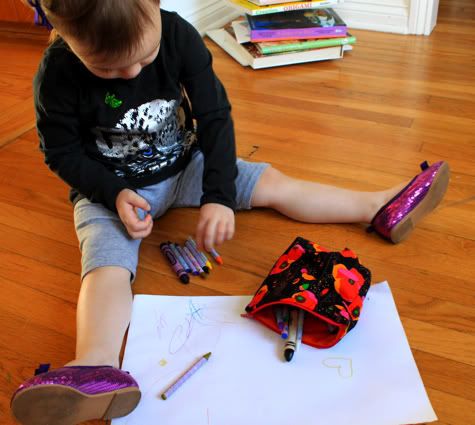
Also, if you do the lining in oilcloth, a makeup bag is a great way to store crayons! A common refrain in our house is currently "ME COLORING!" and ziplocs full of crayons can be found at random locations, including melted in the trunk of my car! Turns out that with a little treat of a bag to tote them in, crayons seem more special and no longer get lost.
Get the DIY Makeup Bag Tutorial after the jump...
DIY Makeup Bag Pattern
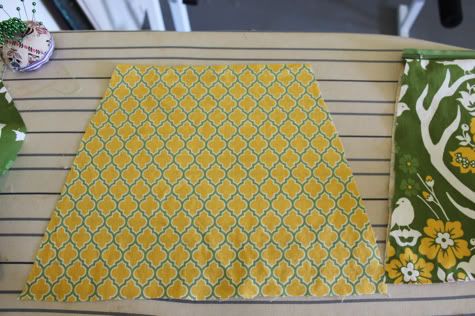
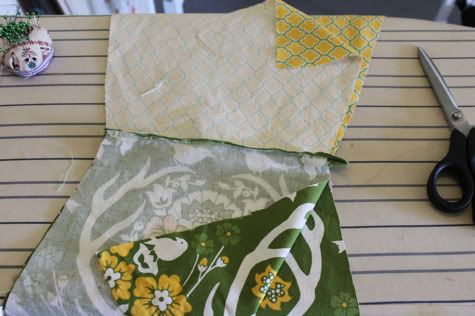
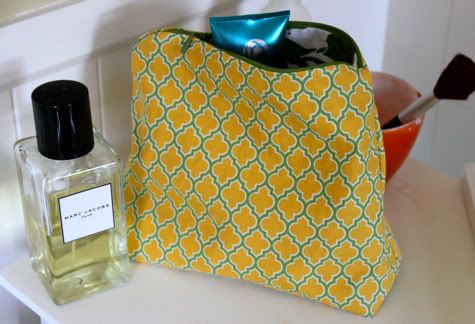
1. Pre-wash and cut your fabric. For the makeup bag I used my amazing City Craft stash, but the fabrics are available online here: Joel Dewberry Lodge Lattice in Golden Rod (outside) and Joel Dewberry Antler Damask in Tarragon (lining). For the crayon bag I used Alexander Henry Good Earth Poppies Brite (1/2 Yard). You'll need two pieces for the lining and two for the outside, as well as a zipper. You want to cut a trapezoid shape that extends a 1/2 inch beyond your zipper on each side. Mine is 9" at the top and 12" along the bottom, 10" tall, with an 8" zipper.
2. Lay one outside piece face up. Lay your zipper facedown with the zip to the left with the top edge of the zipper lined up to the top edge of the fabric. Now lay a lining piece facedown on top, with top edges lined up, like so:

Sew in place with your zipper foot:
3. Now fold your piece with wrong sides facing, it will look something like this:
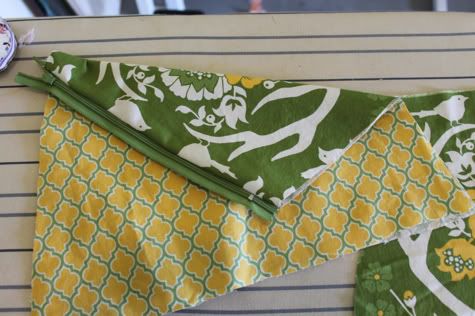
Lay your other top piece right side up:
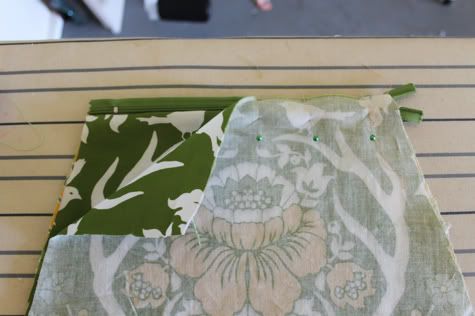
Now lay your zipper and assembled pieces with the outside fabric face down and the lining fabric facing up as pictured. The zipper will be face down with the zip to the right this time. Make sure all the top edges are lined up:
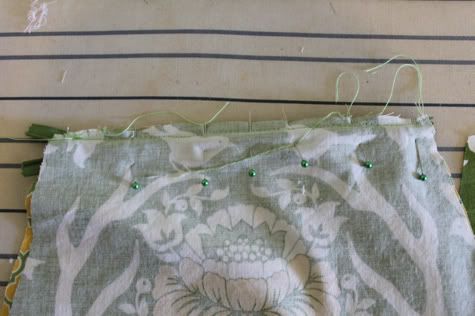
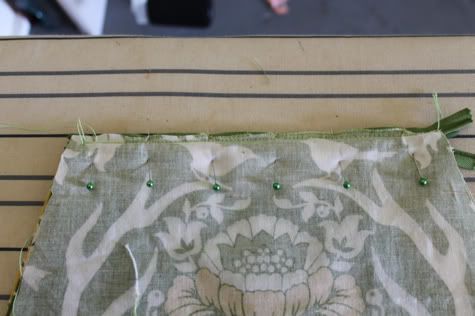
Now lay your other lining piece right side down on top, also lining up the top edge and pin in place:
Sew it on:
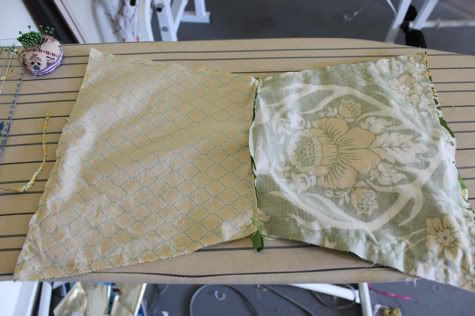
4. Now flip it around so the outside pieces are right-sides facing and the lining pieces are right-sides facing like so. At this point UNZIP YOUR ZIPPER so you can turn it inside out after sewing:
Leaving a hole at the bottom center of the lining, sew with a straight stitch all the way around, across the zipper, back stitching at the beginning and end:
5. Turn the whole piece inside out through the hole you left in the lining:
Sew the hole in the lining closed with a straight stitch:
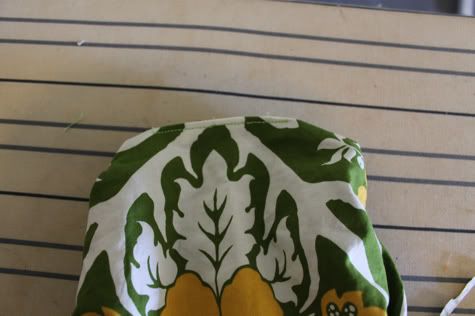
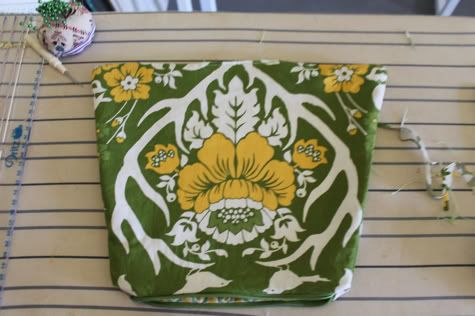
6. Now we want to make our gusset. You want to push the outside into the lining so your bag is inside out. Iron it flat:
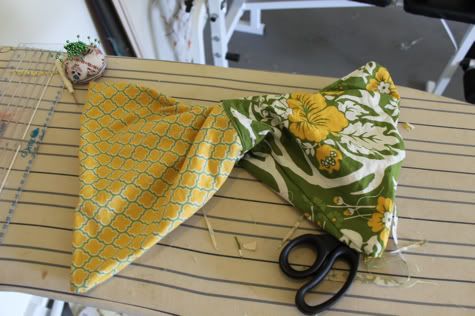
Pull the two bottom corners together into a point, which will require turning your piece so the seam is in the top center:
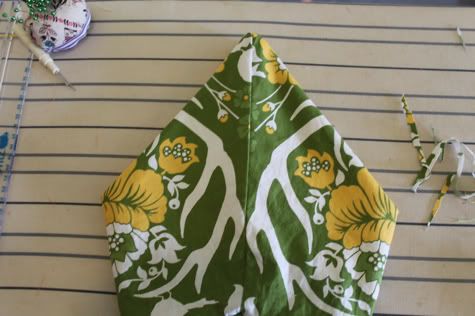
This is what it looks like from the side:

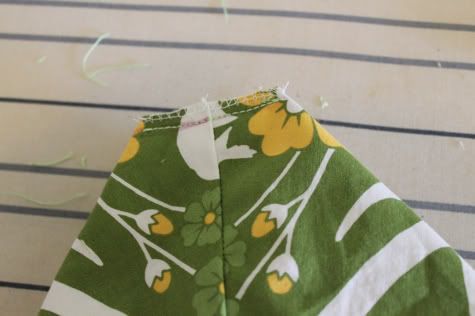
Across the tip of each point draw a three inch line, making sure each line is in the same place on both points, nice and even. Sew across that line on each point (don't sew your two points together), then snip the top of the point off:
Turn your bag right side out, you're done! Such an easy and rewarding project!
Labels: Accessories, DIY, Gifts, Hot Mess Mommy, Kids, Organization, Sewing, Under $5, Under an Hour
posted by Jaime @ 3:00 AM
![]()

22 Comments:
thank you so much for this tutorial!! it seems pretty simple and i love the fabrics you used! now i just have to go and find some oilcloth...
oh, i'm definitely going to make is! I've never used a zipper before so like you said this will be a great first time project ... thanks for the tutorial!
So cute! I can't wait to make a bunch of these!
Such a great choice of fabrics...super cute :)
So... this is amazingly beautiful! Look at that fabric!
I'm finally home from my trek to the arboretum... It was gorgeous. With a little stop at City Craft of course (oops.)
Great choice using the Joel Dewberry! You have been super busy, girl! We love the projects... So talented :)
I love that Joel fabric in green. I've used it in orange, but that green is mmmmmm
That is so pretty! Thanks so much for this, I'll be linking.
I saw your great project on One Pretty Thing and will give it a go using fabric from my stash (oh, will it ever be whittled down?). Thank you so much for sharing your wonderful tutorial.
Gahhhh, thank you!! I've been putting off making a bag like this for a long time, because I couldn't find a tutorial that encompassed all the things I wanted to do, so I would have had to do practice bags on scrap fabric. (And busy mamas don't always have time for that!! ;)
Can't wait to try this out on my bag I've been wanting to make - thanks again!
Thanks for sharing! So cute!
I got a sewing machine yesterday and made this as my first project and it came out really well (with only a few flaws)! I can't wait to make another!
So I was really excited to make these as Christmas presents for my girlfriends. On one of my days off I went to Beverly's and picked out some beautiful fabric that I think matches each girlfriends personality. I bought matching zippers made sure I had matching thread and was sure I was all set for an easy awesome gift project. I went home made a pattern of a trapezoid and got to ironing my fabric. I had everything cut out pinned together and ready to get stitched together.
Until... I got to my machine and tried about 5 times to sew the zipper on without a zipper foot. I had looked online for tutorials, and I checked the manual from the machine how to sew a zipper. The wonderful manual said that a zipper foot attachment was hidden under the extension table of the machine. I excitedly ripped the extension table off my matching to see a 7yr old piece of tape that had turned amber with age holding no such zipper foot.
I raced to the phone to call my mother who had handed me down this super beginner machine and requested she tear about the house to find said zipper foot. Which ... didn't happen..
So here I am with two makeup cases all perfectly cut and pinned together that won't be sewn until I get my $200 early Christmas sewing machine.
oh no liz!!!!! what a bummer. you can buy a universal zipper foot for a few bucks at most sewing shops. or i guess you could hand sew (eew i hate hand sewing). BUMMER!
I'm trying to decide between a Brother XR7700 or a Brother CS6000I any ideas? There is only a $10 difference.
Liz-We hear so many good things about the CS6000I that we can't help but recommend it, esp at $170 on Amazon! Do a search for sewing machine here on Prudent Baby for a lil review and link. Looks like people like the XR too tho. It mentions that it has some special features geared towards quilting? Not sure if that is a selling point or not.
i am completely a beginning sewer, but i made one of these tonight as a gift for my sister, and it turned out fantastic - thanks so much for these awesome, easy-to-follow directions!
Just noticed the zipper in the pic is a tad nicer looking than the cheapies I see everywhere... Any tips on where to get nicer zippers in LA? Thanks! -Karen
I have been 'ready' to try and sew with oil cloth for about 2 months now...even have 4 yards waiting for me to start on! I just have a few questions: What size needle would you suggest? Do you have a recommendation for tension and stitch length? and lastly is regular thread ok? Oh and by ready...I meant about as ready as any new sewer is for starting any project :) Thanks!
I have made four of these now and they are so cute and easy. Thank you so much for the tutorial!! They are wonderful gifts.
Im a beginner sewer and got so excited about this project...till i realized I dont know how to sew zippers and I dont have a zipper foot..boo.
any ideas on how to sew a flap with a mirror onto the bag? my mom has this makeup bag that has been OBSESSED with for more than 15 years but it is falling apart. She refuses to buy a new one unless it is exactly like the one she has..it's very similiar to this tutorial except hers has a flap over the zipper with a mirror in it...
Post a Comment
Subscribe to Post Comments [Atom]
<< Home