body { background:#fff url("http://www.blogblog.com/dots/bg_dots.gif") 50% 0; margin:0; padding:0 10px; text-align:center; font:x-small Verdana,Arial,Sans-serif; color:#333; font-size/* */:/**/small; font-size: /**/small; } /* Page Structure ----------------------------------------------- */ @media all { #content { background:url("http://www.blogblog.com/dots/bg_3dots.gif") no-repeat 250px 50px; width:700px; margin:0 auto; padding:50px 0; text-align:left; } #main { width:450px; float:right; padding:50px 0 20px; font-size:85%; } #main2 { background:url("http://www.blogblog.com/dots/bg_dots2.gif") -100px -100px; padding:20px 10px 15px; } #sidebar { width:200px; float:left; font-size:85%; padding-bottom:20px; } #sidebar2 { background:url("http://www.blogblog.com/dots/bg_dots2.gif") 150px -50px; padding:5px 10px 15px; width:200px; width/* */:/**/180px; width: /**/180px; } } @media handheld { #content { width:90%; } #main { width:100%; float:none; } #sidebar { width:100%; float:none; } #sidebar2 { width:100%; } } html>body #main, html>body #sidebar { /* We only give this fade from white to nothing to browsers that can handle 24-bit transparent PNGs */ background/* */:/**/url("http://www.blogblog.com/dots/bg_white_fade.png") repeat-x left bottom; } /* Title & Description ----------------------------------------------- */ @media all { #blog-title { margin:0 0 .5em; font:250%/1.4em Georgia,Serif; color:#353; } #blog-title a { color:#353; text-decoration:none; } #description { margin:0 0 1.75em; color:#996; } #blog-mobile-title { display:none; } #description-mobile { display:none; } } @media handheld { #blog-title { display:none; } #description { display:none; } #blog-mobile-title { display:block; margin:0 0 .5em; font:250%/1.4em Georgia,Serif; color:#353; } #blog-mobile-title a { color:#353; text-decoration:none; } #description-mobile { display:block; margin:0 0 1.75em; color:#996; } } /* Links ----------------------------------------------- */ a:link { color:#488; } a:visited { color:#885; } a:hover { color:#000; } a img { border-width:0; } /* Posts ----------------------------------------------- */ .date-header { margin:0 0 .75em; padding-bottom:.35em; border-bottom:1px dotted #9b9; font:95%/1.4em Georgia,Serif; text-transform:uppercase; letter-spacing:.3em; color:#663; } .post { margin:0 0 2.5em; line-height:1.6em; } .post-title { margin:.25em 0; font:bold 130%/1.4em Georgia,Serif; color:#333; } .post-title a, .post-title strong { background:url("http://www.blogblog.com/dots/bg_post_title.gif") no-repeat 0 .25em; display:block; color:#333; text-decoration:none; padding:0 0 1px 45px; } .post-title a:hover { color:#000; } .post p { margin:0 0 .75em; } p.post-footer { margin:0; text-align:right; } p.post-footer em { display:block; float:left; text-align:left; font-style:normal; color:#996; } a.comment-link { /* IE5.0/Win doesn't apply padding to inline elements, so we hide these two declarations from it */ background/* */:/**/url("http://www.blogblog.com/dots/icon_comment.gif") no-repeat 0 .25em; padding-left:15px; } html>body a.comment-link { /* Respecified, for IE5/Mac's benefit */ background:url("http://www.blogblog.com/dots/icon_comment.gif") no-repeat 0 .25em; padding-left:15px; } .post img { margin:0 0 5px 0; padding:4px; border:1px solid #cca; } /* Comments ----------------------------------------------- */ #comments { margin:0; } #comments h4 { margin:0 0 10px; border-top:1px dotted #9b9; padding-top:.5em; font:bold 110%/1.4em Georgia,Serif; color:#333; } #comments-block { line-height:1.6em; } .comment-poster { background:url("http://www.blogblog.com/dots/icon_comment.gif") no-repeat 2px .35em; margin:.5em 0 0; padding:0 0 0 20px; font-weight:bold; } .comment-body { margin:0; padding:0 0 0 20px; } .comment-body p { margin:0 0 .5em; } .comment-timestamp { margin:0 0 .5em; padding:0 0 .75em 20px; color:#996; } .comment-timestamp a:link { color:#996; } .deleted-comment { font-style:italic; color:gray; } .paging-control-container { float: right; margin: 0px 6px 0px 0px; font-size: 80%; } .unneeded-paging-control { visibility: hidden; } /* More Sidebar Content ----------------------------------------------- */ .sidebar-title { margin:2em 0 .75em; padding-bottom:.35em; border-bottom:1px dotted #9b9; font:95%/1.4em Georgia,Serif; text-transform:uppercase; letter-spacing:.3em; color:#663; } #sidebar p { margin:0 0 .75em; line-height:1.6em; } #sidebar ul { margin:.5em 0 1em; padding:0 0px; list-style:none; line-height:1.5em; } #sidebar ul li { background:url("http://www.blogblog.com/dots/bullet.gif") no-repeat 3px .45em; margin:0; padding:0 0 5px 15px; } #sidebar p { margin:0 0 .6em; } /* Profile ----------------------------------------------- */ .profile-datablock { margin:0 0 1em; } .profile-img { display:inline; } .profile-img img { float:left; margin:0 8px 5px 0; border:4px solid #cc9; } .profile-data { margin:0; line-height:1.5em; } .profile-data strong { display:block; } .profile-textblock { clear:left; } /* Footer ----------------------------------------------- */ #footer { clear:both; padding:15px 0 0; } #footer hr { display:none; } #footer p { margin:0; } /* Feeds ----------------------------------------------- */ #blogfeeds { } #postfeeds { padding-left: 20px }

Prudent Baby

Get sewing how to, sewing tutorials, and sewing help to learn sewing. We offer sewing tutorial for sewing moms.

Friday, March 5, 2010

How to Make A Pouf Pillow
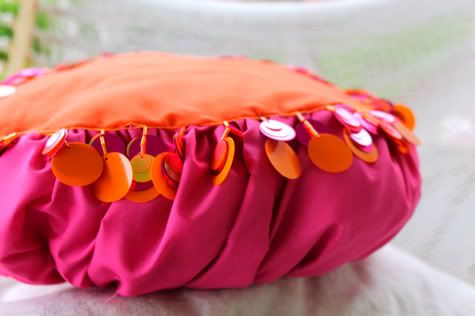

Ladies, I am about to start a deluge of pillow DIYs for you, I hope you don't mind.  They're all quite bright as they're themed for a mystery-event-to-be-revealed-later (I can't wait to tell you about it!).  First up is a pouf pillow, a little tuffet of sorts.  While I used some crazy sequin trim on clearance at Wal Mart, you may want something more subtle, perhaps Pom Pom Fringe, beaded ribbon, or piping.  This DIY pillow was great because I had to use actual geometry (remember that the circumference of a circle = 2r X pi?)...

Don't be alarmed, I do the math and give the whole scoop on How to Make A Pouf after the jump...
How to Sew a Pouf Pillow

1.  Wash & cut your fabric. These are done with inexpensive cotton because I have to make a million of them, but I think this pillow would be a time to use some pretty fabric you've been saving for the top piece, and something solid on the sides.  In a nice home-decor weight it would be a great addition to a love seat or even a floor pillow.  To decide the measurements of your cuts you can copy mine (to make a 1 foot diameter circle) or you can use some geometry, yay!  If you choose the geometry route, you won't be lying when you tell your kids that they'll actually use this stuff one day!

Start with two circles 1/2" larger then your desired finished pillow size.  For my 12" pillow I cut two 12.5" diameter circles:


For the side of your pouf, you'll need to calculate the circumference of your circle.  So take the diameter of your circle and multiply it by Pi.  So in this case 12 X 3.14 = 37.68.  Since we want a little overlap for stuffing, I am going to round up to 40.  So i need a piece that will be 40" long AFTER it is ruffled, so I actually want a piece 80" long and 8" thick.  I sewed two 40" pieces together along one short side to get an 80" piece.
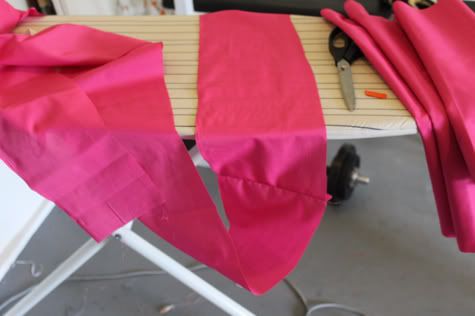

Sew a basting stitch all the way along each long side of your strip.  Pull the bobbin thread and gently start ruffling:


Ruffle both sides.  Try not to break your thread, that sucks and you have to start over.  Keep ruffling until your piece is about 3" longer than the circumference of your circle (so 43" in my case):
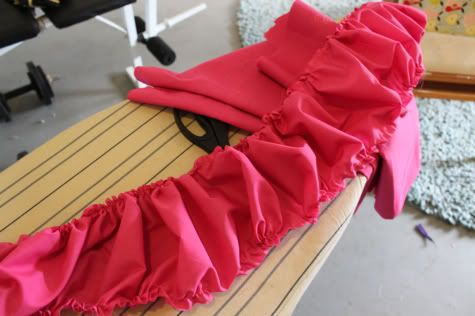

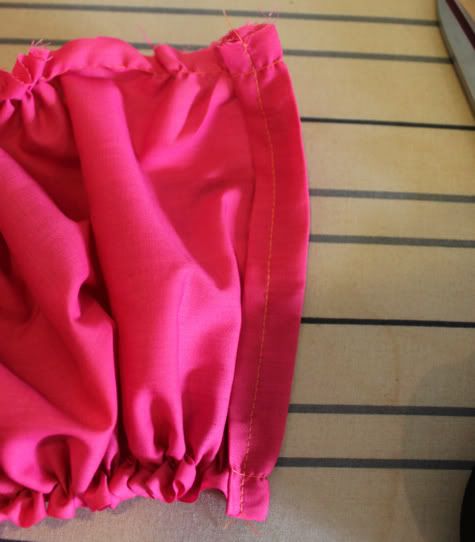
Once it's all ruffled, fold each of the short edges over 1/4" and iron, then another 1/4" and iron, and sew in place:

Now take a circle and lay it right side up to create the top of your DIY pouf.  Pin your trim along the edge with the trim on the inside:
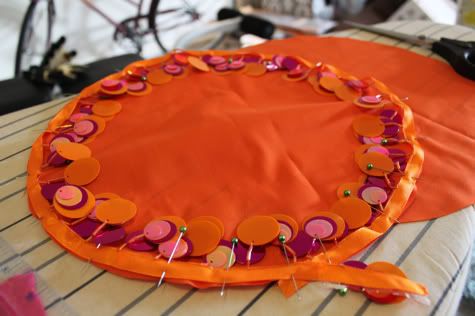

Sew it on with a basting stitch along the inside edge:


Now take your side piece, right side down (so right sides are facing) and pin it to the edge of your circle.  Make sure all the ruffle edges are facing outwards so they don't get sewn in and show up on the front.  Overlap the beginning and end of the ruffle piece by about 3" (this will be where you stuff the pillow)
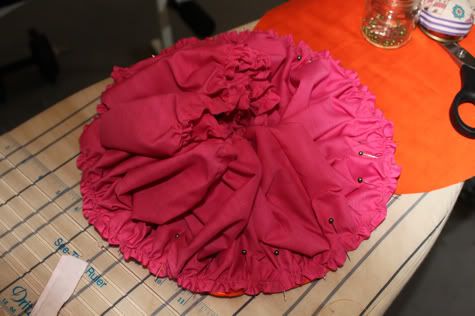

Turn your piece over so you can see the basting line of your trim (you are looking at the bottom of your circle now):
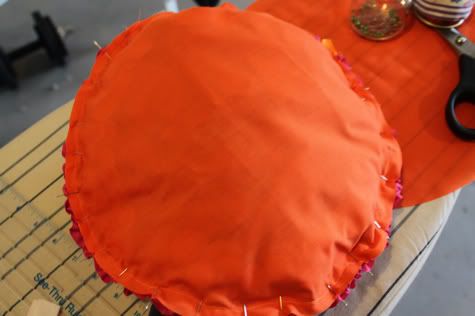

Sew in place with a regular length stitch just inside the basting stitch all the way around:
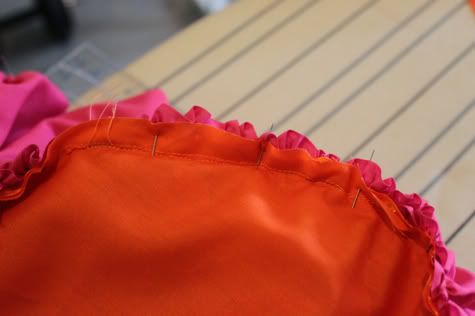

Turn it over and see you've created the top of your pillow:


Now lay your other circle right side up and turn your pillow inside out.  Pin the other side of the ruffled side piece around the other circle right sides facing, making sure all the ruffles edges are facing outwards and overlapping the ends like before:
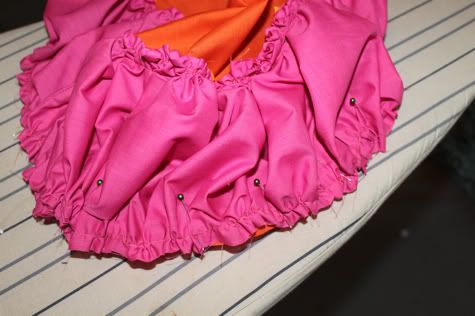

Sew that in place.  Then you can trim the seams with pinking shears or serge:
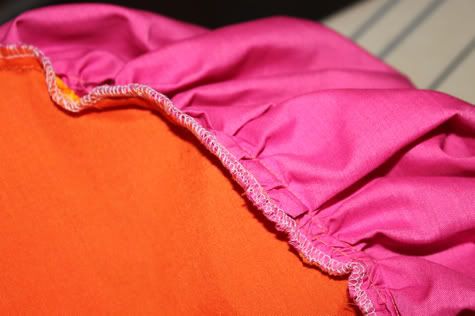

Now time to stuff with some inexpensive Polyfill. Where the ruffled edges overlap you can pull them apart and stuff your pillow:


But when you close them you'll never be able to see the hole, see??  isn't that awesome??
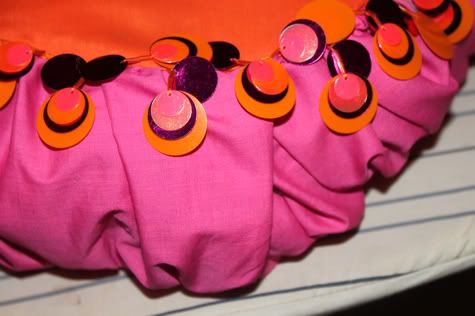

You're done!


Awww...a little Pouf for a little Princess.
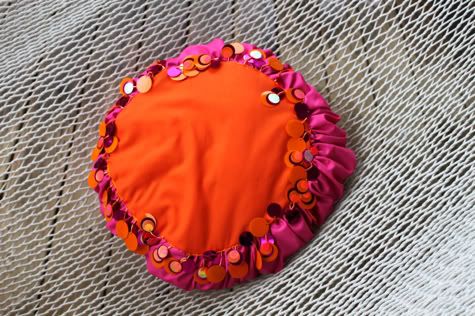
Labels: , , , , , , ,

6 Comments:

Blogger Elizabeth {the Path Less Traveled} said...

thanks for posting - we LOVE DIYs! this would be such a fun pillow to make, soothing the itch to make something fresh for spring. :)

March 5, 2010 at 5:46 AM  
Blogger Anne said...

That's sooo girly!! Love the ruched sides!! I linked to your tutorial on Craft Gossip Sewing:
http://sewing.craftgossip.com/tutorial-pouf-round-pillow/2010/03/05/
(link will go live at 10:00pm CST.)
--Anne

March 5, 2010 at 6:03 PM  
Blogger Melissa said...

This is really great. I love it in the bright colours and with the fun trim. Bookmarking...

March 6, 2010 at 6:04 AM  
Anonymous Richa said...

What a lovely idea. The colors are great but its the trim that makes it so adorable.

Thanks for sharing.

March 6, 2010 at 7:42 AM  
Blogger Katie Lewis said...

I love this! And I love the idea of making a big one and using it as a floor pillow. Wonderful! Thanks for sharing!

March 6, 2010 at 2:46 PM  
Blogger Janice (YaYa) said...

My "Angel Grand" is almost ready for a big girl room and how much fun would this be? Thnx

January 9, 2012 at 11:54 PM  

Post a Comment

Subscribe to Post Comments [Atom]

<< Home