So my friend Anna is having her second baby. This is shocking to me as we had our first babies a few weeks apart and I cannot fathom having two now, but anyway, she wants a nursing cover. So I made her one.
Purchasing one of these things pre-made is outrageously expensive considering how simple they are to make. Learn how to make your own nursing cover after the jump...
And thanks for the post Grosgrain!
DIY Nursing Cover Tutorial
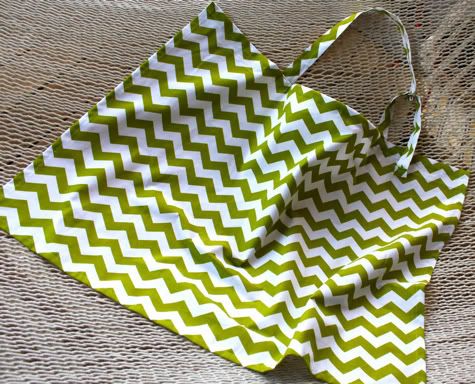
1. Wash, iron and cut your fabric. A yard will do it. I used Paula Prass Summer Soiree chevron in leaf green (still available here). You need three pieces.
26"X38" for the cover
30"x3" for one side of the strap
10"X3" for the other side of the strap
You also need a piece of boning 14" long (i bought one foot and they threw in the two inches) - you can get this at any fabric store for about 50 cents - and a set of d-rings, also about 50 cents.
2. Take the strap pieces and fold them in half, right sides facing:
sew them together with a 1/4" seam allowance:
3. Turn them inside out with a loop turner or like so. Insert a safety pin to one side:
Feed it back in on itself:
Work it through until it turns:
Then iron flat with the seam in the middle, repeat on both straps (the seam side will be the back of your straps):
3. Now take one edge of each strap and fold it over 1/4" and iron:
On the short strap, grab your d-rings and fold the fabric over them and pin like so:
Sew in place with a strong stitch as this area will get a lot of stress on it:
On the other strap, just fold over and sew:
4. Now grab your cover fabric. On the bottom edge, along the length, fold over 1/2" and iron, then another 1/2" and iron:
Sew in place with a straight stitch:
5. On the perpendicular sides (the two shorter sides) do the same thing:
6. Now for the top of your homemade nursing cover. Fold the top edge over 1/2" and iron, then another inch and iron:
Fold the whole thing in half to find the center of the top. Measure 7" in from the center and mark with a pin on both sides:
Sew the seam with a straight stitch in between your two pins:
Insert your 14" piece of boning with the curve out to the right side of your fabric:
Sew up the seam (perpendicular to your hem) to secure the boning in place:
7. Now to attach our straps. Insert the strap right side up under the hem next to the boning:
Fold it up over the hem, iron and pin in place:
Repeat with the other strap on the opposite side:
Sew in place with a straight stitch forming a box (to give your straps holding power):
8. Now just sew the remainder of the seam in place, from the strap to the edge:
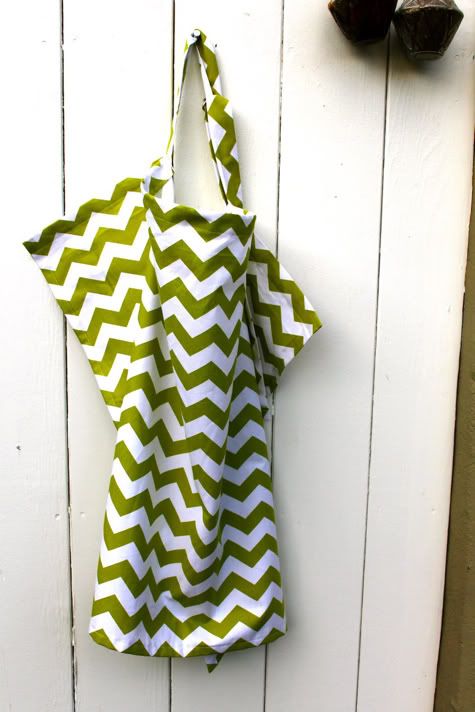
Done!
And thanks for the post
CRAFT!
Labels: Accessories, Baby, Clothing, DIY, Gifts, Sewing, Under $5, Under an Hour


38 Comments:
This is the best invention ever. I use one every day. And I LOVE this fabric choice. Stylish but understated. So you don't scream... I'm breastfeeding! Not that there's anything wrong with that.
i'm glad you like the fabric - this one is a BOY so i wasn't sure what to do
One more idea to add to it is a pocket on the back. I received a nursing cover just like yours as a gift that someone made but at one of the bottom corners on the back there was a little pocket sewn with felt to put breast pads or whatever else you may need to hide away. I like that idea because I never knew what to do with those things to be discreet when I was out and about.
jocelyn - totally! also adding a corner of terry on the inside so you can wipe babies' mouth. i'll do it on the next one!
oooh, that is a good idea too! Maybe we can make it like a swiss army knife in that it does a little of everything! You wouldn't need a diaper bag...have a spot for a diaper and wipes. Of course I'm kidding about that, but the terry cloth is smart!
By the way, I love Prudent Baby!!! You guys are awesome and I'm always amazed at what you come up with and wonder how you find time to do it all. I recently opened a site on etsy and made some of your snuggly blankets. (thenestingspot.etsy.com) I can't crochet at this point, and don't currently have time to learn, but I just sewed a pennant garland to hange across my son's navy curtains to spice them up a bit. I'll have to send a pic sometime. I think they turned out really great. Keep up the great work!!
These covers are so handy! They came out with these right AFTER I weaned my little one, but I really could have used one.
I featured your tutorial at Craft Gossip Sewing:
http://sewing.craftgossip.com/tutorial-sew-a-nursing-cover-for-privacy-while-breastfeeding/2010/01/06/
--Anne
jaime, if i ever ever ever have another please make me one!! i would try but i suck at sewing and just get frustrated. but i have to say this is the best thing ever for nursing moms... mine saved me but it's seen its day (15 months!)
I had a friend make me one similar to this, but my boning does not stay out from my body. It just falls down on top of my babies head. Now I would like to make one for another friend but I am nervous that the boning will fall down. Any thoughts on this?
lajamison - i can't say without seeing it, but the problem could be that the strap is not attached to the top and bottom of the boning seam. see in step 7 how the strap is sewn on with a square...if its only sewn to the top edge it would fall down...
lajamison, it could also be that the straps are sewn next to the boning, instead of on top of it. they need to be touching for the strap to support the boning. :)
jaime, i love this fabric. i just made two in greens for my sister in law who is having a girl, but doesnt like girly colors!
Thank you so much for this! I was just (JUST) going to attempt making one of these one my own. I couldn't think of what to use as the curvy part, so I was just going to cut a piece of plastic off the edge of a large ice cream container. This tutorial will help prevent disaster! :) Can the cover be washed with the boning in it?
Yes! You can wash the boning-it's the same stuff that's in lingerie...my sister-in-law just told me she used a headband from the drug store! Kind of genius!
This is great, am due in a few weeks and these things cost a lot where I live, I just couldn't fathom how to make the 'viewing bit'. Thanks!!
I am trying to find a cute fabric that won't wrinkle after being crammed into the bottom of a diaper bag. Any suggestions?
stephanie - i thought long and hard about this and i think wrinkling is a fact of life for most cute fabrics. you could get a poly-cotton blend that won't wrinkle as much, but it might be stuffy for baby under there since those fabrics aren't as breathable (and probably not as many cute options). the only thing that really doesn't wrinkle is knit. which makes me think maybe a crochet or knit nursing cover! which i think is kind of a fabulous idea and would be really useful especially in cold climates. maybe i can coerce jacinda into making a pattern...
First off all, I love the idea of the crochet nursing cover, maybe I can coerce Jaime into making a pattern! Or is it just a poncho?
But I do have to say that I throw my cotton nursing cover into my diaper bag in a rumpled ball and I've never noticed it looking wrinkled... but maybe that just because it is next to my far more wrinkled clothing. I think a bold/high contrast pattern helps.
Hi Jamie,
I'm pregnant, and new to sewing, so this is a great project for me. I would love to make mine lined on the back side, and wondering how I would adjust your pattern. Any tips would really help me. Thank you in advance!
~Elizabeth
My Hooter Hider certainly comes in handy. A word about the handle. My friend has one with elastic in the handle rather than a buckle. I like the elastic better. My strap loosens over time, especially now that my daughter's learned to grasp and pull. Thanks for the pattern.
Awesome tutorial, I featured it on my blog: http://designsbyvanessa.blogspot.com/2010/04/tutorial-roundup-baby-crafts.html
I totally love this, and I hope that using nursing covers encourages more ladies to bf. That said, it´s a pity that US society has such attitudes to bf that it requires covering up. In Europe it´s normal to just do it without any major hiding.
I don't know that it's the attitude we have about breastfeeding-it's the attitude we have about modesty.
Thanks so much for this tutorial! The fabric store threw in the leftover length of boning from the box so I have enough to make another one for my friend!
Blogged and linked back here: http://thestepfordwife.blogspot.com/2010/05/diy-nursing-cover.html
This comment has been removed by the author.
I made one of these for a friend who had her first baby. Your tutorial was easy to follow! It was so much fun! With some of the scraps I made a bag for her to put it in so she can throw it in her diaper bag and not have to worry about it
Great tutorial! Thank you. I have the same problem as one other. My cover folds so I can't see my son. I followed instructions exactly. Any ideas on how to fix this? Thx
In the process of making this for a friend. The store bought one that I used didn't have boning and I honestly like it better... i would just peek if i needed too. Hoping it turns out good without the boning... :D Thanks for the tut!
This comment has been removed by a blog administrator.
i just finished making one and look forward to using it...and i also had an issue with the boning. it was falling down...even though i sewed it close to the strap. should it be tight in there or just fit? and my boning came with a cover...should that be taken off?
LOVE LOVE LOVE IT. I just ordered one of these online (because it was free and I only paid shipping) other wise I wouldn't have. I love the tut! I will be trying this out since I have two friends that just found out they too are expecting!! Great gifts!
So I've made two of these now, and I might have an answer to the falling down problem -- it could be the fabric. I made my first one out of a medium-ish weight cotton, and the boning held up just fine. I just finished making the other out of a lighter weight cotton, and the boning is falling down (but I think it's still usable). I think the easiest way to fix it, without redoing the whole thing, would be to add some interfacing to the top couple of inches for more stability. It will require some seam ripping, but hey, almost all my projects do! Hope that helps!
Where in the heck does one find the boning and is this it's official name? I have searched high and low and can't find. Any help/direction provided will be most appreciated! Please send response to smowrisATyahooDOTcom along with "Boning" in the subject line. Thanks ever so much!
I have just finished up 4 of these!
Ladies who have problems with the boning: my Joann's has a wonderful product - sew-through boning! Add a couple more inches to your boning on each side so that it is long enough to go underneath where the straps connect. As you attach the straps to the hem you can sew right over the boning so it is all connected. Does that make sense? Then the straps actually hold up the boning! I wish I could take credit for this idea but it was from another nursing cover tutorial that has since been taken down. I believe the boning is Rigilene brand - it looks like it has little holes in it, almost like tiny plastic canvas. Just go slowly with your sewing machine and - voila!
I absolutely LOVE nursing covers. I made my own version and while it was handy, I made this one last night for a friend and it is so much stronger! I do love adding a pocket on the back, no baby likes a wet wipe after eating.. lol.
Just an idea if you go nursing cover crazy, I collected cool cotton fabric pieces from friends, and we are having a sewing day, then donating to the local birthing center. Just an idea for those talking about promoting BFing! We do this for different crafts like blankets and cloth diapers about once a month and have a lunch mommy party out of it. Its a TON of fun.
I finally finished mine...so here is my story. I didn't even know these existed while I was breastfeeding my first child but later on saw another mom with one. So when I was pregnant with my second I wanted one really bad... and that is how I ended up here and found this great website with all the info I needed and more. So I followed the instructions and made one and it turned out perfect and I'm so excited. I can't wait to make more especially for new moms I might come across.
Please keep sharing.
All I did for a nursing cover was take a little (lightweight) blanket and sew velcro onto it. I had it velcro on one shoulder so it would cover everything. It was great because my son--who loved to uncover me--could NEVER undo it!!! :-D This seems like a good idea too!
Just got done making my own nursing cover, thanks to your awesome tutorial! Simple and easy to follow directions and it looks great. Bought one to use with my first child and paid about $35 for it. Learned how to sew a few months ago and I am due to have my second child in a few weeks, thought I would make my own cover this time. All materials cost me less than $12 and spent my daughters nap session making it. I did add a terry cloth pocket on one edge for wiping baby's mouth and to hold my lily pads. Thanks!
Love your tutorial! I it was so easy to follow. I read the comments after I made the cover.I'm gonna have to add the pocket and terry cloth! Thanks so much for the tutorial. This is my first sewing project ever and I love your website.
Post a Comment
Subscribe to Post Comments [Atom]
<< Home