How to Make A Hamper from A Pillowcase
A little while back Jaime spotted a totally adorable Pillowcase Hamper Tutorial made by Sarah from Emmyloubeedoo. It's a vintage pillowcase turned into a gorg way to store laundry - obviously, we had to ask if she would please, please guest post this one-of-a-kind creation for us. Thankfully, Sarah agreed and is very excited to share her tutorial below.
Make sure to stop by her site, Emmyloubeedoo, to see many more creative tutorials such as the Foxy Pillow and the Sunshine Swimsuit. She even shows us that no spot is too small for a creative nook in her Sewing Room Re-Reveal post. Take it away Sarah...

Hello Prudent Baby readers! I'm Sarah and I'm crazy excited to be here today! I blog over at EmmylouBeeDoo where I share my sewing and crafty projects. Come over and say hey!
So do you want to make a hamper?! For like, less than 10 bucks with one of those vintage pillowcases you've been collecting fo-evah?!
Yay! Let's, then! Get the full Pillowcase Hamper Tutorial after the jump...
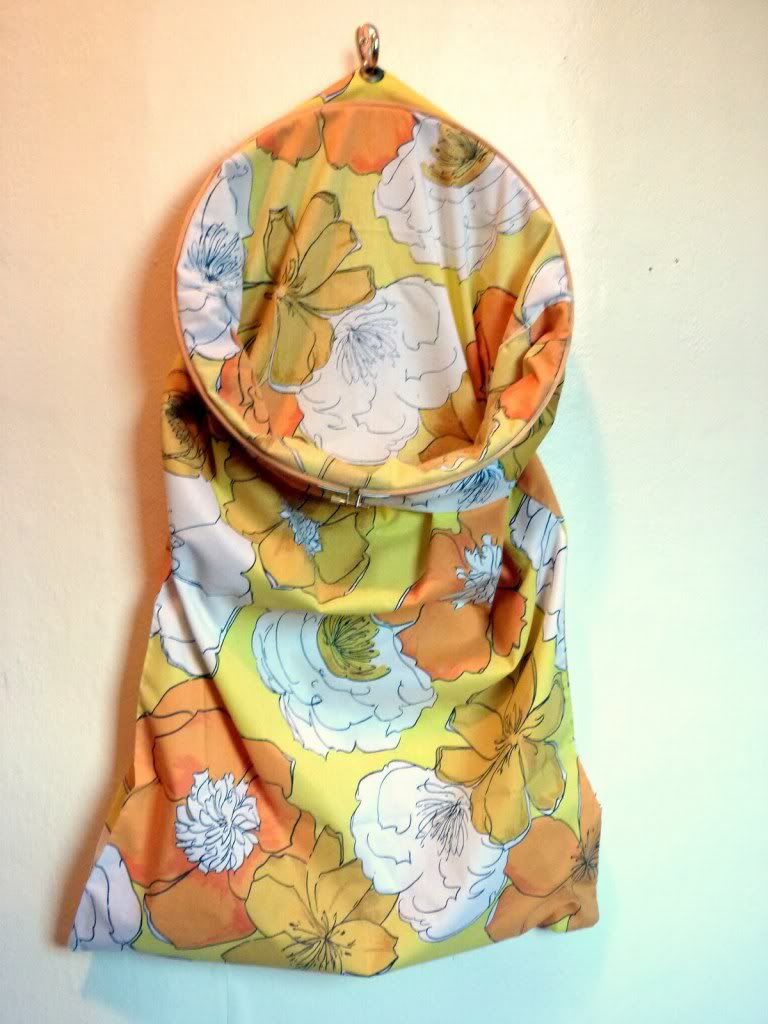
How to Make a Hamper from a Pillowcase


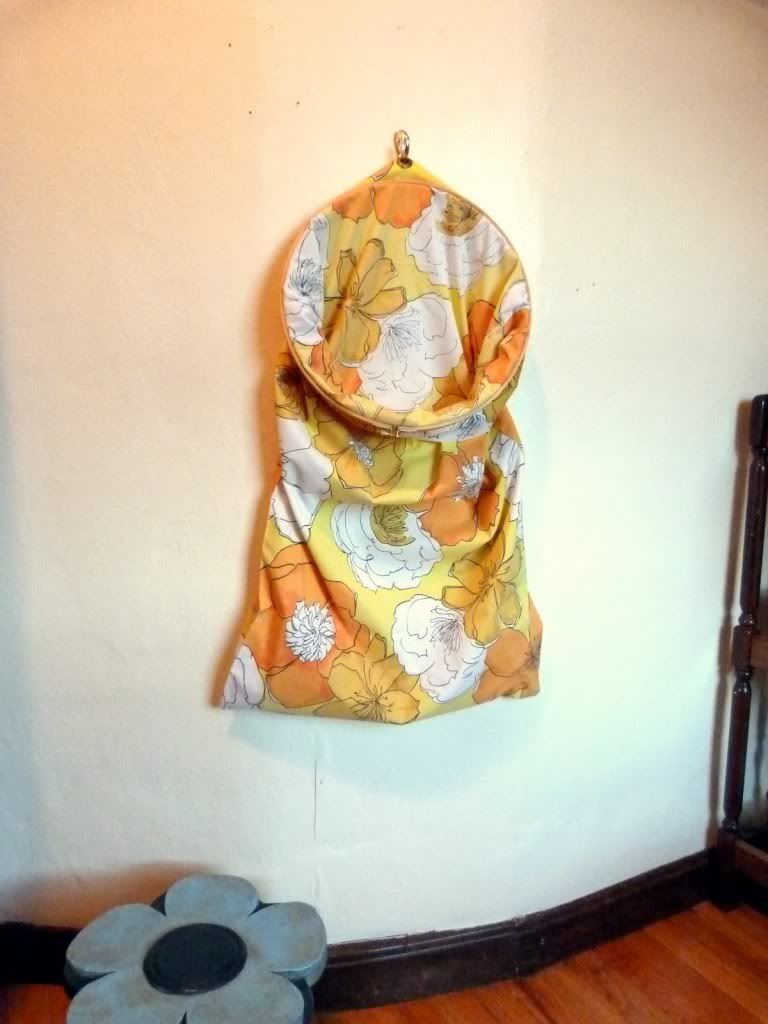
I made this one when I was expecting Emmy, and it has withstood over 18 months of use! I love it so much... and it was a cinch to make. The room she is in now is super tiny, so I needed a hamper that didn't take up a lot of space. So out of necessity, I made this contraption and hung it on the wall! Woot!
We're in the process of moving her into a different room (if you can call Pinning ideas and daydreaming "the process of moving"), and the decor is going to be different from her current digs, so I am making a new hamper to match. Thought I'd take you guys along for the ride!
I hope you'll give it a try! It's crazy easy - except for the picking which pillowcase to use part. ;)
You will need:
* a delightful pillowcase
* an embroidery hoop
* grommets/grommet setting tool
* scissors
* a hammer
* a hook to hang your hamper on

-NOTE- When I made the first one, I actually took my pillowcase to the craft store with me (crazypregnantlady) to ensure the hoop I got wasn't too big or too small. For reference, my new pillowcase measures 19 inches wide across the top when laying flat, and my hoop is 12 inches in diameter.
I got my grommets at Joanns - they are 3/8ths inch and antique brass. MAKE SURE you also purchase the grommet setting tool that corresponds with the size grommets you are using. The tool item number you need will be on the back of the grommet box. Easy peasy. Alternatively, Dritz now makes these plastic snap-on grommets that don't require any tools. Haven't tried them myself, but they come in a few more colors and might be a good option.
Also, the size of the grommet only really matters as it relates to the hook you will be using to hang your hamper. You want to make sure the grommet hole is large enough to get over and onto your hook. Also, scrawny grommet may not hold up as long as a bigger one. Go for bigger.
1. Lay out your pillowcase,nice and square and flat, with the side you want as the front facing up. Iron it if you need to.

2. Measure along the top opening and find the center. Mark where I have here... On the side of the pillowcase that's furthest from you. Err... the inside. ;)
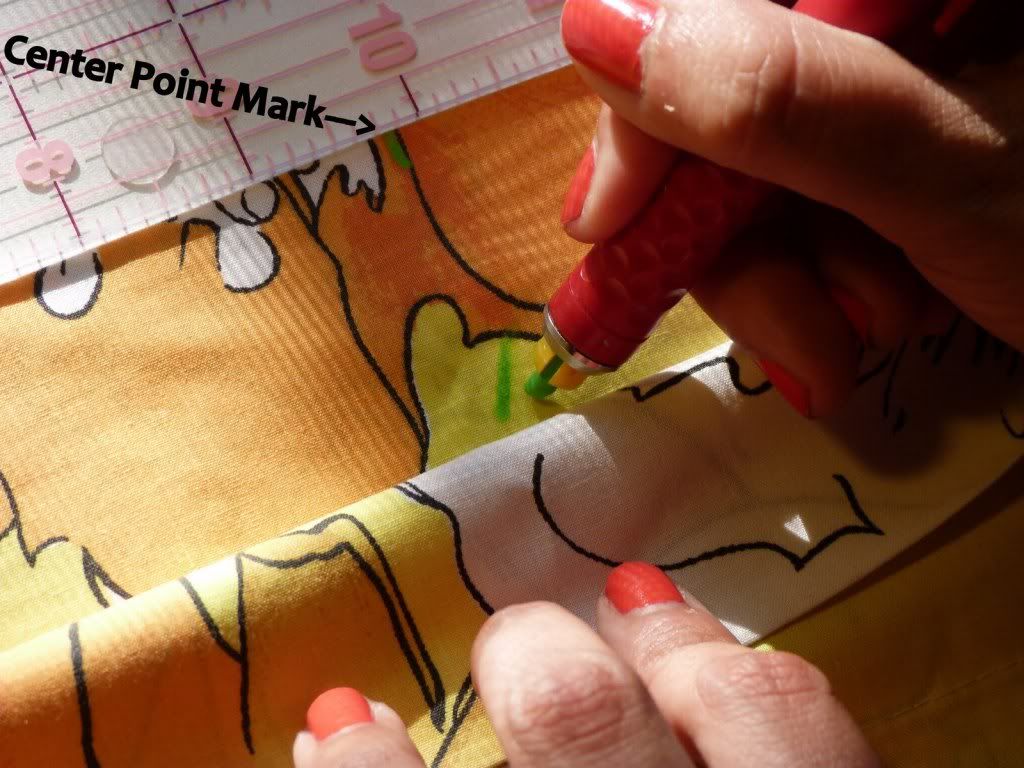
3. Measure down two inches or so from your center point & mark.
4. Place one of your two grommet pieces over your marked point, and trace the inside circle:

5. Cut out the circle you just traced. No need to be fancy here... just err on the side of a smaller hole. You want the grommet to fit nice and snugly.
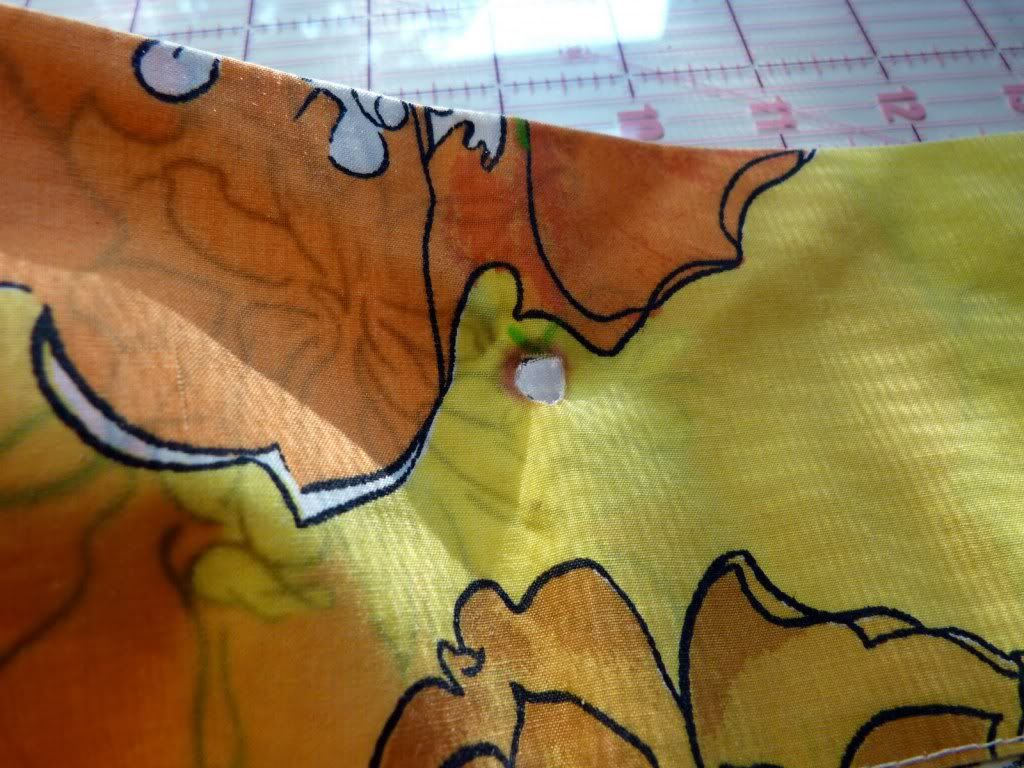
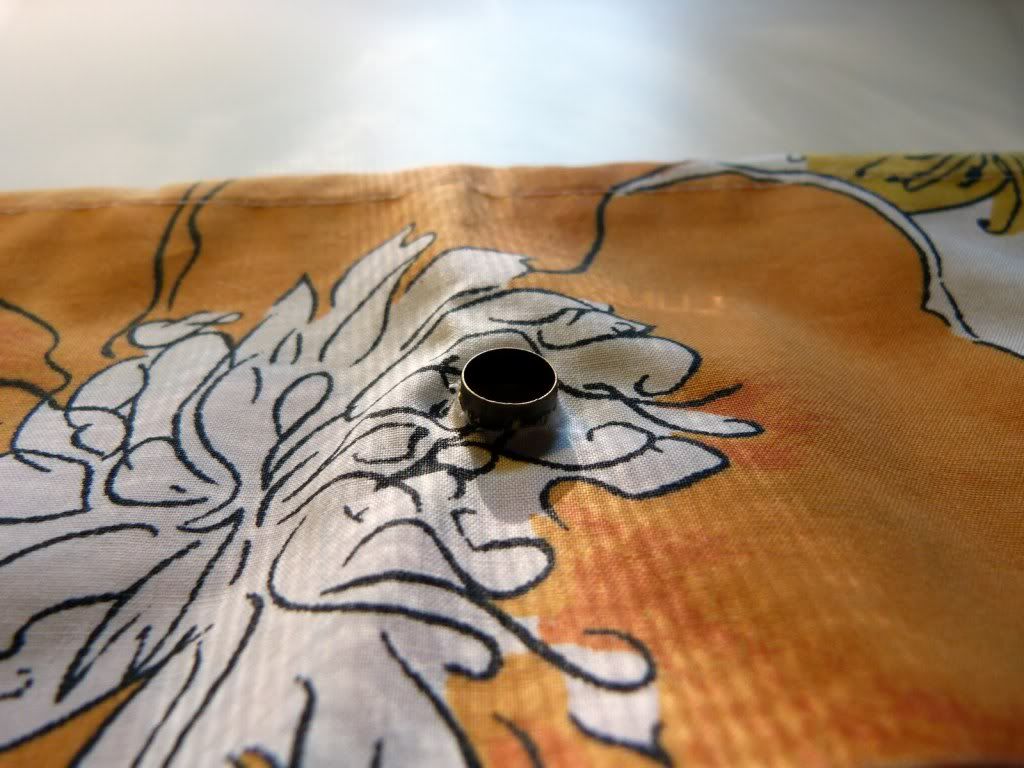
6. Insert the male piece of the grommet into the hole you cut. This is the piece that's not flat.
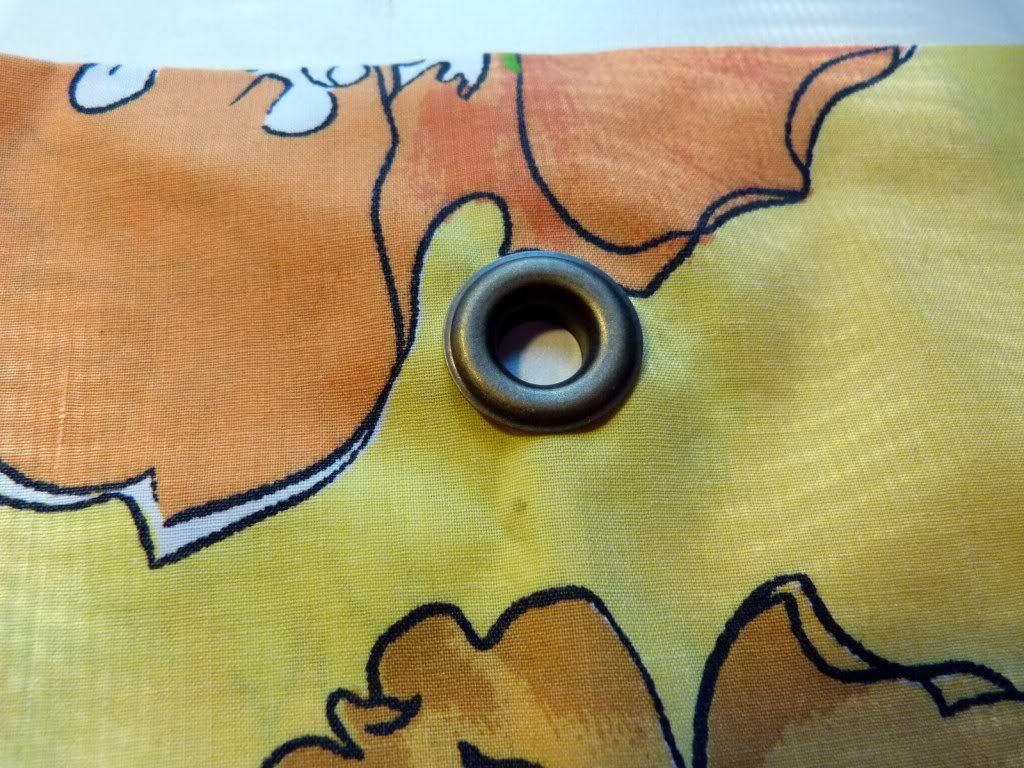
Above is how it'll look from the right/front side (if you turned it over).
This is how the back looks. We'll work from the back now.
7. Lay the female/flat grommet piece onto the male piece. You want the concave side facing up.
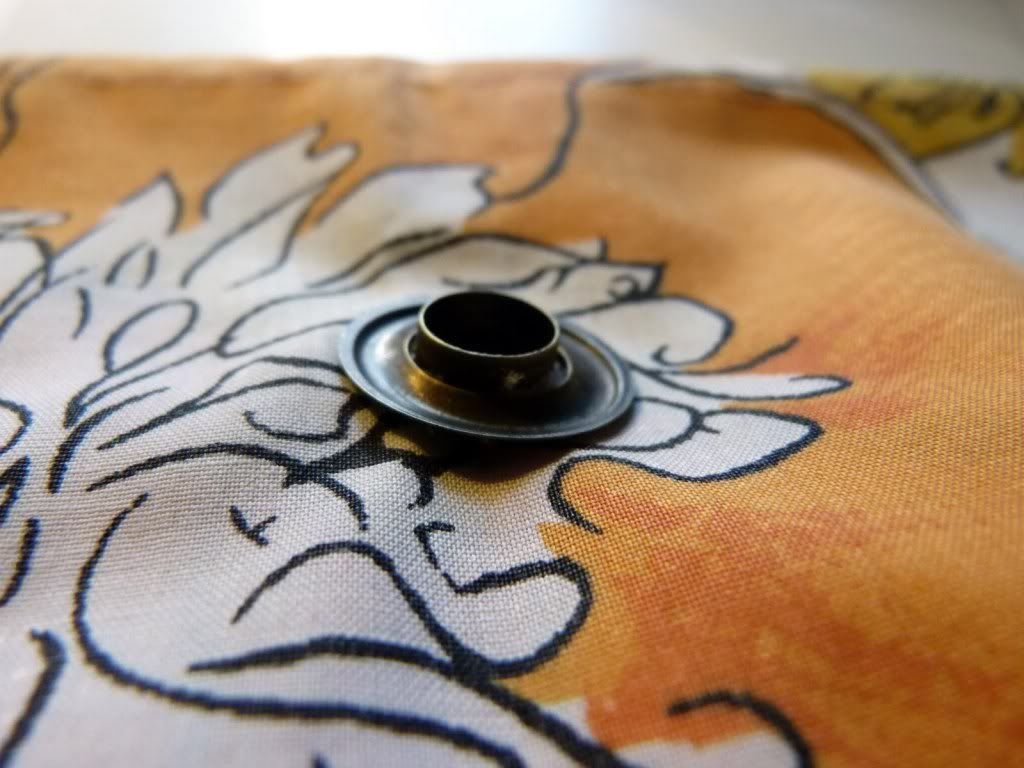
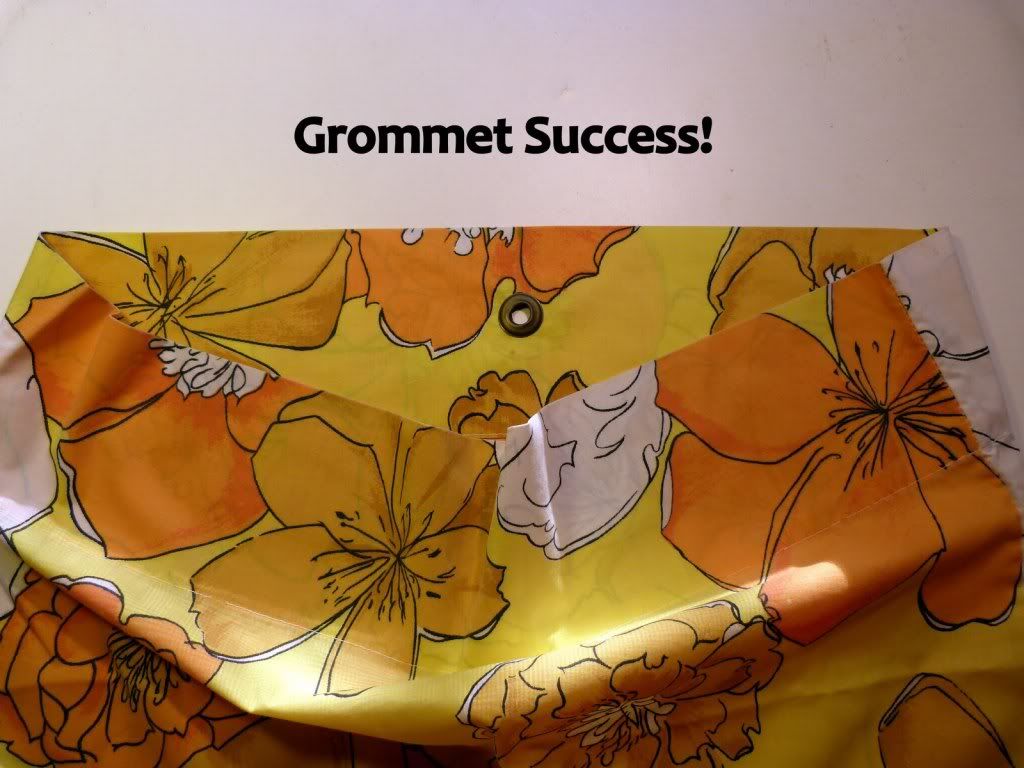
8. *Not pictured because I LOST MY GROMMET SETTING TOOL*, ugh. Don't loose your grommet setting tool. I literally went out to my deck and hammered the whatfor out of this poor grommet, after like an hour of searching for my setting tool. Fail. Anyhow, set the grommet gracefully by following the tools instructions, and....
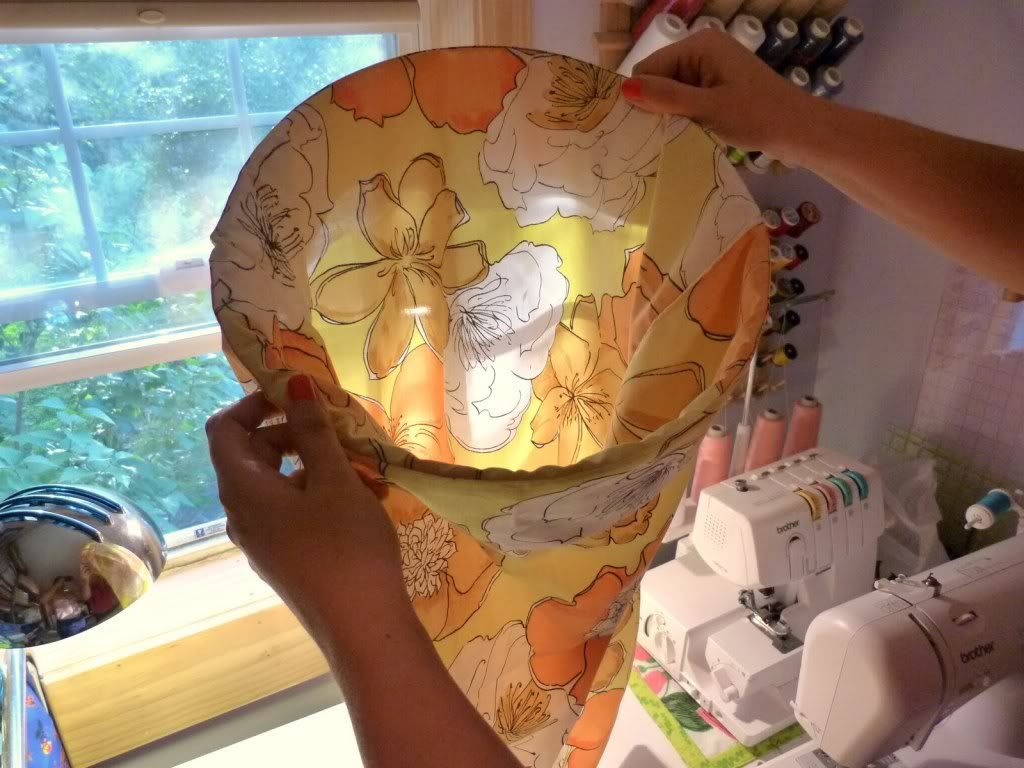
9. Now, grab your hoop. We're going to work with the part of the hoop without the screw.

10. Pull your pillowcase up through the middle of your hoop.

11. Even out the pillowcase around the hoop. For this one, I folded the pillowcase over until I hit the edge of the... what do you call it? That 4-5 inch band at the top of a pillowcase? I went to the end of that. :)
12. Place the other hoop (with the screw) over top of it all and tighten her up!
13. Hang on a wall and enjoy your saved floor space!
Let me know if yall make one! Or two - I was thinking this would be SO cute for kiddos who share a room - you could make two and personalize them so easily!
Also, if anything was unclear or you have any questions, holler!
Cheers!
Sarah
Thanks so much Sarah! Don't forget to stop by Emmyloubeedoo to check out more of Sarah's fun and crafty tutorials.
Want more pillowcase ideas? No need to look much further. Check out our Pillowcase Baby Dress and Sham-Style Pillowcase tutorials - or go pillow mad and browse all of our pillow tutorials here.
Labels: Bedroom, DIY, In One Evening, Sewing, thrifting, Under an Hour
posted by Prudent Baby @ 12:03 AM
![]()

14 Comments:
My goodness that is easy! I may have to make one of these next time I'm pregnant!
Ohhh nelly. I've been looking for a space saving laundry solution for the baby's room & this is perfect!! Annnd if it's hanging up the dog can't get into it. Perrrrfect.
So cute!!' and could be fun with cheesy character-covered pillowcases...I can totally picture making Hubby one of these with a GI Joe or batman pillowcase ;)
Such a cute idea! This would be a cute idea to make for keeping hand washable clothes separated regular washables too. Can't wait to try it--thanks so much for sharing!
Would be great for getting toys off the floor, too. Love it!
SUPER cool idea! And it looks great!!
a smaller version of this would be great for clothespins!
I used a smaller version of this for years in the bathroom as an undie holder for the toddlers. I just hang it from the towel rack... and fresh skivvies are always within reach for those (multiple) accidents throughout the day :)
Thank you so much for sharing your tutorial! Hopefully, this will encourage my daughter to keep her dirty clothes off the floor!!
I love this! Plus, it doesn't seem too difficult. I may have to try this!
This is perfect for SO MANY things. Alternatively, you could sew in boning instead of the hoop, to make it flexible and portable (travel laundry hamper anyone?) Great project, Sarah :-)
I have something very similar to this, but mine has a ZIPPER in the bottom hem. I bet it wouldn't be too hard to install one - I LOVE it for the ease of use - just plunk your laundry basket underneath the hamper as you're collecting clothes for washing, unzip the hamper and the dirty clothes drop right in, and then zip it back up. No need for your pretty hamper to leave the room it lives in!
I just stumbled upon your blog and I'm really enjoying browsing through. Especially the ruffled keyhole shirt - I'm thinking Mommy sized!
In this post, what is the green marking pen you're using on your fabric? I don't think I've seen that before. Looks like a tool I may need to aquire.
Thanks for the inspiration!
I love this idea. My baby boy has just moved to his room, so we are in need of 2 hampers - clothes and cloth diapers. I love an excuse to go estate sale shopping for vintage things.
Post a Comment
Subscribe to Post Comments [Atom]
<< Home