The Lazy Quilter: Easy Half Square Triangle Trick
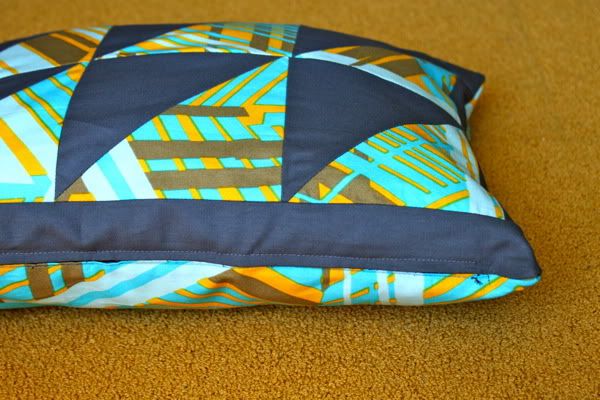
I do so love the idea of quilting. But in actuality, the precision is not something I naturally excel at. I'm all about pretty fabrics and quick projects. Therefore I deem myself the lazy quilter.

I whipped up this pieced pillow for the Craft Room Redesign Project in about an hour and a half, and I want to share with you the secret for making half square triangles in a jiff. I don't even have a 1/4" presser foot or any fancy quilting paraphernalia. You can use half square triangle units to make pinwheels, which are adorbs and very trendy right now. You can also make sailboats and lots of other cuteness with them. Give it a shot, it's a good first-quilting-step.
Get the Easy Half Square Triangle Trick after the jump. And tell us, are you a lazy quilter? Do you have any lazy quilting tips for us? Your comment could win you a gorg Belle & Blue Chair.
The Lazy Quilter: Easy Half Square Triangle Trick
First off, I have three bolts of this gorgeous Jay McCarroll Habitat Raise the Roof cotton from Fabricworm, which I am using to make curtains, pillows, and the like for the office. I love it so much I have it in both colors.
So, because I am a lazy quilter, I do not take serious measurements beforehand. I make all of my cuts and blocks too big and trim them down later. So I generally wanted about 4" blocks, so I cut a bunch of 5.5" squares. You'll need two squares of different patterns, and from those two squares you will get two half triangle units.
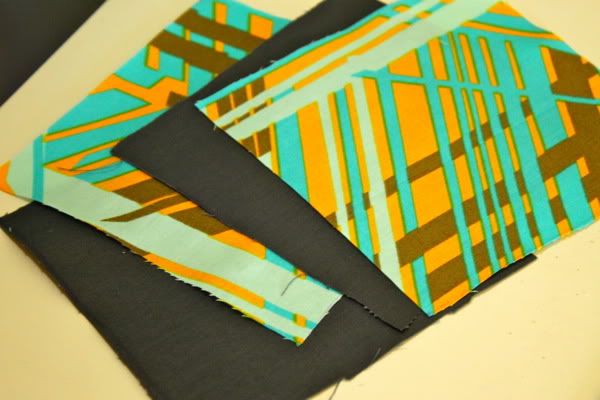
Lay two different patterned squares right sides facing. Put the lighter one on top so you'll be able to see your markings better. Draw a diagonal line from corner to corner. A bias ruler helps with this, but a regular straight edge will do.
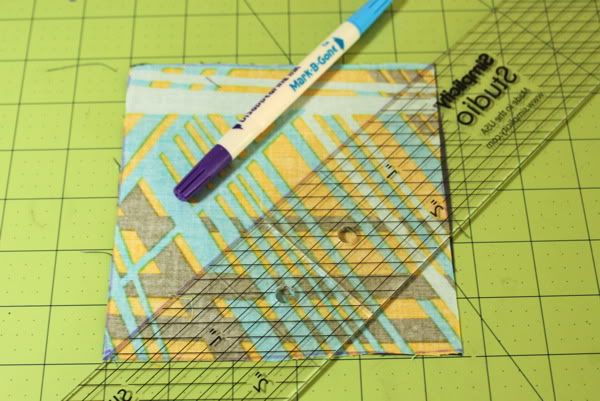
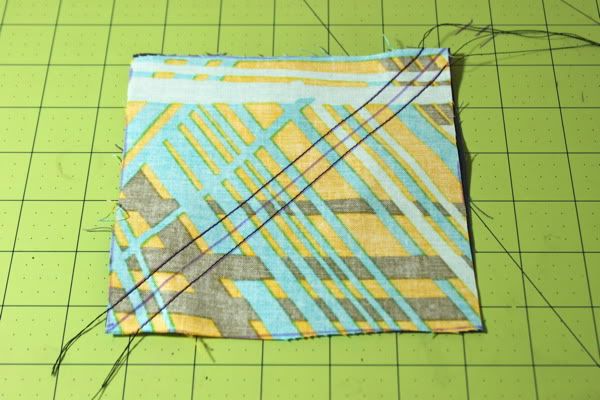
Now draw a line 1/4" away on each side of your center line.
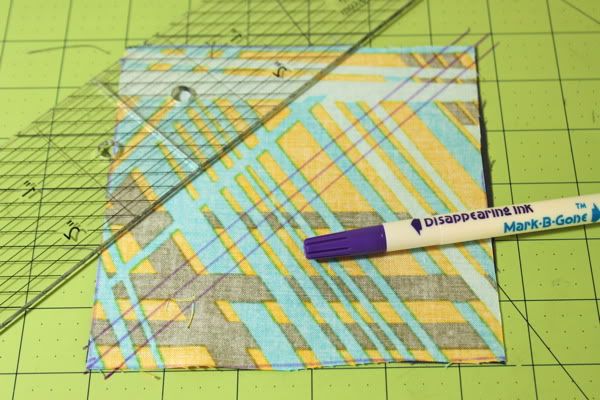
Sew along the two outside lines you drew:
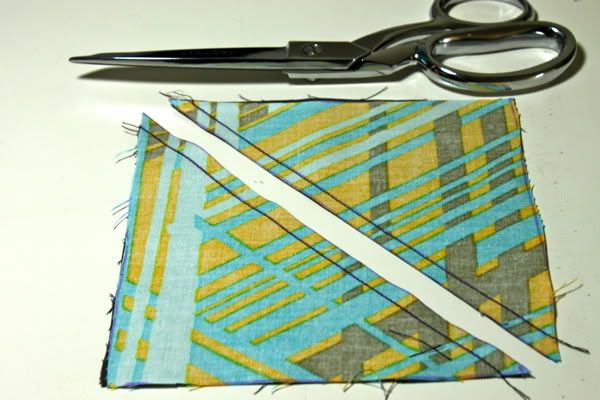
Cut along the center line you drew:
Open up each piece and iron the seam open:
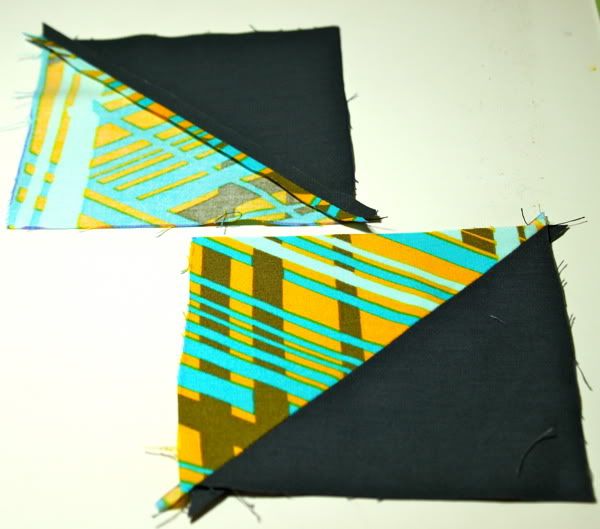
You'll see that you have little fabric bits overhanging the edge:
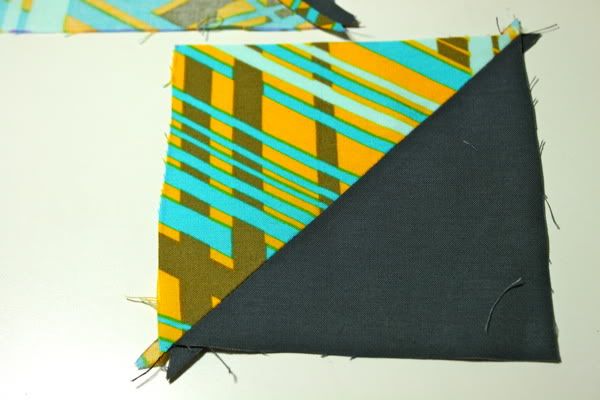
Trim those off:

Now you have two half triangle units. Make two more and you can make a pinwheel:
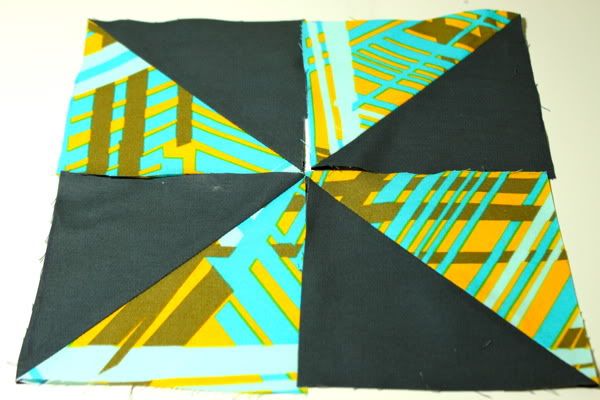
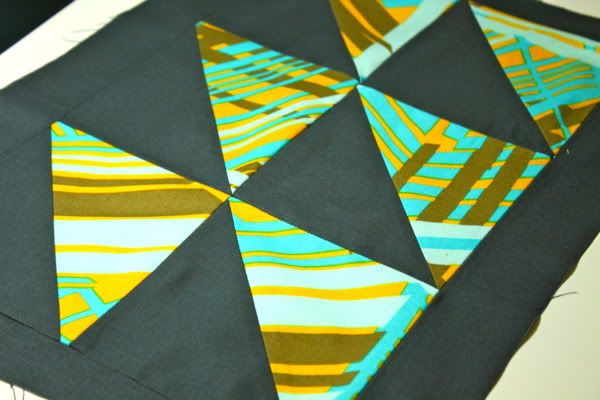
But I decided to align mine this way:
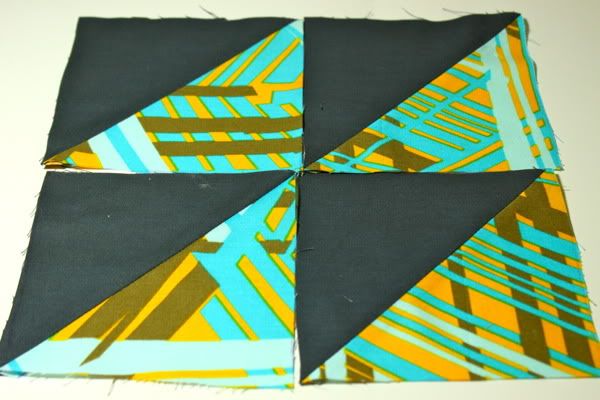
So I sewed each row together:
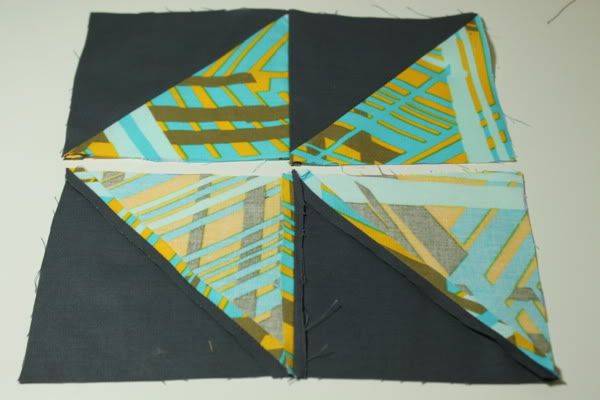
And ironed the seams open:
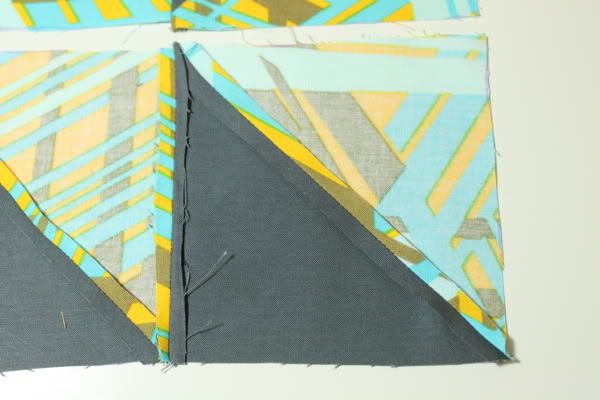
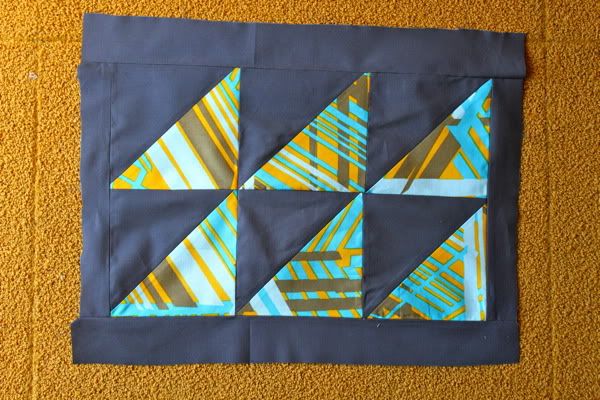
I made six half triangle units. I wanted to make a pillow but the panel wasn't quite big enough so I (lazily) cut some fabric strips and sewed them on each side of the main panel:

Now it's all set to be a pillow front.
So here is the panel:
I followed our How to Sew A Zipper Pillow Tutorial to attach the zipper and pillow back:

Done!
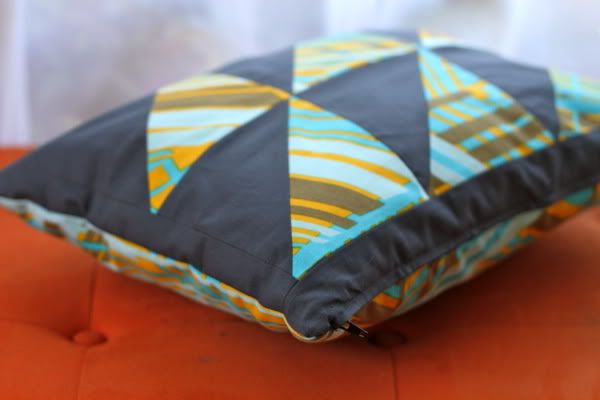
Kind of a cool trick right? Do you have any lazy quilting tips for us?
Labels: Decor, Gifts, In One Evening, pillows, Quilting, Serging, Sewing, Tips

22 Comments:
This isn't lazy! That's how these squares are always made.
I was hoping that you found some magical place where we can find these triangles of fabric; pre-cut, pre-sewed and pre-pressed for us to just attach to whatever fronts we would like to. lol For the record, I am too lazy to be a quilter. But I do appreciate the work.
I've never seen it done this way, and LOVE the idea. It is one of those ideas that I never would've figured out on my own, but now seems so obvious. Thanks!
I love that Jay McCarroll fabric & the way you broke it up with the neutral. You are a talent!
Lazy quilter, that's me! Love the pillow! I keep a mini cutting board/ironing pad right next to my sewing chair so I don't have to keep jumping up to iron, but I think lots of us do that! Thanks for the chance!
Well, I had no idea this was how to make those, and I like it. I've been wanting to try quilting more and more lately. Thanks for your lazy trickiness.
I love a quilt, shudder at the thought of matching all those pieces up, all that ironing, so instead I create quilts that are just like conventional ones but without the stress, Im a rag quilt kind of gal, super easy, fast, look great, but most of all very forgiving when you make a goof :).
Oh my goodness!! That's such an amazing way to quilt!!! I'm completely obsessed with Anna Maria Horner, but I have NO desire to quilt. I usually fall back on my mom or grandmother to quilt for me, but design-wise, they're completely different than I am. I've been wanting to go all modern vintage for my daughter's "big girl" room, and I have to have at least one patchwork pillow in there somewhere. Now I can arm myself with some fun fabric and do it myself without being all precise. Thanks for the idea!!
Strip quilting is super easy, especially for those of us who are also lazy quilters. As are log cabin quilts, which can be made with a version of strip quilting. Imho log cabin blocks are the PERFECT lazy quilting block because they are easy to make and can be done with any combination of fabrics, and then you can arrange the blocks into any sort of design you want.
I'm making my first quilt-mix of appliqué blocks and half square triangles. I found this method online and love it. I like your idea of cutting them down after because I spent a long time cutting out squares and some are just too small. Frustrating!
Cute pillow! This is how I did all my half square triangles for the twin size quilt I am working on. But next time I will try this method - http://www.fromthebluechair.com/2011/02/hsts-super-easy-way.html. It looks even easier, and no marking required!
I am a lazy sewer in general.. hehe.. always use the thread that the machine is threaded with. Maybe I'll try your pillow idea. For quilting.... my best tip - just purchase already made! :o)
That is a good idea! My lazy trick is to fold long strips of fabric into smaller, easier to cut pieces and cut it all at once. Only problem is if I am too lazy to line it up perfectly then my cuts aren't even.
Great tutorial! I love triangles but they scare the life out of me!
i wouldn't say i'm a "lazy" quilter, necessarily...more like a "very busy and ridiculously impatient" quilter. the most helpful tip i can offer is one i came up with while putting together a quilt for my parents for their 40th anniversary. i had 2 weekends to do it (the lady at the fabric store laughed at me when i mentioned that). and at one point, i said to myself, "it doesn't have to be perfect, it just has to be pretty." that's now my mantra whenever i make anything, quilts or otherwise.:)
Awesome! I would never have thought of that myself, but then again that is why I read this blog! Thank you.
What a great tip. I have never ventured into quilting but now I may have to try my hand at it. Also, I just wanted to let you know that I nominated you guys for the Stylish Blogger Award. you can check it out at http://greatgreenroom.blogspot.com
I will have to try this. My mother is an amazing quilter, I always remember her spending months and months constructing them-all of the blocks laid out on her bed. She even stitched my tattered and torn baby blanket into the lining of one as a keepsake. I on the other hand love instant gratification and therefore end up with very small quilts (mostly of the burp cloth variety).
I was going to do a quilt with HST's but went with a different pattern to highlight some large prints instead. But I'll get there eventually!
Eireann, Log Cabin is next on my list!
I also saw this tutorial where you take two squares and sew them right sides together all the way around 1/4. Then you cut diagonally on both sides and wha-la, four hsts....I would like to see a pic tutorial on how to square up a quilt square...I can never do mine right!!
I do just like the One and Only said. You get 4 hst's that way. And you can cut larger and trim down on those also. Much Much easier!
The only tip I can think of (I am a quilter but I can never get my lines to match up!) is instead of ironing open the seams (I always seem to burn myself while doing this) iron towards the darker fabric and when you lay the pieces out to sew together, the the seams lay snuggly together and line your stitches up so everything looks pretty and lines up!
Post a Comment
Subscribe to Post Comments [Atom]
<< Home