Oilcloth Lined Lunch Tote Tutorial
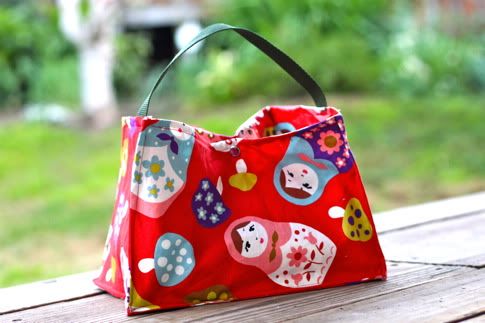
Little Essie takes a packed lunch off to school every day, so of course she demanded a cute homemade lunch bag.
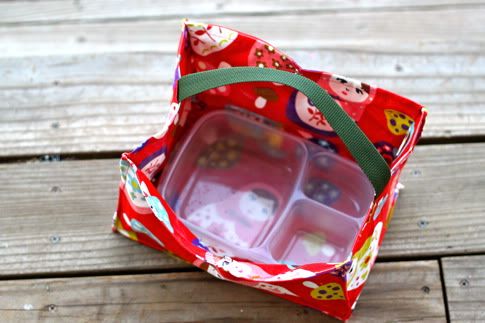
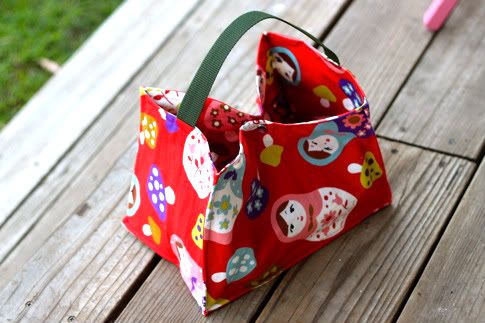
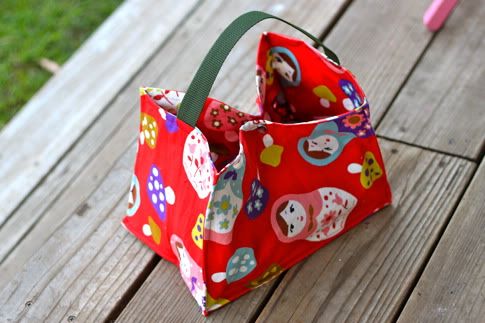
I love these little lunch trays, but they are a wide size, so I had to make a custom shape. I'll show you how to make a boxy bag like this in any size you need.
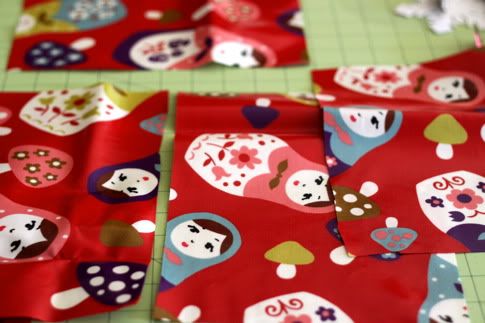
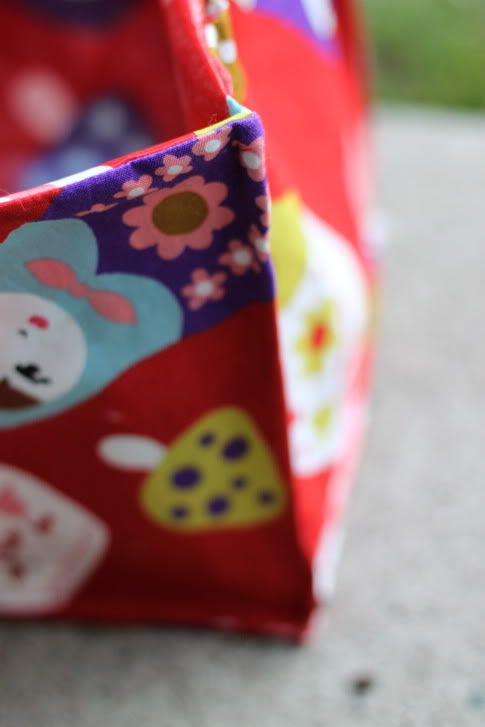
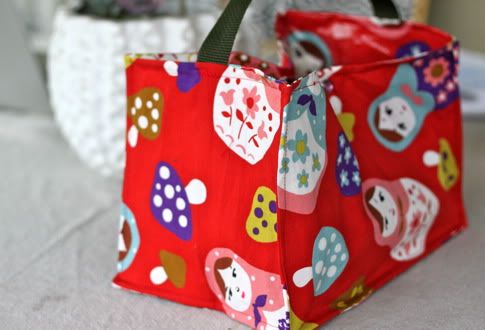
I made the lining from Kokka Large Trefle Matroyshka Dolls and Mushrooms Oilcloth in Red and the outside is matching quilting cotton. Which means I can wipe down the inside, but I can't wash it. Maybe not the best plan? A nylon outer would have been perfect, but she has been using this for 4 months with no issues so it worked out okay. Get the Oilcloth Lined Lunch Tote Tutorial after the jump...
And remember to leave a comment, because this week's prize for fave comment is that awesome embroidery pattern from sublime stitching!
Oilcloth Lined Lunch Tote Tutorial
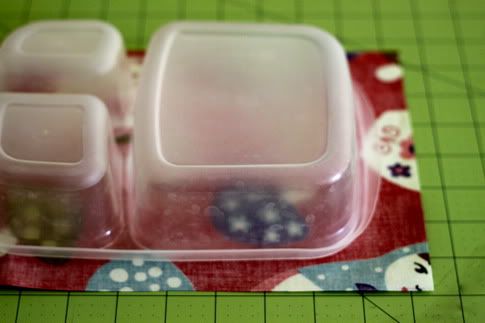
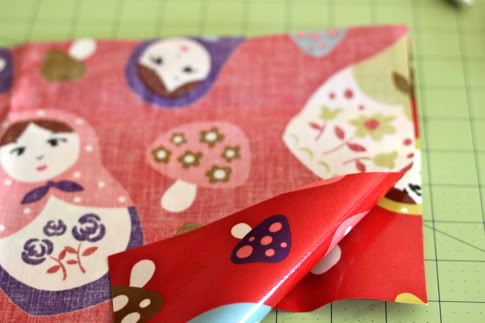
Grab your oilcloth and your lunch container. Trace the outside of the container onto your oilcloth and add an inch to each side:
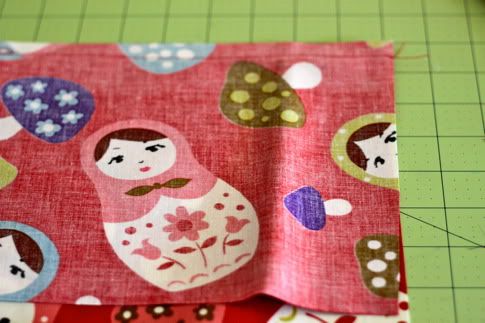
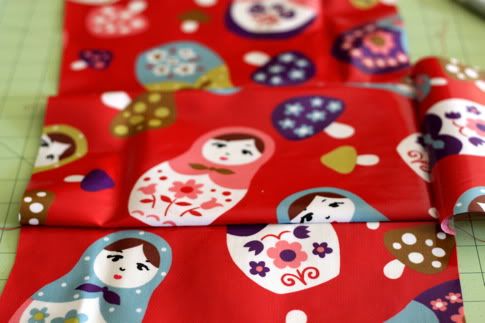
You have made the base of your bag. Now measure each side and decide the height of your bag. Mine is 8" tall. Cut two pieces of oilcloth the length of your base by the height of your bag plus 1". Cut two pieces of oilcloth the width of your base by the height of your bag plus 1". Repeat with the cotton or nylon.
Lay the base of your bag face up. Lay one side piece face down with matching length edges aligned:
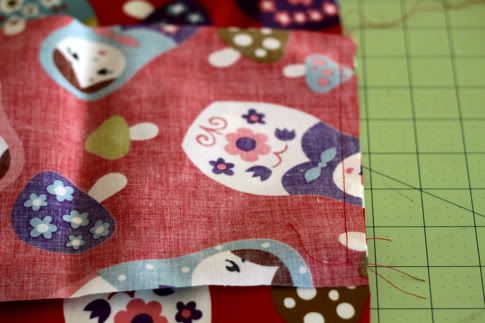
Sew in place with 1/2" seam allowance.
Unfold and repeat on the other length side:
Test to make sure your lunch container fits:

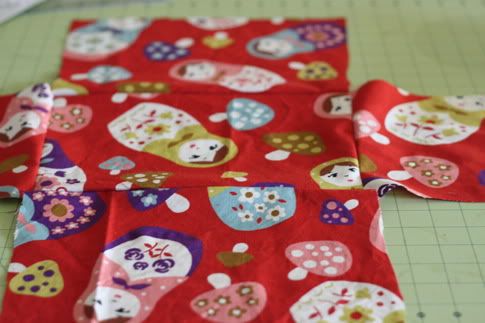
Now lay a width side piece face down with edges aligned and sew in place with 1/2" seam allowance.
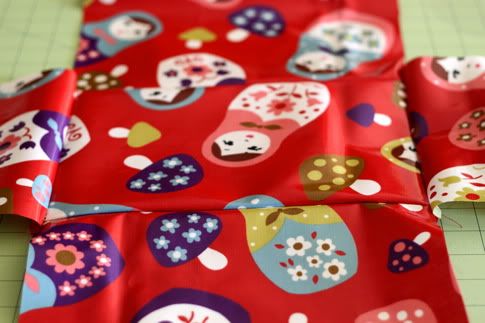
Unfold:
Repeat on the other side with the remaining width piece.
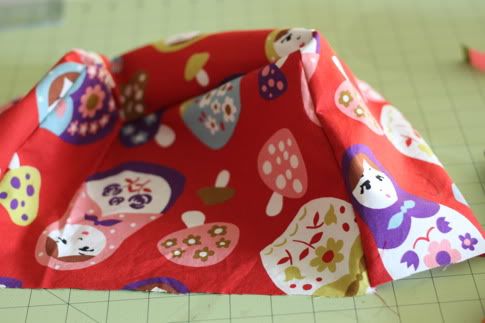
Bring two sides of the bag right sides together at the corner and sew in place with a scant seam allowance.

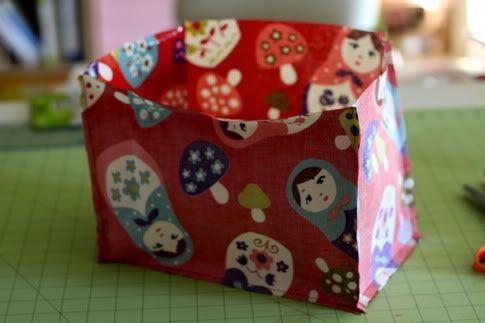
Repeat on all four corners. Your lining is now complete:
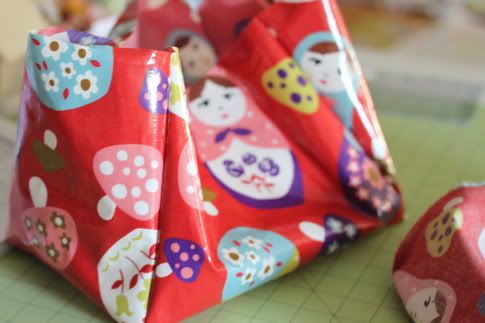
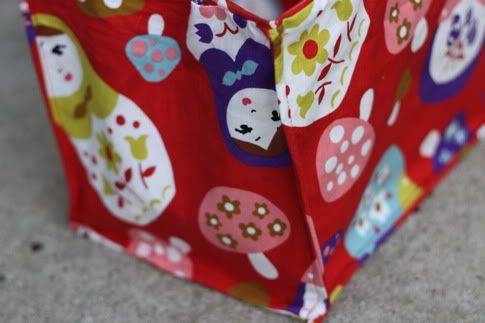
Repeat this process with your cotton or nylon outer, sewing the sides to the base:
Then sewing up the sides at the corners:
Turn your oilcloth lining right side out:
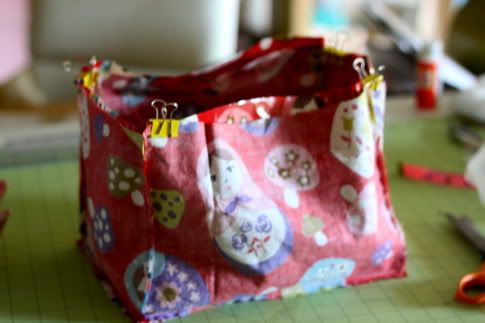
Turn your cotton or nylon outer inside out. Slip the oilcloth lining into the cotton outer and use paper clips or bull clips to hold together and the top edges (don't pin through oilcloth, it will leave a hole).
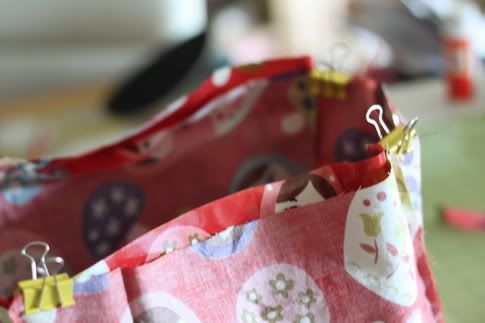
Now it will look like this, sorry for the blurry pic:
Cut a piece of 1" wide cotton webbing (or make a strap) at whatever length you prefer. On each short side of your tote draw a one inch line in the center about 1/2" down from the top.
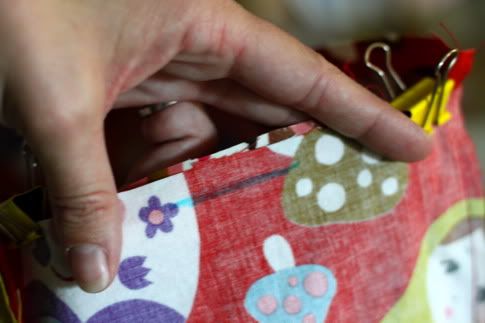
Sew all the way around the top edge, stopping before your line at each side and backstitching. You don't want to sew the area on the line, that will be your turning hole.
Reach in through one of the holes and turn your bag right side out. This part is kind of a pain, but it must be done. Push out all of the edges and corners.
Now at each vertical edge of the bag, pinch the edges together and sew about 1/2" in from the edge (this will stabilize the bag and lining):
Repeat on all four edges and along the bottom.
Insert your cotton webbing into the holes we left on each side and sew in place.
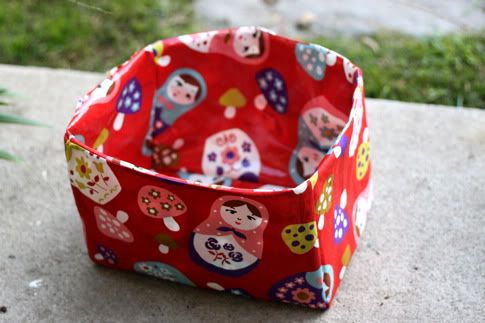
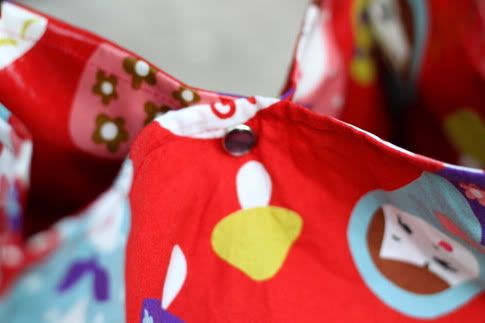
Then I added a snap to the center, but depending on the shape of your bag you could leave it open, or add a button, a strap, velcro, or whatever you like.
Finit!
Kinda odd, but kinda cute too, right?
What do y'all use to pack school lunch in?
Labels: DIY, Gifts, In One Evening, Kids, Kitchen, Organization, Sewing
posted by Jaime @ 2:22 AM
![]()

31 Comments:
My daughter was into owls last summer, so I made her a matching backpack and lunch bag, out of owl fabric lined with denim. That way, I could throw the whole lunch bag into the wash when something spilled, and because the sides were floppy, they expanded to hold her Thermos and other big containers.
very neat! I want to make one for each of my kids. Thanks for sharing!
cute =)
I love this lunch bag, it is so sweet. A little reminiscent of the Laura Ingals lunch pail which the Little House fan in me loves! I can also see this (with different fabric) being a fabulous Easter-egg hunt basket, or trick or treat bag for a little one, or… or… or… its just great!
I got a kung fu panda tupperware set that I use.
http://perth.gumtree.com.au/c-ViewAdLargeImage?AdId=256716511
It's the sandwich box, 2 small round cups and lids, a spoon, the drink cup (my "adult sippy cup/tumbler") and the insulated bag. I love it.
Otherwise I use one of my lock'n'lock containers that I was given at my bridal shower. (Absolutely love em!)
http://farm3.static.flickr.com/2353/2180339981_6063fb204e.jpg
I love this bag however. I'm gonna have my mom make some up for me! (I haven't used a machine since 2000-2001 when I made my prom dress. Never making clothing again!) These would be super cute for babies eating foods and going to playgroup/nursery school/daycare/playdates. Perhaps a bit of a top so a gel pack or ice pack wouldn't slip out?
Oh the ideas!
This is the cutest bag--not odd at all! And the fabric is perfect! Can't wait until my daughter needs one; not sure if the husband would take the doll pattern to school, though his students would get a kick out of it.
He uses one of two free lunch bags we were given--one from a teacher's conference he went to and one from this bank in Philly that was handing out lunch bags for free in Love Park.
What a great tutorial - thanks! And for the giveaway, too!
I use Tupperware's sandwich keepers to pack a lot of my daughter's lunches. I rarely pack sandwiches in them, though. They're just tall enough to accommodate a silicone baking cup which I use as dividers for fruit, etc. The cups go all the way to the top of the keeper so they don't move around. The keepers are just a tad too big for my daughter's store-bought lunch box so I'm always having to squeeze it in there. Clearly we need to make our own reversible oilcloth lunch sack. :)
I linked to your tutorial over at Craft Gossip Sewing:
http://sewing.craftgossip.com/tutorial-lined-oilcloth-lunchsack-sized-to-hold-your-reusable-plasticware/2011/02/16/
--Anne
This is so sweet. The girls would love to tote their lunch (and other assorted junk) in them!
I've actually been looking for a pattern to make a lunch box for myself and this looks perfect! I'm thinking I might try to extend the longer side edges and attempt a zipper....hmmm...maybe too adventurous? I'm not into showing off my lunch or the possibility of my lunch falling out.
So cute. I love it. I would use that, and I guess make on for my daughter! :)
Oilcloth is NOT the product to use with children's and pregnant women's products.
Oilcloth has a high level of phthalates, which means it cannot be used to make items for use by children under 12 years old or touched by pregnant women. Phthalates are chemicals that make plastics softer but have been linked to liver, kidney and lung damage. Use laminated cotton instead of the oilcloth to keep your children safe!
I love that doll print!
...but apparently oilcloth is really evil? I never knew.
such a sweeeeeeeet lunch bag......gonna try to make one for my girl too, thanks for the tutorial.
*** *** *** *** O.M.G. *** ** ** **
These are the best things to a mother's nightmare of oddly shaped lunch bags and containers! Perfect fit for those bento plastic containers (which makes lunch more fun!)
*********** totally LoVe the print **************
I give this an A+
why can't you wash it?
I made an oil cloth and cotton bib for my son (he's four and still wears one) and we wash it all the time with no problem.
I have some gorgeous japanese print oil cloth I've been wanting to use and this is the perfect opportunity.
What about using something like PUL? That can certainly be washed? It would be like a modified diaper wetbag.
yeah, why can't you wash it? could you use regular fabric, line with interfacing and wash that?
btw, was thinking about getting a planetbox lunch box but need a new lunchbox to fit it in: instead i could make a carrying case a la your tutorial.
A few years ago we were robbed and they stole my sewing machine. (I kid you not.) This project is making me feel the need to buy a new one and then actually learn how to use it.
Thank you so much for this tutorial! I looked around in August/September & couldn't find anything cute to make for my preschooler's bentos. Currently he carries a Gap zip-top soft-sided lunch box I nabbed on clearance at the outlet. It's a dinosaur, but I forsee a new custom bag in his future! :)
Amazing! My hubby is in the market for a new lunchbox and when I go to buy one it seems like they are all too big in the stores. Now I have my answer- I will sew him one! he gets his lunchbox and I get to sew. Hooray!
i love this tutorial - never would have thought about the reinforcing in the sides and bases seams.
Also curious as to why it can't be washed? Thanks
The print is so adorable, and the bag so practical. You may have given me the courage to sew with oil cloth. nlogsetty@gmail.com
So I had to bookmark 'cause my baby will need a lunchbag for school next year.
*I wipe a single glistening tear from my eye*
But I will have to make one for me out of this same fabric, as well, because I am so into matroyshka dolls and mushrooms!
I have 6 gorgeous yards of oilcloth that I bough before reading up on the dangers of phthalates. It kills me a little to see it sitting around but I just can't bring myself to sew for my daughter with it (I've resorted to using it as dropcloth for when she paints or does other messy kid crafting). The use of phthalates has been banned in clothes and toys in children under 12. There are alternatives though. Google "phthalate free oilcloth" and you will find some awesome and safe fabrics to use with the adorable project tutorials found on this site.
Meemah is just saying, but that's exactly what I'm looking for to put my clothespins in to hang outside when I hang my clothes out. (hint, hint)
Gosh, I wish I had this tute a year ago. We brought lunch to Daddy at his school for 6 months, so we brought little lunch pails every day. They were ugly, and the space in them was never quite right while using the storage containers. Because, really, am I going to use the plastic bags every day? My husband thought I was, until I showed him the price of using them daily with 4 lunches and the incredible amount of food we would eat.
This is super cute!
I've had a roll of oilcloth sitting around for a few weeks now, and this tutorial is just the ticket :) Thanks for sharing!
Perfect! I was looking for something to make a funky purse to go with my daughters Easter dress, this will be perfect and hey gets to be a lunch tote after! SCORE!
Another thing I've made of yours! Thanks a million. I've linked to it at my blog: http://asewingadventure.blogspot.com/
:-)
Post a Comment
Subscribe to Post Comments [Atom]
<< Home