Pretty Potholders
Potholders are superfun scrap busting projects, so customizable and great for a bit of fabric you want to see every day but don't want to like, wear.
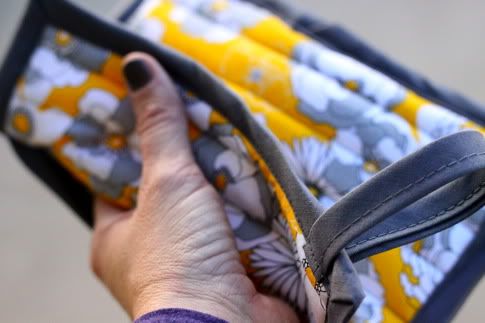
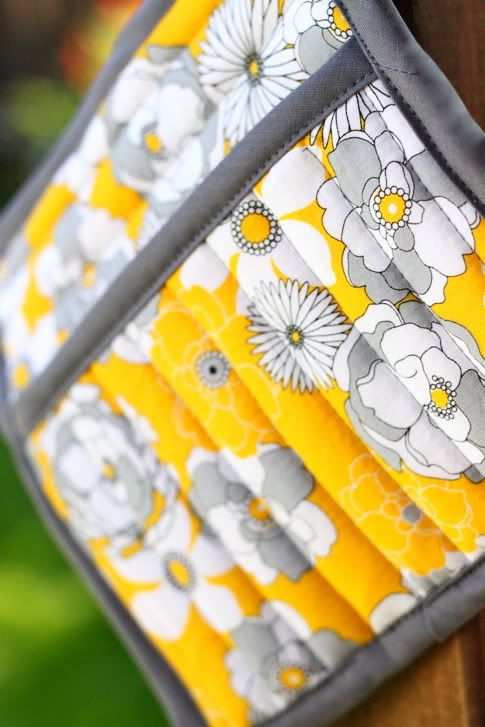
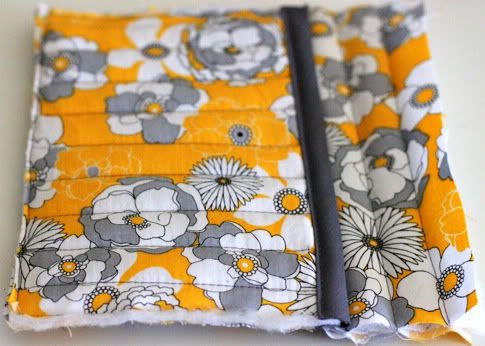
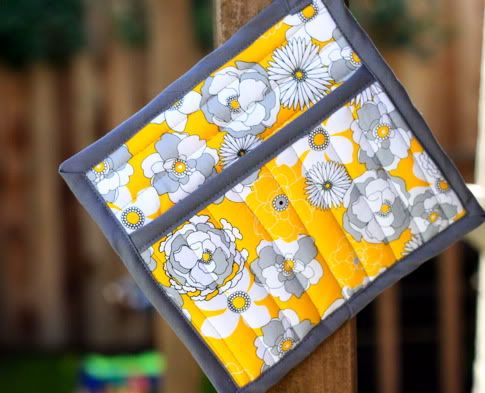
I made this one with a little pocket for your hand, just because I prefer being able to grab a hot pan handle that way. Umm, I have old lady hands. Don't look.
I said don't look!
Sigh. Learn How to Make A Potholder after the jump...
Make one yourself and enter it into the SEWING MACHINE DOUBLE DOWN CONTEST for your chance to win a new Brother Sewing Machine!
Prudent Baby Pocket Potholder
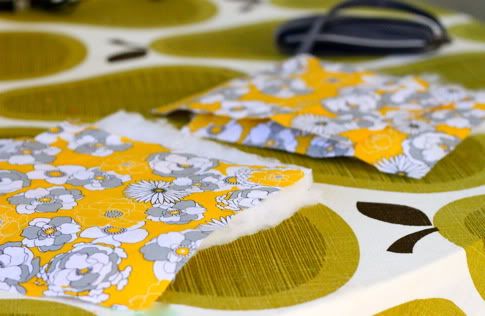
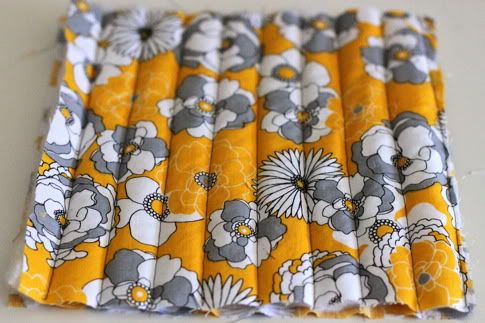
Isn't this fabric soooo pretty? It's Robert Kaufman Night and Day 3 Cluster Floral in Yellow from Fabricworm.
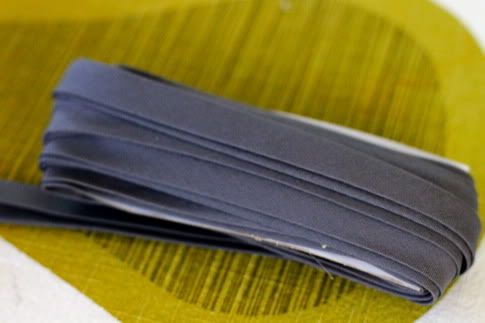
You'll need some double fold bias tape. I made some in gray using our How To Make Bias Tape tute as well as Jacinda's Bias Tape Eureka trick.
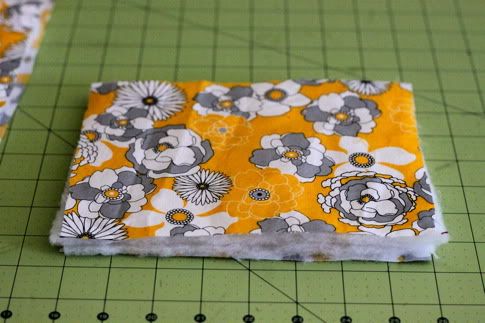
Cut your fabric & batting. You want to use all cotton batting (polyester can melt) or you can buy insul-brite batting which is great for protecting you from heat. You'll need two 8" squares of fabric and batting (you can use one layer of thicker batting, but i used two layers of low-loft), and two 5"X8" rectangles of fabric and batting.
Lay one 8" square of fabric wrong side up and place your batting on top.
Lay your other 8" square of fabric right side up on top.
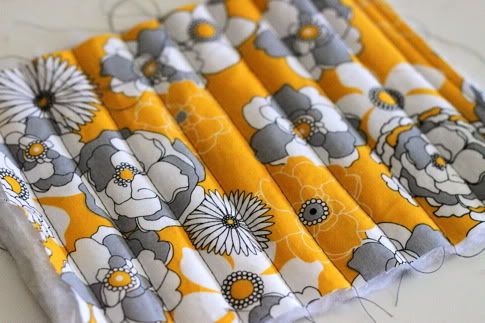
Quilt as you please, which just means sew the layers together. I just did vertical lines. I used my walking foot, but it's not a requirement for a project this small, your regular foot will be fine.
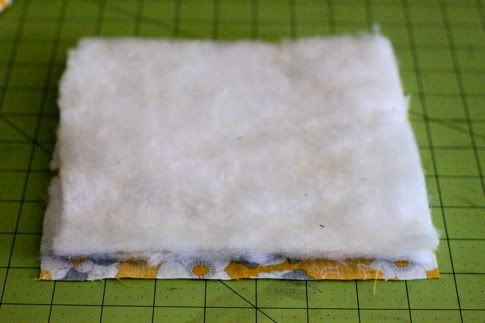
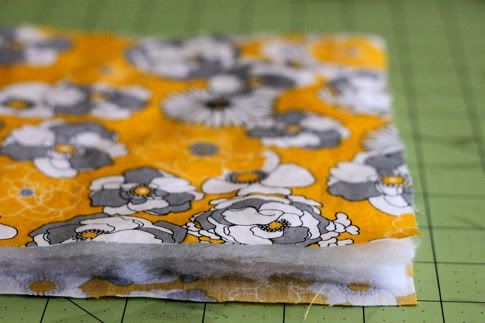
Make the same sandwich with your rectangles of fabric and batting.
Quilt them together as well.
Cut an 8" piece of double fold bias tape and fold it over one 8" side of the rectangle:
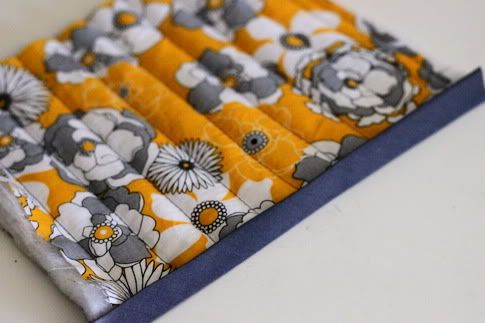
Sew in place:

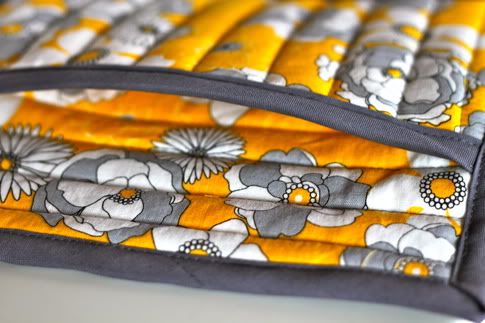
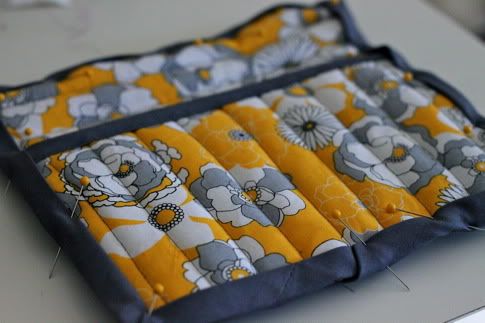
Now choose which side of your pieces you want to show. Lay your rectangle piece with the unfinished 8" edge aligned with one edge of the square. Baste in place on the three unfinished sides:
Attach your bias tape, for step-by-step details on how visit our How To Sew With Bias Tape tutorial. I did single-step binding because I am lazy and prone to rushing, it would probably be best to do two-step binding.
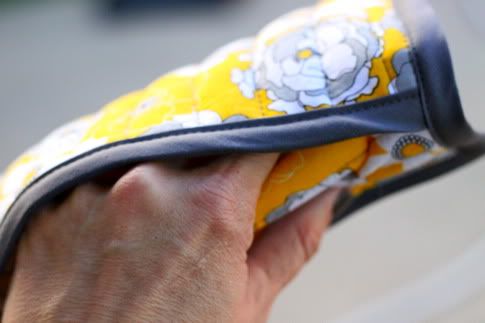
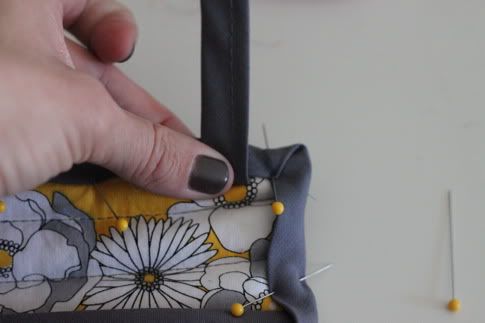
Sew a 6" piece of double fold bias tape together at the edge. On one corner opposite the pocket, insert one end of the 6" strip under the bias tape:

Fold it up and pinch to hold it in place:
Flip the potholder over and insert the other end of the 6" strip under the other side of the bias tape:
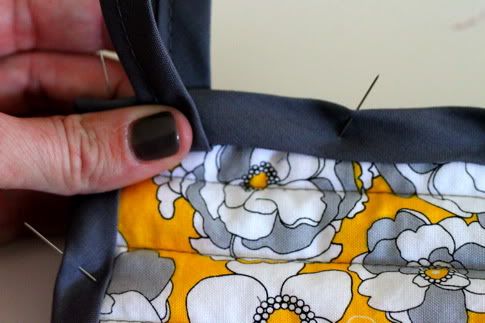
Pin in place:
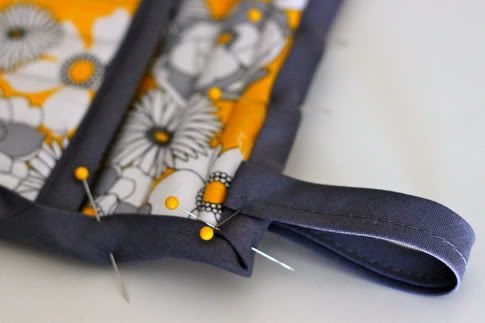
Sew the bias tape in place at the edge all the way around, securing your loop in the process:
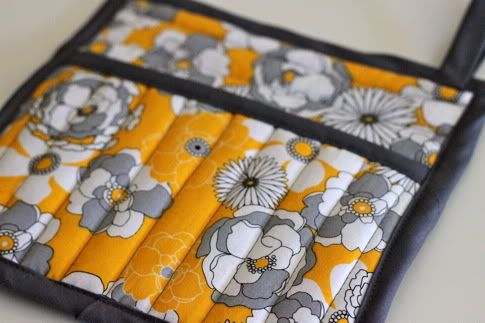
Done!
Labels: DIY, Gifts, In One Evening, Kitchen, Quilting, Sewing, Under $5
posted by Jaime @ 2:00 AM
![]()

22 Comments:
WONDERFUL tutorial!! Love the fabric too!
kisses
Heather from WhipperBerry
I love "great for a bit of fabric you want to see every day but don't want to like, wear." (Although, I'd want to like, wear that beautiful yellow fabric!)
I just got a bias tape maker for Christmas and this is the perfect project to put it to work. It's also good timing - I'm tired of making gifts for others, I want to make something for ME ME ME!
You don't have old lady hands and your nails look great!
Awesome!! I love that fabric you used! I linked to your tutorial over at Craft Gossip Sewing:
http://sewing.craftgossip.com/tutorial-simple-square-potholder-with-pocket/2010/12/29/
--Anne
Love the potholders. I haven't been able to find a tutorial on attaching bias tape. Is there any tricks I should know?
jan - see the bias tape step above and this post: How to Sew With Bias Tape that explains exactly how to do it. XO
Thank you so much Jaime. I knew it had to be here some where.
Thank you so much. I added this pattern linking back to your site at the new online sewing community: www.mysewingcircle.com
Yay! I'm excited to make pot holders! (Never thought I'd be saying that at 26 years old!) I found some great M&Ms printed fabric that I've been holding onto to make something for my mom (she collects everything M&Ms) and now I know what to make! Potholders and a matching fat quarter apron--- I *puffy heart* you Prudent Baby!
Haha... I almost died laughing at the "old lady hands" I really have old lady hands at 28 and my nails only look like yours while they are drying and then I inevitably mess them up and within a day start chipping. Seriously, I love the look of quilting in rows! I always think I need to outline the pattern but you showed me rows! And I love them! (Yes, I do live under a rock or maybe it is just motherhood.)
Tamara: two words: gel polish. just tried it and now i'm a believer - it lasts a month!
Quick question! Love the tutorial first of all. My sister has a birthday coming up and is a cooking fanatic! So being the good sister that I am, I am going to make her a cooking themed gift set, complete with apron, dish towels and of course pot holders. I am however wondering, how expensive do you believe these pot holders are to make? I was wondering if it would be less expensive to buy dollar store pot holders and cover them with my fabulous fabric, or buy the appropriate batting (please excuse me if I spelled anything incorrectly!)?
Is there a trick for keeping the layers from shifting while you're quilting them? Tried to make this tonight and ended up having to trim all the way around both the square and the rectangle.
SqueekersMcgee - the only surefire way is a walking foot. once u get one you'll become obsessed.
I also had trouble with the fabric shifting because I don't have a walking foot. It's on my birthday list though! If you use insul-brite, are two layers needed? I went ahead and used two layers and faced them both toward the fabric, that way the potholder can be used multiple ways but wasn't sure if it was necessary. I blogged about my experience here (http://sewingnovice.com/2011/02/17/potholder-and-oven-mitt/) Thanks for yet another fun tutorial!
Great!I made it. I shared your tutorial in my blog and link it back to you http://krasart.com/?p=335
Hello! I found your blog through the babble quilt link, but I love these pot holders. I made pot holders for a Christmas bazaar last year (different pattern) and they turned out terrible so I swore I would not do any more. After reading this post I'm up for trying again. The square with the pocket is a great design, and THANK YOU for the sewing on bias tape post, so needed!
Clever loop attachment method! Thanks for sharing.
I did this, I think I got carried away with the layers of batting! But I hate to burn my hand.
Quilting it was fine but I struggled with the one-step attachment of the bias tape. I too, am rusher. I think I'll make another and see if the two-step attachment works out better!
I love these potholders and I decided I am going to make a pair for everyone on my Christmas list! I am having a very hard time with the fabric shifting, even with a walking foot! Does the type of batting make a difference? I bought heavier "natural cotton batting" and not the fluffy kind. Also, I am using one square of "insul-brite." Am I overdoing it with too much batting causing a ton of shifting? Any help would be greate!
I made these. Even after being away from sewing for a number of years the directions here were easy to follow and the potholders turn out very nicely (if you don't look too close). Here's a link to a picture,I hope!
https://lh6.googleusercontent.com/-4tc_Ba1PYdg/Tu_REjl0PDI/AAAAAAAAF0o/zrh3k0-zmes/s640/IMG_7748.JPG?gl=US
and one of some towels I made to match.
https://lh4.googleusercontent.com/-dBOG4NC3CHI/Tu_QSDc8w1I/AAAAAAAAF0Y/sE-1kdwku7I/s640/IMG_7741.JPG?gl=US
Post a Comment
Subscribe to Post Comments [Atom]
<< Home