New & Improved DIY Swaddle Blanket
Ladies, we had so much fun with the first DIY Swaddle Blanket, right? But everything can be improved with a little user feedback. So I gave one to my friend Rebecca and her new baby girl, and she gave me some useful tips on how to improve it for even better swaddling-action. What I heard was that baby could kick out of it just a little too easily, so we made it longer. Then I also heard it needed more "tuckability" so I made an adjustment for that. The final thing I did was to make it all out of flannel and create a finished edge that doesn't require a serger, for all you sergerless sewers out there.
Take a look and let us know what you think. Get the full DIY on How to Sew a Swaddle Blanket after the jump...
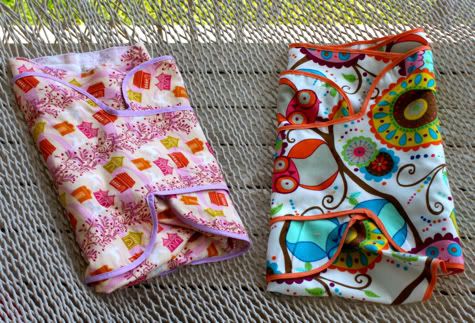
New & Improved Swaddle Blanket Pattern
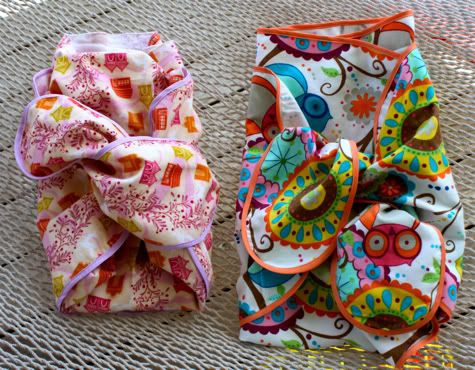
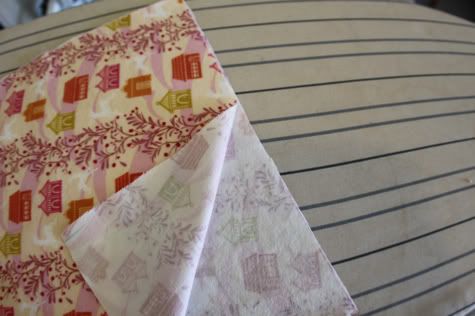
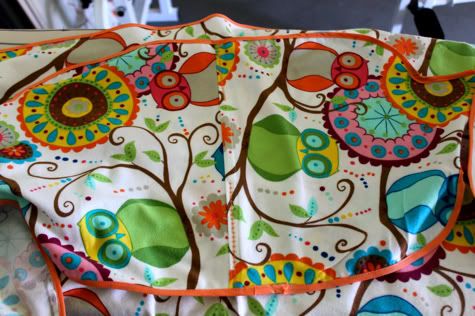
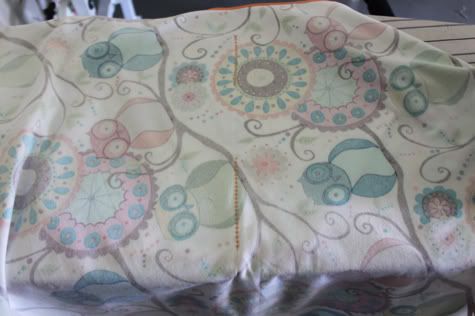
The pink one is made with Anna Maria Horner Folksy Flannels Forest Hills in Glow and the bright one is Valori Wells Della Flannel in Multi.
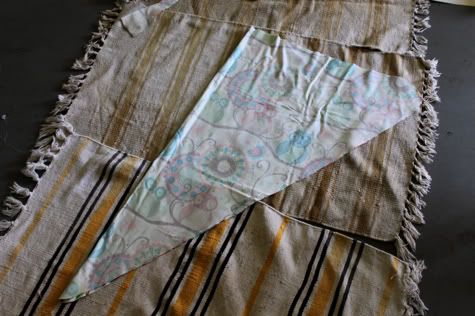
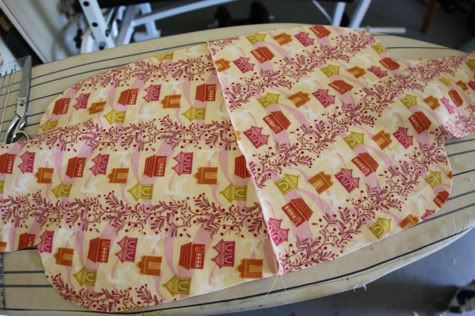
1. You'll need one yard of flannel or some other soft non-stretch fabric, like a muslin gauze. Fold the flannel in half along the width, so it's as long as possible and cut a triangle out of it as pictured (on my disgusting floor, don't judge me, it's my garage). In the previous DIY I said to cut off some of the tip of the triangle, but I've changed my mind, don't be mad. Round the corners and the tip of the triangle when you cut, so you've got a piece like this:
2. Now you want to use the two leftover bits of flannel you have to cut two shapes like this. UPDATE: to clear up confusion i've made this super ghetto drawing of how the fabric cuts work:
![]()
So here is what they look like:
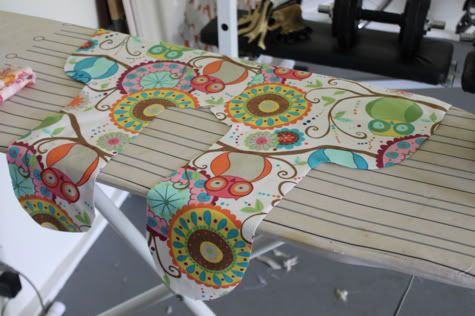
You can make the shape by folding your pieces of fabric in half lengthwise, then drawing your tie shape onto. I freehanded it but you can trace something round for the curves and use a ruler for the straight edges. See this picture for guidance:

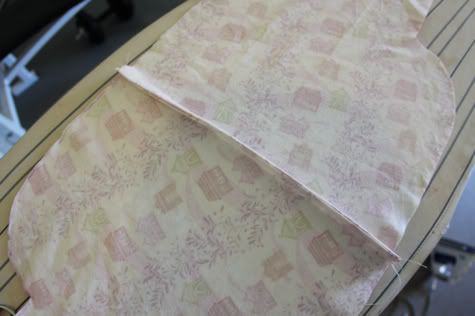
3. Now we want to sew those two pieces together with a french seam. Here's how you do that. Take the two flat ends and line them up WRONG SIDES FACING (this seems counter intuitive but it's correct):
Sew them together along the flat edge with a straight stitch then open up your piece. It will look like this:
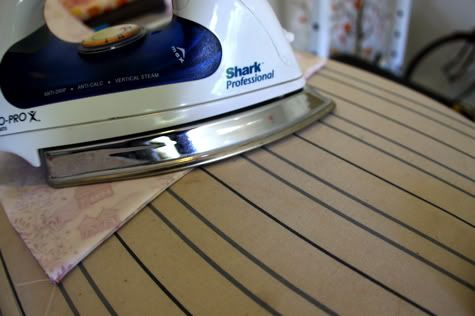
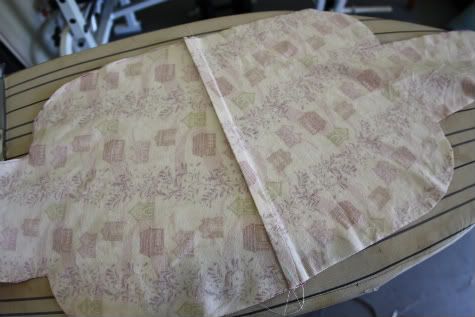
Now turn the pieces so they are right sides facing and your seam is in the middle. Iron it flat:
Now sew with a 5/8" seam allowance like so:
Open it up again and it will look like this:
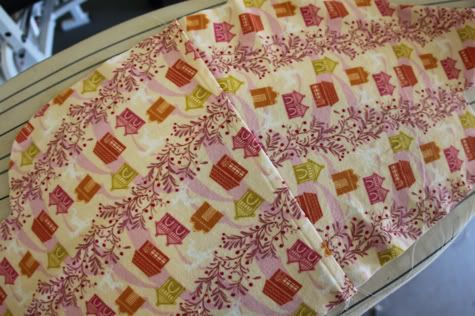
Fold your seam to one side and iron it down:
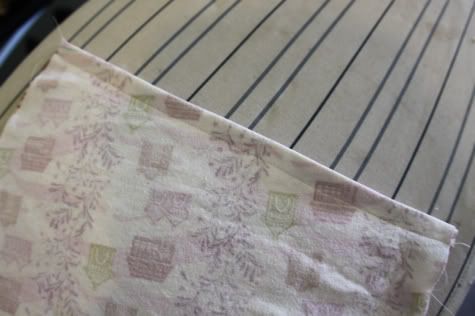
Then sew the flap down with a straight stitch. It will look like this from the right side:
Yay you made a french seam! So easy! Ok, moving on...
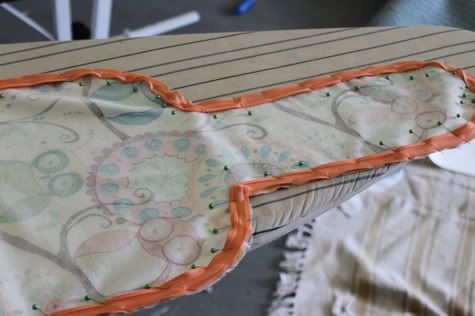
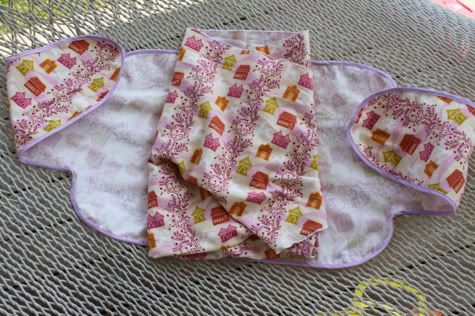
4. Now we want to finish the edges of our blanket and our tie. You can serge all the edges, but not everyone has a serger and honestly it just doesn't look as cute:
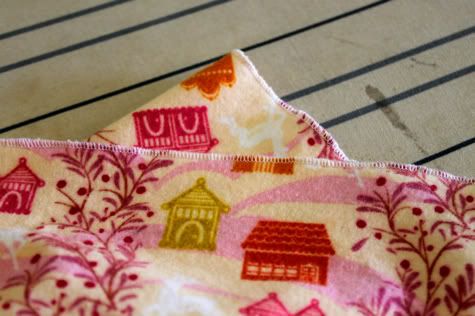
So instead, grab some double fold bias tape, the skinniest kind you can buy. You need one 4 yard package for the blanket and one for the tie. Check which side is slightly longer than the other. Unfold and pin the edge of that side to the wrong side of your tie all the way around:
Sew in place along the fold with a straight stitch:
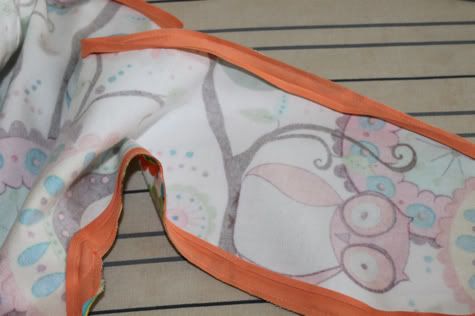
Fold the bias tape back up and flip it over to the right side of your piece, iron, pin and sew it in place all the way around:

Do this to the blanket and the tie piece.
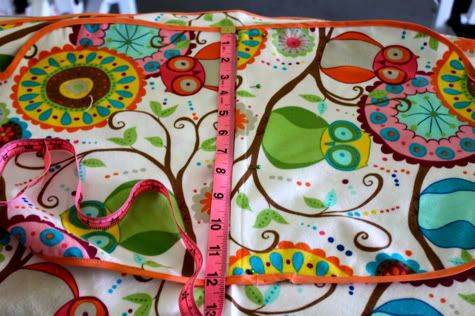
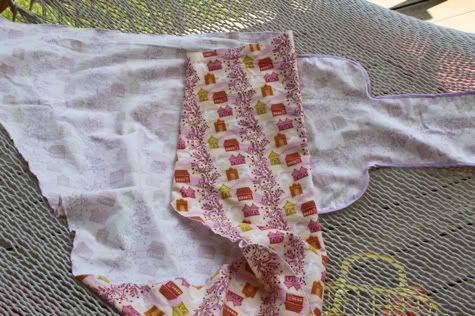
5. Now fold your triangle blanket in half and iron a nice sharp crease into it. Unfold it and use the crease as your guide to where the center of the blanket is. Align the center of your tie piece with the center of the blanket, about 3 inches down from the top, and pin in place. Lay a ruler or measuring tape along the seam of the tie piece. mark with a pin 3.5" down and 7.5" down. You are marking where you are going to sew the tie to the blanket. In this new and imporved version of our DIY swaddle blanket we are leaving a hole for tucking by NOT sewing between those two marks. Check this picture to see how it's done:
6. Now sew from the top center of the tie down to your first pin. Since you can see this stitch on all sides, and we want it to be a strong one, I used a decorative stitch my sewing machines comes with, but you can just use a zig zag if you like. Then cut your threads and sew again from the second pin down to the bottom. So it will look like this:
It's actually easier to see from the inside so here's another view:
GIRL YOU ARE DONE!
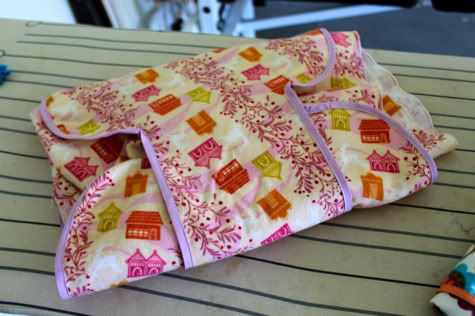
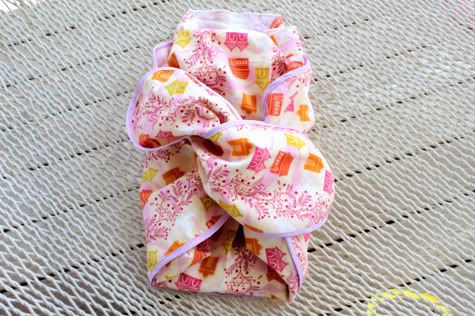
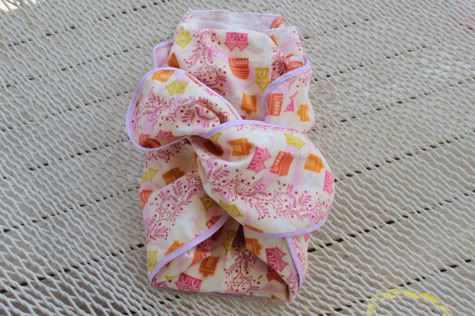
Now fold that baby up. Start by spreading it all out, then bring the right side over baby and tuck under:
Then lift the bottom up and tuck into the top or behind baby's shoulders:

Then wrap the left side around baby, tucking the excess fabric through the hole we made:
Then tuck:
or tie:
Labels: Baby, DIY, Gifts, In One Evening, Serging, Sewing, The Season of Cozy
posted by Jaime @ 3:30 AM
![]()

28 Comments:
This is too cute.
I wish they made one for larger babies. i have a sleep sack for Macy but its just not the same as the awesome swaddler she grew out of. :(
Aack! So cute!
Jaime, I love the finished edge! so pretty for gift giving! And these fabrics!
Oooh Sleep sack! Good idea Mommybear22!
This is fantastic, thank you!
Wow! This looks great. We used the Miracle Blanket with our daughter, but I may have to try this with future babies. Thanks@@
I can't wait to start making these. I don't have any grand children as yet, but have a hope chest going.
Thanks for the cute blanket tutorial! I combined both blanket projects. I used the bias tape on the large triangle but used the cotton/flannel combination for the wrapping piece. It was an easy and quick project. I was so excited to give them as gifts! Thanks!
it WAS a great gift! (both times) thanks, prudent baby.
HEY! I love the site! I'm a sewing NEWB and for the life of me, I just can't seem to figure this one out! Being the crazy person I am, I made a grid in Photoshop 10px = 1 inch. So it's 360px wide, or "36 inches" for my yard, and 440px or "44 inches tall for my bolt width. When I fold my "fabric" so there's 22 inches at the top, and cut my triangle, I'm left with 2 (separate) triangles. Is this correct? I thought we were supposed to make the tying pieces from the left over fabric? I'm totally confused!
Should the bottom of the triangle be 36" or 44"?
Your help would be much appreciated!
THANK YOU!!!
I'm also having a hard time with the two tie pieces out of the left over triangles. Is there anyway you could post the measurements for the tie pieces?
Thanks.
Ok, so I am also confused! After cutting the large triangle, I am left with 2 smaller triangles, and I don't see how folding them in half and then in quarters and then cutting the tie pattern will produce what is shown in the picture.
The blanket looks so cute and I want to try it, but I'm stuck on the ties now!
I love this idea! I was also having trouble figuring out how to use the leftover triangles to get what is shown in the picture. After looking at the original set of instructions, it looks like you are trying to get a rectangle that is 10 inches by 22 inches and you can get that by trimming off the top and side of each triangle. Since you are making each side piece separately, it looks like you only have to fold them in half lengthwise. You would fold them into quarters if you were cutting both wrap around wings out of a single piece of fabric.
I'm SUCH a newbie sewer but we're expecting baby #2 in late November so this would be a fun project to try! Thank you for posting :)
Just whipped up two of these in about 3 hours! Our daughter just told us she is expecting #1, and we are headed to see her tomorrow, so wanted a cute gift- one pink, one blue! I actually made them two layers, one flannel, one cotton print. Made it easy to stitch and flip, then sewed a line around the edges to hold. Thank you for the pattern!
Holy cow! I finished, but whew! Harder than I thought. Like always though, a second one would be much easier!
Here's my version, and let me know if you want me to take out the pictures.
http://kindergartencrafter.blogspot.com/2010/12/baby-swaddler-thing.html
I just came across your blog and can't tell you how excited I am to try out so many of your projects!! I started usingmy machine a little over 6 months ago and coming from a mom who is a genius sewer/crafter, I can't wait to show her some of the things I create. Thanks for the inspiration!!
I think it would be fun to make a version that is essentially just an open-topped bag, with the swaddling sashes sewn to either side, so you could just slide baby into the bag and wrap it up, that way it couldn't kick free :) but this is super cute! I'll have to give it a go
Velcro? I don't know about you . . . but velcro was the only thing that held my boy in after the first couple of weeks!
Anyone put velcro on?
where's the pattern for the new and improved swaddling blanket? i would love to try making one.
I like this pattern and would love to make some to give as gifts, but I just ruined my first attempt when cutting the side ties because I don't think I made them long enough. It would help to know some general dimensions for those ties -- like about how wide the base should be, how tall to make the bottom portion before narrowing it, how narrow the tie should be, and how long the tie should be. I'm pretty sure I just cut my first one too short, so I'll have to get more flannel and try again. Can you help by providing additional details to make this tutorial even better? Thanks!
Thank you so much for sharing this tutorial. I have dubbed it the "Magic swaddle blanket" because it seems to put the baby to sleep instantly. :) I posted about it here http://embeshop.com/2011/08/for-the-boy-a-magic-swaddle-blanket/
I JUST BOUGHT SINGLE FOLD BIAS TAPE!!!! :(
Do you think it will still look/work okay? :(
mommafo - how thick did you buy it? if you fold it in half and iron it into double fold bias tape before sewing with it, it could work!
Jaime- I did just that! I only bought one pkg though so I'm going to go back and buy some double-fold for the blanket part. My tie-back part seems so small compared to the blanket part. =\
Maybe its just me but I am so confused! haha
I've been a "professional swaddled" (NICU RN), and think this is WONDERFUL!!!
I especially love the one with the owls.
This is great! Love it!
I was also wondering if you could let me know how long and wide the skinny part of the tie should be - would love to work on this project this weekend but don't want to mess it up!
Post a Comment
Subscribe to Post Comments [Atom]
<< Home