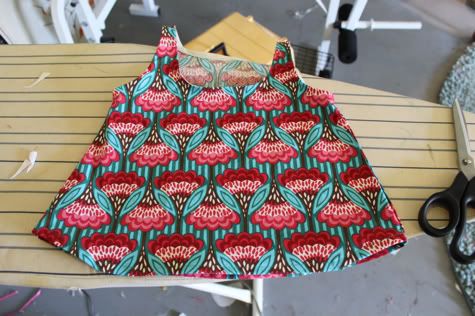
Swingy Summer Tank Top

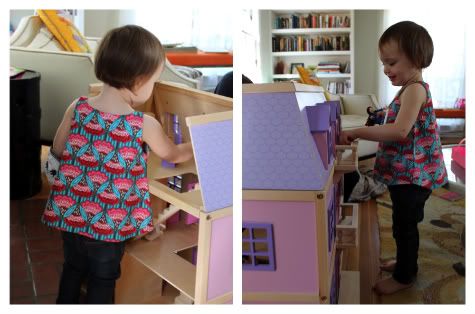
Yesterday my little girl turned TWO! Daddy and I took the day off work and we all did some family gardening, visited the zoo, ate daddy's famous coffee cake AND ice cream cake, and had an all around magical day. And Scarlet wore this "birthday shirt" I made her all day long. It's easier then it looks, I promise.

I'll share the full Swingy Summer Tank Top pattern with you after the jump!
Toddler's Swingy Summer Tank Top Free Pattern
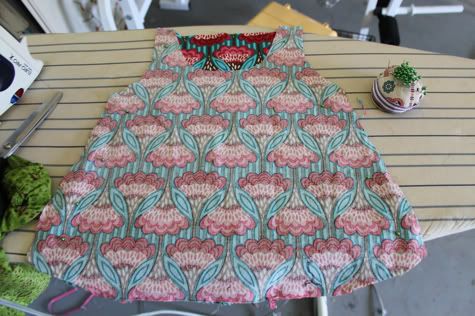
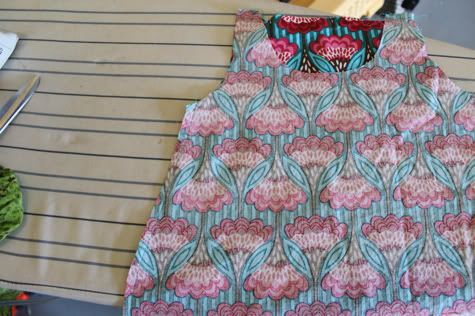
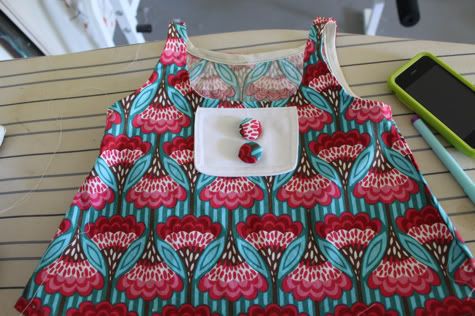
1. Get some awesome fabric and pre-wash it. I wish I'd bought a whole bolt of this stuff! This is Anna Maria Horner Garden Party Collection, the print is called Fanfare and the color is ah10 blue, and of course, I bought it on my crafty visit to Dallas at City Craft. I'm almost out of my stash! I might have to fly back soon! This fabric is available online here. At $9.50 a yard, this shirt in total cost about $5. I feel like it looks like it cost way more than that, if I do say so myself. Here's a few more views of the top so you see the swingy-ness of the shape:
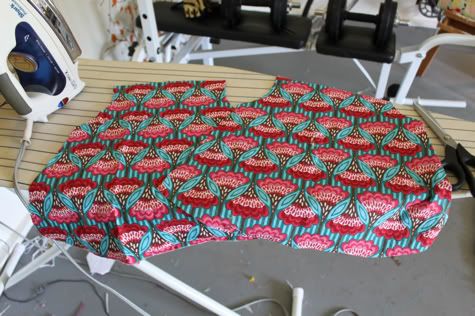
2. So you want to start by cutting two identical pieces for the front and the back. The best thing to do is trace a dress or top that fits your wearer. Make sure it's a non-stretch dress. You want to start by just making sure the armhole cuts line up with your tracing-shirt, just give yourself about 1/4" extra fabric (so cut 1/4" in on your fabric from where the armhole is on your model shirt). Then just cut the sides wider (an A-line shape). We'll cut the neckline next. I also slightly rounded each side of the bottom for cute-ness sake.
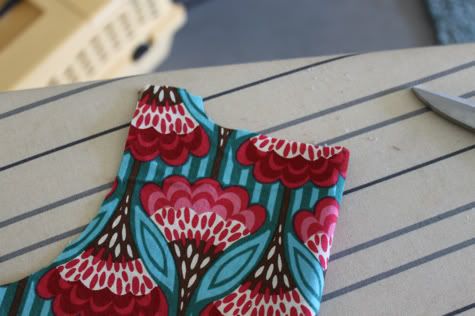
3. Now take your back piece and fold it in half. Cut a slightly dipped neckhole with a 1.5"-2" strap as pictured. You can correct the depth of the neckline later, just make sure your strap is defined.
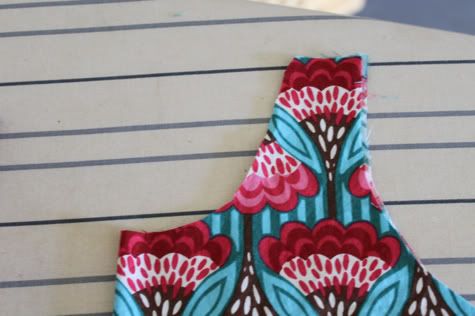
On the front of the dress do the same, just cut a deeper neck line. You can correct it later to the right shape. The key here is making sure the wearer can get it over her head so you don't have to sew a button or zip anywhere.
4. Now lay your two pieces right sides facing and pin at the "straps" and up the sides:
Sew together. Just don't sew the armholes closed.
Finish your seams by serging, sewing with a zig-zag or cutting with pinking shears:
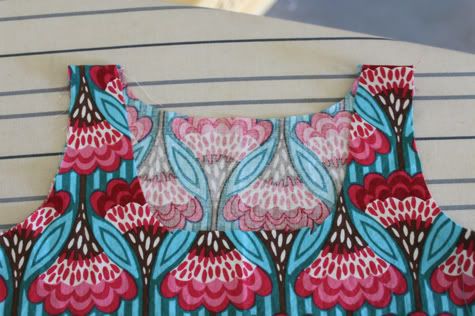
5. Now it's time to perfect the neckline. I dipped the back down a little more and slightly squared the front. Just fold each side in half and cut, don't be scared:
6. Now take your single fold bias tape, open it up, and starting in the middle of the back of the neckline, pin it to the outside of the shirt aligning the edge of the bias tape with the unfinished edge of the neckline like so:
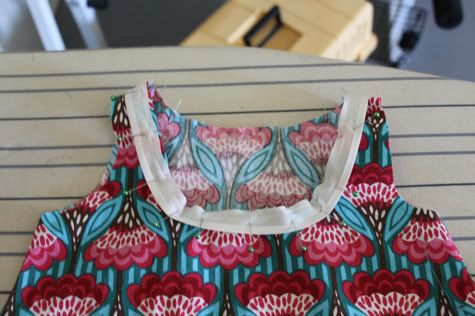
Sew it in place along the fold:
Now it looks like this:

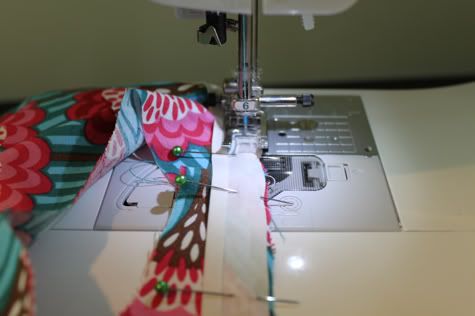
Turn the shirt inside out, flip the entire piece of bias tape to the inside, folding it back up and pin:
Sew in place at the edge of the bias tape:
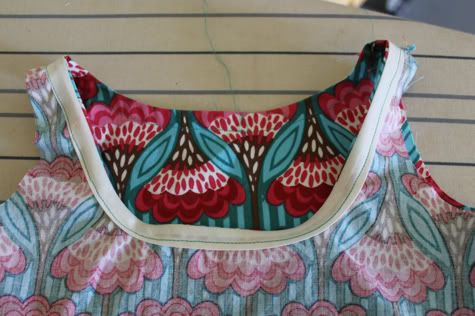
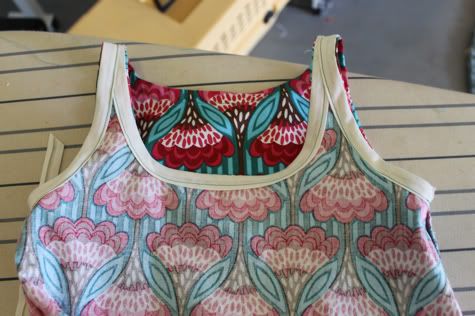
Now your neckline is done:
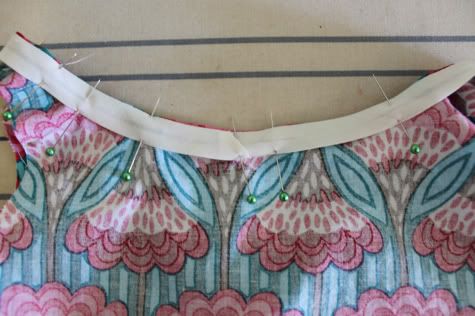
7. Repeat the same process on the armholes, starting at the bottom of the armhole (the armpit). So pin as above, sew along the fold:
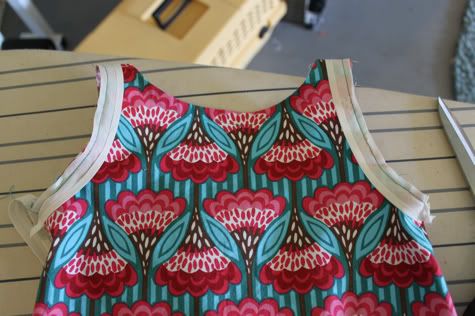
Flip to the inside and sew along the edge:
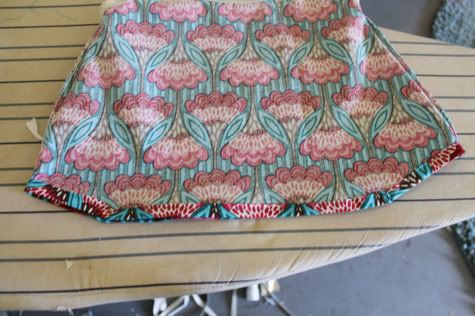
8. Now we hem! Fold in 1/4" and iron, then another 1/4" and iron and sew in place with a straight or blind hem stitch:
So you could leave it like this and it would be pretty cute, right?
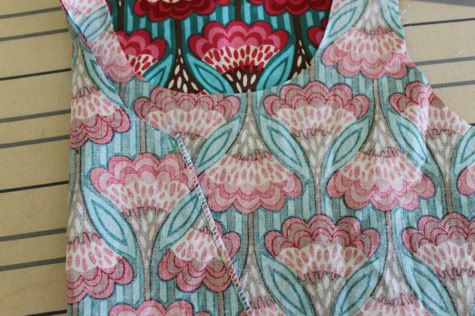
But let's jazz it up with a little bib detail.
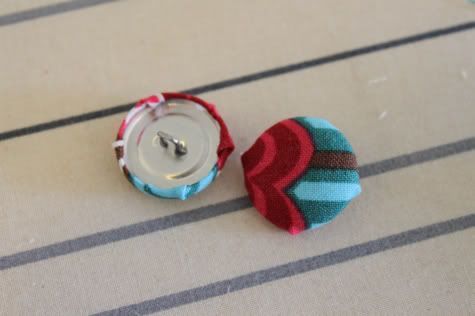
9. I whipped up some matching fabric-covered buttons (so easy and fun and the kit can be bought at any sewing store):
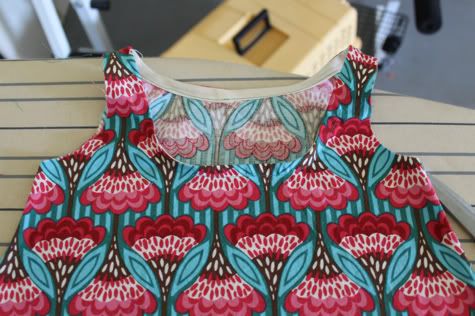
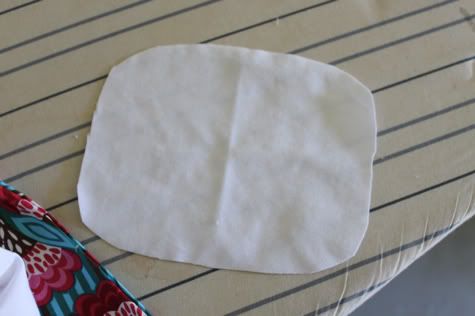
10. Take a rectangle of contrasting cotton about 1/4" bigger on all sides then you want your bib to be and fold it in quarters, then cut your bib shape:
When you unfold it will look like this:
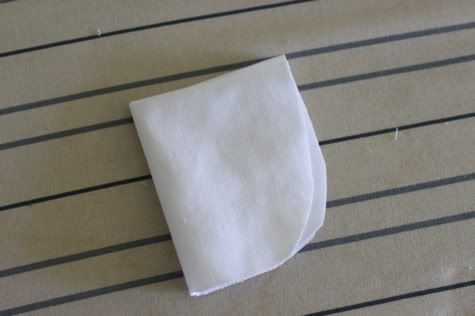
Now fold it in half right-sides facing and sew around the edge with 1/4" inseam, leaving a hole for turning:
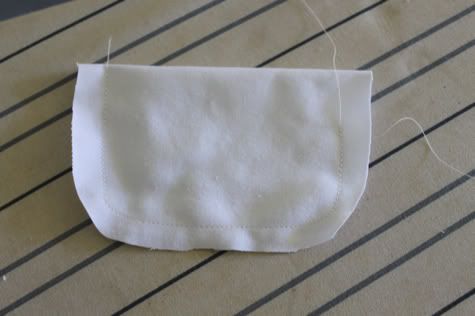
Turn it right side out, push the edges out, fold the hole in and iron nice and flat:
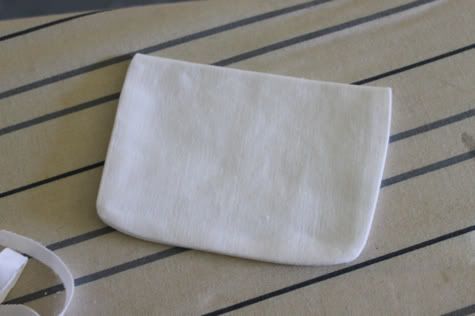
Using a piece of double-sided fusible web, iron it to your shirt:
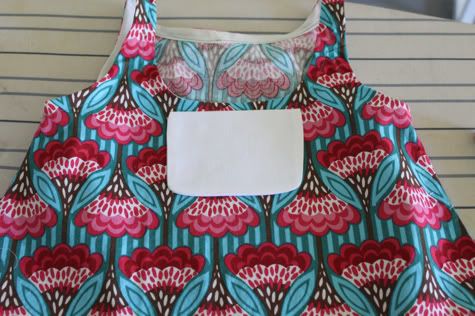
Top stitch whatever pattern you like into it, just make sure it's attached at all the edges. I did two rows of stitches following the outline of the shape:
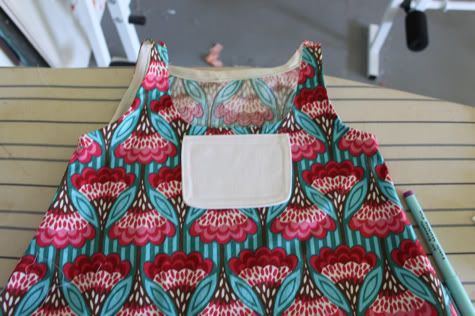
Sew your buttons on. DONE!
So now, here is my question to you...how do you get ICEE out of the brand new shirt you made?
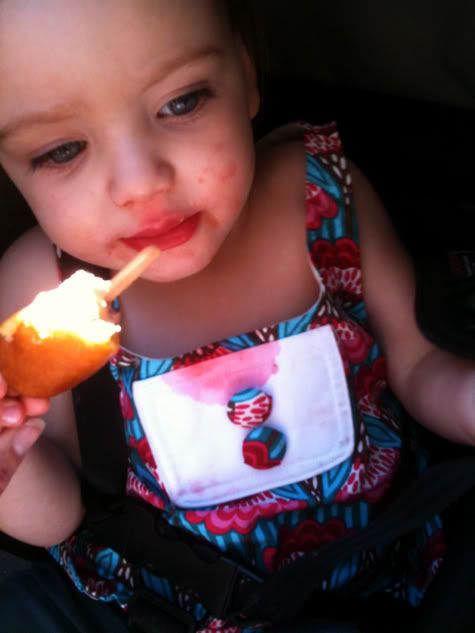
and yes, that is a corn dog. it was her birthday, don't judge me.
Labels: Baby, Clothing, DIY, Gifts, In One Evening, Kids, Serging, Sewing, Under $5
posted by Jaime @ 10:00 AM
![]()

17 Comments:
I love this top. I think I might just make one for my little girl this weekend!
Oooh I *love* that fabric! It made such a great top. Thanks for sharing, I'll be linking.
thank you for the detailed instructions. I think I will make a dress for my great niece
Why the guilt about a corn dog?
Cute shirt!
Beautiful fabric!
Beautiful Corndog!
Scarlet - Hope your birthday was great! You're stylin' in your gorgeous mama-made shirt!
super cute! and the icee....oxy spray!
What a pretty little top!!! I linked to your tutorial on Craft Gossip Sewing:
http://sewing.craftgossip.com/tutorial-swingy-summer-tank-top-for-toddler-girls/2010/04/04/
--Anne
I arrived here through a link on luvinthemommyhood (http://www.luvinthemommyhood.com), and I have been loving looking through all your tutorials! You make such great things, I don't know which one to try first! I have you bookmarked now. :) Thanks for all your tutorials.
I have had luck getting the worst set in stains out by making a paste w/ the powdered oxyclean, liberally coating the stain, letting it dry overnight and then just tossing it into the wash. Sometimes I have to repeat because I missed some spots, but this has gotten out everything (including stains that have been washed and dried a few times) except sharpie marker...
I love corn dogs!!
I love reading your blog! You have such wonderful and clever ideas. :) Awesome!
Hi dear!
My name is Rose, I live in Brasil!
I have a company, fabric dresses for girls.
I love your blog.
kisses
Rose
I can not wait to make this. I have to bookmarked to make it as soon as I find that perfect material!
so lovely! did the ice come out??
Love, love, love your generous tutorials. I'm going to my stash right this minute. A little hint you may already know--when covering your buttons, use wet pieces of fabric when covering the button. It will go on easily and will dry to a perfect, pucker free circle.
omg! she's so teeny... and now she's such a big girl! i love this site. you guys are great, thanks for including us in your lives :)
I am wondering what width of bias you used? I used extra wide and it would not lay flat, I had to take the stitches all out and fold it, leaving part of the bias on the front side.
It was a little frustrating but tuned out cute. Dawn
Post a Comment
Subscribe to Post Comments [Atom]
<< Home