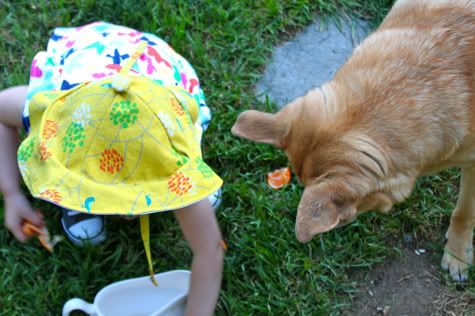
Summery Sun Hat with Free Downloadable Pattern!
It's summer (almost)! Time to protect baby head's from melanoma and what-not. I whipped up a little summer hat and created a pattern for you.
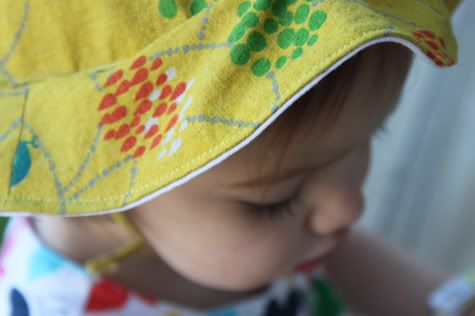
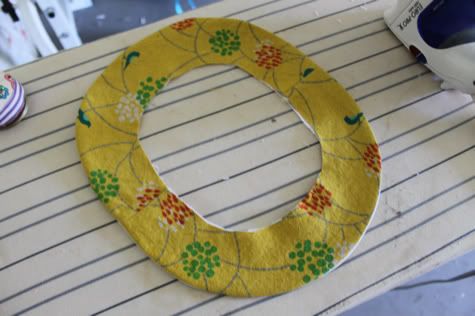
Isn't that fabric the cutest? It's a home-decor weight Etsuko Furuya I picked up at favorite fabric shop Fabricworm. Get the full DIY Summery Sun Hat Free Downloadable Pattern after the jump...
Summery Sun Hat Free Pattern
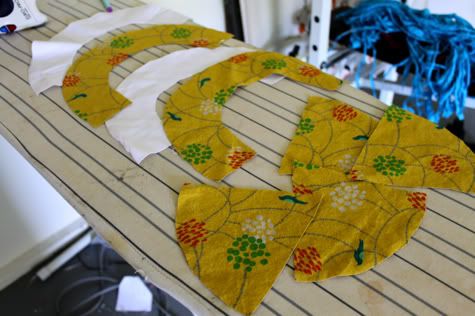
1. First download and print our summer sun hat pattern. Cut it out of the paper and trace onto the wrong side of your fabric. Download the pattern for free on google docs here: Prudent Baby Summery Sun Hat Free Pattern
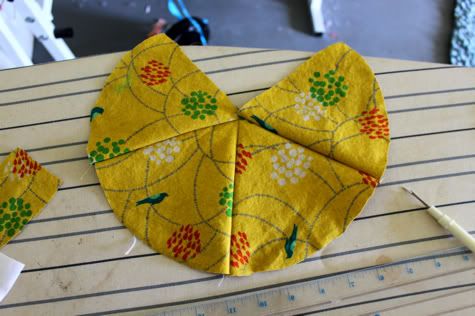
2. Cut your fabric out. Throughout this DIY you'll notice my hat is pointier and wider then yours. That's because I didn't love the shape I ended up with, so I adjusted the pattern for you. Yours will be cuter, but I didn't see a need to re-write and photograph the whole DIY (sorry):
2. Now we sew the hat together.
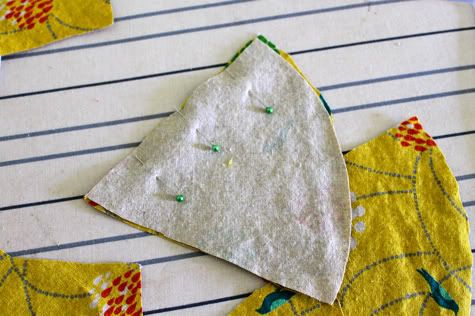
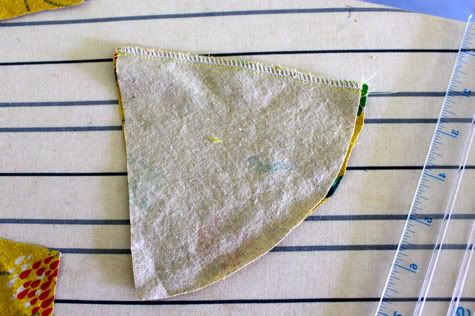
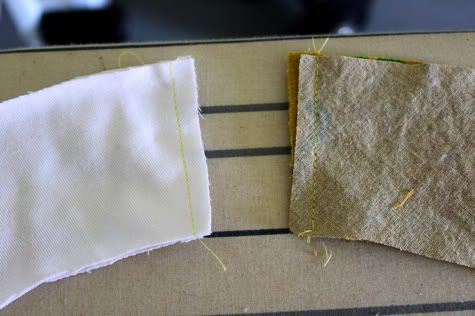
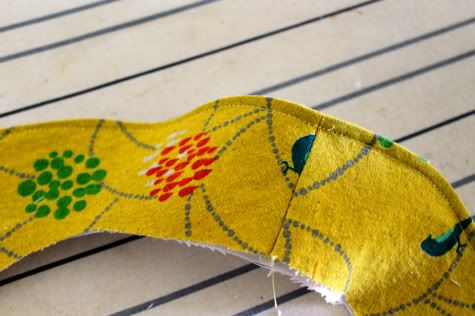
So you have four triangle-ish piece of fabric to form the shape of the hat. Take two of them and pin them right sides facing along one edge (not the bottom edge):
Sew them together along the edge and finish by serging, sewing with a zig zag stitch, or cutting with pinking shears:
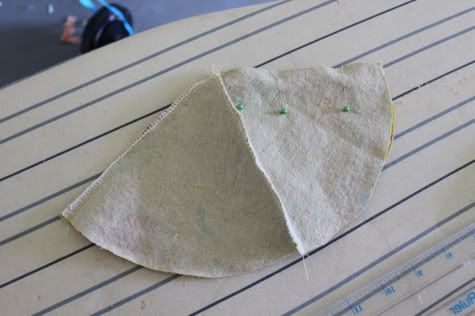
Take another piece and pin it right sides facing to the other unfinished edge of one triangle:
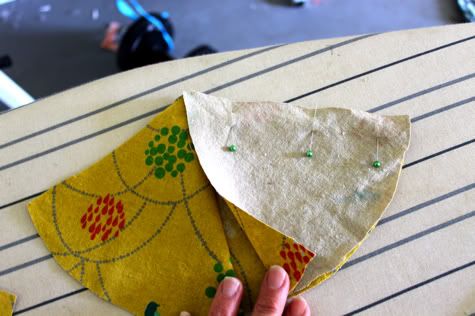
Sew it in place and finish the edge. Now you have a piece that looks like this:
Take your last piece and pin it right sides facing to another unfinished edge of your hat:
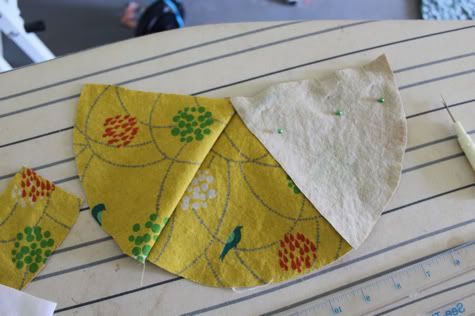
And sew it in place and finish the edges. Now your hat looks like this:
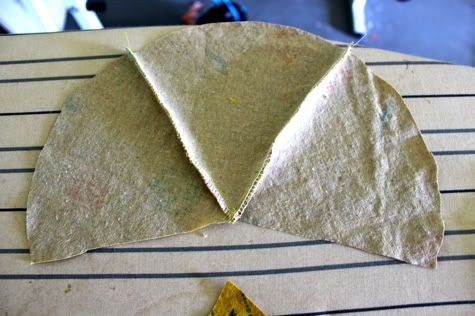
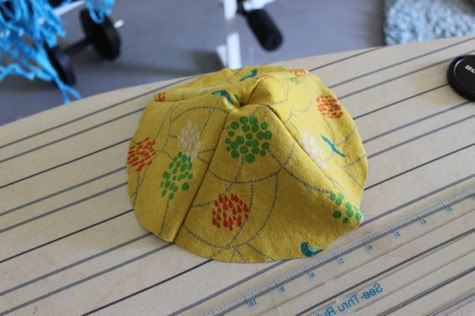
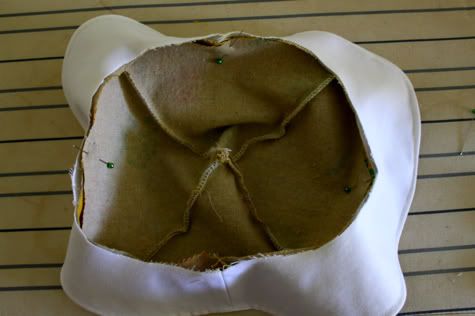
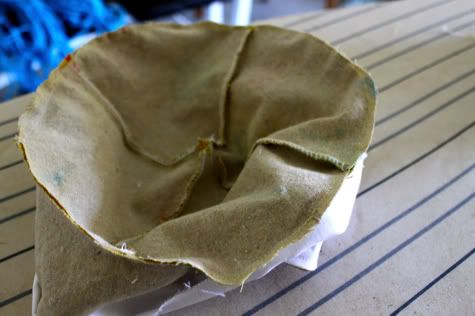
Fold that right sides facing and align the two unfinished edges and pin in place:
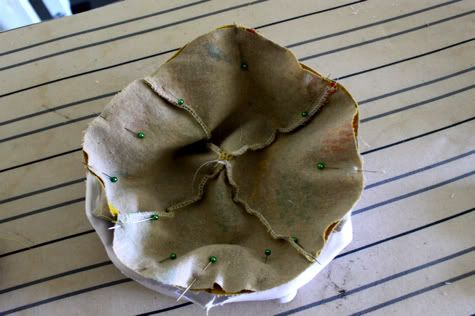
Sew them together and finish the edge. Now you have the top of your hat (except yours is less triangular):
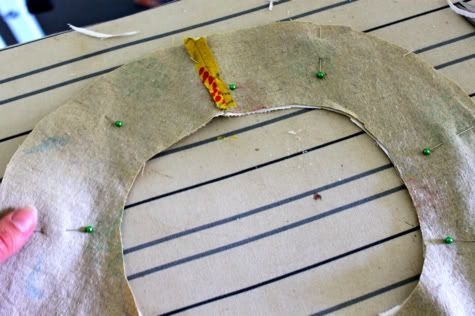
3. Now we create the brim. I did not have enough of my gorgeous fabric to do both sides of the brim the same color, so I used a white cotton for the lining of the brim (the underside) and my yellow fabric for the top. You have four "c"-shaped pieces. Lay the two lining pieces together right sides facing, and do the same with the two top brim pieces. Pin at the straight edges:
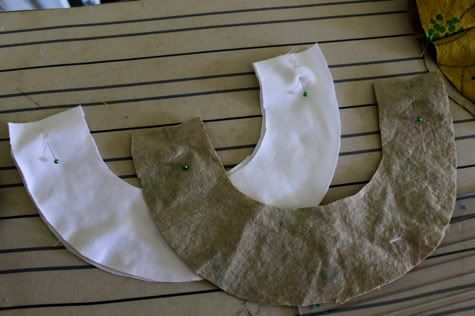
Sew each straight edge together:
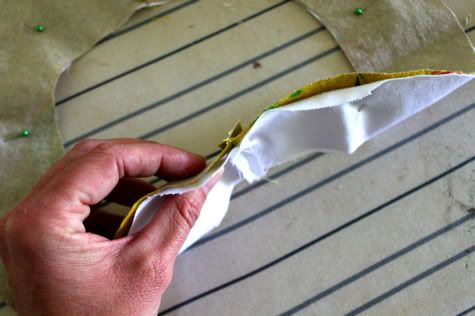
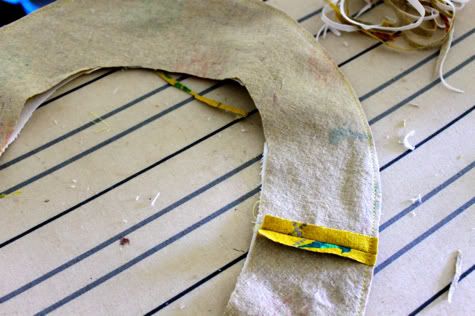
Unfold and iron the seams flat like so:

Now lay your lining right side up and your brim outer right side down on top of it:
Make sure the seams line up like so:
Sew all the way around the outside with a straight stitch and trim the edges:
Flip it right side out and iron it flat:
Top stitch around the outside edge. I used yellow thread on the spool and white thread in the bobbin so the stitch color coordinated with each side:
4. Now we will attach our brim to our hat. You want to turn your hat so you are looking at the inside, and place your brim over it right side down. Align the seams in the brim with the sides of that hat (so in the middle of one triangle pieces. Only pin the RIGHT SIDE of the brim to the hat, leave the brim lining unpinned. Start by pinning at the sides by the brim, then the top and bottom so you get it all aligned nicely:
Flip the brim lining around, this will help you get your pins in more easily. Pin the rest of the way around:
Sew the outer brim to the hat and remove the pins:
When you turn it around it will look something like this:

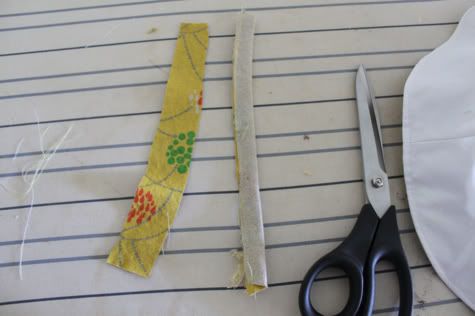
5. Let's make some strap really quick (not required). To make a strap, cut a strip of fabric, fold it the long way right sides facing and sew up the edge:
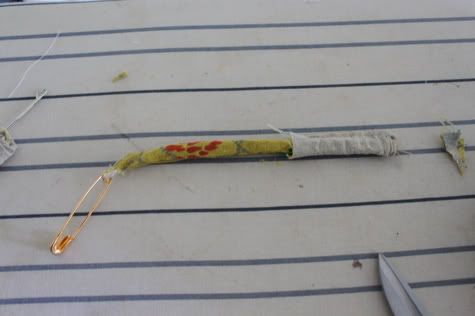
Use a safety pin or loop turner to turn it inside out then iron it flat with the seam on one side. Finish one end of the strap by either tying in a tight knot or folding one end over and sewing in place:
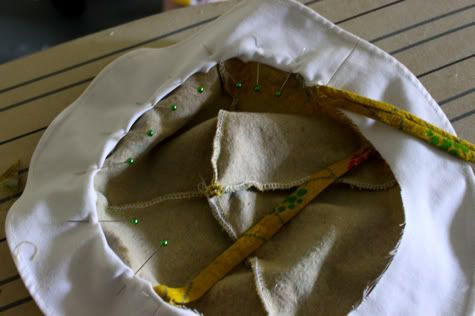
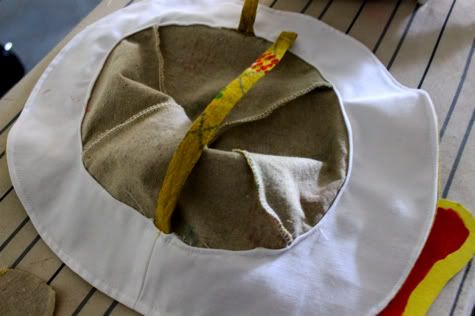
6. Now slip your unfinished strap ends between the brim liner and the brim at the sides where your brim seams are. Make sure the seam of the strap is facing to the inside of the hat. Now we are going to fold the unfinished inside edge of the brim lining to the inside of the hat, around the seam we made when attaching our brim to the hat. This is going to enclose the seam and finish the edge of the lining. At the straps, just fold the lining under a bit and pin. Here it is about halfway pinned so you can see the process.
Now you are going to stitch this in place. it will enclose the original seam and finish the lining edge. The other side of your stitches will be visible just inside the brim on the outside of the hat, so you might want to use two different colors in your spool and bobbin. This is called "stitching in the ditch" and it's a great technique, but you have to be a little careful so take it slow:
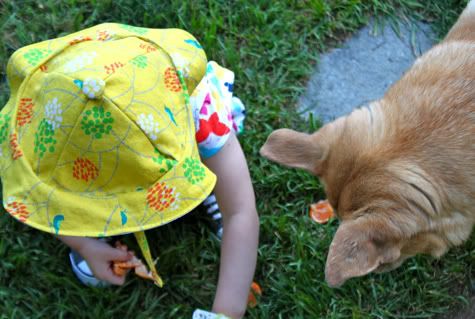
Turn that baby around! I added a fabric covered button to the top of the hat, totally optional. You're done!
Labels: Accessories, Baby, Clothing, DIY, Gifts, In One Evening, Kids, Serging, Sewing, Templates, Under $5
posted by Jaime @ 8:17 AM
![]()

27 Comments:
omg this is sooo freaking adorable and perfect for a little girl!!!! love the pattern!
This is sooo cute! Totally "special fabric I've been saving" worthy. Now even I can have a pretty sun hat for my giant "no hats fit me " head. I just need to increase the pattern X 1,000,000.
That is really awesome!
Aww, that is so cute! Thanks so much for sharing the pattern, I'll be linking.
Love it! There's so many babies around my house right now. I know the PERFECT fabric for this. <3
So cute! I am gonna have to try making this for your little cousin. By the way, Jojo has that butterfly shirt...
What a cute little hat!! I linked to your tutorial over at Craft Gossip Sewing:
http://sewing.craftgossip.com/free-pattern-summery-sun-hat-for-babies/2010/04/16/
--Anne
Mind readers! I was just looking at my daughter's too small hat from last year thinking, "I should work out a pattern and make her one for this summer."
Thanks for saving me some time! :)
Thank you for a great pattern. (and for your sweet comment on my blog)
This pattern is just what I was looking for. I couldn't find what the seam allowance is supposed to be, though. Is it 5/8"? Thanks!
-Laura
I love the pattern, but when I made the hat it came out so small. More for a small infant, not a toddler. Did I do something wrong?
PS I made the onsie dress also....so cute!!
uh oh trisha! i bet your print settings were set to "shrink to fit" so your pattern came out smaller! and laura, i used 1/4" inseam :)
Oooooo, I'll check when I print it again, should it fill a regular 8x10 paper? (my daughter grabbed up the first hat for her doll, it made her day!)Thanks!!
Thanks for posting this! I finally have a free weekend, and this is at the top of my to-do list! I am going to make the hat for my 8-month old daughter (who is very average sized)...do you think I should just use a larger seam allowance so it will not be too big or try cutting it smaller? Thanks!
Hi Trisha-It's actually 8.5x14", legal size, it was just a little too big to fit on 8.5x11"
Great pattern. What size it is actually. I need to make one for my toddler and wanted to make sure it would fit her.
I just made this! I am a novice sewer and, while it didn't come out perfect, it was so easy to follow the instructions. It came out great. I also made it reversible!
What a great tutorial! I just made one for my girlfriends baby boy! Here is a link to my blog so you can see pictures! http://gretam.wordpress.com/2010/06/16/167365/
Thank you so very much for sharing!
This is the first pattern I've tried to download from SCRIBD. They want too much personal information as well as wanting to access my face book page. Not worth it. I just don't want to be on one more mailing list.
Maureen - thanks for the heads up. Scribd sort of tricked us, we didn't realize they would do that to you, so we are moving all of the patterns over to google docs bit by bit. I just moved this pattern and updated the post above. Here it is: Prudent Baby Summery Sun Hat Free Pattern
XO
As an extremely amateur seamstress, this project was time consuming but fun. I can't wait for my little one to wake up in the morning so I can try it on her sweet little head. Thanks! :)
Great and easy to make...am an amateur seamstress but I wish I had looked at some of the comments regarding the size; I printed it, made the hat and it turns out fit for a doll.. am not sure how to get it to fit my 16weeks grand-daughther
Great pattern! Can you comment on what age child it should fit?
Hi, I just made this for my baby girl. She's 7 months and I guess average-sized, unfortunately she's now asleep so I can't try it on :) I think it should be ok if a little large, if so not to worry she'll grow into it! Thanks for sharing your pattern, I'm a beginner and the instructions were very clear and easy to follow.
I did a version of this one, tks for the tips :)
http://maomaocrafts.blogspot.com/2011/05/reversible-hat.html
So I didn't have any legal size paper but I just printed on 8.5x11 (no scale so it cut off the end) and then cut the pattern in the middle so I could use it on the fold of the fabric. It makes things come out more symmetrical anyway!
I just can't stop making this hat for my baby boy! I printed it at 78% and used 1/4" seams and it's a great size for my 3-month-old, that I think will make it thru the summer. And as of today, he has 2 new ones to match the cool clothes his grandma's making him... Thanks for the pattern. :)
Post a Comment
Subscribe to Post Comments [Atom]
<< Home