Cozy Cotton Terry Cover Up Pattern
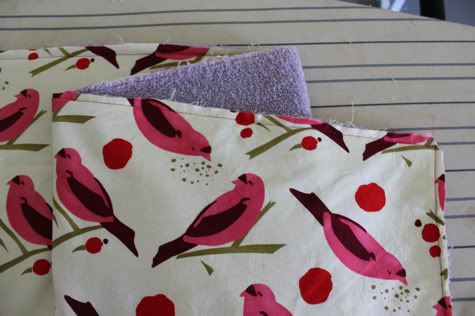
It's almost pool time (or beach time if you're lucky)! Time for a cute cover-up for baby. This is made from a towel, 1/2 yard of cute cotton, some double-fold bias tape and a few snaps. It's all cozy on the inside and cutesy on the outside. I totally dig it and want a giant one to wear around the house all day while I write, ha, can you imagine?
I am so beyond in love with Alexander Henry Bird Seed Fabric (also made the DIY Changing Pad Cover out of it) which is sold out pretty much everywhere but you can find some in aqua and yellow at Fabricworm! Get the full Terry Toddler Cover Up Pattern after the jump...
Terry Toddler Cover Up
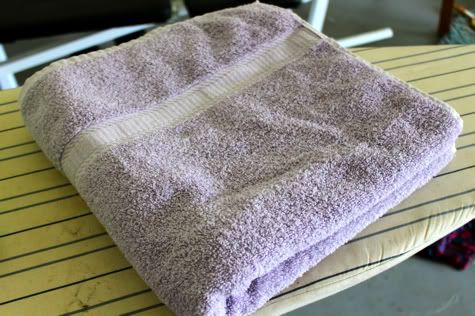
1. Gather your materials: One bath towel (or you can buy some terry but a towel actually will be easier for the project), 1/2 yard of cotton, 2 packages of double-fold bias tape (about 4 yards), a box of snaps(plastic or metal) and a 10" piece of 1/2" elastic (the width isn't super important so whatever you have on hand).
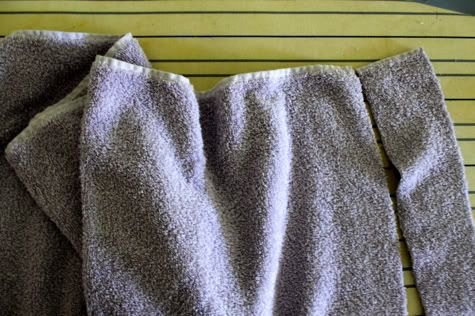
2. Let's cut all our pieces. Cut the sides off the towel like so:
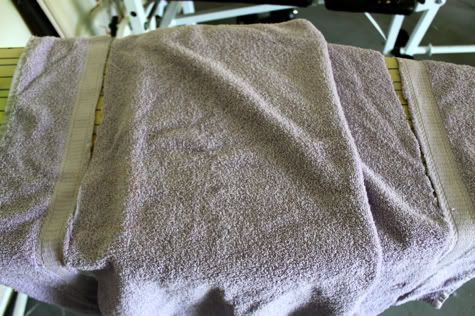
Take one of those sides and cut it in half:
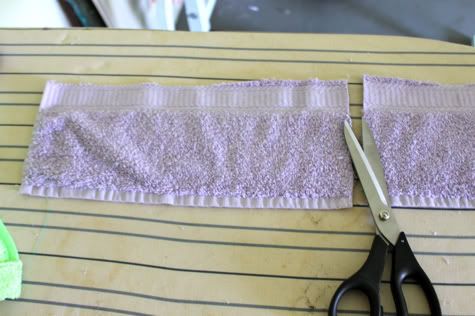
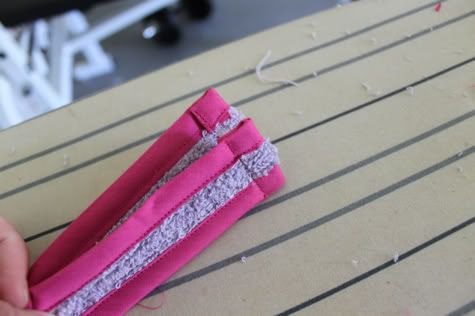
From that half cut two 1.5" thick strips:

Now take the towel and cut it down to 36.5" wide and discard the little remaining bit of towel:
At the very top of your 36.5" piece, cut a strip 1.5" wide and save the strip, we'll be using it later (you want that finished edge on it):

Now cut the length of the towel down to 18.5". So the body of your towel is now 36.5" wide and 18.5" long. Cut your 1/2 yard of cotton to the same size.
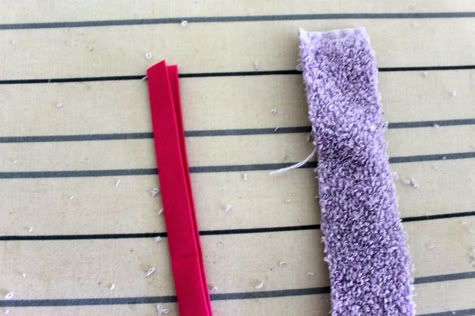
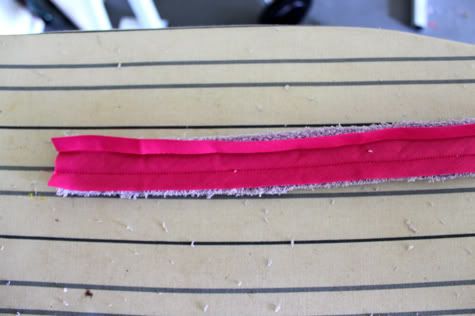
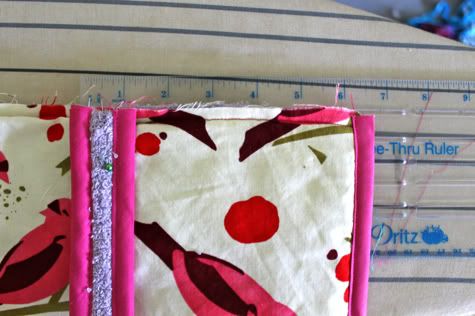
3. Now let's make our straps. So take one of your small strips and your bias tape, check which side of the tape is slightly wider:
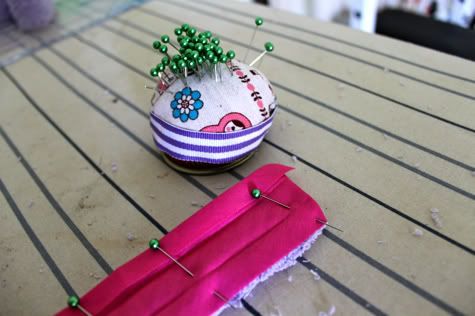
Open the bias tape and pin the wide side aligned with one edge of your strip. At one edge fold the bias tape over the strip and pin so it's attached on both sides like so:
Sew it in place along the fold:
Fold the bias tape back up and wrap it around to the other side of the strip and pin:
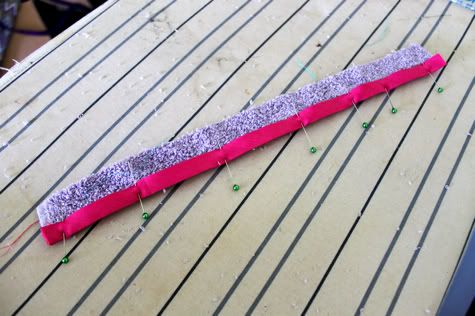
And sew it in place right at the edge. Because you are stitching on the shorter side of the bias tape your stitches will catch on both sides.
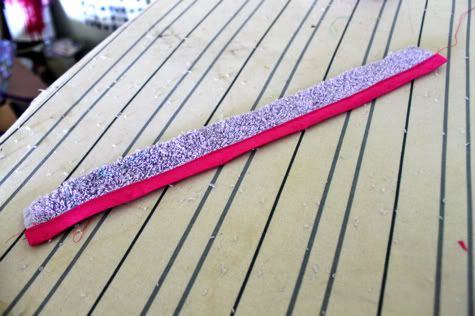
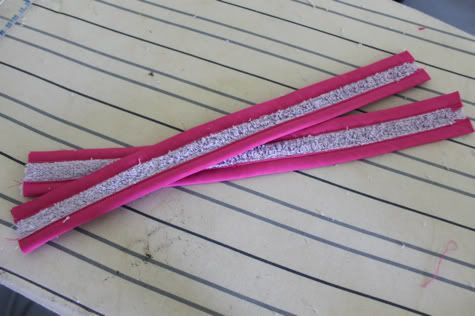
Repeat the process on the other side of that strip, and on both sides of the other strip to create your straps:
Take the edge of each strip with the folded over bias tape, fold the whole end under 1/4" and sew in place:
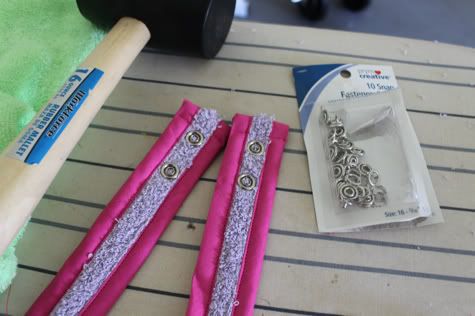
Now get out your snap kit. If you've never used one you should, it's so easy, you just use the little tool and hammer the snap in place according to the directions. Here's a kit to check out. One billion times easier then sewing buttonholes or sewing snaps on yourself, though you can if you really want to. On the finished end of each strap, measure in 1" and 2" from the end (so the snaps are 1" apart) and attach a snap backing. This will allow your towel to grow with your toddler:
Set the straps aside.
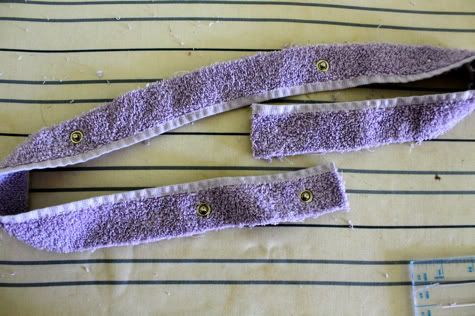
4. Now grab the 36.5" long strip we cut earlier (with the finished edge- if you're using straight terry, go ahead and finish one edge of it). With the unfinished edge facing up measure 1" and 4" in from the left side (so the snaps are 3" apart) and attach two snap fronts:

Also measure 14" in from each side and attach two snap fronts. So now your strip has 4 snap fronts on it:
Set that aside.
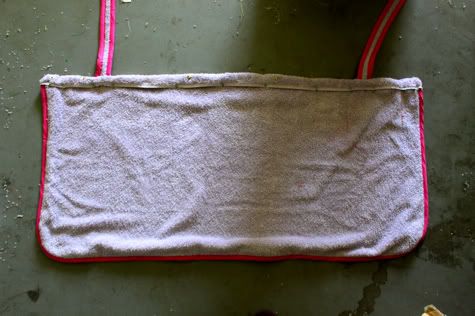
5. Now for the body of the towel. Pin your towel and your cotton together wrong sides facing (so you see the pattern):
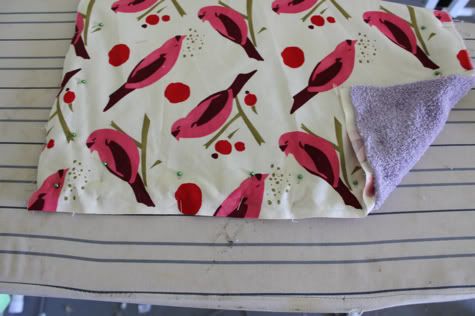
Sew in place all the way around the edge with 1/4" inseam. It doesn't matter what color thread because you won't see this later:
Now lay your towel flat with the cotton facing you. On the top left corner measure in 1" and 4" (so the snaps are 3" apart) and attach two snap backings:

Now lay your towel terry side up, open up your bias tape, and pin the wider side all the way around with the edge of the bias tape aligned with the edge of the towel Curve it at the bottom corners for extra cuteness like so:
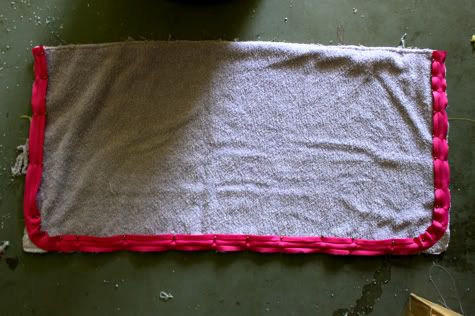
Sew in place along the fold, the cut the excess fabric from your rounded corners:

Turn the towel over, fold the bias tape back up, enclosing the unfinished edge, pin and top stitch in place:

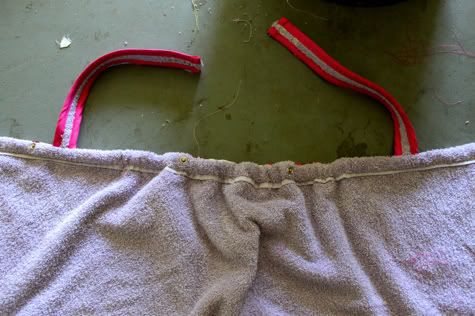
6. Now measure in 6.5" from each edge and pin the unfinished edge of your straps towards the inside with the snaps facing down:
it should look like this (you see the folded edge of your strap is up):

See there they are pinned to both sides:
Now take the crazy strip we made earlier and pin it right side down (so you can't see your snap fronts) to the front of the towel over the straps:

Sew that in place along each short side edge (at the very edge) and across the top with 1/4" in seam. It might help to turn it over and follow the thread line you made earlier when sewing your terry and cotton together, just to be sure you are sewing right inside that line:

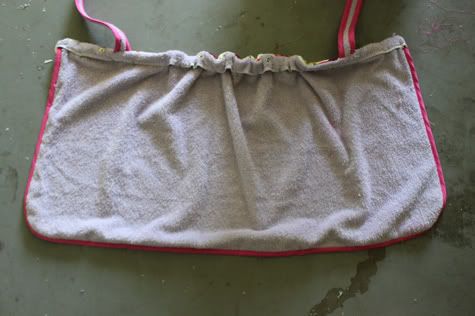
Now flip the strip over to the back of the towel and iron it flat. Now your straps are in place.
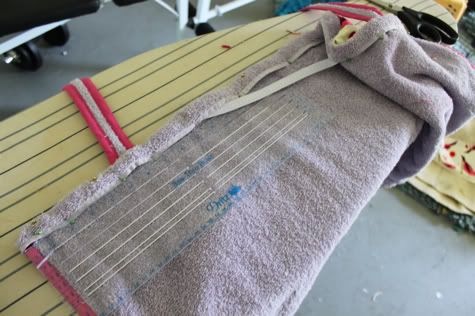
This is a little tricky so pay attention. Measure in 9" from the left side and pin your piece of elastic in place under the strip. Do the same on the right side. Your towel will gape in the middle like so:
Sew each end of the elastic in place with a straight stitch, perpendicular to the strip:

Fold the strip over the elastic and pin it in place (don't pin the elastic):
Sew the edge of the strip down (don't sew your elastic). You may want to use a thread that matches your towel on the spool and one that matches your cotton in the bobbin so it all coordinates:
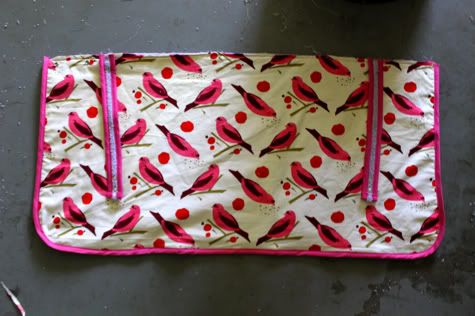
LADY YOU DID IT! It wasn't that bad right? Snap your straps into place in the back, and your two snaps in the front. It feels so luxurious doesn't it?

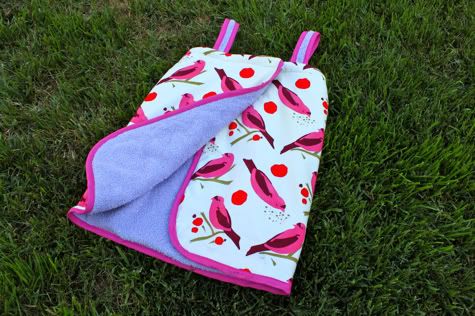
So here it is all opened up.

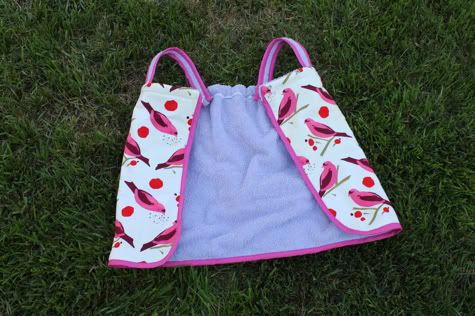
And from the back:

Is this too many pictures? Can you tell i'm proud?

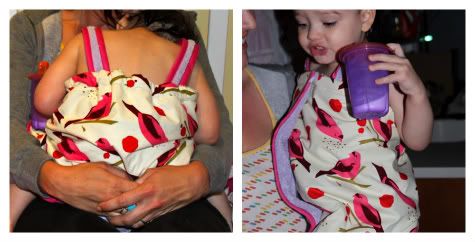
and there's my baby all snuggled up in it after bathtime:
Labels: Baby, Clothing, DIY, Gifts, In One Evening, Kids, Sewing
posted by Jaime @ 3:00 AM
![]()

25 Comments:
Wow! What a great cover-up!! I linked to your tutorial on Craft Gossip Sewing:
http://sewing.craftgossip.com/tutorial-terry-cloth-swim-cover-up-for-little-girls/2010/04/22/
--Anne
This might be my most favorite Prudent Baby project yet. I want one for me, to wear all day, inside, avoiding the Texas heat, lamenting my land-locked life... & drinking.
Adorable idea, thanks for sharing!!
Thanks for the tutorial I have been looking for one. What was the final measurement around the chest?
Love it!! Great for a quick cover up after playing in the sprinklers!
so cute, I am going to make one tonight for my daughter, you are amazing! we are going to live at the pool this summer so this will be perfect. I will just have to figure out how make a manly version my my one 16 month old.
Oh wow, this is exactly what I need! I was going to make a bathrobe for my 2.5 year old son, but I think this may be better! He keeps making me wrap a towel around him after bath but it keeps falling off and then he gets upset. This is simply perfect!!
Thanks so much for posting this :).
Hee hee hee...I think the company that makes bias tape should sponsor you for all the lovely ways you incorporate it into projects (and all of the lovely colors you use!!!).
SUCH A SMART PROJECT!!!
Gonna make my girls one for this summer...
Thanx for the how to!!!!
Oh, how do I make one MY size? :)
This is fantastic. Well done! excellent instructions!
thanks everyone!! and rebecca, once the elastic is in this measured 28" around the chest. and EHC yes they seriously should. i love bias tape. i'll have to do a DIY on making your own but it's so time consuming, i stock up on packages of it whenever i see a color i like!
Do you have any tips on how to keep the towel and the fabric together STRAIGHT while sewing? I have pinned and pinned and pinned and still can't keep it straight while sewing. It's so frustrating for me - I'm literally in tears typing this... :( I'm ready to just chunk it all in the trash!
Hi Jessica! I know exactly how you feel ugh! Don't toss it! Jaime is off in the desert with a bunch of cowboys today (she can explain later) but will be back online later tonight and I'm sure she will have tips for you. In the meantime, take a brake and have a diet coke/glass of water/margarita. It will all seem better with a little break, I hope. No tears while making making beach cover-ups! : )
thanks can't wait to make some for my nieces, as a mom of three boys I can't get enough girly stuff.
This is beyond adorable!! My girls would love this
Super fun!!!!! I'm going to need to try this one for sure!
I'm cutting the towel part out of some terry fabric - so how long are the straps that go over the arms? Love the way it looks so far (I skipped ahead and did the body first).
kelsey - 14.5"
I bought 1/4 yard of cotton but don't have enough. Shouldn't it be 3/4 yard of cotton?
hey kelly - you are right and i am sorry! what a terrible typo. thanks for the catch, changing now.
I would love to know how to adjust it to fit an adult (small and round!). This might just be the perfect Christmas gift for the women in the family. (Melbourne = hot christmas = great gift!).
this is totally off sewing topic but i LOVE the take&toss sippy cups!! omg! they are perfect: dont need a filter, dont need to screw on the lid, the kid cant get the lid off, and barely leak. :D
just found this site and am so mad I haven't found it before. I just made the most adorable pillow case dress for my babe and am about to start this cover up. thanks for posting great instructions for a lesser sewer.
I LOVE this project... So cozy & useful!!I did, however, put the snaps on backwards. Big oops, but cute nonetheless!
Post a Comment
Subscribe to Post Comments [Atom]
<< Home