How to Make A Bow Tie
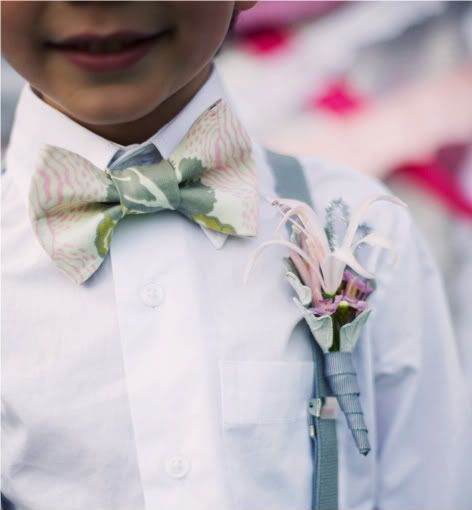
And you thought we only made girls' stuff! As I mentioned, we had the amazing honor of creating these bow ties for a little website you may have heard of called Martha Stewart, and as you mentioned, you'd like the tute. So here is our free bow tie pattern for you!
See the whole gorgeous shoot on Martha Stewart Weddings here and get the full DIY for how to sew a clip-on bowtie for a boy after the jump...
How to Make A Bowtie
You'll need some fabric and a teensy bit of lightweight interfacing for the bow, and for the strap you'll need a set of bow tie accessories (one 7/8" slider and one clip set). There are three sections to this DIY, two different ways to sew a bow tie, then how to sew the bow tie strap. See the measurements for each item below.
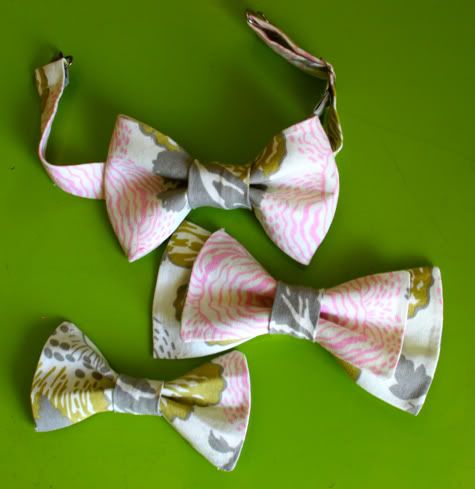
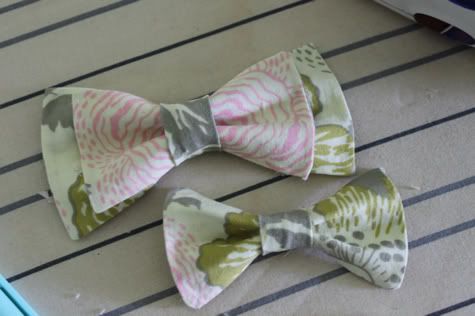
Simple Bow Tie & Double Bow Tie

These two use the same method but the big one doubles up. Make 'em any size you want, I like them a little big to give the boy a funky look.
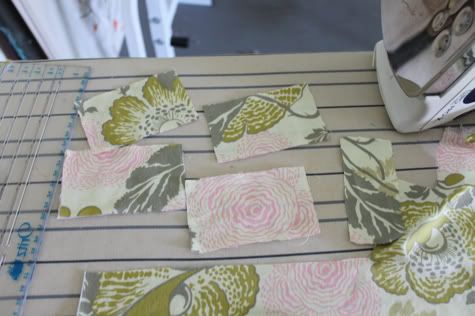
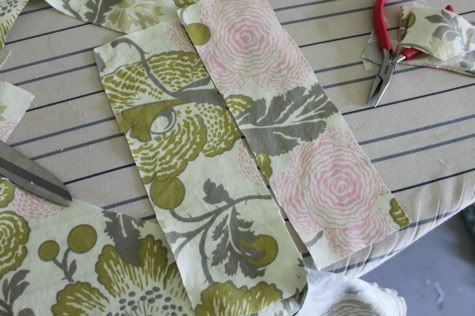
1. For each bow tie cut two rectangles of fabric 1/4" bigger then you want your finished bow tie to be. Mine are 4.25" X 3.25" for the small one. For the big one I also cut two pieces 6.25" X 5.25". You'll also need a piece of fabric for the center of the bow tie 2" wide X 3" long. I eyeballed it after the fact but it should be double the width you want it to be plus 1/2" and the length plus 1/2".
2. Cut a piece of lightweight double-sided interfacing 1/4" smaller then the fabric and iron it to the wrong side of one rectangle.
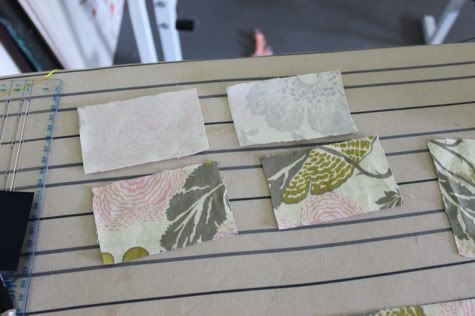
3. Leave the paper on the un-ironed side of your interfacing and pin your rectangles right sides facing.
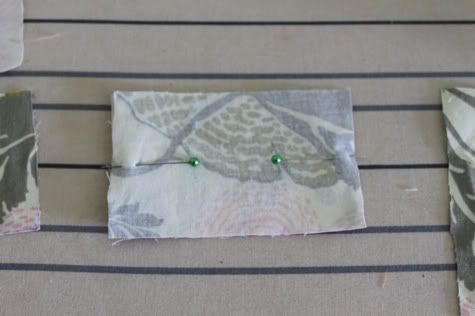
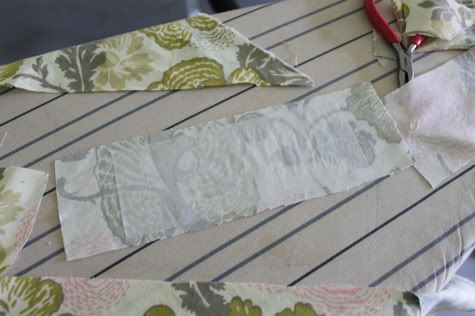
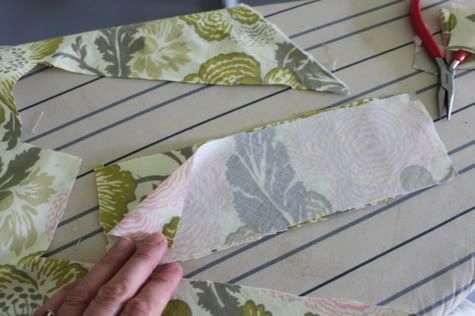
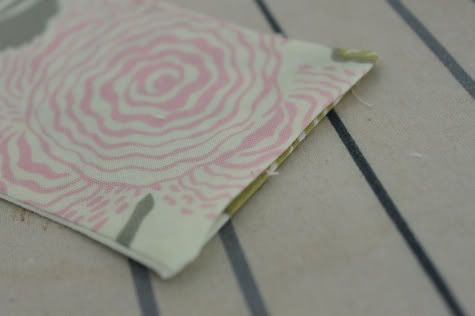
Sew all the way around the edge with 1/8" seam allowance, leaving a hole in the center of one long side for turning, then remove the paper from the interfacing and trim the corners:
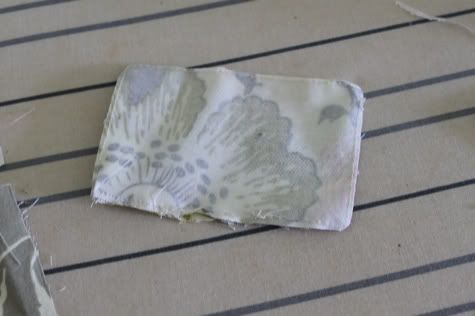
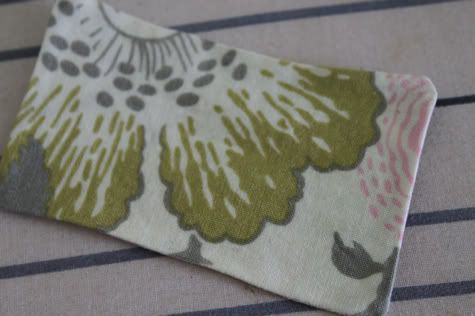
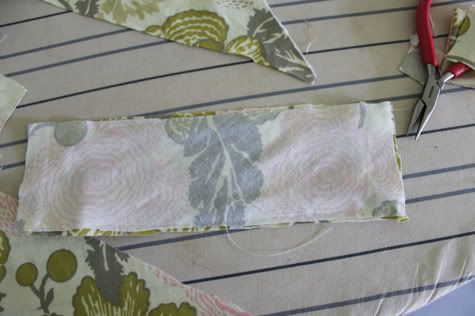
Turn it inside out, push the corners out as sharp as you can, and fold the edges under at the turning hole. Iron it flat, which will attach the interfacing to both sides and give you a stiff rectangle:
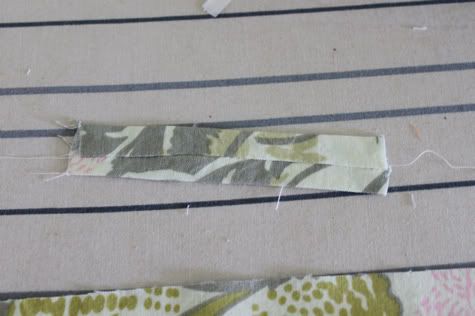
4. Now take your small piece of fabric and fold it in half the long way right sides facing and sew a tube. Turn it right side out and iron it flat with the seam in the middle:
Fold it in half right sides facing and sew together along the short side like so (ignore my huge seam allowance, I cut it off after as I was eyeballing it):
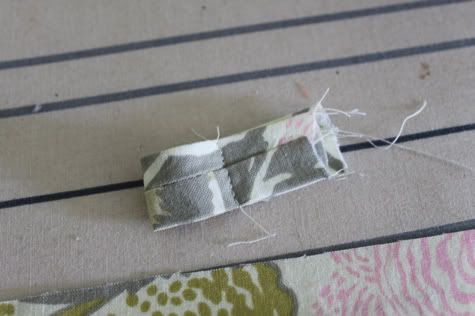
Iron the seam flat:

Turn it right side out:
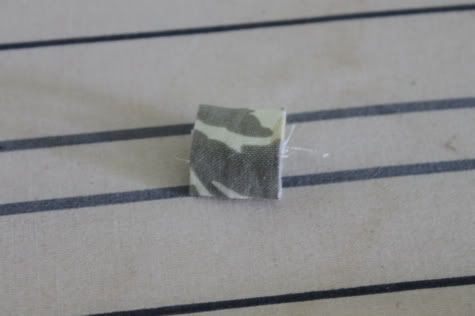
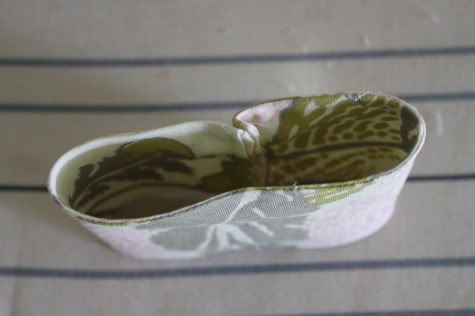
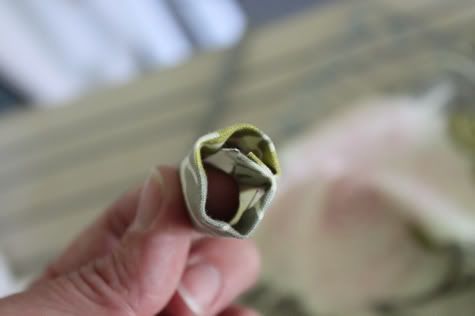
Take your bow (or two bows) and fold them accordion style:

and slip your tube over them. Arrange your bow tie to your liking:

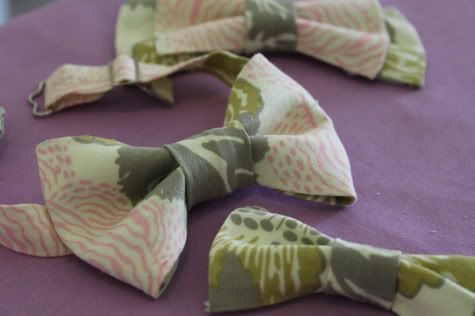
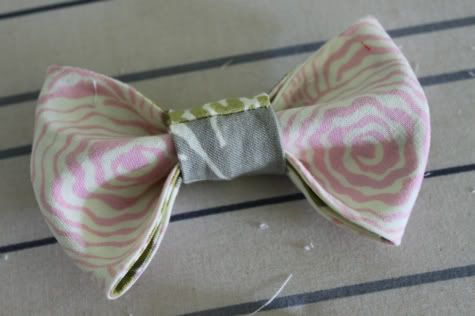
You're done:
Double Fold Bow Tie
This one is my favorite and also the easiest!
1. Cut two long pieces of fabric, double the length you want your bow tie plus 1/2" and the width your want your bow tie plus 1/4". So for mine I cut two pieces of fabric 12.5" long by 3.5" wide.
2. Cut a piece of lightweight double-sided fusible interfacing the size of your finished bow tie (3"x6" for mine) and iron it to the wrong side of one piece of fabric in the center:
3. Leave the paper on the un-ironed side of the interfacing and lay your two pieces of fabric right sides facing:
Sew around the two long sides and one short side:
Trim the corners, remove the paper from the interfacing, turn it inside out, poke out the corners, and fold the edges of the unfinished side under. Iron it flat to fuse the interfacing to both sides:
4. Decide which side is the front of your bow tie and fold it in half with that side to the inside:
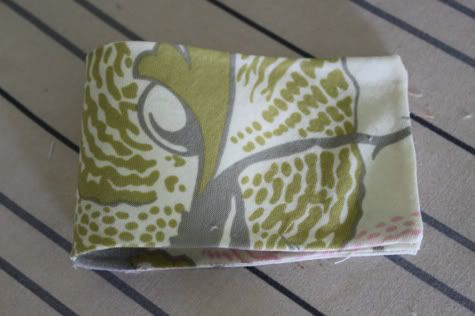
Sew up the short side:
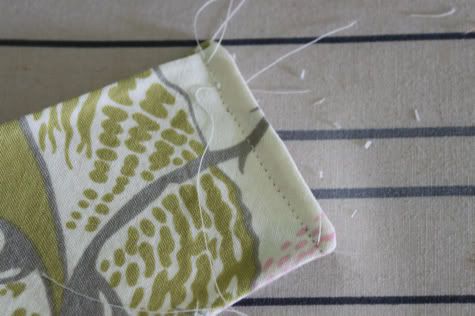
You've created a tube. Turn it inside out and align the seam to the middle of the back:
5. Sew the tube as described in the simple bow tie above:
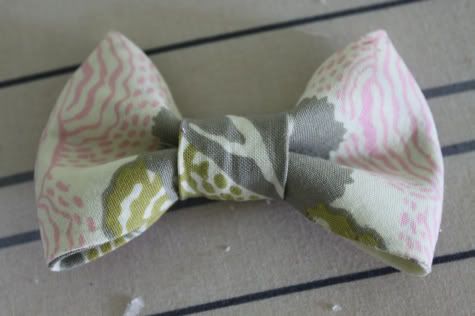
And slide it onto your bow tie with all the seam to the back:
You're done!
Clip-on Bow Tie Strap
Now I only created one strap so these could all be interchangeable, but you could actually sew your bow tie to the strap if you wanted. This strap is sizeable so it can grow with your boy!
1. Cut a long piece of fabric for the strap. If you know the neck measurement of the boy, make it about six-seven inches longer by 2" wide (for a 7/8" strap width). I made mine so at it's largest it would fit a 12" neck circumference (the size of my neck), but could go down to 6". So I cut a piece 14" long and 2" wide. It is a good idea to cut this on the bias. Fold it in half the long way with right sides facing and pin:
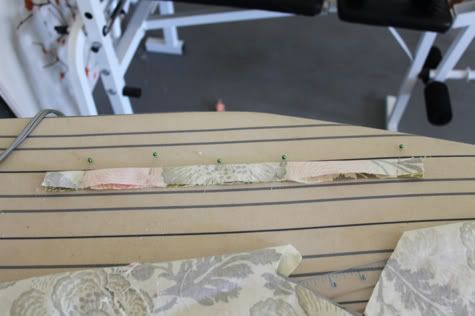
Sew it together then loop turn it inside out with a loop-turner or safety pin:
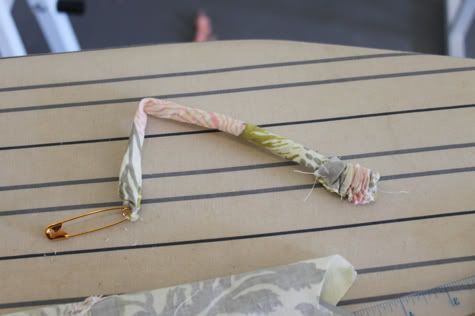
Iron it flat with the seam in the middle:

2. Slide your slider on in one side and out the other. You are looking at the BACK of the neck strap in all of these pictures:

Now slide the receiving end of the clip on:
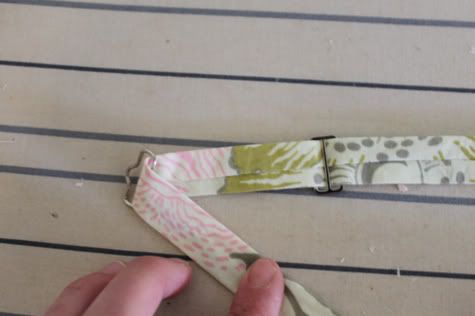
Then fold the end of the strap over and back through both sides of the slider:

Cut notches in the end of the strap:

Fold it under 1/4", then another 1/4", iron and sew in place:

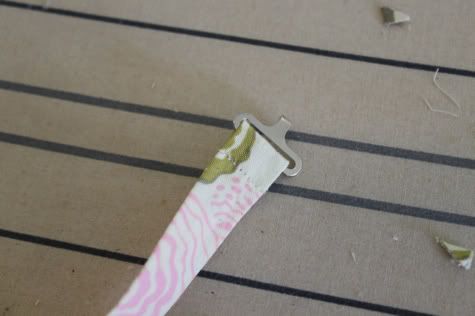
On the other end of the strap, cut notches like above, fold 1/4", then another 1/4" and iron to hold the shape, but don't sew yet:

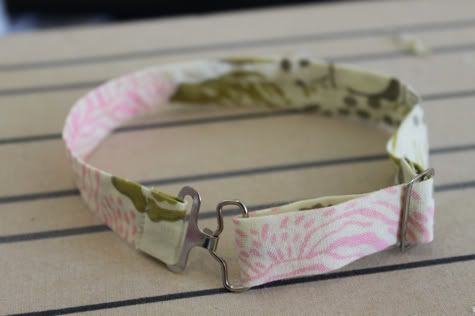
Slide the clip on, making sure it is facing the right way to actually clip into the other side, fold it back up along your ironing lines, and sew in place:
Done!
Slide your bow tie on!

Yay! These sound complicated and probably look that way from the instructions above, but really they were not. Once you make one, you will want to make a million and might reconsider the usual position that it is more fun to sew for and dress girls. I totally wish I had a little boy of my own to make 10 million of these for!

Labels: Accessories, Baby, Clothing, DIY, Easter, Gifts, In One Evening, Kids
posted by Jaime @ 3:00 AM
![]()

37 Comments:
adorable!!!
Are you kidding me with all this cuteness!?!?!
oooh thanks - i have to make this!
So fun!!
This will definitely be made as a gift soon :)
Thank you!!
yay! something for the little men in our lives :) My hubby wears bow ties (I know, we're dorks, right?), and now my son can have some, too! oooh, maybe you can make a pattern for ones that tie for real? Then he could really be his daddy's boy.
Great tutorial! So glad I found it!!
Awesome!! I love how a floral, pastel fabric ends up looking appropriate for a boy when it's made into a bowtie!!
I linked to your tutorial over at Craft Gossip Sewing:
http://sewing.craftgossip.com/tutorial-how-to-make-a-bow-tie/2010/04/23/
--Anne
puhhhlease....more boy tutorials! this is out of control cute!
Hiya! I'm making a few of these as gifts and I am having a heck of a time finding the hardware! Did you buy a bow tie accessory kit, or was it separate pieces? I've been to JoAnn's and Hancock and can't find it ... Help!!
hi! i found it in a kit (that also included a snap-on bow tie thingie that i didn't use) at a local fabric shop called international silks and woolens. it was $1.25. i'm not sure where else you can buy it!
Can you give the manufacturer and product name? I am having a really hard time finding anything I can use even online when I am searching for some to buy. They don't have it at our local Joann's either, and the store you went to doesn't have an online shop where I can buy them. Thanks so much!
happyyellowball@hotmail.com
Thanks for this -- it's so great! I bought a McCall's pattern but I like your directions much better.
Oh, I found the hardware kits online at http://www.bblackandsons.com/bowtie-hook-eye-slide-p-389.html
They're very reasonably priced although the shipping was a shock. I bought a few dozen, so it looks like I'm going into business making bowties. I design my own fabric, so this is a great way to use it!
I went looking for a tutorial for a regular tie but saw this and LOVED it! I can't wait make one for my little guy's school pictures tomorrow! Thank you so much for this!
Just wanted to let you know I made the bow tie last night and it turned out great! I used a lightweight denim fabric and a small plastic snap, like on a backpack, since I could't find a clip like the one you used. It all turned out as good as I hoped and looks so adorable on my little guy! Thanks again for a super easy tutorial and pics to go with it!
Thanks a million for the tutorial. I made one for homecoming just now and it turned out perfect. I couldn't find the hooks that I needed so I stopped in the Dollar Store and found a little bra that had perfect slider and hook!!! Worked like a charm.
Okay ladies, so I found the bowtie hardware today at my local Hancock Fabrics. The price was $1.50 for the set. The manufacturer is Blumenthal Lansing Co. and the website is www.blumenthallansing.com. The style number is 1070 and the item is found in the button section of the store. Hope that this helps someone!
Great tutorial! And the funny thing is I would still make one of these to use for my daughters hair! lol! girls are fun.
Whoop whoop! Just made a set of bow-ties for my boys! Got the hardware at Hancock thanks to Handmade Mama! I serged the collar casings and that was a big mistake because I could never get the seam flat/smooth and it was super hard to stitch over plus it just doesn't look as nice. Next time I will use a regular stitch and then go back and iron flat before I turn it right side out. Thanks or the great tutorial!
What a fabulous tutorial!! I have three little boys who will be sporting new ties soon!!
Awesome and so easy. Just putting on snaps now. Thanks so much. ♥
You have just made my day! I love bow ties for my infant (well, now toddler, but I started putting them on him very early!) son. You can not buy them anywhere, and the very few I have came from thrift stores (where I jumped up and cheered in the middle of the store). I can NOT wait to start making one for every season, and ever sweater vest he owns, and for every holiday. Thank you so much for showing me not only that I can do it myself--but how to do it!
Here's my finished bow tie! Used as a decorative finish to some homemade burp cloths. :)
http://brynnabegins.wordpress.com/2010/11/19/homemade-burp-cloths/
Thank you so much for the tutorial. The bow tie is absolutely adorable.
Where did you get your bow tie clasp set? In desperate need on for a costume for my son's play. Anyone who can help, please email me at teressa3469@hotmail.com
Thanks a million!!!
I love this! I followed the tutorial and made one for my big man, but am having a hard time coming up with measurements for my little men (6mths & 20mths). Can you help?
Thank you. I am going to make one for my cousins's twin and my little man out of the extra material from their Easter pants.
I got just about everything I needed at joann fabrics to make some bowties, yet I could not find a clip set!! Any idea where I can buy some online?? I am not having much luck with my searches.
Thank you thank you thank you.
My 4 year old has a bunny he named tricks and he wants to be a magician and announced now all I need is a bow tie!
Maybe this will be the magic bowtie he is begging for!
I just made two of these for myself more or less following the directions. Okay, I read the measurements and winged it from there. hehe So cute! Thanks for sharing!
These are awesome! And so easy! Thank you for the tut!
All the fabric stores in Kansas City have quit carrying the finishings. Most knew of them, but they were no longer stocked.
Thank you for posting that website!
ola boa noite adorei a ideia estou indo ver alguns desfiles do sao paulo fashion week e a ideia vai dar um ar moderninho no look ate mais
hello good night loved the idea I'm going to see some shows in sao paulo fashion week and the idea will take a look at the air Hipster even more
I finally got around to making my little one a bow tie, and I posted pics online on my blog :)
http://sewing-chick.blogspot.com/2011/07/dress-shirt-onesie-genius.html
Thanks for the tutorial! It was very easy to follow :)
hey where did u get the slider from? Ive searched my local fabric stores and had no luck
I used this etsy seller for the hardware.
http://www.etsy.com/shop/AmandaJoHandmade?ref=pr_shop_more
Where do you buy the metal clips?
I did it! So cute! I couldn't find the slider & fasteners locally so I used Velcro instead. Thank you for the FREE tutorial!! Hopefully my 2 yr old will wear it long enough for a pic
I bought sliders and fasteners online at B Black and Sons:
http://www.bblackandsons.com/bowtie-hook-eye-slide-p-389.html
I thought that the price was reasonable and the shipping as well, I wound up buying a few dozen to make as crafts and gifts, etc! They are wonderful quality.
Post a Comment
Subscribe to Post Comments [Atom]
<< Home