10 Minute Onesie Dress - Easiest Dress Ever
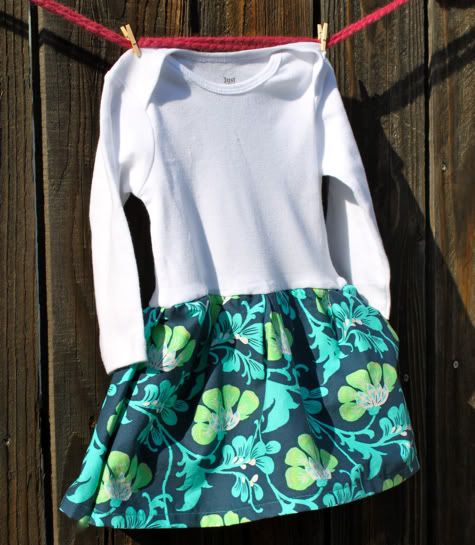
Hello, when you read this DIY you will be like "That's it, I'm buying a sewing machine." SO SIMPLE. It's a onesie with a skirt around it, cute AND comfy:

Find out how to make this 10 Minute Onesie Dress (with finished seams through no work of your own!) after the jump...
10 Minute Onesie Dress
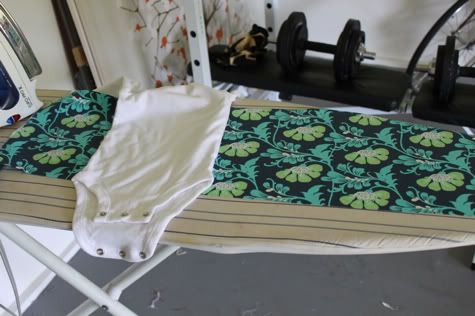
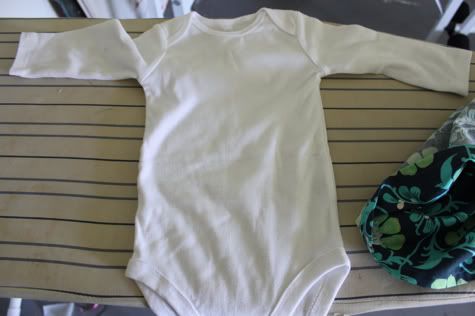
1. Acquire one onesie and 1/4 yard of cute cotton fabric (mine from City Craft, isn't it pretty? get it online here: Amy Butler Sweet Jasmine in Navy). Pre-wash and iron:
2. Fold one long edge under 1/4" and iron, then another 1/4" and iron and stitch in place to create your hem. jacinda also suggested you could use a cute tea towel and it would already have a hem, so you could skip this part and have like a seven-minute onesie dress.
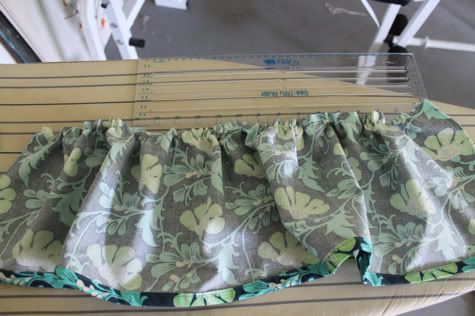
3. Sew a basting stitch along the other long side:
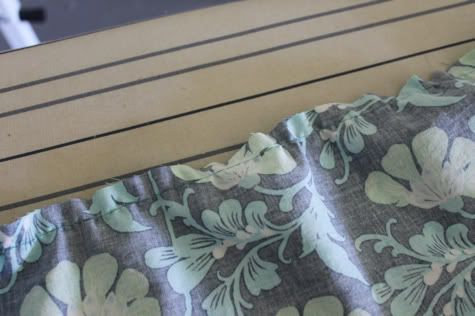
3. Pull the bobbin thread to gather it until it is twice the width of your onesie (when it's slightly stretched out). For my size large gerber onesies i made mine 18":
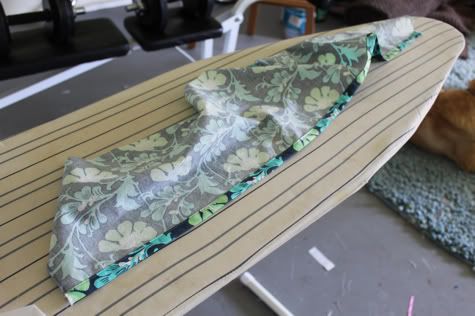
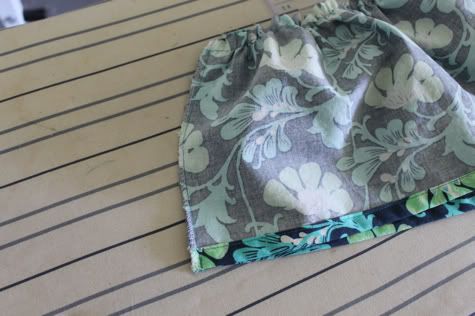
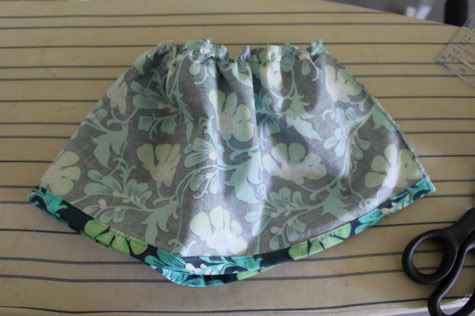
4. Fold it in half right sides facing:
Sew together and finish the edges by serging, sewing with a zig zag or overlock stitch or cutting with pinking shears:
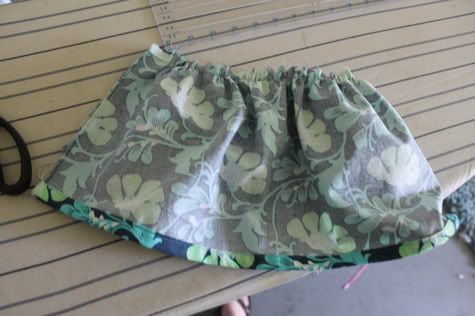
Turn your skirt inside out to admire:
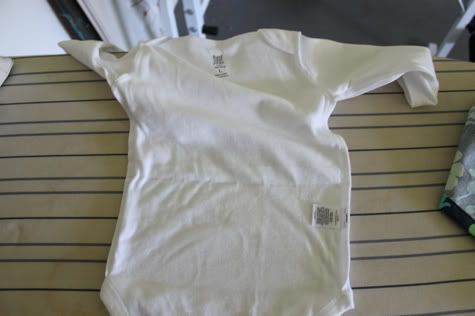
5. Now take your onesie and draw a line at the waist across the front and back with a washable or air-erasable marker:
Turn it inside out and do the same thing on the inside:
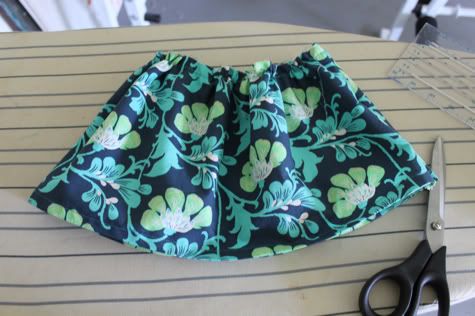
Now turn your skirt inside out and arrange the seam to one side:
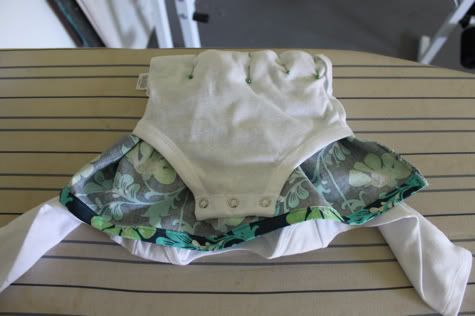
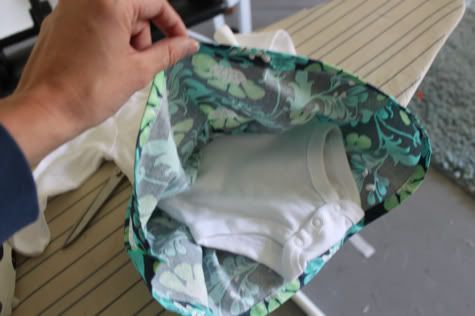
With your onesie right-side out, slip it headfirst through the skirt with the front facing up, like so:
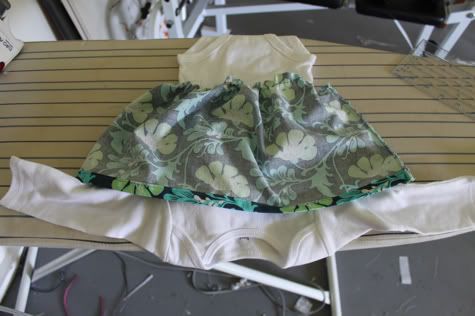
Unbutton the bottom of the onesie and flip it over the skirt. Line up the edge of the skirt with the lines you drew and pin through all the layers so you've trapped your skirt edge in onesie fabric:
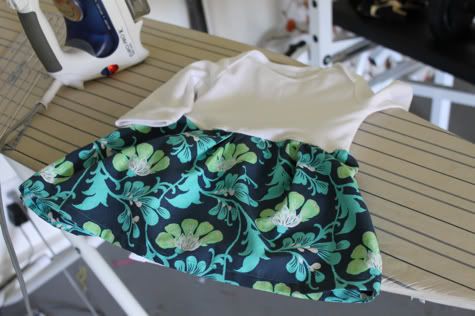
Sew all the way around with a 5/8" seam. So mine is a little messy, who cares?
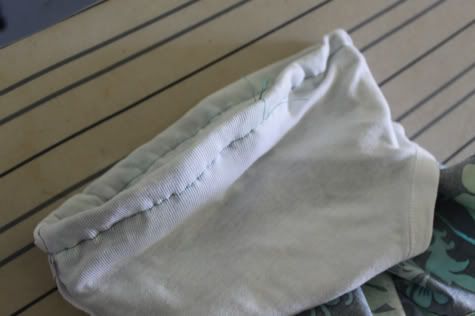
Flip it all around! DONE! And your unfinished skirt edge is encased in onesie softness so as not to bother baby:
See, onesie goodness:
Yay! What do you think? Do you want a sewing machine now? I swear you can do this, so easy. You could also applique or embroider something cute to the chest for matchy fun.
Labels: Baby, Clothing, DIY, Gifts, Serging, Sewing, Under $5, Under an Hour
posted by Jaime @ 4:00 AM
![]()

57 Comments:
That's very cute. Too bad my girls are too big for onesies now. :(
ok, that's darling and easy.
also, i have no kids, but i can see doing a version of this to turn T's into tunic tops....wheels are turnin'!
This is really cute. Bookmarked.
Love, love, love - I want to make them for babies I don't even know!!!
love it I think this could be my first real sewing project
i'm all over this. ordered some new fabric that will be perfect for this!!
thanks!
Loves so cute. And easy but I bet it would take me like two hours. That thing where you scrunched it looks confusing!
This is the blog I was searching for!! Happy to discover you ;) And Super DIY dress!
This is such a great idea! Would be really cute with some ric-rac too!
If I only I had a little girl!!! This is adorable and simple and all around fabulous. I may just have to break out the sewing machine and try this out.
I LOVE this! I am so making these for my friend's baby girl. Thank yoU!
SO cute! I can't wait to make one for all the girl babies in my life!
niiiice! perfect for spring! Thanks!
you guys are killing me with the adorable dresses! if you were making one with a tiny newborn or 0-3 onesie would you suggest trimming the width of the skirt? seems like it could be bunchy if all that fabric was gathered to that small size?
I love your site and I am devouring it! But I have A LOT to learn still...
How do you do a basting stitch?
hi stephanie! a basting stitch is just a regular straight stitch set to the widest width your machine will go, usually about 5!
yes anu definitely trim it down! you don't even have to ruffle it very much if you want a straighter skirt!
I LOVE IT!
Children's Place still sells onesies up to 3T (check online) so there are some really cute possibilities for older girls! So cute!
Thank You Thank You Thank You! So excited to try this for my baby girl. Your tutorials are so easy to follow and always look cute. You are a gift to novices everywhere.
Thank you for this great tutorial! I made one of these today. It looked so cute on my little girl!
So freaking doing this. Too cute and thankfully I still have one little one left in onesies. Also, thanks for the pillowcase dress tutorials. I shall be making several, putting all this yardage I have to good use. You rock!
Just finished making this and love it! So easy, thank you so much for the idea!
I love this. I finally bought a sewing machine (on Craigslist) and I can't wait to get started! I think this will be my first project. Do you think it would work if you cut the bottom out of the onesie at the end? My daughter is long in the body, and I often can't do them up at the crotch anymore, but this would allow me to re-use them as a dress!
lisakisch - yes it would work, but you want to finish the cut edge so it doesn't fray away! i recommend cutting the onesie, folding the edge over some fusible tape and ironing it, then continuing with the DIY as written!
I love this and I made it...except this 10 min project took me about 3 hours! I'm new to sewing, but you make me want to do more! I came close to giving up, I'm no natural at this, but this is the most fun I've had in awhile. Thanks!
Oh, yes I also made a matching burp cloth from your other DIY Burp Cloth tutorial. I don't know how to post a pic, but here's a link:
"Recycle Reduce Reuse" Onesie Dress
Finally getting ready to make this dress for my daughter....but how many inches wide and long is 1/4 of fabric?
a 1/4 yard is 9" by 44/45" (whatever the width of the bolt of fabric). have fun!
These are so super easy! I made similar things when my daughter was little. Now that she is older, we don't do onesies anymore, but it works great with a tank top or t-shirt. Here is one I made for her for her 2nd birthday: http://picasaweb.google.com/SusanBerthold/CraftProjects#5347761255656712850. Love your blog and can't wait to make a few more things based off the ideas you have here!
Thank you so much for this tutorial! This was the first dress I have ever made for my little girl who is almost 6 months old. Love it! :)
Thanks for the tutorial! The hem alone took me 10 minutes, but other than that it was an easy, super-cute project :)
Done. Just created my own. NOTE TO SELF: Do not sew pins inside dress =)
Alright, here's mine:
http://www.flickr.com/photos/anulewicz/4779066454/in/set-72157623415086986/
I just made one for my great niece! So darn cute and easy!
Sigh... Gee I wish I had a girl!!!!
If You have bigger girls a long t-shirt with a pretty Bandanna split in half for skirt might work.I know my Granddaughter all ways has me buy
her cute ones but just puts in drawer,I think I'll raid the drawer next time I'm over there.
Bandanna's are about 18-20 inches sq.They
make a nice gift if you only have little bit of special fabric left.
Super cute! Now I just need to have a girl...
This is awesome. And you could use up some fat quarters if you cut them in half and seamed them together!
The only thing I would recommend is a zigzag stitch when attacking the skirt so you don't pop the seams when you are trying to get it on the Baby. Otherwise super cute.
Just made one of these! Added some rickrack trim to the bottom which just makes my life happy. It definitely took me longer than 10 minutes though.. but I like to realllllyyyy take my time so I don't mess things up.
Maybe a silly question, but... I just made one and it is TOO CUTE! I'm wondering though why you fold the snap part of the onesie over. I did so without thinking about it and now the onesie is shorter. I made it for a friend so I can't try it on anyone, but I'm curious if anyone else ran into this or chose not to fold the onesie bottom over prior to sewing. Thanks for any advice! Great tutorial.
I just made one and realized the shorter onesie means it probably won't fit until Easter - and I used bunny fabric with that in mind. ;)
I also had real trouble ruffling the fabric. Oh, an am I supposed to pull that stitching that made the ruffle out? I sorta didn't sew it into the fold, so there's this little extra stitching that doesn't look so hot. Oh well, second time every sewing anything - so I still think I did ok!
I am going to try this for my 3 year old cousin who wears a size 5T with a t-shirt or tank top since it's getting warmer. Could anyone help me out on measurements for that? How many inches would the waist need to be (with the ruffle)? And how long in inches? I made your pillowcase dress for my baby cosuin coming at the end of the month and it was adorable! I can't wait to see her in it! :)
lindsey - jacinda made one just like that and did a tute: 5 Minute T Shirt Tunic
http://amelieobscura.blogspot.com/2011/04/my-first-onesie-dress.html
I loved making it!!!
LOVE this tutorial! Thank you for some fun sewing today! :)
http://happyallenfamily.blogspot.com/2011/04/super-quick-sewing-project-or-i-didnt.html
This dress is so fabulous! I made once with lots of pink tulle instead of fabric for a cute little ballerina on the way. My friend is having her baby shower soon and I can't wait to see her reaction! Thank you so much!
I also made a dress for myself out of a yard of fabric and an upcycled a shirt that has a bleach stain at the bottom for a cute summer dress using the same concept, it was super easy!
GET ME A ONESIE!! I can't wait to go make these for my niece! My sister is craftier than me so I have to beat her to it on this one. I'm a little confused about what you did to attach it, with the flipped seam thing, but I'll figure out something.
I just turned my sewing machine on today for the very first time EVER, and I made this dress. Because this was also my first sewing project, it took longer than 10 minutes to make (I had to read my sewing machine manual, etc), but still was very easy and fast. I did have some problems with the thread breaking when trying to gather it after the basting stitch, but it turned out very cute and wearable! I can't wait to put it on my 6 month old! Thanks for the inspiration. This is definitely just the beginning!!
Hi,
My name is Barbara and I am the creator and owner of www.onez4u.com I make Onesie dresses in sizes from newborn to 24 month. Although your dress is simple, it is not going to last as long as you would like. We have spent a lot of time designing and have come up with a very special way to make that dress stand up to the stretching and washing baby clothes go through.
I have purchased few newborn clothes from mymiraclebaby - those were very gorgeous and beneficial to use. I liked them so much and wanted to refer to other's as well. They have huge collection for other products like - Baby Clothing, newborn clothes, newborn baby boy and baby girl clothes and more. You can also use this coupon code: COUPON05 for availing $5 discount on your purchase of $30 or more.
I have bought newborn clothing for my son. It's very fabulous. I like this so much and want to recommend to other's as well. You can buy and avail $5 off on all your purchases. If you use this coupon code: COUPON05. I had been relying on www.mymiraclebaby.com earlier and they too offered good stuff.
I did a 3T version with a tank top. First time to ever sew clothes and it was very rewarding to see it on my daughter!
http://www.facebook.com/photo.php?fbid=541680586236&set=a.541451205916.2030920.63500311&type=1&theater\
Love this ! Thank you for posting, you just made my daughters Minnie Mouse costume so easy for me to make ! :)
Love it!!! I"m gathering all my plain white onesies and making this!! But won't incasing the unfinish edge make the onesie shorter?
Just made one with thanksgiving turkey handprint fabric and it turned out so cute! I also noticed the onesie is a bit shorter now, will have to wait until my LO gets home from my parents house to try it on her. I may have to cut off the bottom of the onesie if its too short as my LO is long! But leggings would work under it nicely without the bottom of the onesie. It also took me closer to about 2 hours! Maybe I was just going really slow? The only things I've ever sewn recently are baby leggings and a fabric book. I kept messing up the ruffling. :-( But it didn't turn out too bad. I plan on making two more of these for my LO's first birthday and just a wintery one. Thanks for the tutorial! Yours are the easiest for me to follow. :-)
Just posted the one I made for my friend's baby - due today! Thanks for the tutorial! Naomi x
http://journeyhome-naomi.blogspot.com/2012/01/frog-princess.html
Post a Comment
Subscribe to Post Comments [Atom]
<< Home