body { background:#fff url("http://www.blogblog.com/dots/bg_dots.gif") 50% 0; margin:0; padding:0 10px; text-align:center; font:x-small Verdana,Arial,Sans-serif; color:#333; font-size/* */:/**/small; font-size: /**/small; } /* Page Structure ----------------------------------------------- */ @media all { #content { background:url("http://www.blogblog.com/dots/bg_3dots.gif") no-repeat 250px 50px; width:700px; margin:0 auto; padding:50px 0; text-align:left; } #main { width:450px; float:right; padding:50px 0 20px; font-size:85%; } #main2 { background:url("http://www.blogblog.com/dots/bg_dots2.gif") -100px -100px; padding:20px 10px 15px; } #sidebar { width:200px; float:left; font-size:85%; padding-bottom:20px; } #sidebar2 { background:url("http://www.blogblog.com/dots/bg_dots2.gif") 150px -50px; padding:5px 10px 15px; width:200px; width/* */:/**/180px; width: /**/180px; } } @media handheld { #content { width:90%; } #main { width:100%; float:none; } #sidebar { width:100%; float:none; } #sidebar2 { width:100%; } } html>body #main, html>body #sidebar { /* We only give this fade from white to nothing to browsers that can handle 24-bit transparent PNGs */ background/* */:/**/url("http://www.blogblog.com/dots/bg_white_fade.png") repeat-x left bottom; } /* Title & Description ----------------------------------------------- */ @media all { #blog-title { margin:0 0 .5em; font:250%/1.4em Georgia,Serif; color:#353; } #blog-title a { color:#353; text-decoration:none; } #description { margin:0 0 1.75em; color:#996; } #blog-mobile-title { display:none; } #description-mobile { display:none; } } @media handheld { #blog-title { display:none; } #description { display:none; } #blog-mobile-title { display:block; margin:0 0 .5em; font:250%/1.4em Georgia,Serif; color:#353; } #blog-mobile-title a { color:#353; text-decoration:none; } #description-mobile { display:block; margin:0 0 1.75em; color:#996; } } /* Links ----------------------------------------------- */ a:link { color:#488; } a:visited { color:#885; } a:hover { color:#000; } a img { border-width:0; } /* Posts ----------------------------------------------- */ .date-header { margin:0 0 .75em; padding-bottom:.35em; border-bottom:1px dotted #9b9; font:95%/1.4em Georgia,Serif; text-transform:uppercase; letter-spacing:.3em; color:#663; } .post { margin:0 0 2.5em; line-height:1.6em; } .post-title { margin:.25em 0; font:bold 130%/1.4em Georgia,Serif; color:#333; } .post-title a, .post-title strong { background:url("http://www.blogblog.com/dots/bg_post_title.gif") no-repeat 0 .25em; display:block; color:#333; text-decoration:none; padding:0 0 1px 45px; } .post-title a:hover { color:#000; } .post p { margin:0 0 .75em; } p.post-footer { margin:0; text-align:right; } p.post-footer em { display:block; float:left; text-align:left; font-style:normal; color:#996; } a.comment-link { /* IE5.0/Win doesn't apply padding to inline elements, so we hide these two declarations from it */ background/* */:/**/url("http://www.blogblog.com/dots/icon_comment.gif") no-repeat 0 .25em; padding-left:15px; } html>body a.comment-link { /* Respecified, for IE5/Mac's benefit */ background:url("http://www.blogblog.com/dots/icon_comment.gif") no-repeat 0 .25em; padding-left:15px; } .post img { margin:0 0 5px 0; padding:4px; border:1px solid #cca; } /* Comments ----------------------------------------------- */ #comments { margin:0; } #comments h4 { margin:0 0 10px; border-top:1px dotted #9b9; padding-top:.5em; font:bold 110%/1.4em Georgia,Serif; color:#333; } #comments-block { line-height:1.6em; } .comment-poster { background:url("http://www.blogblog.com/dots/icon_comment.gif") no-repeat 2px .35em; margin:.5em 0 0; padding:0 0 0 20px; font-weight:bold; } .comment-body { margin:0; padding:0 0 0 20px; } .comment-body p { margin:0 0 .5em; } .comment-timestamp { margin:0 0 .5em; padding:0 0 .75em 20px; color:#996; } .comment-timestamp a:link { color:#996; } .deleted-comment { font-style:italic; color:gray; } .paging-control-container { float: right; margin: 0px 6px 0px 0px; font-size: 80%; } .unneeded-paging-control { visibility: hidden; } /* More Sidebar Content ----------------------------------------------- */ .sidebar-title { margin:2em 0 .75em; padding-bottom:.35em; border-bottom:1px dotted #9b9; font:95%/1.4em Georgia,Serif; text-transform:uppercase; letter-spacing:.3em; color:#663; } #sidebar p { margin:0 0 .75em; line-height:1.6em; } #sidebar ul { margin:.5em 0 1em; padding:0 0px; list-style:none; line-height:1.5em; } #sidebar ul li { background:url("http://www.blogblog.com/dots/bullet.gif") no-repeat 3px .45em; margin:0; padding:0 0 5px 15px; } #sidebar p { margin:0 0 .6em; } /* Profile ----------------------------------------------- */ .profile-datablock { margin:0 0 1em; } .profile-img { display:inline; } .profile-img img { float:left; margin:0 8px 5px 0; border:4px solid #cc9; } .profile-data { margin:0; line-height:1.5em; } .profile-data strong { display:block; } .profile-textblock { clear:left; } /* Footer ----------------------------------------------- */ #footer { clear:both; padding:15px 0 0; } #footer hr { display:none; } #footer p { margin:0; } /* Feeds ----------------------------------------------- */ #blogfeeds { } #postfeeds { padding-left: 20px }

Prudent Baby

Get sewing how to, sewing tutorials, and sewing help to learn sewing. We offer sewing tutorial for sewing moms.

Wednesday, October 26, 2011

Making Your Own Pattern


We often hear that new sewists are intimidated by drawing their own patterns, so we were thrilled to see Katy from Sweet Verbana made a fantastically easy Make Your Own Pattern Tutorial that everyone, yes everyone, can do!

Make sure to stop by Sweet Verbana's to check out many of Katy's other tutorials like the adorable Maxi Dress, an infinity loop scarf (perfect for winter) and even a learn how to do reverse applique (I'm seeing Holiday gifts!).

Don't go anywhere just yet, keep reading for the Making Your Own Pattern Tutorial after the jump.


Making Your Own Pattern

Patterns aren't cheap. Seriously, I was browsing through the look books at Hobby Lobby the other day and some of them were as much as $20. Tack that on to the price of fabric and other supplies and suddenly sewing your own clothing becomes very expensive.

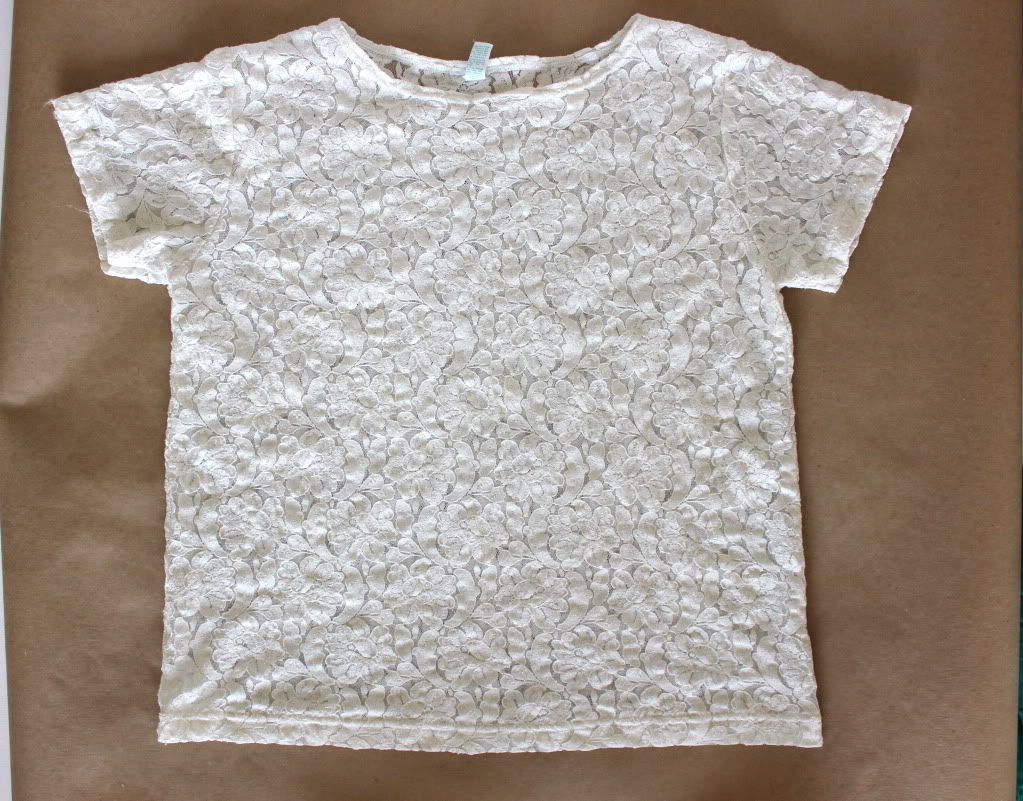
Thankfully, you can make your own patterns using your own clothing that you know to fit well. I'll show you how to make a simple blouse pattern using a top of my own.

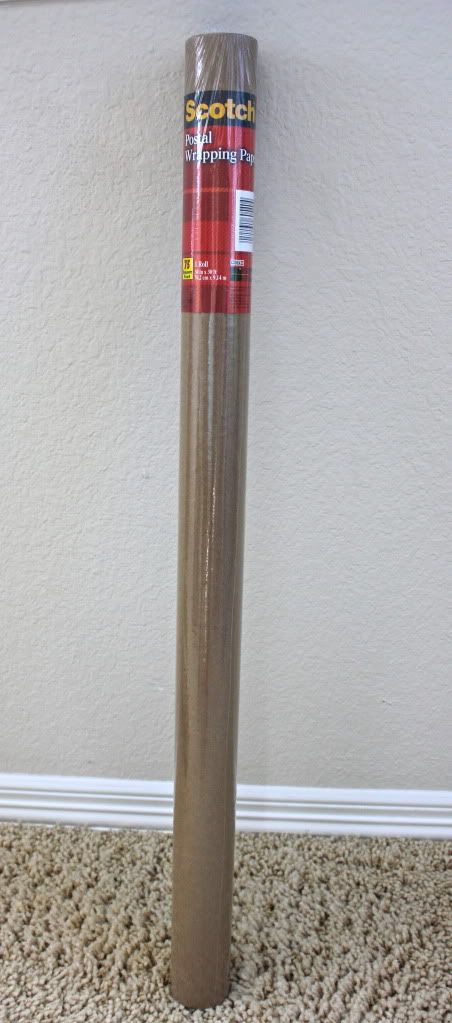
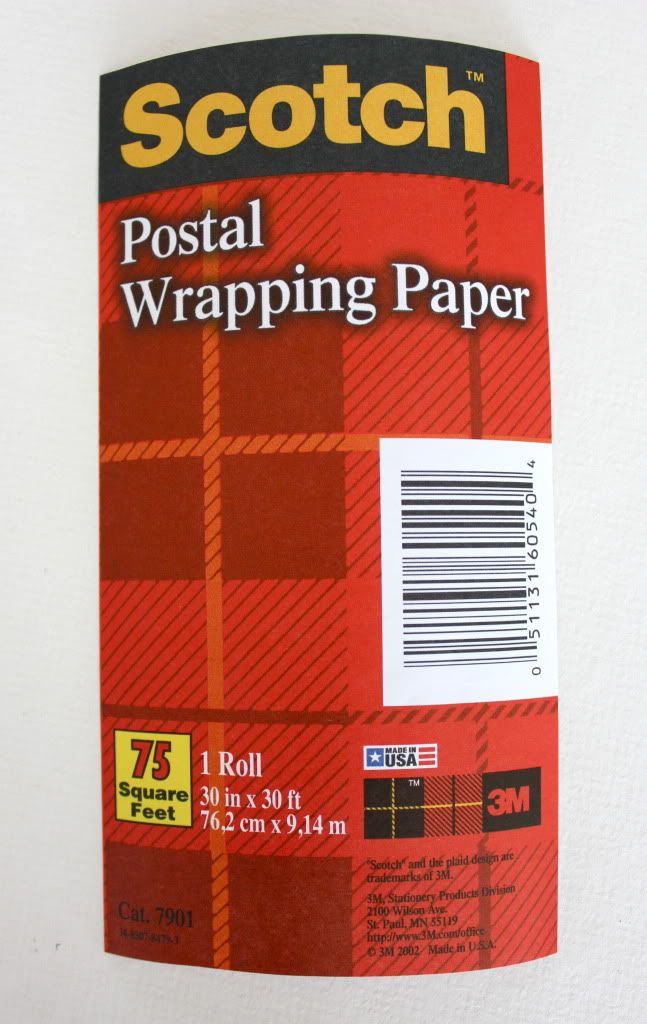
I used Scotch Postal Wrapping Paper as my pattern paper. I found it at Target for about $5. It gives you 30 feet of paper, so it will last a long time.


I used paper because I like to lay my pattern piece down and trace the shape directly onto my fabric. If you think you'd prefer to pin the pattern to your fabric and then cut it out, paper may not be the way to go for you.

Muslin fabric is another great material that would allow you to pin the pattern piece to your fabric. It's also nice because it can be folded up and stored away when not in use.

Lay your garment down on the paper and determine the middle of the top.

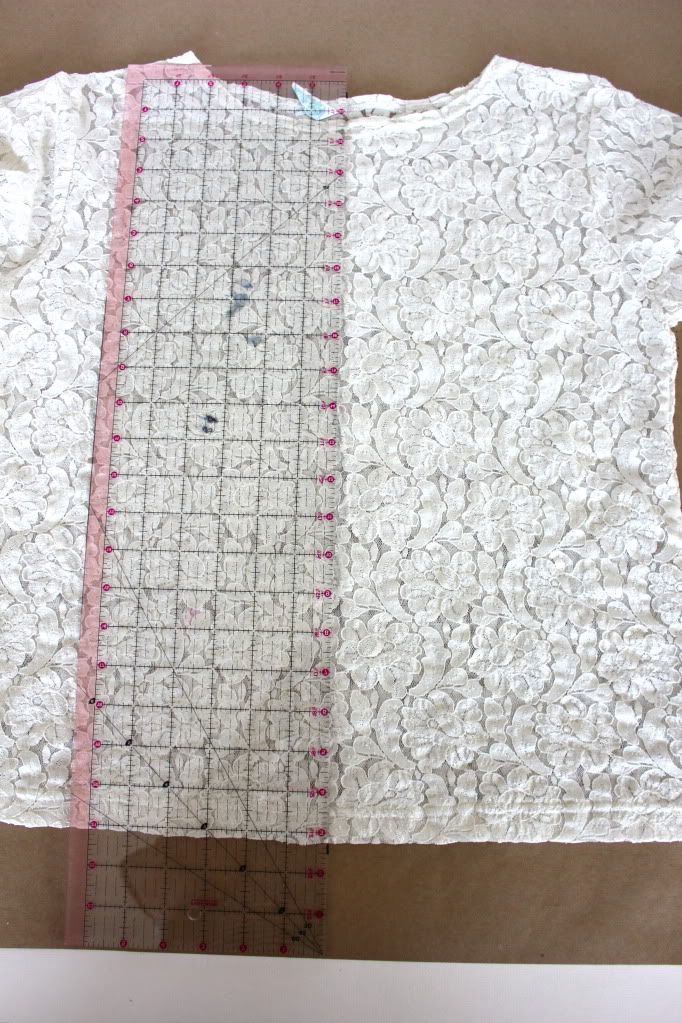
Mark right above the collar and right below the hem.

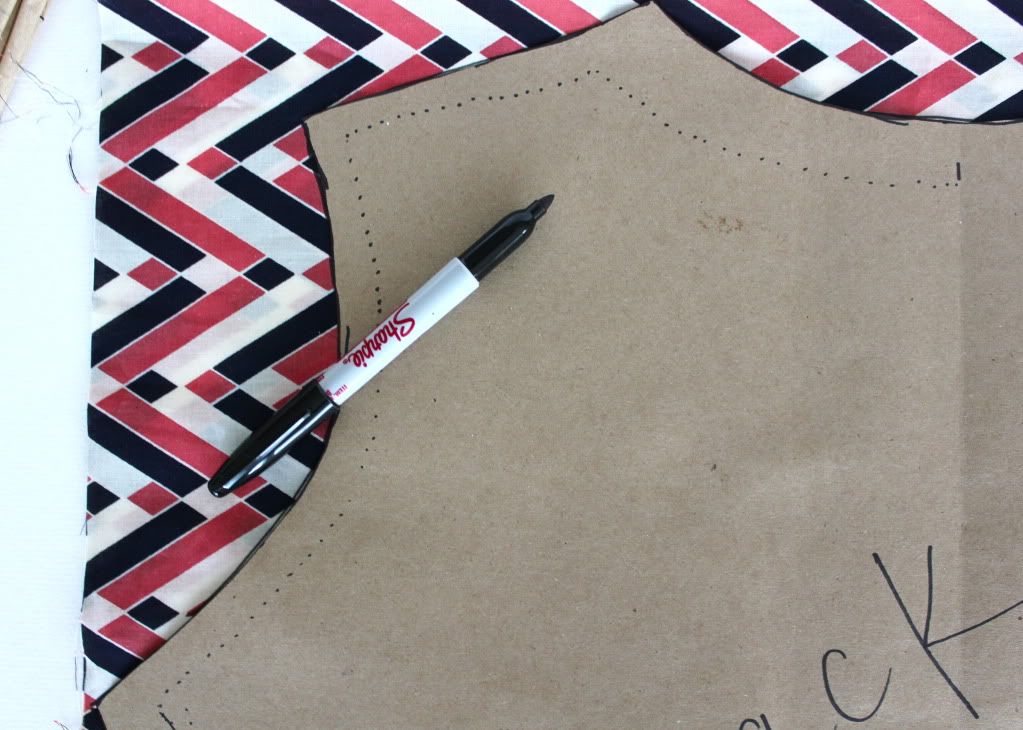
Draw a rough outline of one half of the top.

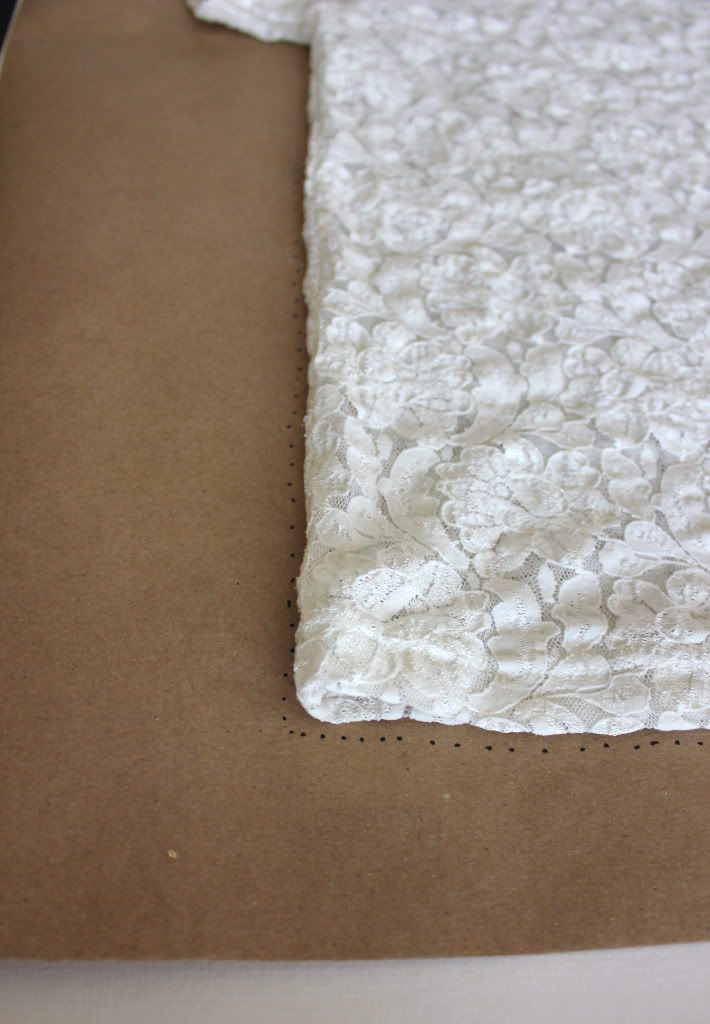
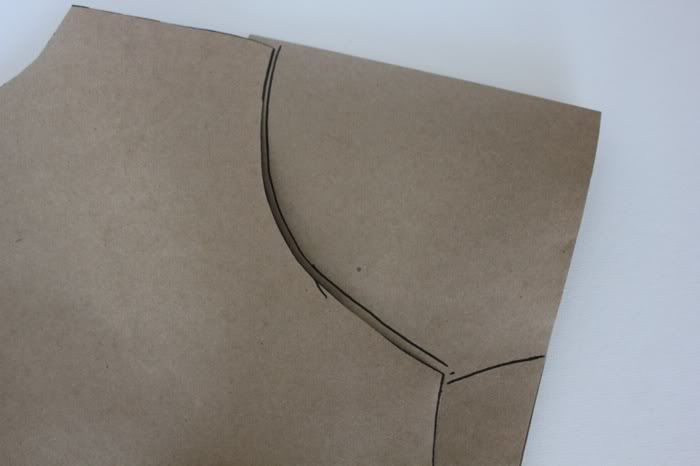
When you get to the sleeve, do your best to fold it back so that you just see the armhole. Sketch the curve as shown below.

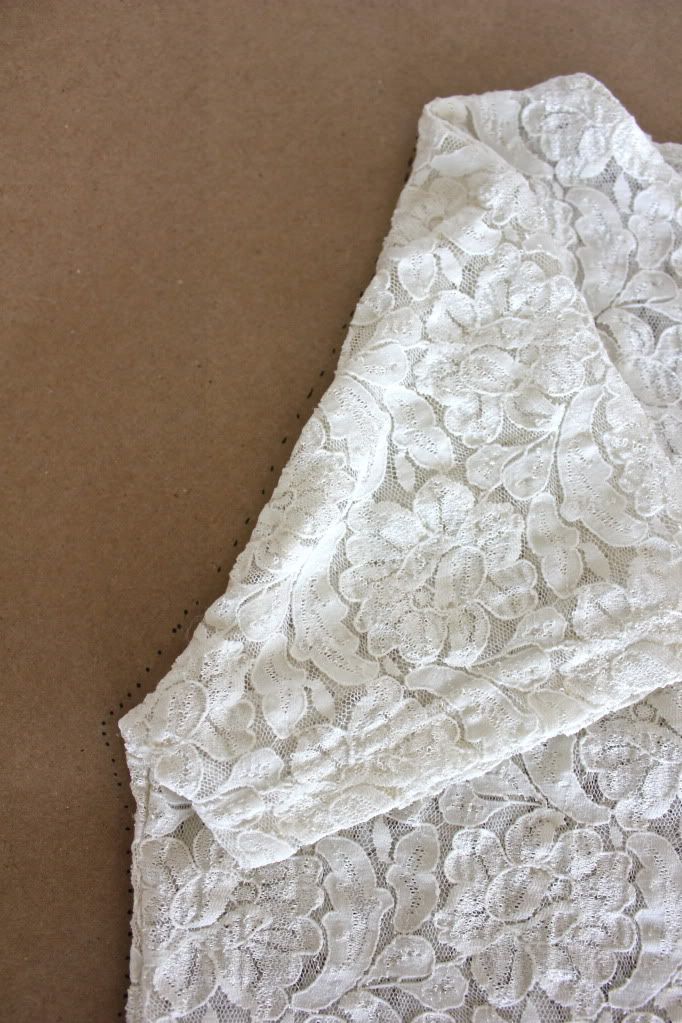
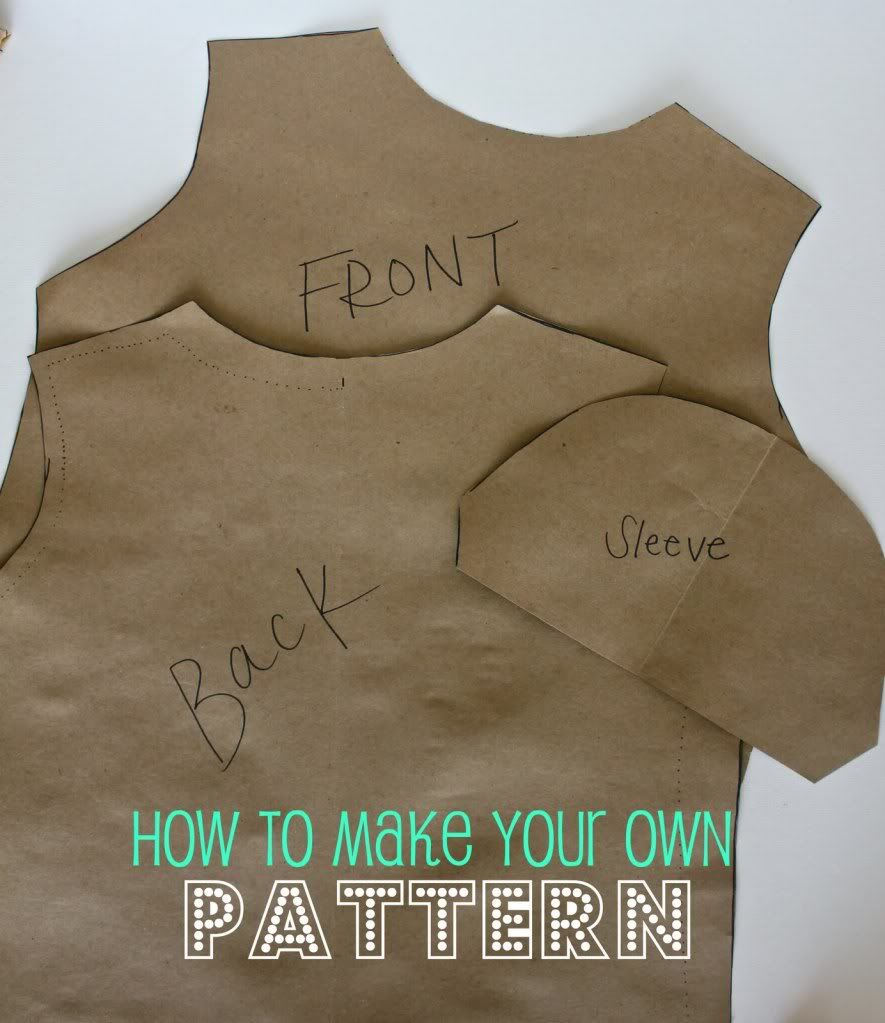
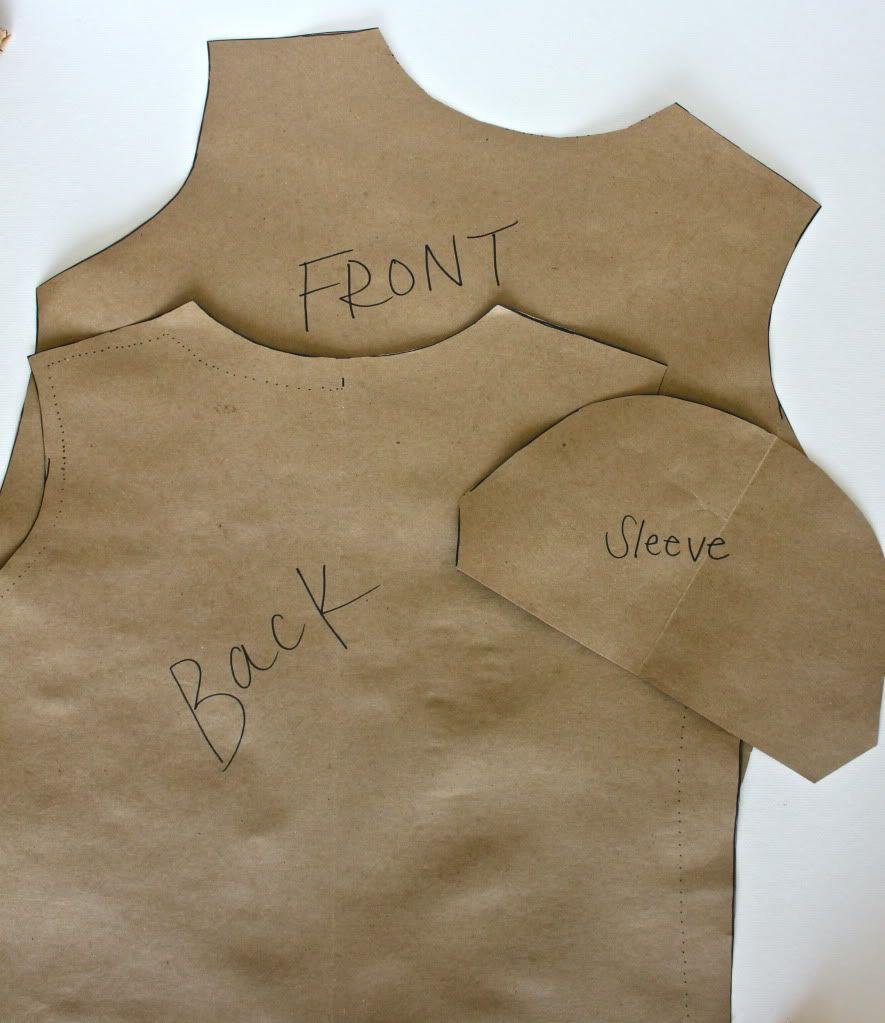
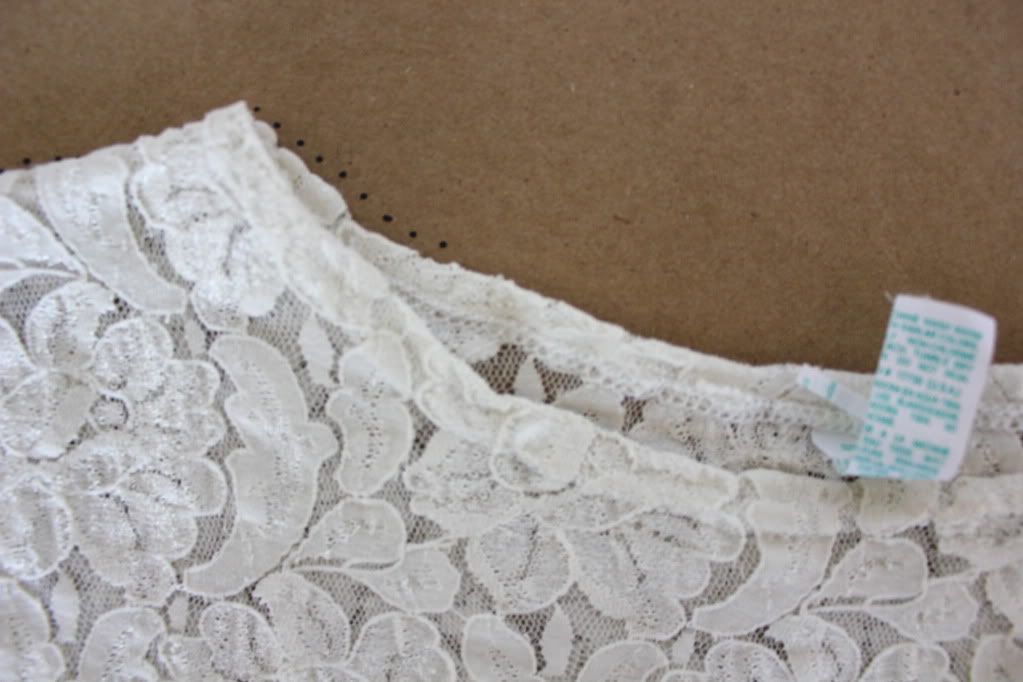
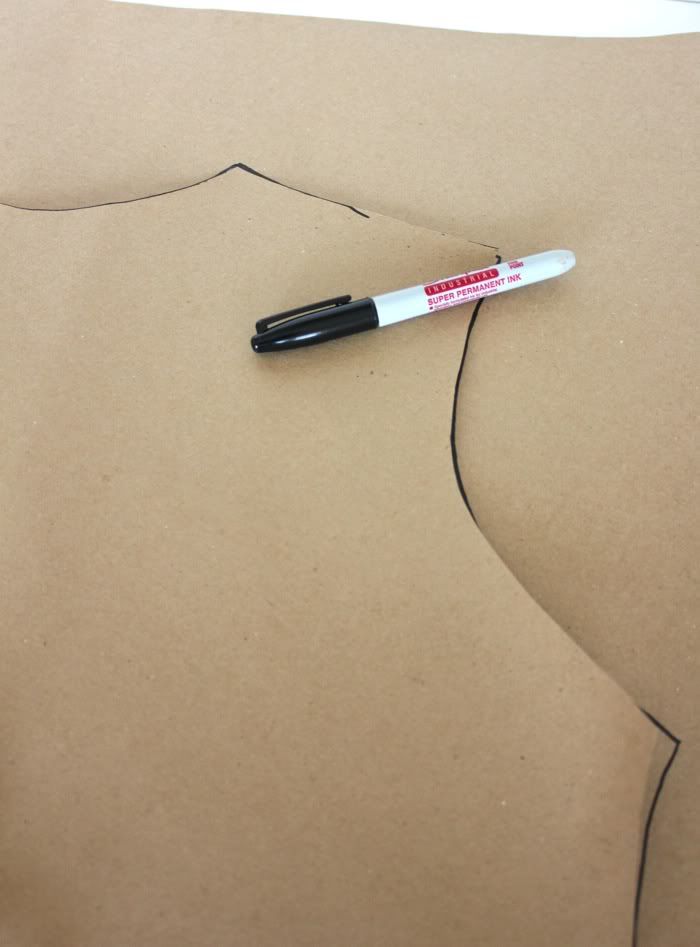
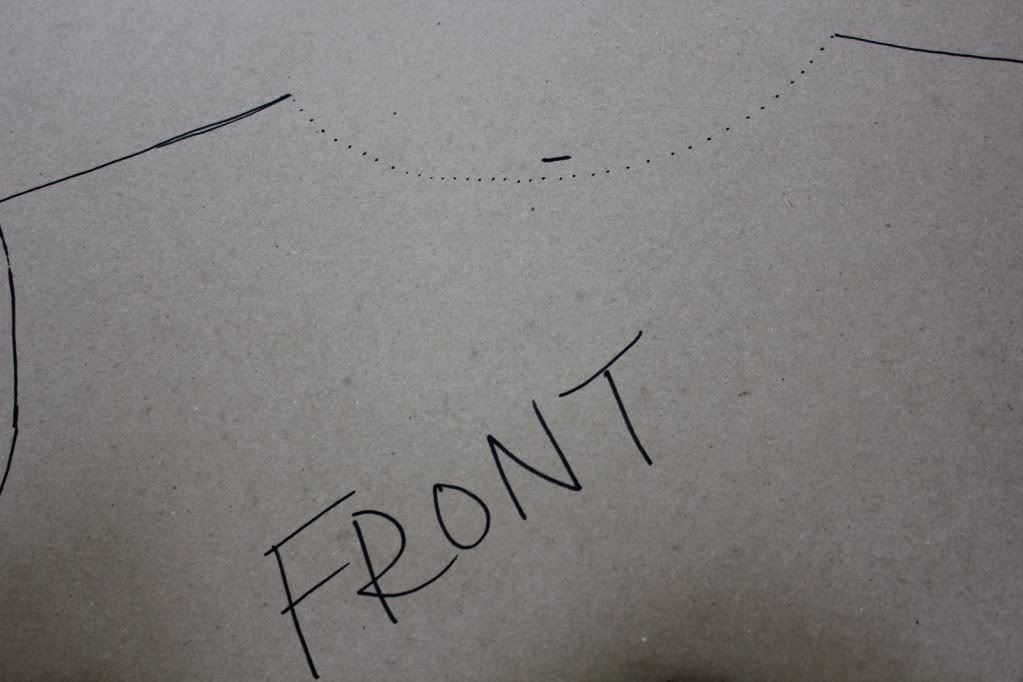
This first pattern piece I'm working on will serve as the back of the pattern. Sketch the outline of the slightly higher, back collar. Stop once you get to the half marks that you previously made.


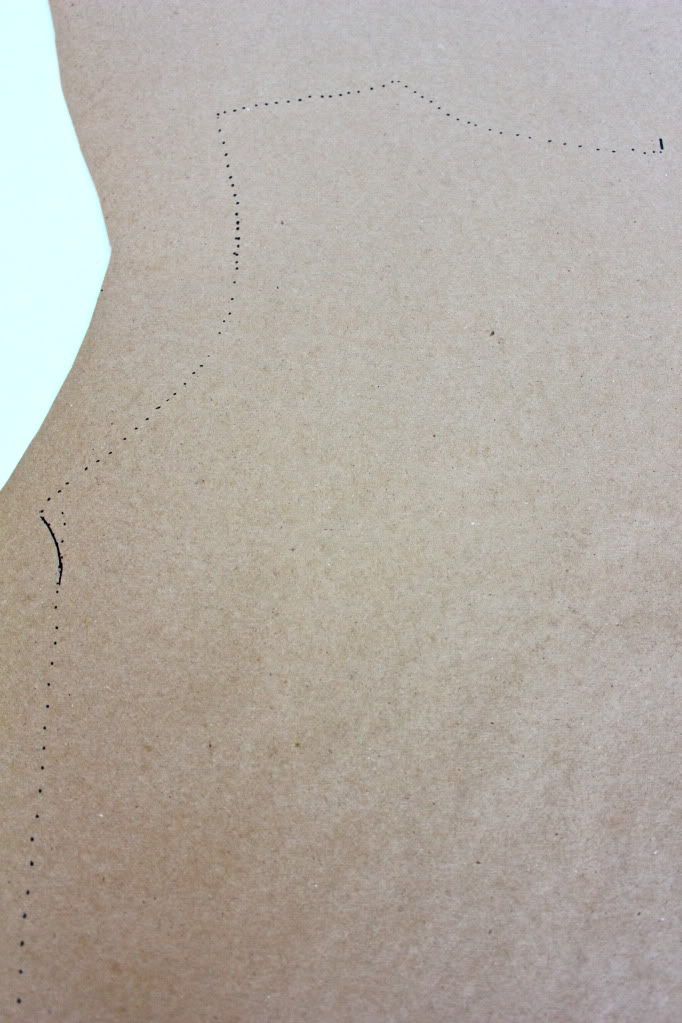
Now you'll need to sketch an outline outside the dotted line to allow for seam allowances.

To determine how far apart the rough sketch line should be from the final outline of the pattern you'll need to take what materials you're working with into consideration.

For example: The lace top I am using has a stretch quality to it. If I want to use this pattern to make a top with a non-stretch fabric, I will need to make the final pattern outline a good amount wider than my rough sketch. However, if I was using a non-stretch garment to make my pattern I wouldn't have to allow for as much extra fabric.

It's always better to have a too big pattern and therefore a too big top than it is to go too small. Don't be afraid to be generous.

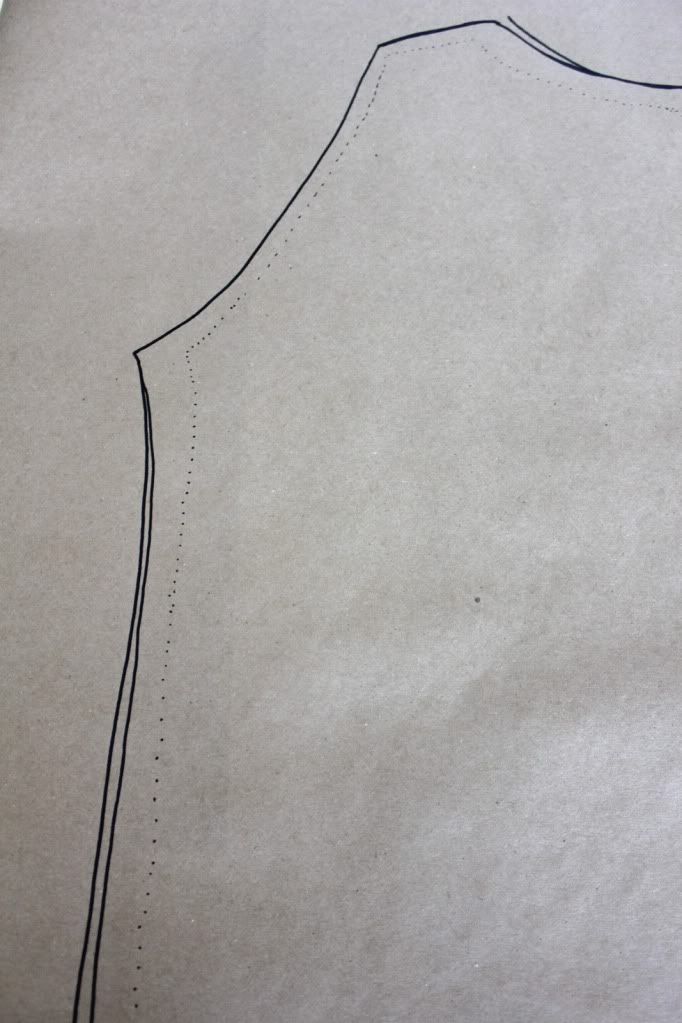
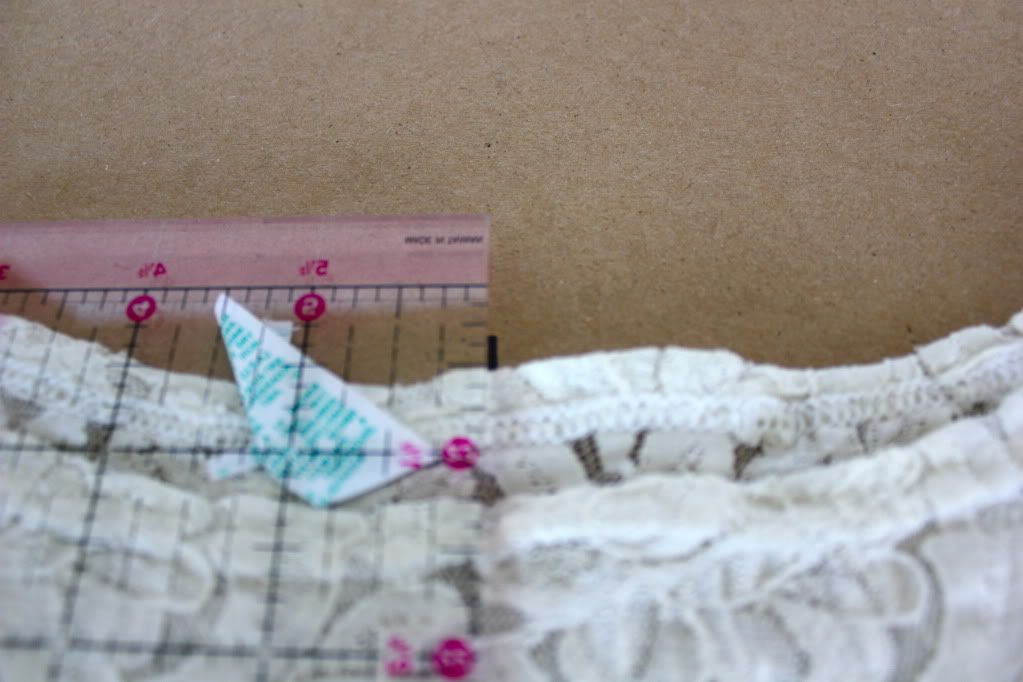
Extend the outline by about 1.5 inches along the sides and about 1 inch at the armholes and collar.

Extend the bottom of the top by several inches to allow for hemming.

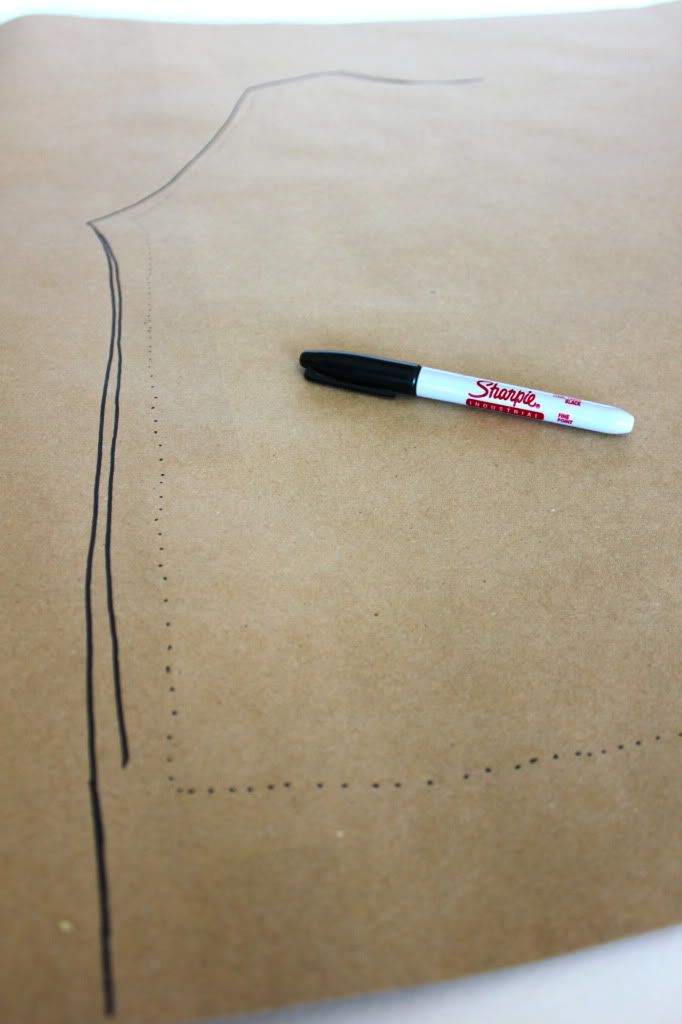
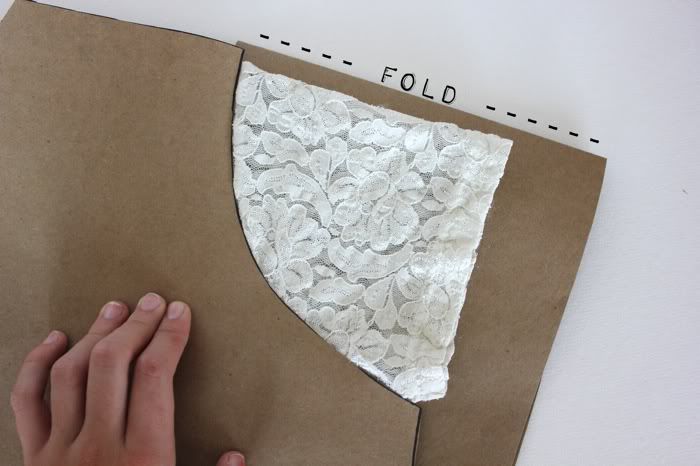
Cut on the line and fold the pattern over making sure that the crease is on the middle marks you made previously.

Trace so that you have a perfectly symmetrical pattern.

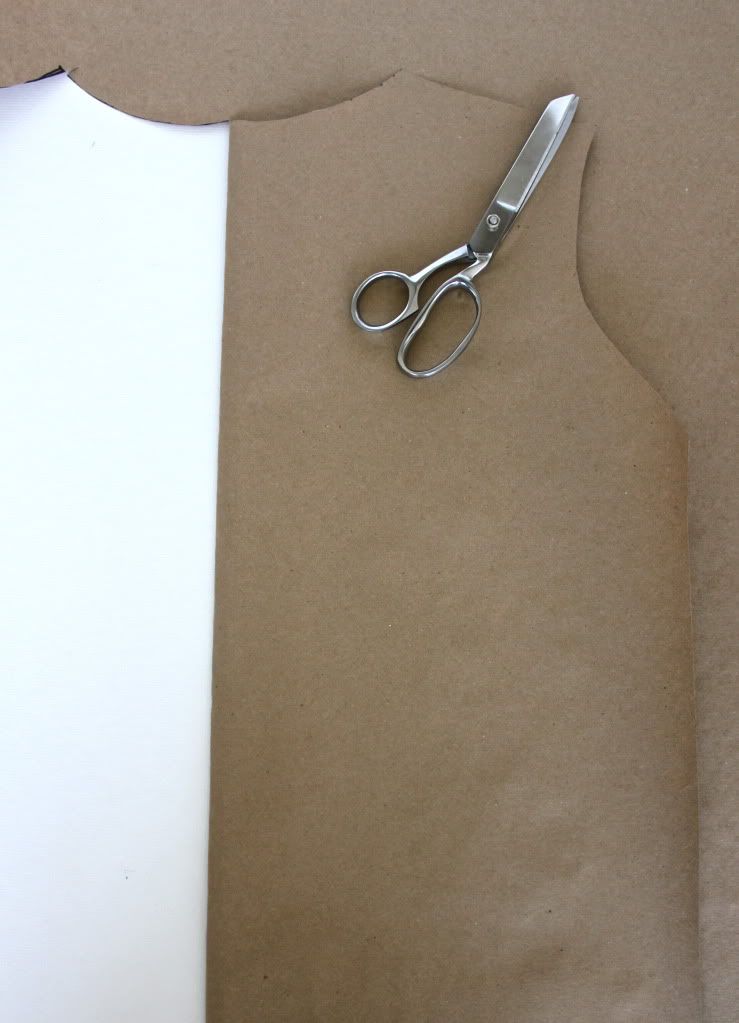
Repeat the same process for the front piece of the pattern being sure to trace the front part of the collar this time.

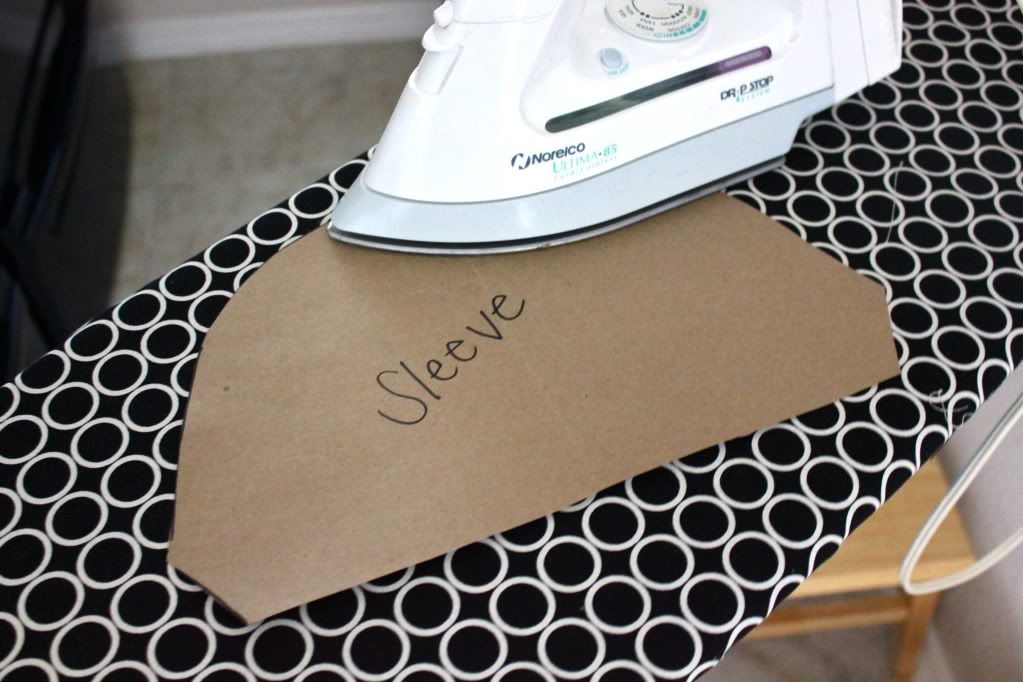
Now for the sleeves. Fold a piece of paper and position it underneath the garment and the pattern. The fold should be parallel to the top of the sleeve.

Trace the curve of the front pattern piece. Leave plenty of extra room for the sleeve to be hemmed.

Remember it's better to go oversized than undersized. You can always take the shirt in if it is a little too big.

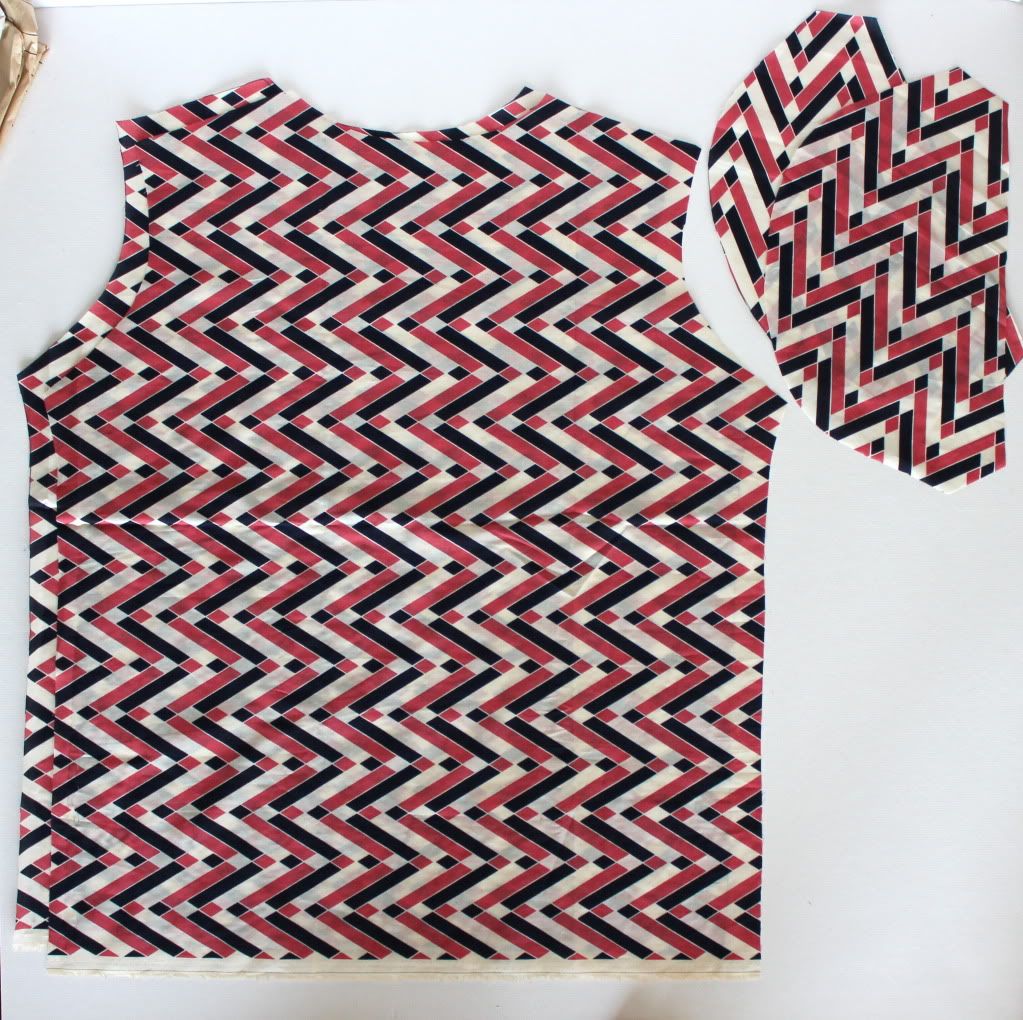
Cut out all of your pieces and press to get rid of creases and you're done!


*Update*

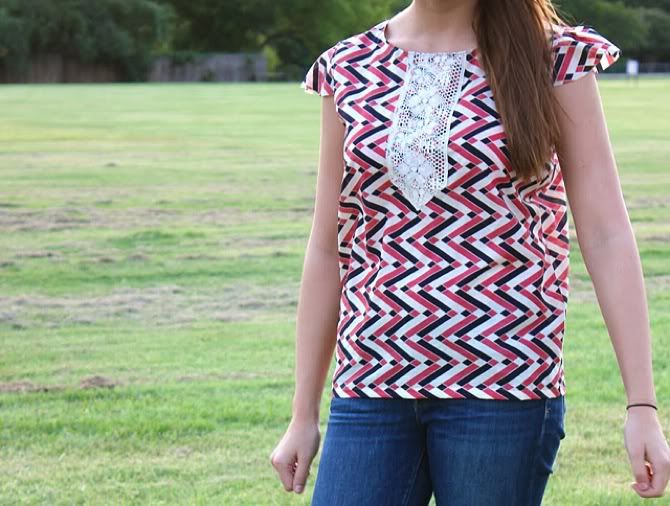
I recently used this pattern to make this cute little top. Click on the picture for the full tutorial!

Labels: , , , , , , ,

4 Comments:

Blogger Jessica said...

great how-to. I love that fabric you used for your top. I've been tracing pattern pieces onto freezer paper which is awesome. It's easily see-thru for tracing and you just iron the shiny side onto the fabric and it sticks perfectly, no pinning or tracing around! AND the best part is, when you peel it off, it will stick to more fabric again and again. I love it.

October 26, 2011 at 8:02 AM  
Blogger Val said...

Love to see someone showing us how easy it really is to make your own patterns. I just actually made my own pattern two days ago for my 5 month olds Halloween costume, because I was not about to pay $23 for a pattern! Thanks again so much!

October 26, 2011 at 9:04 AM  
Blogger Darija said...

I use the same method, but with plastic drop cloths from the hardware store. They're clear, so it's easy to trace. Easy to cut and store too, and the plastic scraps are recyclable. Look for 4 mil thick if you want to try it.

October 26, 2011 at 9:58 AM  
Blogger Katie said...

I trace my patterns onto tissue paper, iron it to fusible interfacing, and then cut it out. It folds for storage and you just iron it to get the wrinkles out before you use it again. It's tough so you can pin it to your fabric over and over again.

January 7, 2012 at 9:13 PM  

Post a Comment

Subscribe to Post Comments [Atom]

<< Home