body { background:#fff url("http://www.blogblog.com/dots/bg_dots.gif") 50% 0; margin:0; padding:0 10px; text-align:center; font:x-small Verdana,Arial,Sans-serif; color:#333; font-size/* */:/**/small; font-size: /**/small; } /* Page Structure ----------------------------------------------- */ @media all { #content { background:url("http://www.blogblog.com/dots/bg_3dots.gif") no-repeat 250px 50px; width:700px; margin:0 auto; padding:50px 0; text-align:left; } #main { width:450px; float:right; padding:50px 0 20px; font-size:85%; } #main2 { background:url("http://www.blogblog.com/dots/bg_dots2.gif") -100px -100px; padding:20px 10px 15px; } #sidebar { width:200px; float:left; font-size:85%; padding-bottom:20px; } #sidebar2 { background:url("http://www.blogblog.com/dots/bg_dots2.gif") 150px -50px; padding:5px 10px 15px; width:200px; width/* */:/**/180px; width: /**/180px; } } @media handheld { #content { width:90%; } #main { width:100%; float:none; } #sidebar { width:100%; float:none; } #sidebar2 { width:100%; } } html>body #main, html>body #sidebar { /* We only give this fade from white to nothing to browsers that can handle 24-bit transparent PNGs */ background/* */:/**/url("http://www.blogblog.com/dots/bg_white_fade.png") repeat-x left bottom; } /* Title & Description ----------------------------------------------- */ @media all { #blog-title { margin:0 0 .5em; font:250%/1.4em Georgia,Serif; color:#353; } #blog-title a { color:#353; text-decoration:none; } #description { margin:0 0 1.75em; color:#996; } #blog-mobile-title { display:none; } #description-mobile { display:none; } } @media handheld { #blog-title { display:none; } #description { display:none; } #blog-mobile-title { display:block; margin:0 0 .5em; font:250%/1.4em Georgia,Serif; color:#353; } #blog-mobile-title a { color:#353; text-decoration:none; } #description-mobile { display:block; margin:0 0 1.75em; color:#996; } } /* Links ----------------------------------------------- */ a:link { color:#488; } a:visited { color:#885; } a:hover { color:#000; } a img { border-width:0; } /* Posts ----------------------------------------------- */ .date-header { margin:0 0 .75em; padding-bottom:.35em; border-bottom:1px dotted #9b9; font:95%/1.4em Georgia,Serif; text-transform:uppercase; letter-spacing:.3em; color:#663; } .post { margin:0 0 2.5em; line-height:1.6em; } .post-title { margin:.25em 0; font:bold 130%/1.4em Georgia,Serif; color:#333; } .post-title a, .post-title strong { background:url("http://www.blogblog.com/dots/bg_post_title.gif") no-repeat 0 .25em; display:block; color:#333; text-decoration:none; padding:0 0 1px 45px; } .post-title a:hover { color:#000; } .post p { margin:0 0 .75em; } p.post-footer { margin:0; text-align:right; } p.post-footer em { display:block; float:left; text-align:left; font-style:normal; color:#996; } a.comment-link { /* IE5.0/Win doesn't apply padding to inline elements, so we hide these two declarations from it */ background/* */:/**/url("http://www.blogblog.com/dots/icon_comment.gif") no-repeat 0 .25em; padding-left:15px; } html>body a.comment-link { /* Respecified, for IE5/Mac's benefit */ background:url("http://www.blogblog.com/dots/icon_comment.gif") no-repeat 0 .25em; padding-left:15px; } .post img { margin:0 0 5px 0; padding:4px; border:1px solid #cca; } /* Comments ----------------------------------------------- */ #comments { margin:0; } #comments h4 { margin:0 0 10px; border-top:1px dotted #9b9; padding-top:.5em; font:bold 110%/1.4em Georgia,Serif; color:#333; } #comments-block { line-height:1.6em; } .comment-poster { background:url("http://www.blogblog.com/dots/icon_comment.gif") no-repeat 2px .35em; margin:.5em 0 0; padding:0 0 0 20px; font-weight:bold; } .comment-body { margin:0; padding:0 0 0 20px; } .comment-body p { margin:0 0 .5em; } .comment-timestamp { margin:0 0 .5em; padding:0 0 .75em 20px; color:#996; } .comment-timestamp a:link { color:#996; } .deleted-comment { font-style:italic; color:gray; } .paging-control-container { float: right; margin: 0px 6px 0px 0px; font-size: 80%; } .unneeded-paging-control { visibility: hidden; } /* More Sidebar Content ----------------------------------------------- */ .sidebar-title { margin:2em 0 .75em; padding-bottom:.35em; border-bottom:1px dotted #9b9; font:95%/1.4em Georgia,Serif; text-transform:uppercase; letter-spacing:.3em; color:#663; } #sidebar p { margin:0 0 .75em; line-height:1.6em; } #sidebar ul { margin:.5em 0 1em; padding:0 0px; list-style:none; line-height:1.5em; } #sidebar ul li { background:url("http://www.blogblog.com/dots/bullet.gif") no-repeat 3px .45em; margin:0; padding:0 0 5px 15px; } #sidebar p { margin:0 0 .6em; } /* Profile ----------------------------------------------- */ .profile-datablock { margin:0 0 1em; } .profile-img { display:inline; } .profile-img img { float:left; margin:0 8px 5px 0; border:4px solid #cc9; } .profile-data { margin:0; line-height:1.5em; } .profile-data strong { display:block; } .profile-textblock { clear:left; } /* Footer ----------------------------------------------- */ #footer { clear:both; padding:15px 0 0; } #footer hr { display:none; } #footer p { margin:0; } /* Feeds ----------------------------------------------- */ #blogfeeds { } #postfeeds { padding-left: 20px }

Prudent Baby

Get sewing how to, sewing tutorials, and sewing help to learn sewing. We offer sewing tutorial for sewing moms.

Tuesday, September 6, 2011

How to Make a French Pouf from a T Shirt


Here's another fun embellishment you can whip up with a recycled t-shirt and a few minutes: a french pouf.

You can make 'em in any size and with any pouffiniess-quotient you desire, then wear as a brooch, a corsage, in your hair, on your shoes, on kid clothing, etc. Or put some on sticks and make a centerpiece for your table.

Learn how to make a french pouf from a t-shirt after the jump...

How to Make a French Pouf from a T Shirt

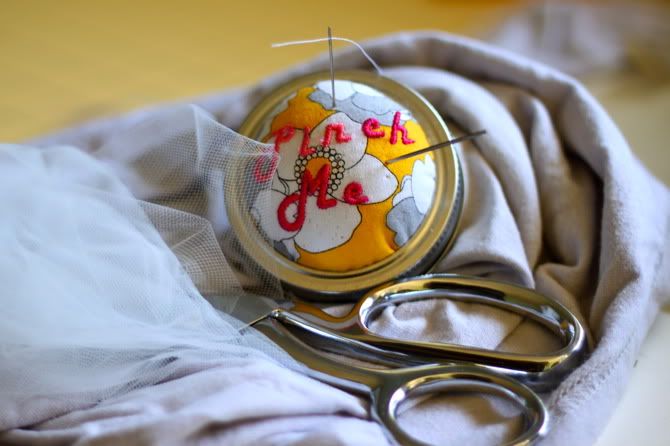
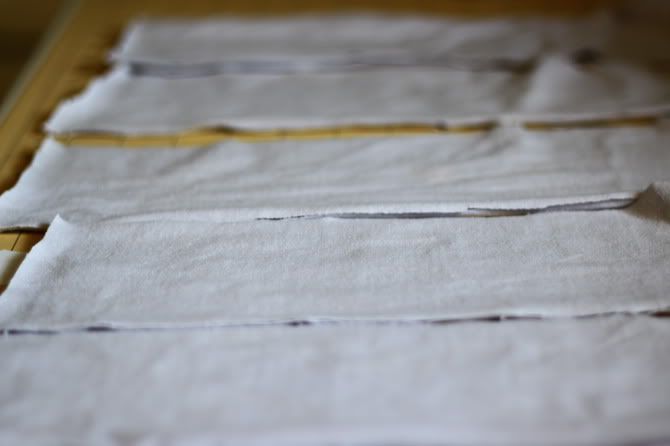
First, assemble your materials. Scissors, needle & thread, an old t-shirt (or any knit jersey, the lighter weight, the better), and some tulle.


Cut off all the seams from your T.


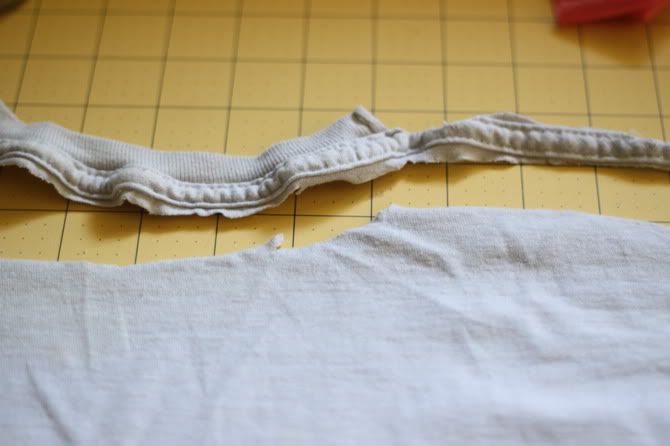
Cut the material into strips. Mine are 3" wide.


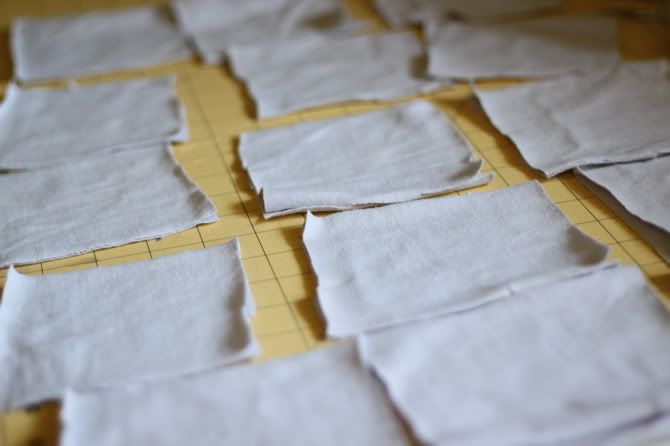
Cut the strips into squares. Mine are 3X3.


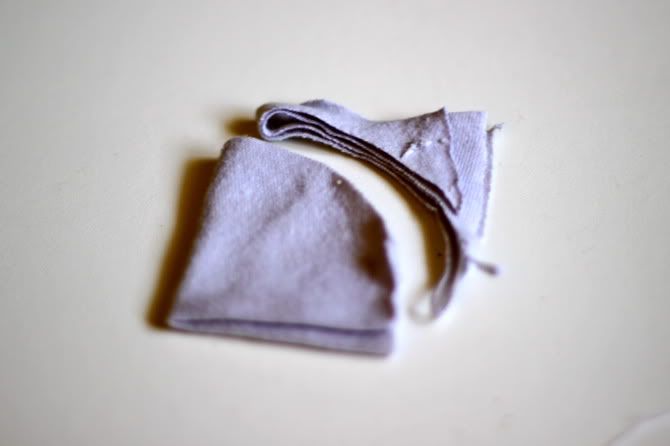
Take one square and fold in half.
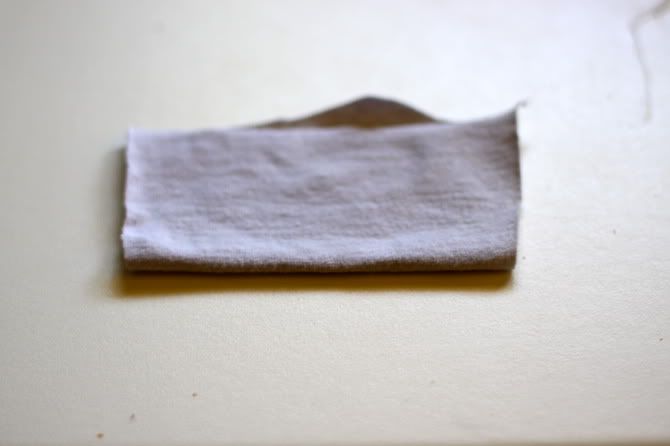

Fold in half again.


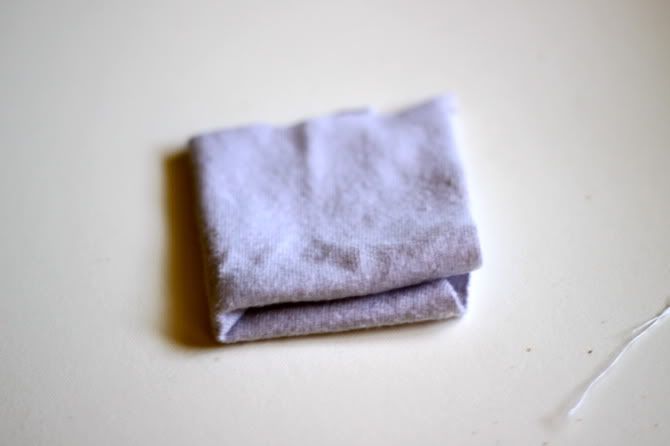
Cut around the unfolded corner to form a petal shape. You have just cut a circle, if you own a circle cutter, you could use it to do all this work for you.


Repeat. I put mine in stacks of five...


I made a ton, some for this pouf, some to save for future poufs.


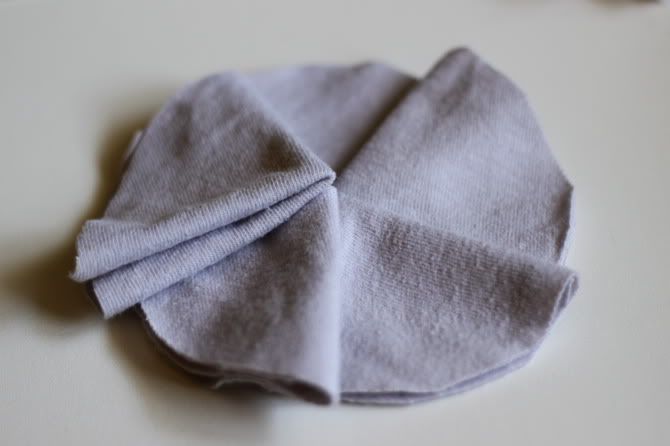
Now take five petals (or four, depending on how poufy you want your pouf to be - the pink one uses 4) and overlap to arrange in a circle with the folded corners in the center.


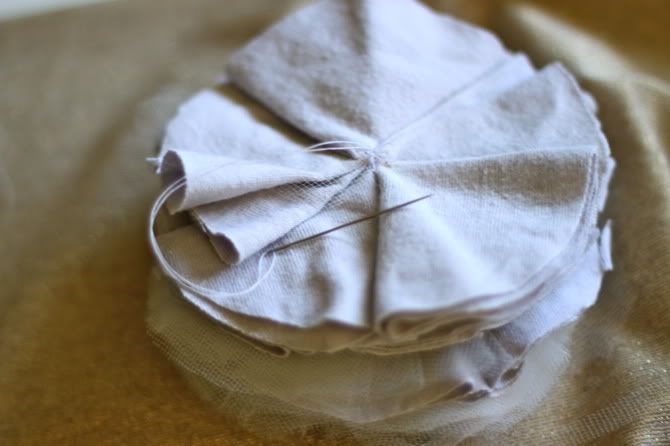
Sew them together with your needle and thread.

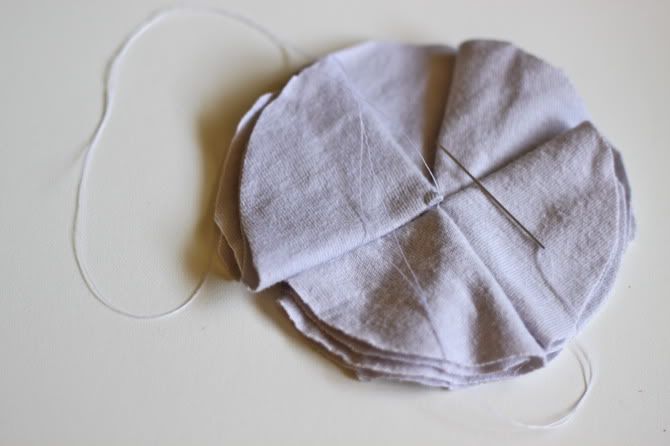
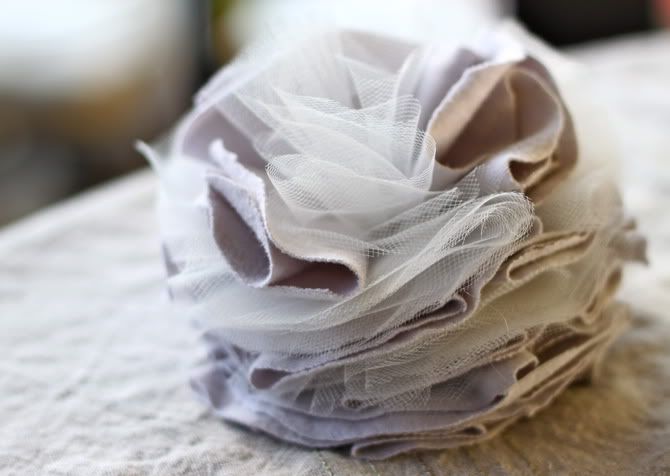
Repeat for however many layers you want your pouf to have, mine has 3 layers of 5 jersey petals.

Repeat the process with tulle. I sewed with orange thread so you could see.


Now pull your needle and thread through your first jersey layer. Offset the tulle layer and pull your needle through it to attach the two. Sew a few stitches to secure.


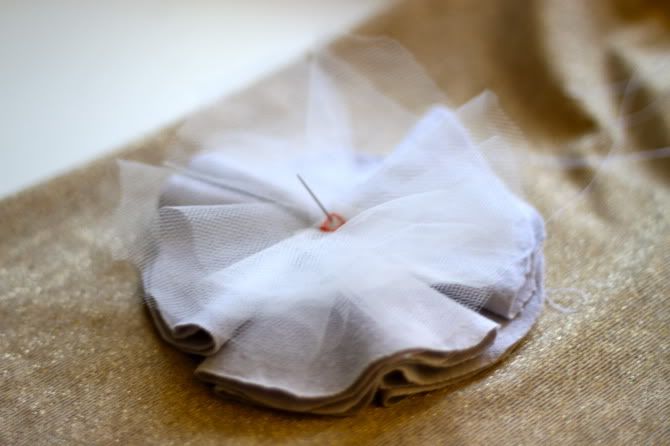
Repeat, alternating jersey and tulle layers. This has 3 of each, but 2 of each would make a nice pouf with less stiffness.


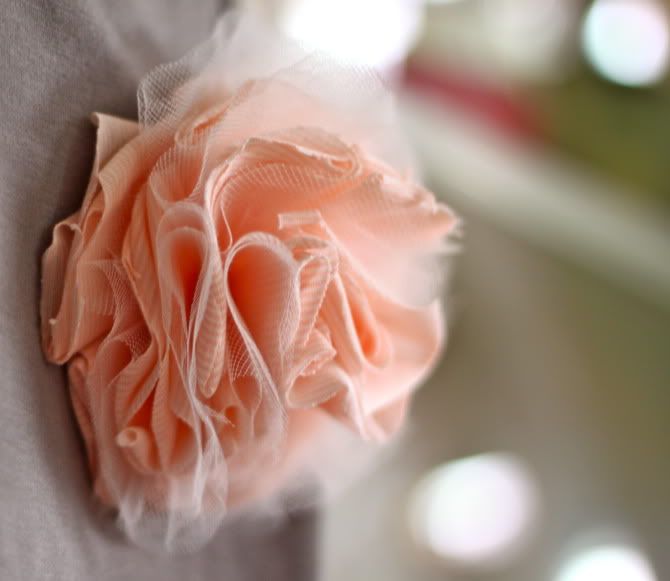
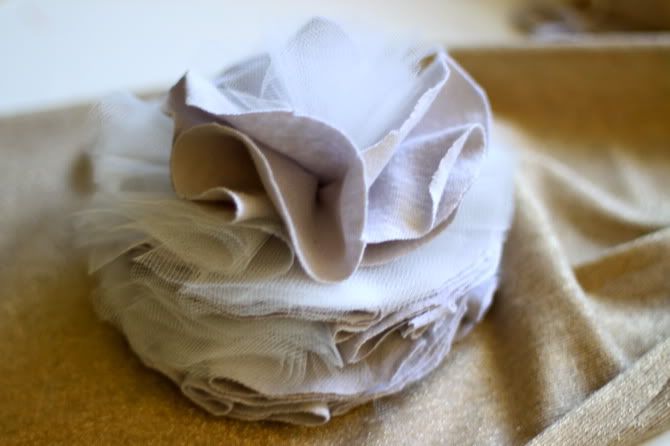
On the top I did 3 jersey petals, then 3 tulle petals to round it out.


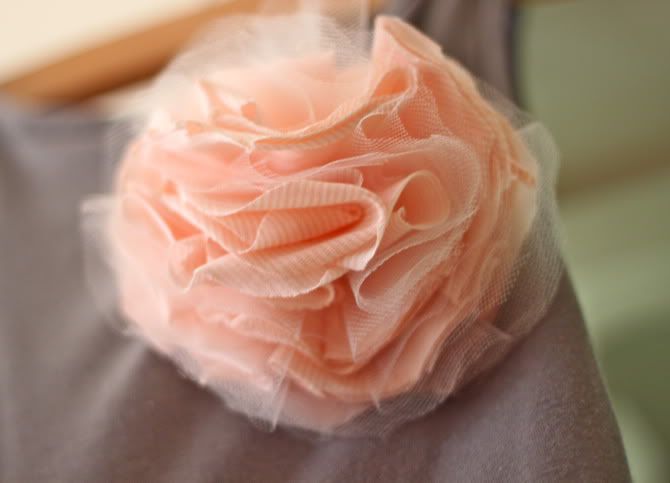
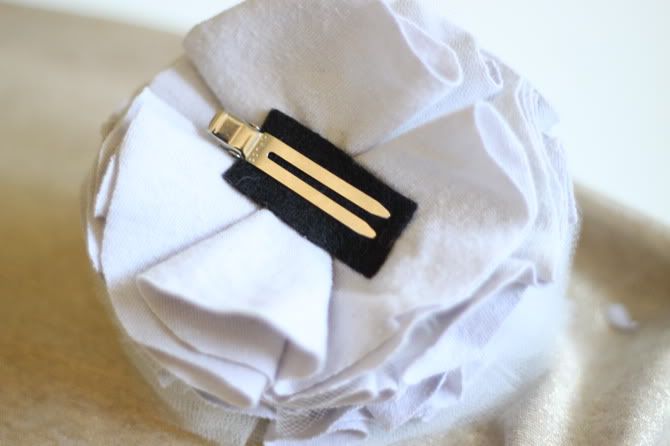
When your pouf is complete, you can do what you like with it. If you want to be able to wear it on any old dress or t-shirt, or even on a shoe, you can hot glue an alligator clip to it with a piece of felt like I did.

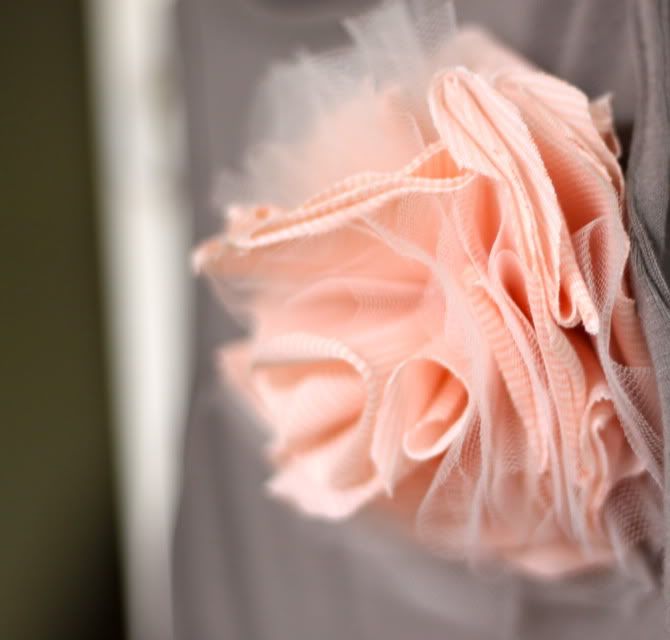
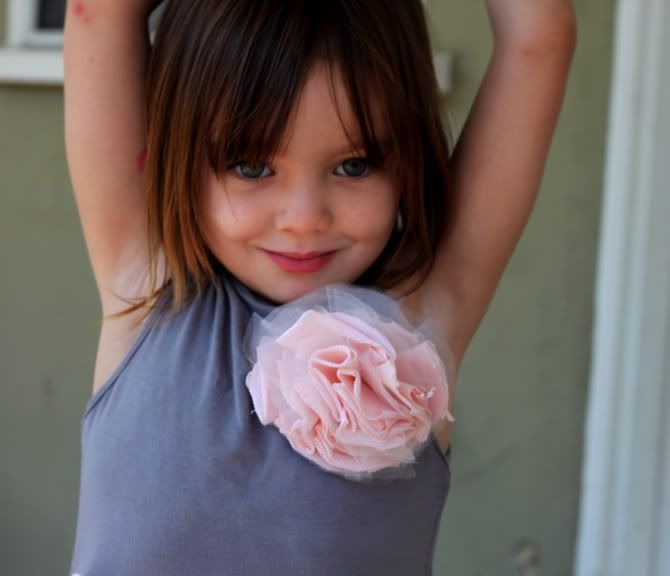
Or you can attach a pin backing to make a "corsage," or just sew it directly onto your item, like I did with Scarlet's dress.

Now fluff up your petals, unfold a few and push 'em around until you like the amount of poof you have going.


Done!


Now do some ballet.

Labels:

10 Comments:

Anonymous Anonymous said...

That's cute! What a neat way to dress up a plain tshirt.

September 6, 2011 at 5:09 AM  
Blogger Itty Bitty Beasties said...

Oh My, beautiful and cute overload!
Let the POUFING begin!!! :o) Thank you for the tutorial!

September 6, 2011 at 6:36 AM  
Blogger Jenny {Heavenly Blossoms} said...

This comment has been removed by the author.

September 6, 2011 at 9:01 AM  
Blogger Jenny {Heavenly Blossoms} said...

Definitely helpful!!!! I think this makes a great gift to go along with my crafts!!! :)

And I have PLENTY of shirts to get rid of er...I mean...for material lol.


Prudent Baby is the first blog I have ever "followed" thank you so much again...You guys are an inspiration.

~Jenny

Visiting from www.heavenly-blossoms11.blogspot.com

September 6, 2011 at 9:01 AM  
Blogger Unknown said...

Wow!!! So pretty! Thanks for sharing:)

September 6, 2011 at 10:31 AM  
Blogger Alicia for Isabelle said...

Oh Jaime, how do I adore thee? Let me count the ways! I adore thee for ALWAYS giving the BEST ideas, I adore thee for showing me how to perform those ideas! And so on, and so on! YOU ROCK girl! Thanks!

September 6, 2011 at 10:44 AM  
Blogger eLLe said...

Oh, I must try this! I've been thinking of making something for the girls in my class when they sing a song as a group for their program. This is great!

September 6, 2011 at 1:53 PM  
Blogger Mama Bear said...

Until you said "embellishment", I was picturing myself making my own shower poufs. Which would have been totally cool. Maybe it could still be done...as long as I didn't put a pin backing on it...ouch!

September 6, 2011 at 2:32 PM  
Blogger MzSugarCookie said...

Love! I am in need of some tulle, I want to wear a tutu on my shirt lol.

September 6, 2011 at 10:02 PM  
Blogger Kelsey Johnson said...

I made some last night and pinned them on my daughter's ballet tote bag. Easy and beautiful! Thanks for the tute.

September 8, 2011 at 3:57 PM  

Post a Comment

Subscribe to Post Comments [Atom]

<< Home