How to Block Print Fabric
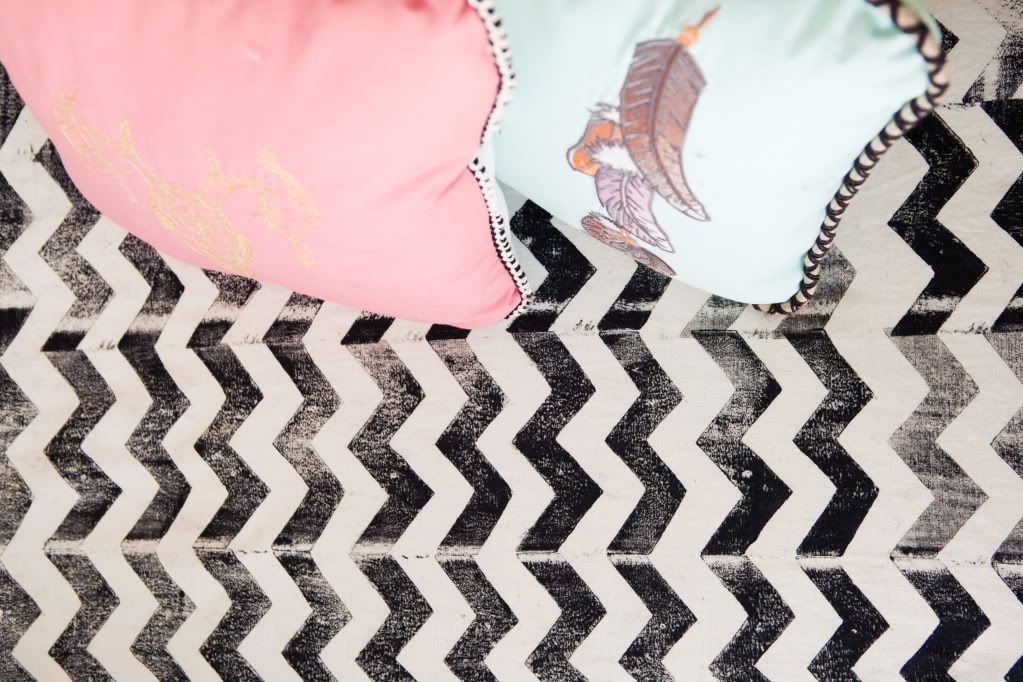
I showed y'all My New Backyard and promised some tutorials. One thing I did was to block print some fabric with a chevron pattern. I couldn't find a fabric I liked to cover the cushion with, I wanted a linen with a sort of handmade feel to it. So I block printed my own.

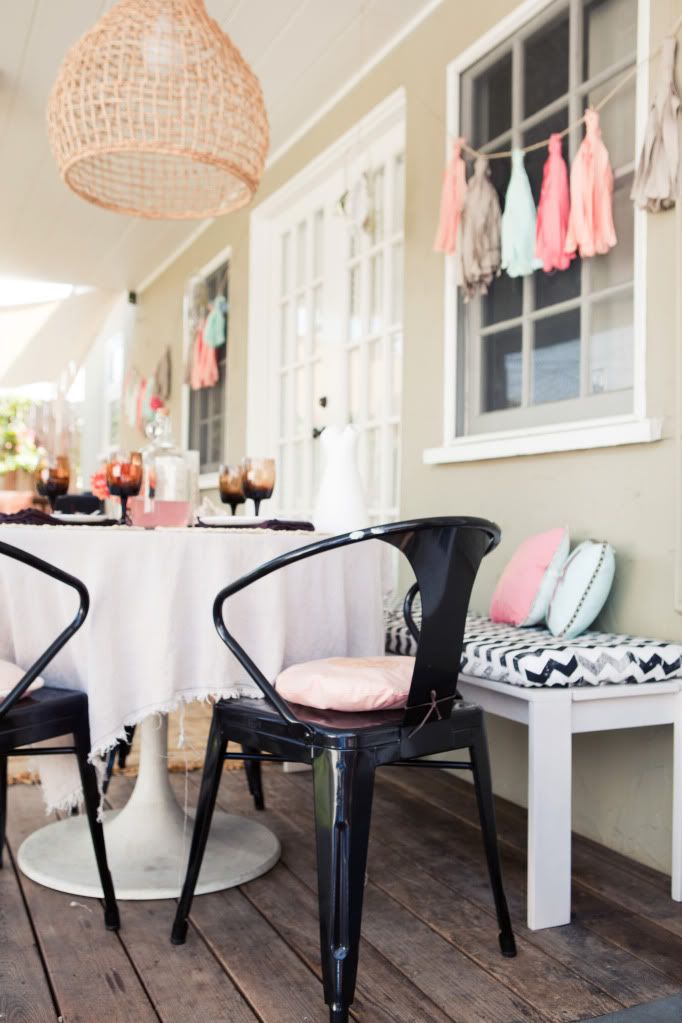
Then I sewed it into a cushion cover (using the exact same method as I did in my tutorial on sewing a crib sheet, with the measurements adjusted to the measurements of the seat cushion).
I'm really happy with the way it turned out. Let me show you How to Block Print Fabric after the jump...
How to Block Print Fabric
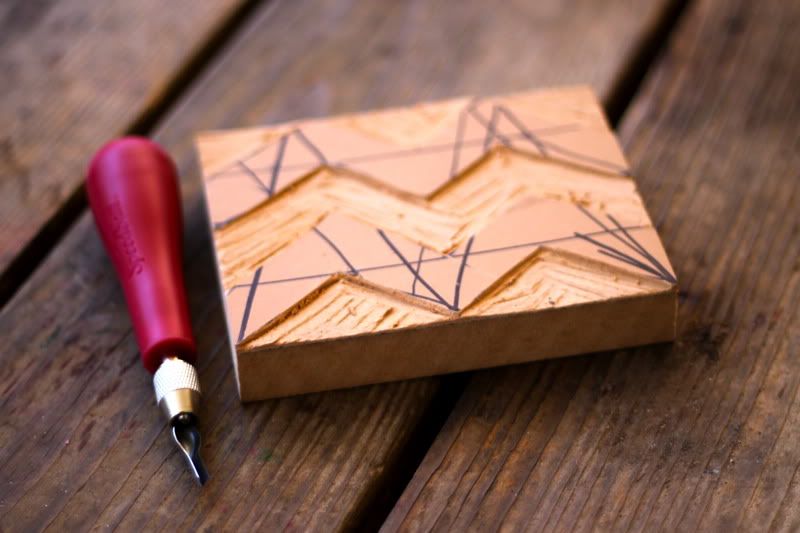
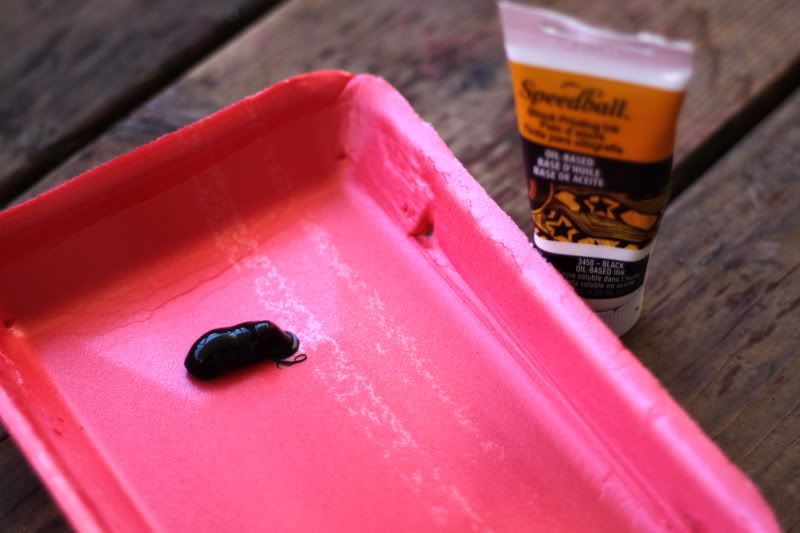
First you'll need a few supplies. You need to create a block with your design on it. I've seen people use cardboard, but it's easier in my opinion to actually do it the OG way and make a linoleum block. You can buy a linoleum block at amazon for around $5 (depending on the size) or any art supply store in a variety of sizes. You'll also need a cutting tool, some tips, an ink roller and a tray for your ink. You can buy a complete starter kit with everything you need for $17 here: Speedball Block Printing Starter Kit
. That includes the lino handle (cutting tool), a variety of different tips for it, some ink (only for paper though), and a foam tray and roller to apply the ink to your block.
And you'll need some fabric. I used linen in bleach white from Fabricworm.
So first things first, determine your design. You can draw it right on the block like I did (remember it will be reversed when you print) or you can draw it on paper, use a pencil to shade in the back of the paper, then put the shaded side down on your block and trace the design to transfer it. If you transfer it, use a sharpie to go over your design on the block so it doesn't smudge. Then use your cutting tool to cut out the white space from your design, like so:
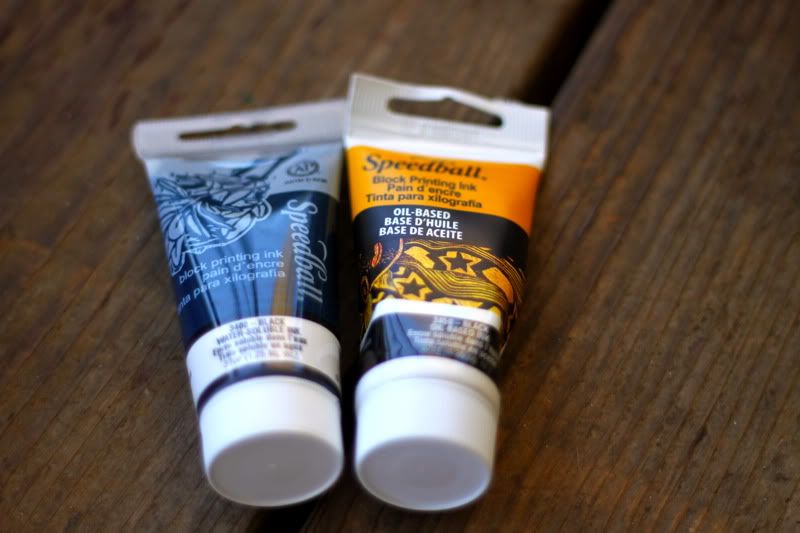
Then you'll need some ink. I used oil-based block printing ink which is for fabrics (and paper). It'll leave a texture, and it takes about two weeks to fully dry/cure, but it works. You could use fabric paint, but it won't go on as smooth. You can also experiment with screen printing ink and a variety of other stuff, googling will give you so many options your head will spin.
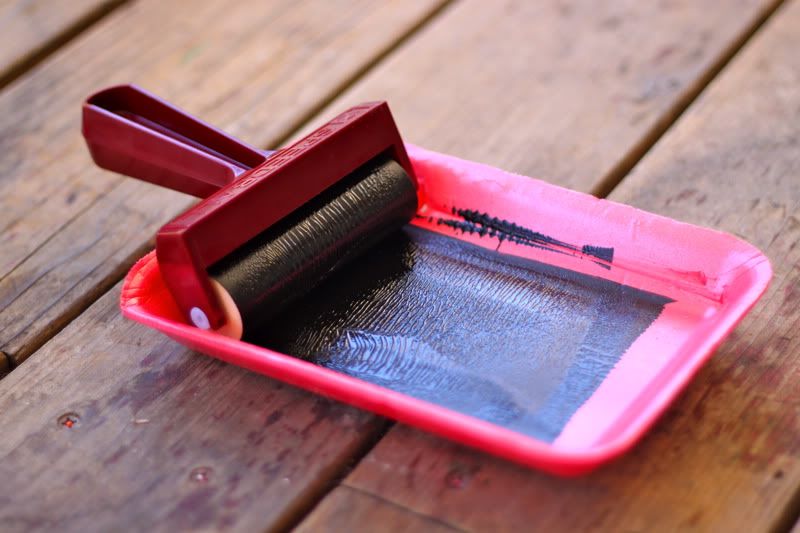
Squeeze a small amount of ink into your tray. Wear gloves, it gets everywhere and is hard to get off your hands:
Use your roller to evenly distribute it. Even distribution is key.
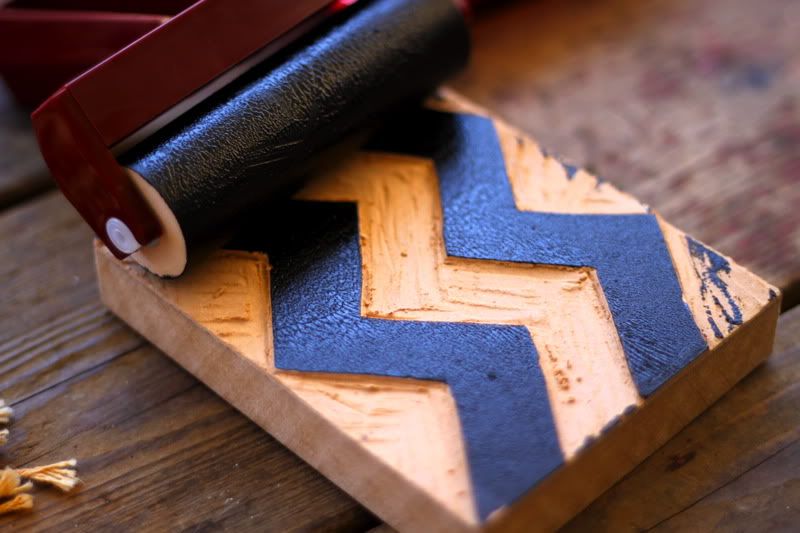
Use the roller to roll the ink onto your block:

Go back and forth a few times to distribute it as evenly as possible:
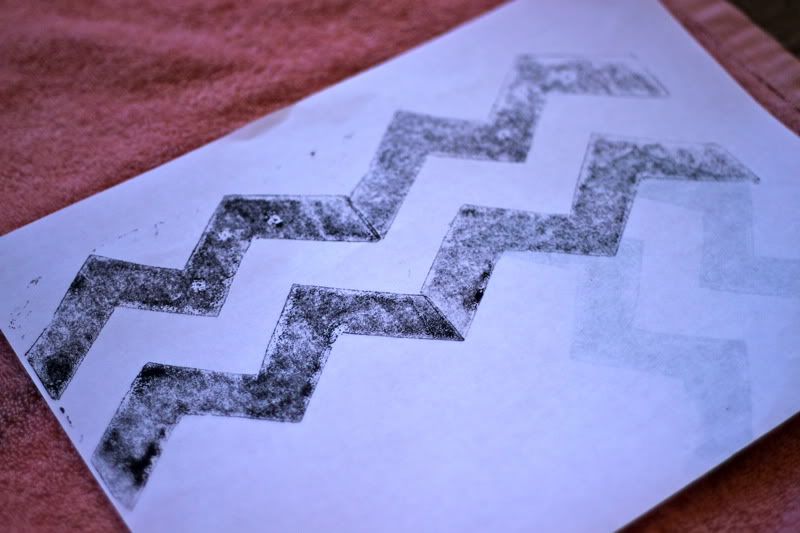
I did a practice stamp on a piece of paper:

That's just what i wanted! You can get it more even, but I liked this look:
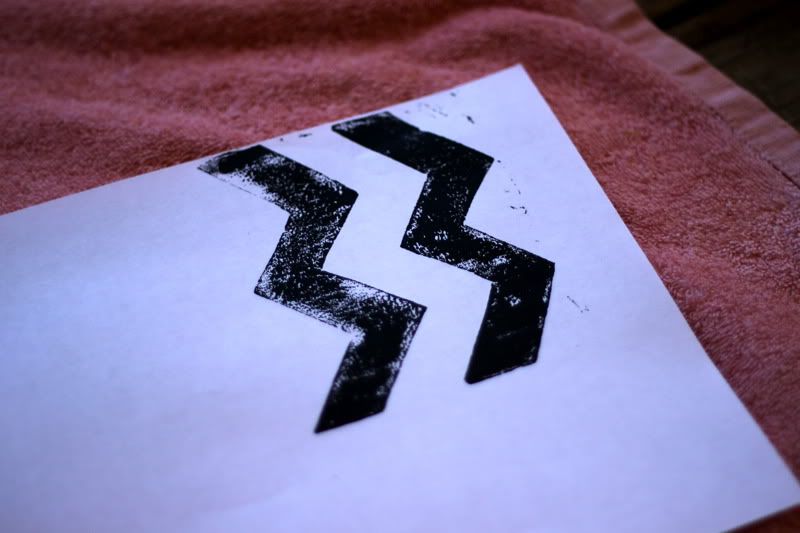
I also wanted to check to make sure my print would line up so I could make any necessary adjustments, but it was lining up just fine:
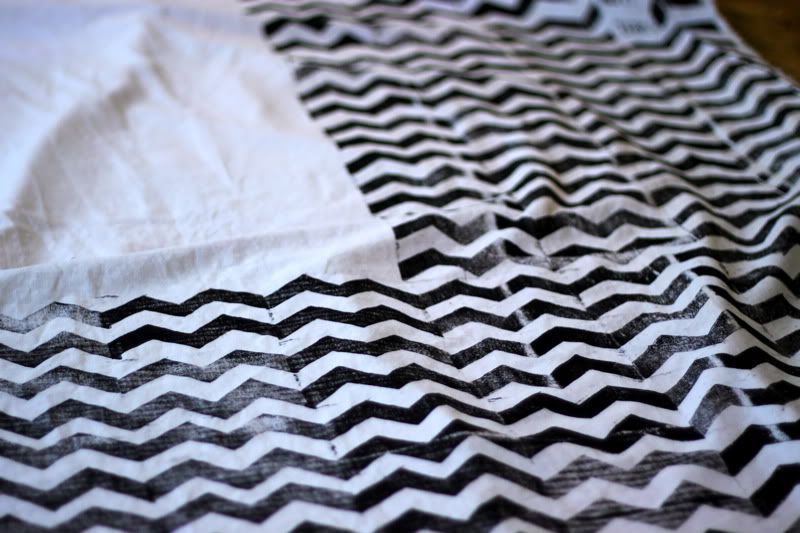
So lay your fabric on a flat surface. I started on my wood deck with a towel, but saw that the spaces in the wood slats were showing up, so I put a piece of cardboard under the fabric instead, that worked much better. Stamp away, reapplying ink to the block after each stamp.
Continue...
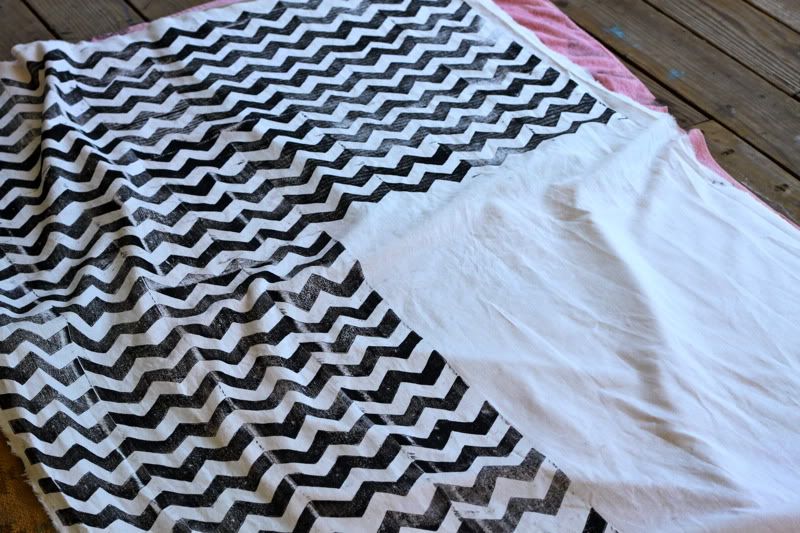
Until you're all stamped up. This would also be great if you just wanted to do a pretty design, like a flower or some such, that didn't need to line up and didn't require as many stamps.
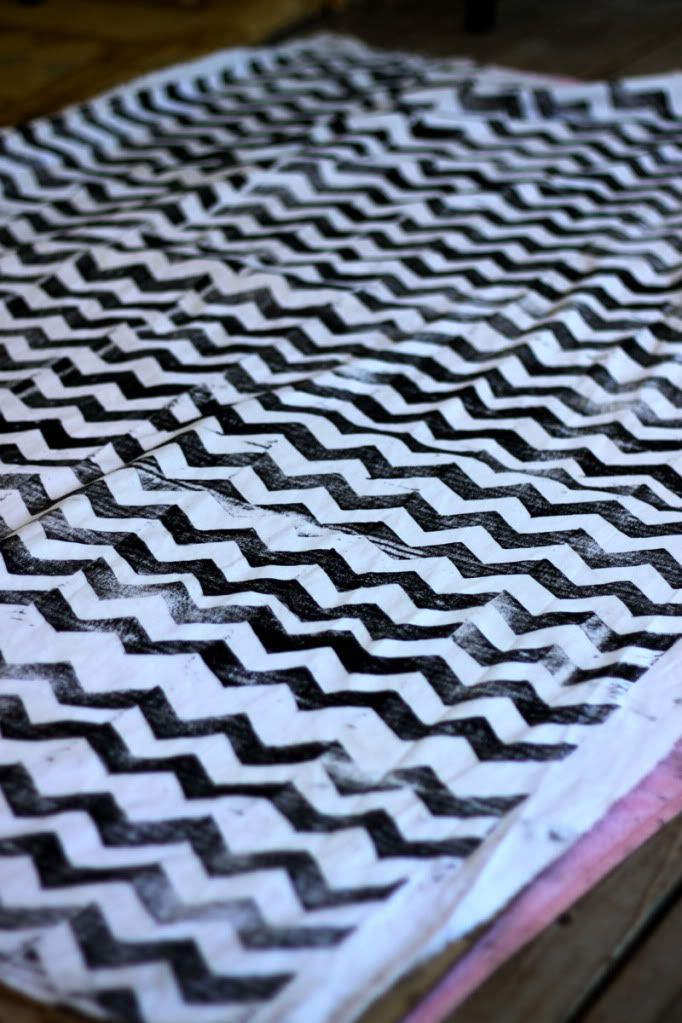
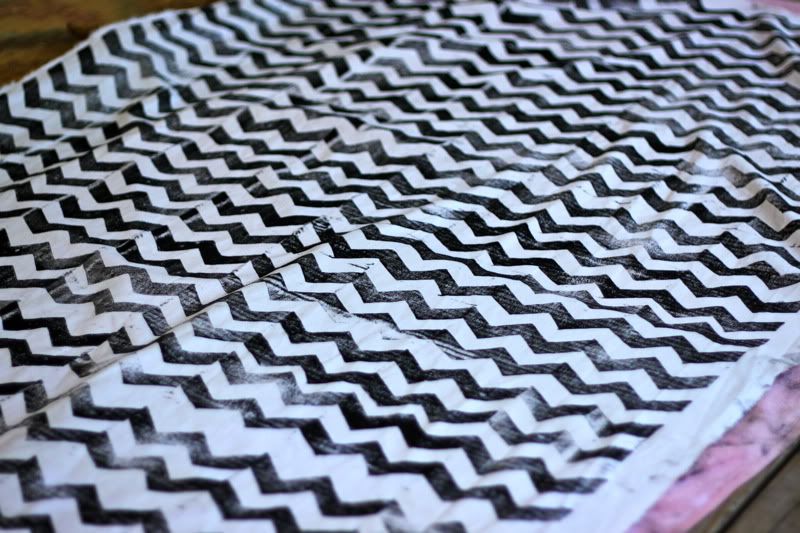
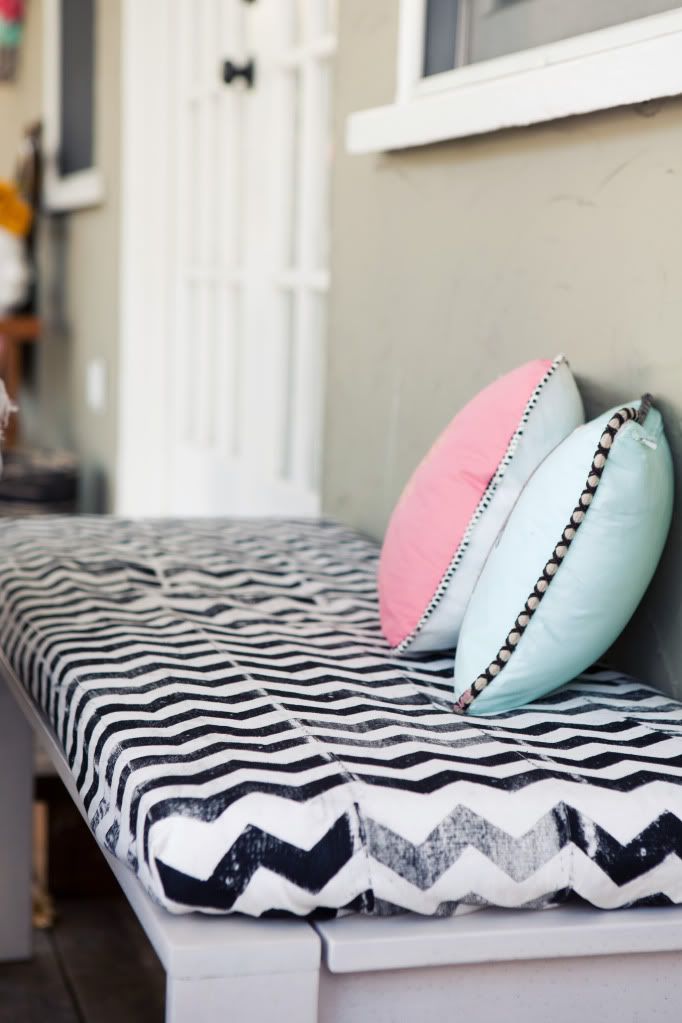
Hang to dry. It takes about three-four days before you can touch it without getting ink on your hands. Then another week or ten days to be sure that it is fully cured. After that you can wash it and everything. This is what is flapping in the wind behind the title at the very beginning of my video love letter.

Go ahead and make your creation with it. I love the way this turned out.
So, think you might try block printing your own fabric?
Labels: Decor, DIY, fabric, In One Evening, Tools
posted by Jaime @ 12:10 AM
![]()

20 Comments:
Yes! I've been itching to try printing my own designs for my bibs. This might be my gateway method. Thanks for sharing!
I love how the print has different qualities in different sections - some darker, some lighter, some more defined, some less. Quite lovely. Don't know if I'd have the patience to wait so long before fondling. I'd for sure have ink all over my hands every day!
That's really fantastic! It would be a great idea for window treatments!
I LOVE that look! I just need to get out a block of wood... carving the stamp looks like the hardest part. I've been wanting to do some block printing for awhile now so I think I will try it! I have a few yards of canvas I want to put color on.
I have done that before. It's been a long time, but I just found the coolest thing EVER. Fabric Dye Sticks. Check out what I did with them. Have you ever heard of them?
http://erinscreative.blogspot.com/2011/07/using-fabric-dye-sticks.html
Oh and wanted to let you know that Speedball does have fabric ink too.
SO excited about this tutorial. When you sourced your backyard makeover the first thing I did was look for that fabric source, only to find I was cursed and you made it yourself! Now I can have my very own :)
Ooh, that's too beautiful.
I really love the way it turned out.
Chevron even more beautiful.
My heart beats faster!!
I really feel the need to try this soon!
........I wish I would be able to crete an exact copy of your backyard....
Not really exact, for sure, but veeeery close to yours, because it is really amazingly beautiful, I really fell in love with it a bit. ♥.
Thank you for sharing this.
:)
Just a quick couple questions: You said that you make sure the pattern repeated correctly, but did you have to create guides or anything on your fabric to line your stamp up each time or did you eyeball the spacing? Also, when you hang it outside, is the ink so tacky that things like dust, bugs or bits of grass stick in it? I really like your project, I think it makes for a fun design element on your bench :)
This is awesome Jaime, thank you so much for sharing! I'm definitely trying this. Is linen the best fabric to use, or can you pretty much use any fabric? Thanks for the link to the starter kit!
Absolutely! I've been carving my own little stamps in the pink quick-carve stuff but mentioned to my parents that I was wanting to do more fabric stamping. I ended up with a bag full of large vintage hand-carved stamps from India. They are so gorgeous and I am now ready and eager to stamp everything in sight. If I weren't myself I'd be totally stinking jealous.
This is excellent! I am wanting to add some designs to our "new" bedroom but I have not found any I liked. This would bring some unique prints!
Well, I'm jealous of Mama Bear.
I love this zebra-tastic print!
I have made my own stamps before with wooden blocks and thick foam. I helped some kiddos make their own craft aprons and they got to create their own stamps by cutting out the foam and using wood glue to fasten the foam to the wood block.
This is great. It's beautiful! Thanks for the tutorial!
this is the best thing i've seen lately! love it! i hope you don't mind i do a post on my blog linking back to your tutorial?
wow! so amazing.
I did a block printing project in high school, years ago. I've been looking for argyle fabric for curtain panels, but haven't had much luck, especially in the colors I want. So I decided to try this. I will keep my fingers crossed! Thanks!
I'm loving this idea! I could see my husband making me some rather large wood "stamps" to block print! Thanks for the great tutorial!
There are so many good ideas here that can be applied differently to other projects...I find inspiration everyday on this site.
Post a Comment
Subscribe to Post Comments [Atom]
<< Home