Recycled Ruffle Sleeve Bubble T

Look at little Dove, daughter of my dear friend Rebecca, who writes the awesome site Cooking With My Kid! Could she be any cuter? She came thisclose to being a native New Yorker, but was born here in LA (just like me, aww). So I had to make her a little I HEART NY tee, but I wanted it more girly than the usual.

It has a little gathered waist and chest, and some cap sleeves. Super simple, a little elastic thread and you can make your own too! I kind of want to make a big one for me. In fact, I think I will.
Get the full Recycled Bubble Sleeve T Tutorial after the jump!
And remember, leave a comment and you could win that gorg Alexander Henry fat Quarter up on the left. BTW, I'm going to be saying "gorg" in every post this week in honor of Jacinda's husband. Long story.
Recycled Bubble Sleeve T Shirt
First you'll need one t-shirt. I used a kid's shirt to make my baby t, but you could use a man's shirt to make a big one.

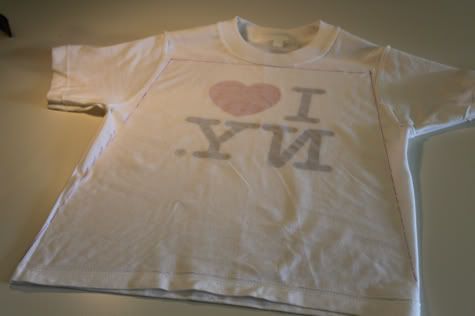
1. Turn it inside out and use a ruler to draw a big trapezoid on it. You want to cut off the neck, side seams, and bottom hem, like so:
Cut it out.
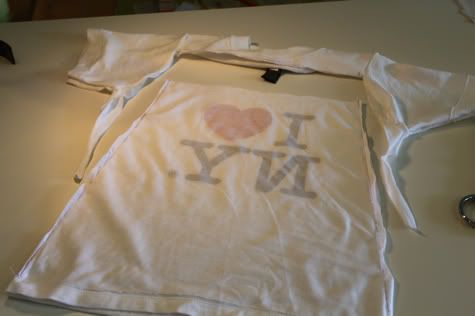
3. Lay the shirt pieces together right sides facing and sew up each side. Turn inside out and your top edge looks like this. You could serge it but you don't have to, the jersey won't unravel.
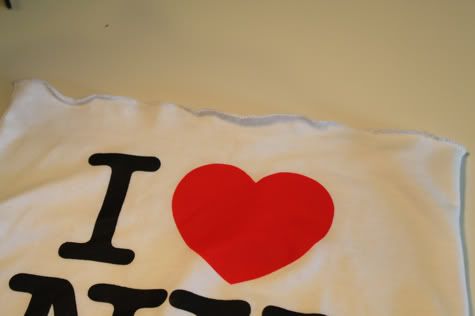
Using elastic thread in your bobbin, sew all the way around about 1/4" down from the top edge. For how to sew with elastic thread visit this post about shirring. Seriously visit it because it holds the secret to making elastic thread work in your machine.
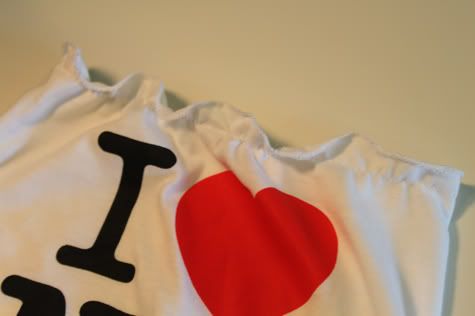
Repeat 1/4" below that. I made four rows.
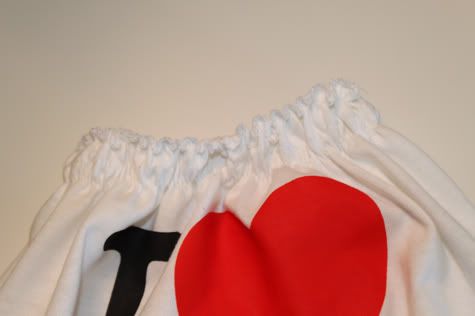
4. Now choose where your waist will be. Sew all the way around with elastic thread in your bobbin, in rows 1/4" apart. Here it is at four rows:
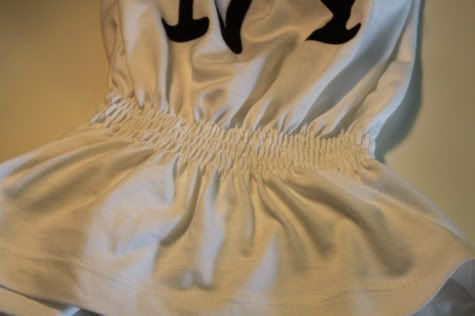
But I was having fun so I kept going, ending up with 7 rows. I think a nice thick band of elastic thread stitching like this is so cute. Then I chopped the bottom off (i already told you to do this earlier because your hem looks super weird if you don't).
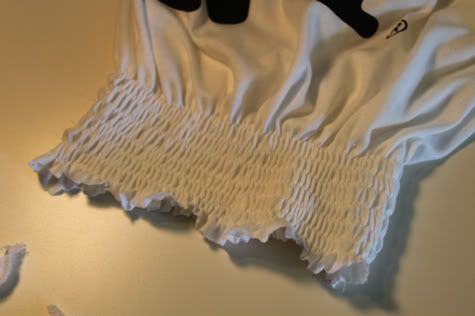
Now you have a strapless top. If you're down with your baby wearing a strapless top, then you're done. You're also weird.
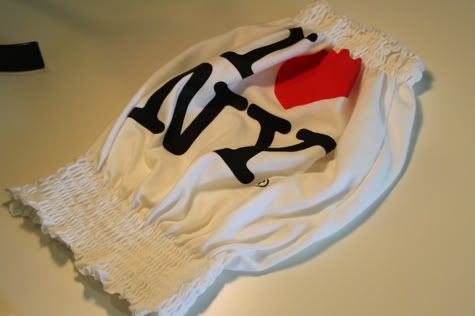
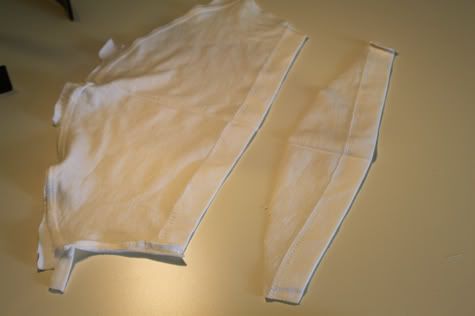
5. So to make the sleeves, cut the sleeves off your original t-shirt, and slice the seam open so they lay flat. Trim a piece off the hemmed edge, you will use this as your new sleeve. Here's one un-trimmed and one trimmed so you can see how I did it:
Now on the un-hemmed side, sew two rows of elastic thread stitching 1/4" apart:
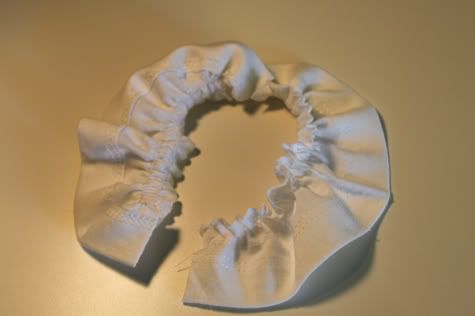
Then sew them onto the neckline of your shirt. Just attach them in the previously made stitching rows.
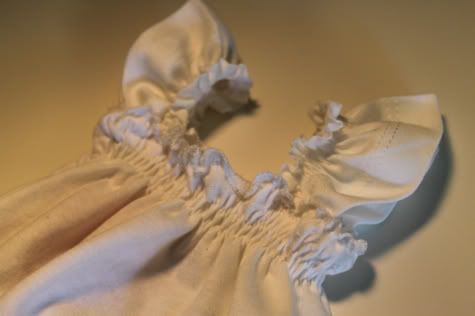
Done!
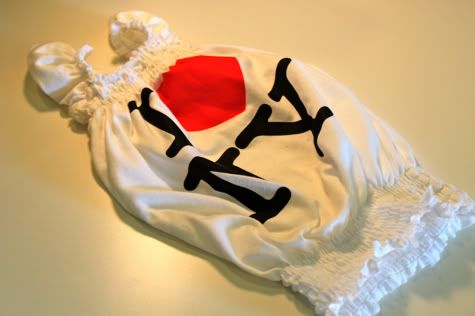
Put on cute baby!!

I love babies!!

Labels: Baby, Clothing, In One Evening, Kids, Recycle, Sewing, Under $5

38 Comments:
Oh now THAT is just SWEET~and EASY looking! LOVE IT!
Oh my goodness - this is so perfect!! I just pulled my "I heart NY" shirt out of the box of pre-pregnancy clothes yesterday and decided it no longer fit my mommy boobs and promptly dropped it in the sewing pile. Now I have something to do with it! What an adorable why to recycle all those (now a little tight) t-shirts that I can't seem to part with!
Lots of gorg little clothes for my little girl!!
(Obviously I don't know the story with Jacinda's husband but thought I'd help you out with your 'gorg' quest this week.) :)
That is Brilliant! Stunning!!! Gorgeous!!! (Ok. ... so the kid probably makes it seem even more gorg then it would otherwise - but hey, she's a cute kid!) Now I want one for myself. I've never been to NY... I live in Australia. Might have to get one of my friends to pick me up one sometime when they are travelling though :)
Thank you for this awesome tutorial! Can't wait to try it!!
I heart DOVE! Look at that baby! Yum! Cute shirt too! So many retired t-shirts that would work. Sports team shirts would be perfect. A little girlie flair!
Old t shirts, beware!!! bwahahaha
PS, The baby is too darling.
PPS The dog in the background is too, though it does look slightly jealous of not having it's own way cool shirt....
Ooooh, I have a gorg child's NYC shirt just waiting for a Kathy Lee and Hoda style ambush makeover. Thanks!
Sooooooooooooooo stinkin' cute!
She is seriously so stinkin' cute! I want to make one for Joleen!
I guess I have to get over my fear of elastic thread so I can try this one. I save a bunch of shirts that my husband wore while we were dating and I think I may have to make our girl a shirt or two.
This is super adorable. I can't wait to make one, with an old T out of my yard sale pile.
Love Dove, love the T. I want one!!
Thank you ladies for another fab tutorial. I recently got my first sewing machine ever (yay!!!!!!!!) and have been whipping up some major cuteness thanks to your blog! This shirt will be my lesson on elastic thread... thanks for thinking of me! Just kidding. I know it's not all about me. Yes it is! No, really, it's not. But totally making this shirt!
Great tutorial - especially the sleeves!
this is adorable~ too bad my I heart NY shirt was so cheap it literally fell apart in the wash!! I took it out and it looked like a knife had attacked it in there! Seriously- what was it made out of???? Tag said "cotton", ummmmm, not any cotton I've ever seen!
Oh how I want a little girl. I am just going to have to deck out my niece with all these cute ideas. Going to have to get creative for cute stuff for my boys.
What an adorable shirt redo! My new little niece is going to have the cutest things ever!! Love the sleeves, totally makes the shirt.
so so sweet!!! (Both lovely baby and project =)) Thanks!
So fantastic I can't stand it. Making one for me and the girlie TONIGHT!
Dove is so super cute and this top is awesome.
wow that's so cute! I want one for myself too! AND I just so happen to have a friend visiting NYC right now! I know what I'm requesting she get me...
LOOOOOVE it. I'll have to look up how to shire
You make everything look so easy and the instructions
and pictures are so clear. Now I have something different each weekend to make.
This is so cute! I may have to make my daughter's Mickey Mouse shirt like this. I love it!
Dove LOVES her shirt and her daddy (who misses NY terribly) likes it even more. Thanks for the baby love, Prudent Mamas!
LOVE this shirt...I so want to try this!
Love this!! And Dove is so cute :-)
Jaime- I'm afraid of my sewing machine though!
Any tips or tutorials you can suggest? Were you self taught?
X
OMG this is perfect for all those funky threadless tshirts that I have that I never get round to wearing.... watchout nieces funky buble shirts here I come!!!!!!
Cute:):) Wish I could figure out how to "boy-ify" it for my baby!!
This is so great. I have a load of daddy's old t-shirts that have stains, etc. Now my little girl can wear them. YAY! Thank you!
Umm...OK. Am I crazy? I don't have any baby girls to make this for, but I want to make one for ME! Would an adult look ridiculous in this? Might have to try it anyway. :)
This is so cute! I actually LOLed at the "You're also weird."
I'm so excited I figured out how to use elastic thread in my machine and made a little dress version of this project! Thanks for making this tutorial! So many shirts will now have new life as little dresses and shirts for my baby girl.
http://timpandababy.blogspot.com/2010/10/fear-turtle.html
I made a dress with the top and cap sleeves like this.. too bad we can't post pics. I don't have a blog to add a link. Thanks for the tutorial, it came out SO CUTE!
Lisa! send us a pic using the contact us form or post it in our Flickr pool! We'd love to see it.
i laughed out loud during your tutorial...the bit about being weird if you like your baby in strapless top..thankyou for brightening my day...ps i LOVE prudent baby
I made a dress and posted it on my blog! Love it! and love you!
http://pandiolalane.blogspot.com/2011/02/recycled-t-shirt-dress.html
Gah! So cute and easy! Doing this tonight! Thanks for getting me addicted to elastic thread.
Post a Comment
Subscribe to Post Comments [Atom]
<< Home