body { background:#fff url("http://www.blogblog.com/dots/bg_dots.gif") 50% 0; margin:0; padding:0 10px; text-align:center; font:x-small Verdana,Arial,Sans-serif; color:#333; font-size/* */:/**/small; font-size: /**/small; } /* Page Structure ----------------------------------------------- */ @media all { #content { background:url("http://www.blogblog.com/dots/bg_3dots.gif") no-repeat 250px 50px; width:700px; margin:0 auto; padding:50px 0; text-align:left; } #main { width:450px; float:right; padding:50px 0 20px; font-size:85%; } #main2 { background:url("http://www.blogblog.com/dots/bg_dots2.gif") -100px -100px; padding:20px 10px 15px; } #sidebar { width:200px; float:left; font-size:85%; padding-bottom:20px; } #sidebar2 { background:url("http://www.blogblog.com/dots/bg_dots2.gif") 150px -50px; padding:5px 10px 15px; width:200px; width/* */:/**/180px; width: /**/180px; } } @media handheld { #content { width:90%; } #main { width:100%; float:none; } #sidebar { width:100%; float:none; } #sidebar2 { width:100%; } } html>body #main, html>body #sidebar { /* We only give this fade from white to nothing to browsers that can handle 24-bit transparent PNGs */ background/* */:/**/url("http://www.blogblog.com/dots/bg_white_fade.png") repeat-x left bottom; } /* Title & Description ----------------------------------------------- */ @media all { #blog-title { margin:0 0 .5em; font:250%/1.4em Georgia,Serif; color:#353; } #blog-title a { color:#353; text-decoration:none; } #description { margin:0 0 1.75em; color:#996; } #blog-mobile-title { display:none; } #description-mobile { display:none; } } @media handheld { #blog-title { display:none; } #description { display:none; } #blog-mobile-title { display:block; margin:0 0 .5em; font:250%/1.4em Georgia,Serif; color:#353; } #blog-mobile-title a { color:#353; text-decoration:none; } #description-mobile { display:block; margin:0 0 1.75em; color:#996; } } /* Links ----------------------------------------------- */ a:link { color:#488; } a:visited { color:#885; } a:hover { color:#000; } a img { border-width:0; } /* Posts ----------------------------------------------- */ .date-header { margin:0 0 .75em; padding-bottom:.35em; border-bottom:1px dotted #9b9; font:95%/1.4em Georgia,Serif; text-transform:uppercase; letter-spacing:.3em; color:#663; } .post { margin:0 0 2.5em; line-height:1.6em; } .post-title { margin:.25em 0; font:bold 130%/1.4em Georgia,Serif; color:#333; } .post-title a, .post-title strong { background:url("http://www.blogblog.com/dots/bg_post_title.gif") no-repeat 0 .25em; display:block; color:#333; text-decoration:none; padding:0 0 1px 45px; } .post-title a:hover { color:#000; } .post p { margin:0 0 .75em; } p.post-footer { margin:0; text-align:right; } p.post-footer em { display:block; float:left; text-align:left; font-style:normal; color:#996; } a.comment-link { /* IE5.0/Win doesn't apply padding to inline elements, so we hide these two declarations from it */ background/* */:/**/url("http://www.blogblog.com/dots/icon_comment.gif") no-repeat 0 .25em; padding-left:15px; } html>body a.comment-link { /* Respecified, for IE5/Mac's benefit */ background:url("http://www.blogblog.com/dots/icon_comment.gif") no-repeat 0 .25em; padding-left:15px; } .post img { margin:0 0 5px 0; padding:4px; border:1px solid #cca; } /* Comments ----------------------------------------------- */ #comments { margin:0; } #comments h4 { margin:0 0 10px; border-top:1px dotted #9b9; padding-top:.5em; font:bold 110%/1.4em Georgia,Serif; color:#333; } #comments-block { line-height:1.6em; } .comment-poster { background:url("http://www.blogblog.com/dots/icon_comment.gif") no-repeat 2px .35em; margin:.5em 0 0; padding:0 0 0 20px; font-weight:bold; } .comment-body { margin:0; padding:0 0 0 20px; } .comment-body p { margin:0 0 .5em; } .comment-timestamp { margin:0 0 .5em; padding:0 0 .75em 20px; color:#996; } .comment-timestamp a:link { color:#996; } .deleted-comment { font-style:italic; color:gray; } .paging-control-container { float: right; margin: 0px 6px 0px 0px; font-size: 80%; } .unneeded-paging-control { visibility: hidden; } /* More Sidebar Content ----------------------------------------------- */ .sidebar-title { margin:2em 0 .75em; padding-bottom:.35em; border-bottom:1px dotted #9b9; font:95%/1.4em Georgia,Serif; text-transform:uppercase; letter-spacing:.3em; color:#663; } #sidebar p { margin:0 0 .75em; line-height:1.6em; } #sidebar ul { margin:.5em 0 1em; padding:0 0px; list-style:none; line-height:1.5em; } #sidebar ul li { background:url("http://www.blogblog.com/dots/bullet.gif") no-repeat 3px .45em; margin:0; padding:0 0 5px 15px; } #sidebar p { margin:0 0 .6em; } /* Profile ----------------------------------------------- */ .profile-datablock { margin:0 0 1em; } .profile-img { display:inline; } .profile-img img { float:left; margin:0 8px 5px 0; border:4px solid #cc9; } .profile-data { margin:0; line-height:1.5em; } .profile-data strong { display:block; } .profile-textblock { clear:left; } /* Footer ----------------------------------------------- */ #footer { clear:both; padding:15px 0 0; } #footer hr { display:none; } #footer p { margin:0; } /* Feeds ----------------------------------------------- */ #blogfeeds { } #postfeeds { padding-left: 20px }

Prudent Baby

Get sewing how to, sewing tutorials, and sewing help to learn sewing. We offer sewing tutorial for sewing moms.

Thursday, October 28, 2010

Last Minute Costume - Easy Poodle Skirt


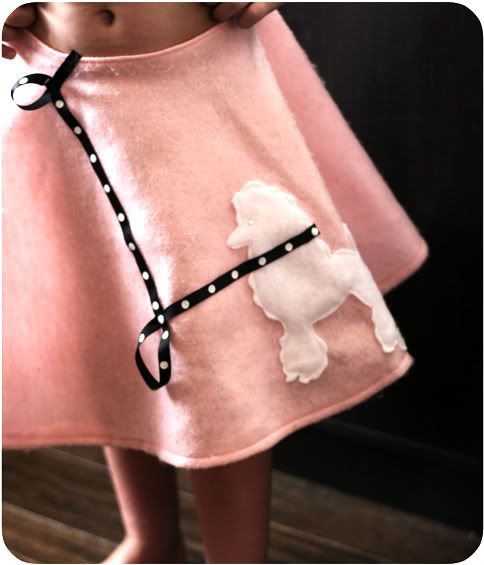
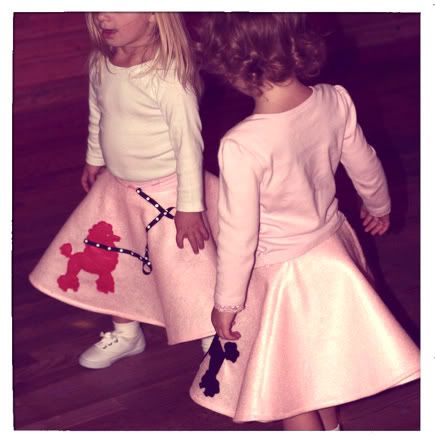
Wendy from Gurgle Turtle sent me this picture of her super cute poodle skirts she made her girls and I just HAD to beg her to share her tute with y'all.  It's crazy simple but with such polished results, you can totally whip one up before the friday school halloween parade!  Take it away Wendy from Gurgle Turtle...

So I wanted to make my little girls some poodle skirts without spending hours dealing with patterns or elastic waistbands. The girls would only be wearing these for a couple of hours, so why spend too much time making them? That's when I decided to make the poodle skirts in a wrap style. Super easy, super fast, and totally cute!

Get the full Easy Peasy Poodle Skirt Tutorial after the jump...

And remember, any comment you leave this week could win you some special secret mystery trim from Jacinda's stash, so show Wendy some love!


Easy Peasy Poodle Skirt Tutorial

Ok here we go:
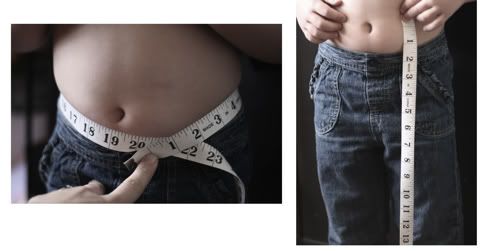
First, measure your little girl's waist. Add 2 to 3 inches because it's going to "wrap" or overlap. Then measure the length you want the skirt to be. Add a 1/4 inch for the hem you are going to sew.

(*note* -if you are using felt, and want to make this even easier, don't sew a thing! Felt won't unravel or fray! It would look nicer with finished edges, but if that's not important, skip it!)


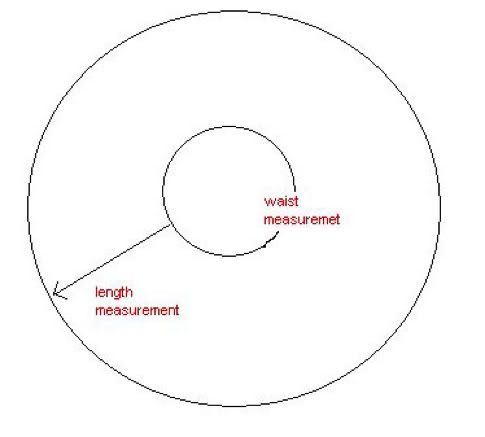
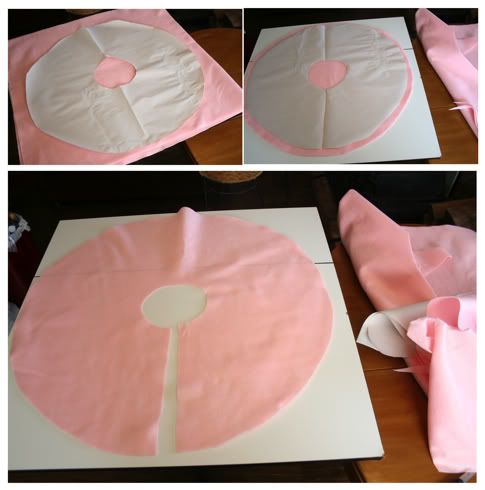
Next, using a big piece of paper or newsprint, draw a circle the size of your little girl's waist measurement. In my case, it was 22 inches (20 inch waist plus two inches of overlap). Then you are going to use your length measurement and make a bigger circle around your first one:


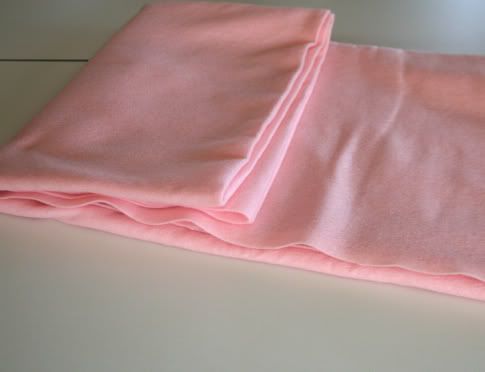
Ok, so take these measurements and figure out how much felt you need. In my case, I needed a square of felt 35 inches by 35 inches to make one. (I made three skirts, so I purchased more)

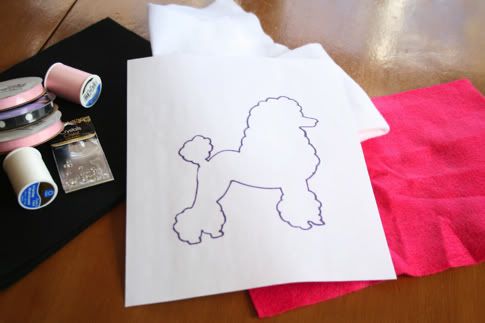
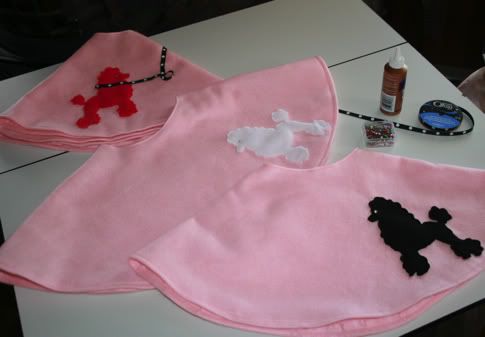
You'll also need some felt for a poodle, some ribbon for a leash, a rhinestone for an eye, and thread to sew. (I used Tacky Glue to put the finishing touches on, so this could still be a no-sew project if you'd prefer!)

I could not draw my own poodle outline for some reason, so I found an outline here: Poodle Shape


Alright, lay your felt out and start cutting your circle. Cut it open in one spot. It's gonna wrap!


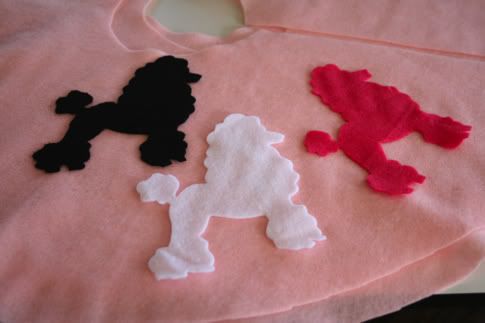
Cut out your poodle applique.


If you are not sewing, this is what an unfinished edge looks like.

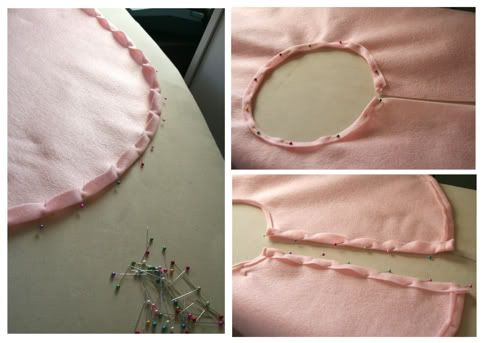
If this is what you'd prefer, then skip down the page a bit. If you are going to sew, then Sew all of your edges:


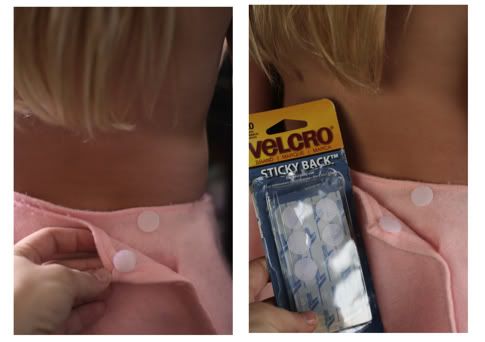
I used these convenient little sticky back Velcros to close the wrap. These can make you life so easy!


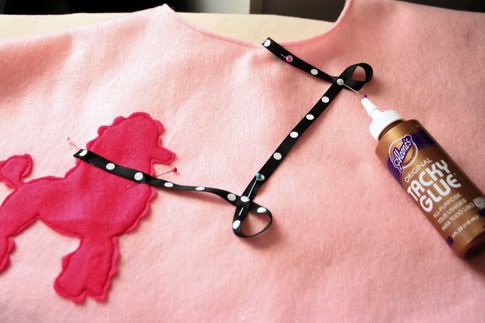
Now it's time to glue the poodles! Figure out where you'd like to place them.


Get out the Tacky Glue and go to town!


I left the pins in place while the glue dried. Don't forget to glue a sparkly little eye on the dog!
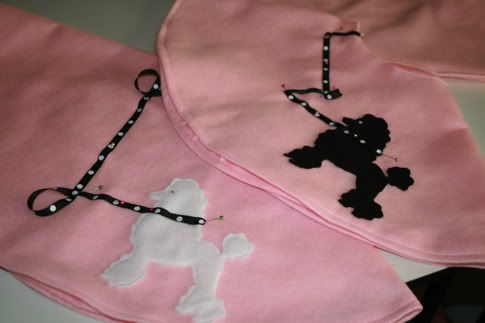

There you have it!


After it is all dry, have her try it on. Watch her twirl and admire your work.
You just made a 1950's Poodle Skirt in under 30 minutes!

Thanks Wendy! This is so cute. Don't her girlies look adorable?

Labels: , , , , , ,

14 Comments:

Blogger blithe & arden said...

When I was younger my mom made my sisters and I poodle skirts very similar to these! I remember feeling so awesome in that big twirly skirt. Definitely my favorite Halloween costume growing up. This tutorial is great and brings back lovely memories for me! I will be filing it away for next year. My one year old daughter already has plans to be a black cat. :) Thanks for sharing, Wendy!

October 28, 2010 at 4:59 AM  
Blogger Ooty said...

thanks for this! So pretty =)

October 28, 2010 at 5:07 AM  
Blogger Katielin317 said...

Cute! I just posted some super simple costumes on my blog today too! http://hipposanddinosaurs.blogspot.com/2010/10/halloween-costumes.html

October 28, 2010 at 6:48 AM  
Anonymous Anonymous said...

I wonder how easy this would be to do for an adult. I made my daughters' costumes, but I haven't decided whether I will dress up. But like you always say "When given the opportunity, wear a costume." And you know I live by what you post on here!!

October 28, 2010 at 8:07 AM  
Blogger ralus said...

i was thinking about a costume for a little witch.
i have an ideea for the dress now.

October 28, 2010 at 9:03 AM  
Blogger SandyQuilts said...

Love using felt ... doesn't ravel so need to hem. I've made plenty poodle skirts in my days. Oh gosh one year I had to make a "coke" bottle instead of a poodle. What fun that was.

October 28, 2010 at 10:17 AM  
Blogger Brian and Courtney said...

Thanks for this post, believe it or not it's hard to find a poodle skirt tutorial!

October 29, 2010 at 12:03 AM  
Blogger Anne said...

Awesome!! I linked to your tutorial over at Craft Gossip Sewing:
http://sewing.craftgossip.com/tutorial-last-minute-poodle-skirt-costume-for-little-girls/2010/10/29/

--Anne

October 29, 2010 at 7:02 AM  
Blogger Danae said...

So adorable!!!

October 29, 2010 at 10:04 AM  
Blogger valkuan said...

What a wonderful tutorial!! Wish I have a girl to dress up.

October 29, 2010 at 10:41 AM  
Blogger babalisme said...

I love poodles!! Oh my, they are just almost too cute for words. And the felt poodle, if resized, can make a great ponytail holder or a hairclip!

October 30, 2010 at 6:09 PM  
Blogger ti_jean_54 said...

Great skirt.I will have to make one for my Smallest grand-daughter.And then make her big sister one so they can play dress-up.1 1/2 yr old just loves to even sleep in big sis's s t-shirts.
She will love having same as Sister.

October 31, 2010 at 2:18 AM  
Blogger Sher' Cares said...

Love the skirt, I am making one for my daughter and myself for a Sock Hop Valentine's Day dance at school. I noticed you did something to finish your poodle applique. What did you do to make it look slightly puffed and crimp the edges?

Thanks,
Trying to be a crafty mom, but have along way to go.

February 7, 2011 at 5:26 AM  
Blogger Shirley said...

thanks so much for your tutorial, you saved me! had to make it for my daughter's concert choir tomorrow night.

April 25, 2011 at 2:18 PM  

Post a Comment

Subscribe to Post Comments [Atom]

<< Home