How to Make Fabric Slippers with Free Pattern

Homemade slippers, what could be cozier? After all, The Season of Cozy is upon us.
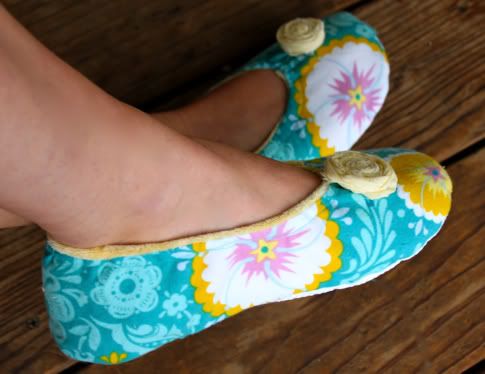
These are non-slip slippers and they have a super comfy minky lining. I'll tell you all about how to make them non-slip and how to make a sole, along with a free pattern, so you too can get cozy.
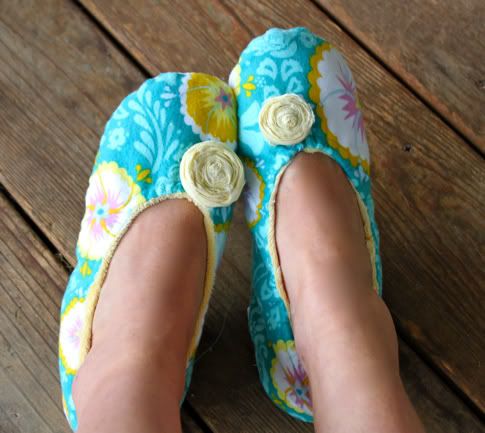
And I had fun making the Rolled Fabric Flowers we posted last week as little embellishments. Gorg, right?
Get the full How to Make Slippers Tutorial and Free Slipper Pattern after the jump...
And remember, leave a comment on this or any post this week and you might win yourself some fabric glue!
How to Make Fabric Slippers with Free Pattern
So you'll need a few things to get started. You'll need some fabric for the outside and the lining. I used pretty Anna Maria Horner Folksy Flannel Fortune in Marine, and this AMAZINGLY luxurious Minky - Moda Snuggles Whimsy in Butter (seriously the nicest minkee i have ever touched) as the lining. I think they look pretty cute together, right?
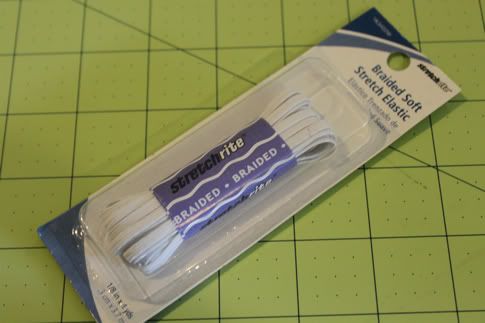
You'll also need some 1/4" elastic, less then a yard (for size 9 feet you'll need 22 inches -2 pieces each 11" long- to be exact).
Now, you can skip an insole but your slippers won't be very comfy, so what's the point in that. So buy a pair of these in your size: washable insoles.
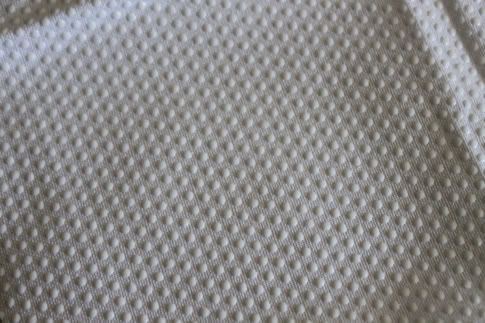
And then to have a nice non-slip bottom pick up some of this (you can make about 3 pairs with this $3 package): Jiffy Grip
1. So download the free slipper pattern and print it out here: Prudent Baby Slipper Pattern. It's for my feet which are a massive size 9. So to edit it, you can make them shorter by cutting a bit out of the middle of the sole. If you cut out an inch, then also cut out an inch on the length of the side piece. I hope that makes sense. But at the end of the day, these are slippers and they have an elastic top, so they are very flexible when it comes to sizing. You can also use a slipper or shoe that fits you to create your own pattern, using ours as a guideline. So get the Free Prudent Baby Slipper Pattern here.
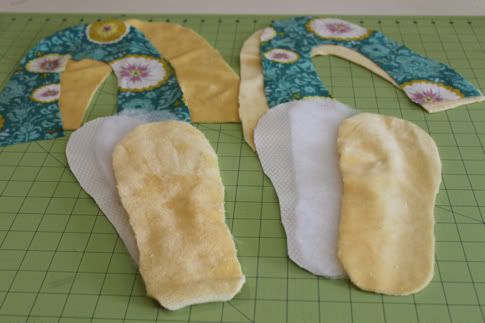
2. Now you need to trace and cut out your pattern pieces. For the sole you need 2 pieces in Jiffy Grip, 2 pieces in batting (or more batting pieces if you want them even cozier), and 2 of your lining (minky in my case). These slippers aren't right foot/left foot just to keep it simple. Then for the slipper upper you need two pieces of lining and two pieces of outer fabric (flannel in my case):
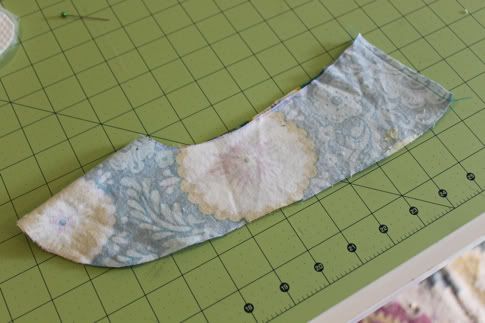
3. Now grab one of your outer pieces and fold it in half right sides facing and sew up the straight edge. This is your heel:
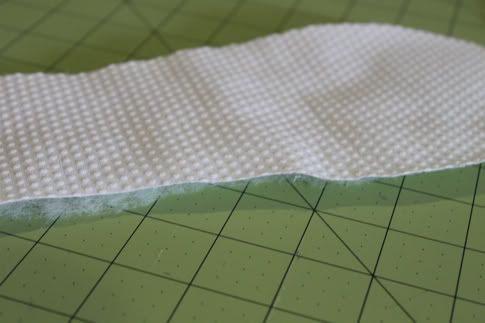
Lay one piece of batting, then put your jiffy grip on top of it, right (bumpy) side up:
Then take your upper and pin it right side facing to the sole, through the jiffy grip and batting. Start by pinning the center of the heel, then the center of the toe, then the center of the sides, so it all stays nicely aligned:
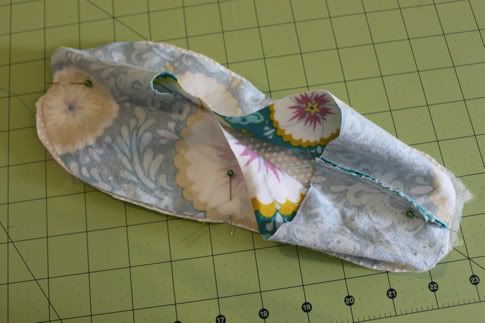
Continue to pin, edges aligned, all the way around:
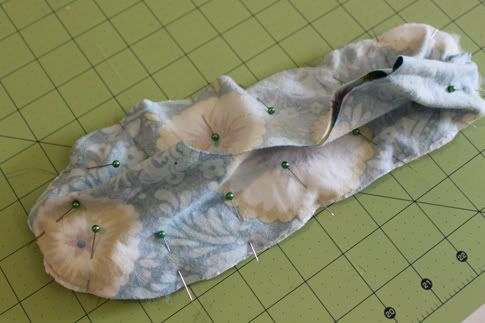
Sew near the edge with a straight stitch, then trim your edges:
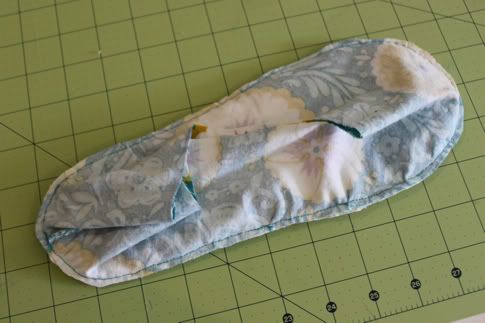
When you turn it inside out it will look like this, you've made the shoe outer:
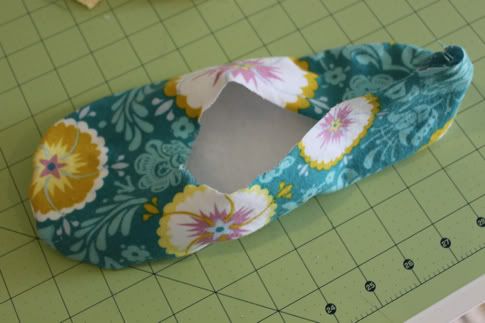
4. Now we repeat with the lining for the same foot. Fold the upper in half and sew the heel together along the straight edge:

Put the lining sole right side up, then pin the lining upper to it, right sides facing:
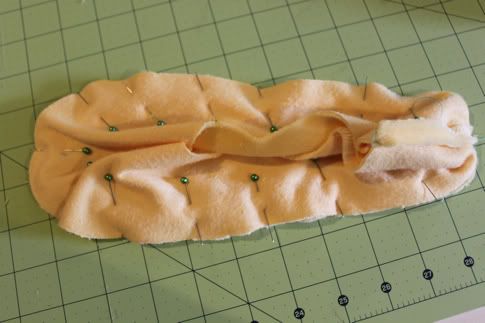
This time sew almost all the way around with a straight stitch, but leave the base of the heel open, backstitching at the beginning and end:
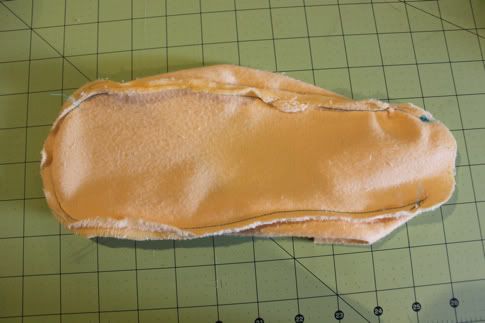
5. Now make sure your outer shoe is inside out:
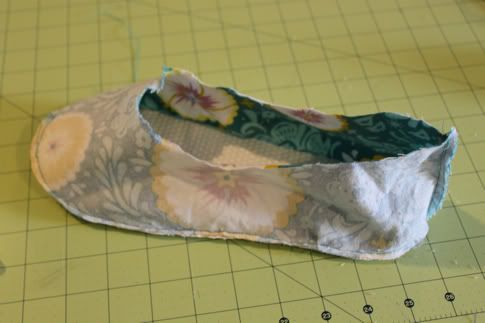
And the lining is right side out:
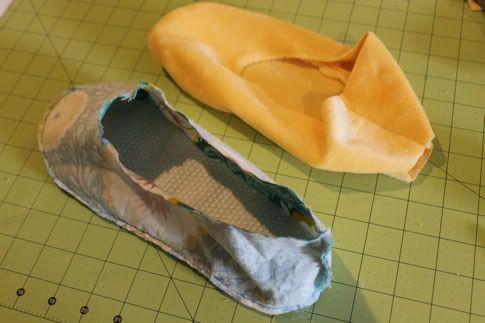
Fit the lining into the shoe (now right sides are facing) and pin at the heel with the seams open:
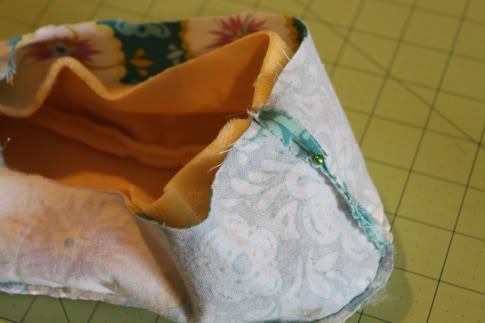
Pin all the way around the shoe opening:
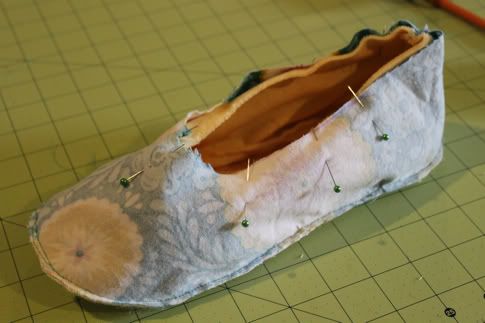
Sew in place at the edge with a straight stitch all the way around, then trim your edge:

6. Now reach in the hole in the lining of the heel and turn your slipper right side out:
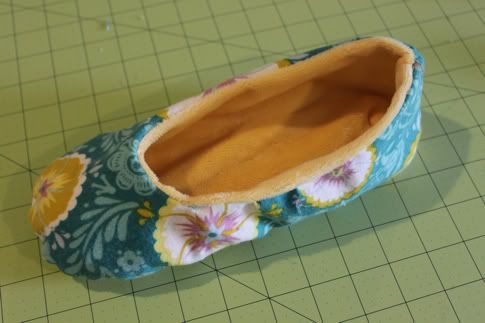
We need to sew a channel around the top for our elastic.
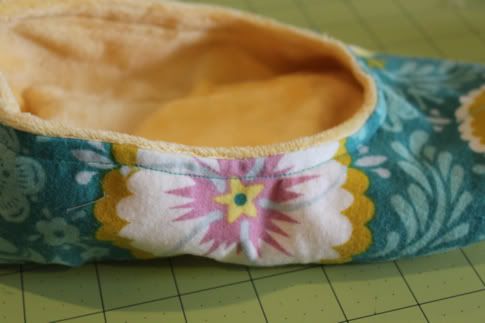
So start on one side of the heel seem, back stitch, sew all the way around the shoe opening about 1/4-1/2" down from the seam, stopping a little on the other side of the heel so there's an opening to thread your elastic through like so:
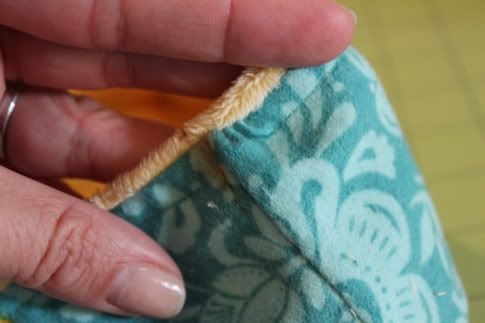
7. Now grab your elastic (mine was 11" - start longer then cut it if you need to after trying it on) and go through the hole in the heel lining to thread it all the way around the channel we just sewed:
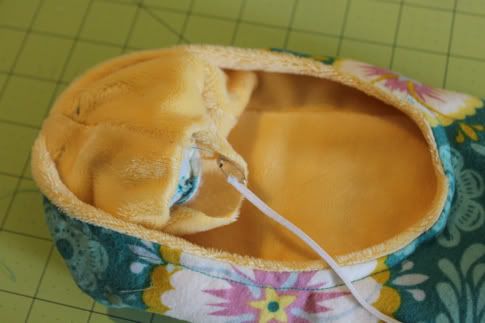
Pull it out the other side through the opening in the heel. Try it on, see how long you need it to be:
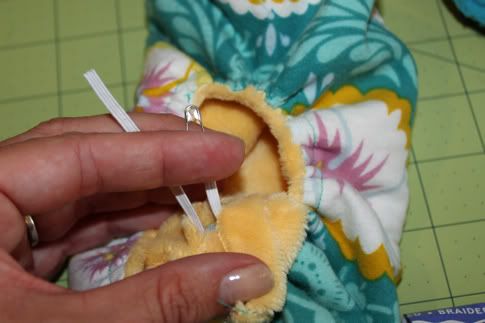
Sew it together with a zig zag:
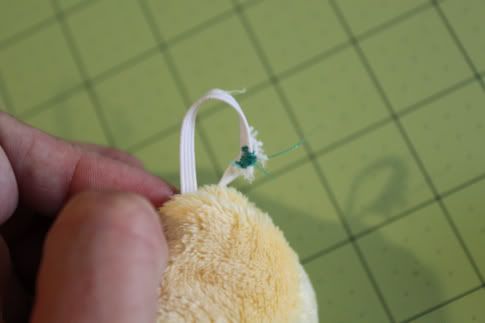
Push it back into the casing and sew the opening between your casing start and finish point closed:
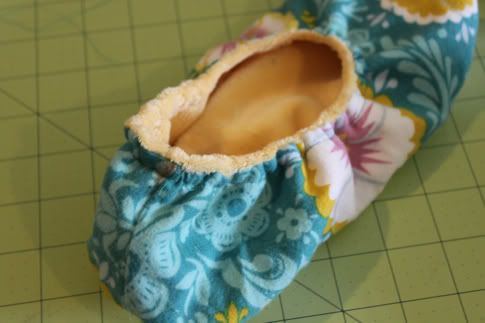
8. Now pop open the hole in the lining of the heel:
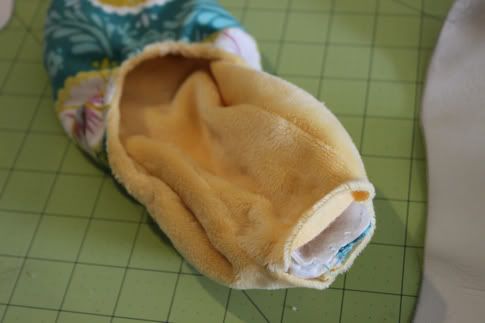
Push your shoe insert in:
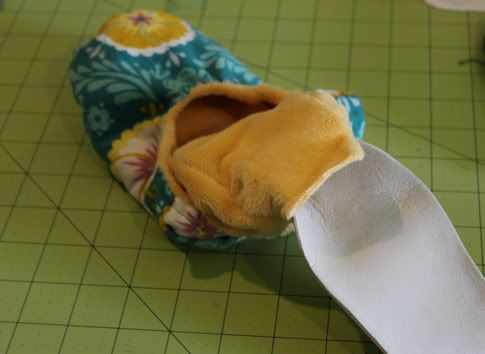
And sew the hole closed. You could slip stitch but this is the inside of a slipper, I wasn't stressing the finishing details, so I just closed it with a straight stitch on my sewing machine:
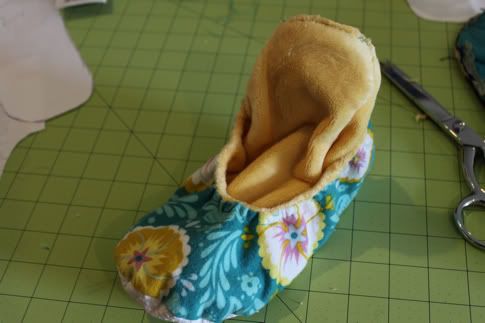
Push your shoe back into place. Now make some rolled fabric flowers or pom poms or what-have-you for decoration (or none, whatever your pleasure) and sew them on.
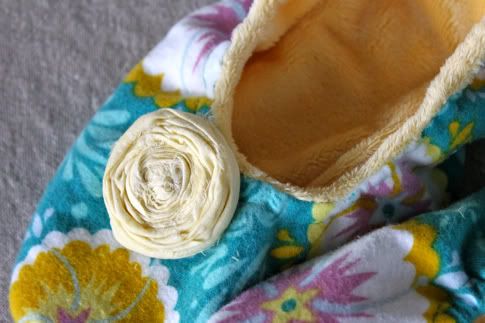
Finished and it feels so good!
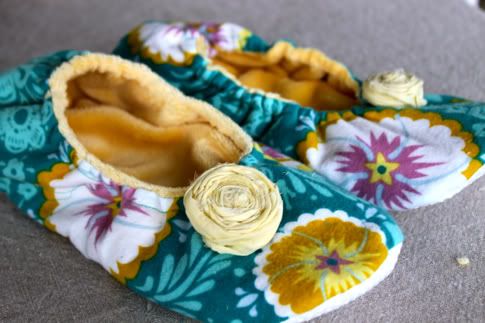
Oh wait, I forgot to mention you have to start all over and make a second shoe. That's the thing with shoes. And pillows. And earrings. So anyway, make another one. OK, now you're done.
Cozy up!

I can't wait to make a tiny matching pair for Scarlet! And i can't wait to see some pictures if you decide to make these!
Labels: Clothing, DIY, Gifts, Hot Mess Mommy, In One Evening, Sewing, Templates, The Season of Cozy

45 Comments:
Perfect gift for a baby shower! I need to make some for my vacation, I mean, my days in hospital. So pretty & love the roses!
The title to this post showed up in my google reader last week, and I was so disappointed when it wasn't actually posted yet. These are cute, and would make a great gift with an eye mask and other girly stuff :-)
Beautiful!!! I think they would make PERFECT holiday gifts! hmmm....now, so many fabrics to choose from...
(thanks for the pattern!!)
FINALLY someone in blogland with big feet!!
Adorable! I am going to steal your idea and make tiny slippers for my little girl. So cute! Is that jiffy grip washable?
These are super cute! My Mamaw loves her slippers these would be awesome for her. Plus if she knew I made them that would make it even better for her!! =) I actually just bought some elastic last night so I just need a couple of other things and I can do this!!
Thanks.
Angie S.
After having my twins my feet were a size 9. Yikes! Finally an advantage to these "massive" feet-I don't have to resize this wonderful pattern! I'd love it if you'd post the pattern for Scarlet's when you make them. I'd like to make some for my girl, too.
If your size 9s are massive, what would you call my size 11s? The flowers on each slipper look great. BTW My father told me that larger feet are a blessing because they gave me a solid base so I wouldn't be blown away in a heavy wind! I live in the state of hurricanes.
ok now i am super self conscious about my giant feet. and yes, emily, jiffy grip is washable. it's awesome! great for making jammies and gardening gloves too!
Um, Size 9 is NOT MASSIVE! Be nice to Jaime and her clown feet. FYI, I'm a size 10.
So cute! I've been making my baby girl little felt shoes much the same way, but my sewing machine is broken so I've been hand sewing. To make them non-slip, I draw with puffy paint on the bottom.
i love these, and i can't wait to make a pair of ostentatious ones for my mom this christmas!
Those look great. I may have to make some for Christmas for my daughter.
love this idea! thanks for sharing the tutorial. =)
Yeah!!! Thank You so much for this tutorial! I want to make some pairs for my daugther to use at the day care. Here in Finland we don't use shoes inside the places, but the day care is cold and wearing just the socks is not enough... I think those slippers would be perfect for she use there.
Love these slippers! and its a great tutorial too!
Very easy to follow..makes me want to go right out and get some fuzzy fabric and make a pair right now. Thanks so much for sharing!
These are so cute and seem so easy. I'd love to give them a try! Great job!!! :-)
THESE are awesome, I will make a few pairs for myself and for gift giving :) LOVE wearing slippers like this, i am wearing a pair right now as well lol :)
brilliant tutorial! These are great!!!
These are awesome! I have been wanting to make some slippers for my daughter. I have a question though, her feet are very tiny so I don't think I can buy insoles for her. Could I just use extra layers of batting? What type and how many layers of batting would you recommend?
hi Anna - so for baby feet i recommend crafting foam cut into the sole shape. not sure if you can wash it though? if she's not walking a bunch of layers of batting should do the trick
This comment has been removed by the author.
i love how they're ever so slightly retro feeling...but entirely adorable. can't wait to *try* to make them! they're perfect for a craft swap my friends and i have coming up!
I cannot wait to make these! I hope it's alright that I shared your link with my readers this morning. :)
http://www.positivelysplendid.com/2010/10/saturday-standouts.html
Have a terrific weekend!
Amy
SO CUTE! And I'm extra super excited because I have massive size 9 feet like you, too. The better stability, my dear, right?
We just love this project at www.WeAllSew.com, and we are adding it to our list of favorite project links this Friday! Please let me know if you have any questions about being a featured project at WeAllSew.com - Erika
Best ever tutorial for homemade slippers! I never comment anything, but this time I`am making exception.
Ana
I love it! but how do you change the size, esp to a childs foot?
SUPER cute. Would be such a cute giftie item for baby shower or whatnot. And yeah, I'm size 11 too! Tough to find cute slippers in my size, so now I can just make some. :)
loooove this and plan on doing these and the eye masks for all the ladies in my family for their b-days this next year. one question - where did you find the slipper insoles?
I finally made a pair :) ...size 9 is too small for me so off to my cousin they will go! Now to figure out how to send you a picture!
Thank you, thank you, thank you! This tutorial saved my sanity, I'll be linking to it in my post tomorrow! Francesca
Hi, Thank you for this wonderful tutorial. This is my version.
http://eccosophie.blogspot.com/2011/05/ancora-pantofole.html
Denise
but weres the pattern
Ooh very cool - and my size! :D Here's my interpretation.. (because I have no idea about this Jiffy stuff and hadn't had a chance to look for it)
http://shelikestosew.blogspot.com/2011/05/warm-feet.html
Thank you! My feet are awesomely warm now :)
Hi there, hoping you can answer my question. Am working on a pair of these right now and, I may be missing something, but I don't see that you've mentioned what size seam allowance is built into this pattern anywhere. It looks like 1/4 inch?
Love these. I've made two pairs already. It was quick and they are great for using left over fabric!!
I love this. I share it in my blog here and link it back to you http://krasart.com/2011/02/28/%D0%BF%D0%B0%D0%BD%D1%82%D0%BE%D1%84%D0%B8-%D0%BE%D1%82-www-prudentbaby-com/
I love this!! I made one for my husband and he love it! Thanks for sharing this pattern! Kisses from Brasil!! Elaine
Awesome tutorial, this will be happening for our hand made Christmas this year.
Great tutorial. I was trying to make some slippers for my little girl with fleece, but this makes it so much easier! Thank you!
I cut out the size 7.5 but when I finished it was a size 6. What happened? Love this! Will continue to make. thanks.
I picked up some old wool blankets for a steal at a local thrift shop so I'm thinking of cutting a double thickness of wool for the insoles for a little extra comfy warm zip. Thoughts?
Just made these house slippers. Thanks for tutorial. Come by and take a peek.
http://jakoblaylaruby.blogspot.com/2012/01/my-vintage-sheet-house-slippers.html
Finally I can make these thanks to your step-by-step photos...before I have gotten stuck at some point when following other directions. thank you!
Post a Comment
Subscribe to Post Comments [Atom]
<< Home