DIY Tinkerbell Fairy Costume

So I have mentioned that Miss S requested a Tinkerbell costume for Halloween, and you guys know me, I had to take that as a challenge and make one, instead of spending like two dollars to buy one (seriously, maybe you should just buy one).

I took inspiration from a bunch of places, including this awesome homemade costume I found through some creative googling. I already shared with you how to make Homemade Fairy Wings and the Tutu I whipped up as a sort of petticoat. Now I'll share the full tutorial for the costume. This will work for pretty much any fairy/princess get up your little one requests.

At the end of the day, I'm really glad I did it, I mean, the look on her face when she saw it...priceless.
Get the full Homemade Tinkerbell / Fairy Costume Tutorial after the jump...
And remember, leave a clever, cute, or kind comment on any post this week and you could win that 1/2 yard of Nicey Jane Oilcloth!
Homemade Tinkerbell / Fairy Costume Tutorial
To make this complete costume as is, you'll need to purchase or make some wings: Here's our Easy Homemade Fairy Wings Tutorial.
You'll also need to make a tutu: Here's my Tinkerbell Tu Tu.
1. Take some measurements of your costume-wearer.
-Chest measurement & Waist Measurement (on scarlet this is 20 inches for both)
-Bodice length: Measure down from the top of where you want the bodice to where you want the waist (on Scarlet, 8 inches)
-Skirt length: Measure from where you want the waist to the bottom of the skirt (on Scarlet, 9 inches)
2. Acquire your materials. For the tutu you need 4 yards of tulle and some elastic, see the tutu-torial for details. For the dress you'll need 2 yards satin (if there's anything I learned from Project Runway it was don't sew with satin, but actually it wasn't that bad) and some grommets
(or you can use a zipper).
3. Make the straps. Tinkerbell doesn't have straps but her actual outfit is too, ahem, slutty for my two year old, so I made it a little more modest by adding straps and reducing the cleavagey-ness. So cut a 2.5 inch wide strip of fabric the length of your yard:
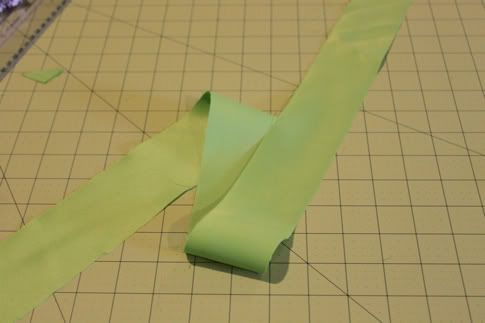
Fold it in half right sides facing and sew up the length:

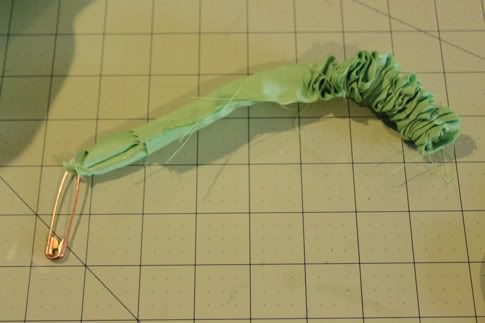
Use a safety pin to loop turn it right side out:
Iron it flat with the seam to the middle of one side:
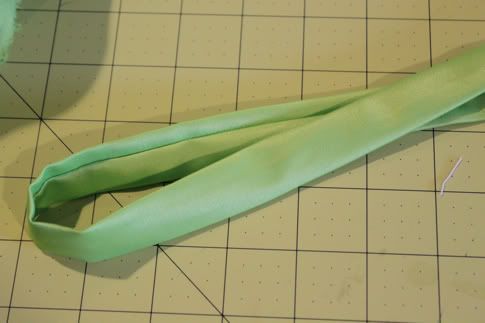
And cut it in half so you have two straps:

4. Now let's make the bodice. Cut two pieces of fabric the width of your chest measurement plus two inches (so 22 inches for Scarlet) and the height of your bodice length measurement plus one inch (so nine inches for Scarlet):

To give it a little tinkerbell flair without doing a deep-v i marked the center, measured down one inch and 1.5 inches to each side:

then another inch away on each side (to allow a one inch area for the strap to attach):

And cut the bodice one inch down all the way to each end:

5. Now lay a bodice piece right side up (this will be the side that shows on your final garment) and lay the straps right side down (so you can see the seam) at the points on the front of the bodice:

Lay your other bodice piece right side down on top and pin:

Pin all the way around all three sides:

Sew all the way around the three sides, leaving the bottom unsewn:

Turn inside out and iron flat:

Now fold the bottom unsewn edge under 1/4" to the wrong side and iron a sharp crease into it:

Set your bodice aside:
6. Now we make the skirt. The skirt is made up of five petals. To make the petals, start by cutting petal shapes. I made three bigger ones and two smaller ones. For each finishes petal you'll need two pieces of satin. The bigger ones I cut matching size shapes 11" long and 9" wide, and the smaller ones 9" long by 8" wide and free handed the petal shape. So take two matching petal pieces and lay them right sides facing, and sew around the two curved sides, leaving the top open:
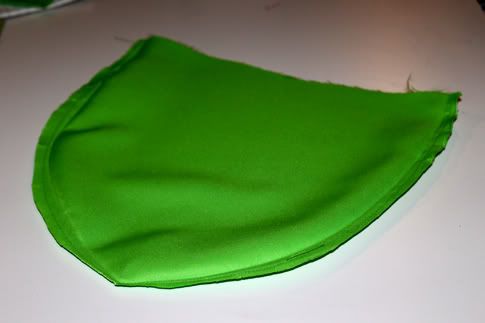
Trim the edges and cut score marks around the curves, then turn inside out, push the edges out and iron flat:

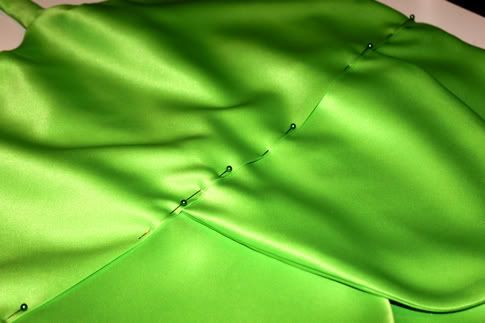
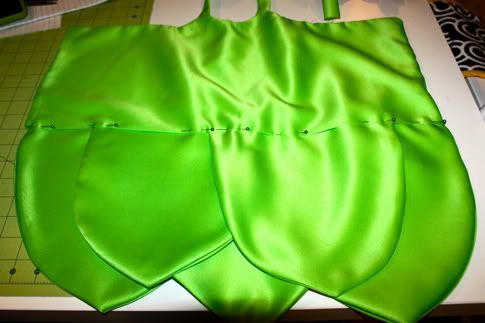
7. Now open up your bodice and lay it right side up (so the seams in your straps are facing away from you). Arrange the petals inside the opening at the bottom of the bodice. I did the three larger ones on the bottom and the two smaller ones centered on top. Pin in place, so the petal tops are enclosed in the bodice opening:
Here's the wide view:
Sew in place with a straight stitch along the bottom of the bodice. Don't worry if it's a little crooked, we are going to cover it up later:

8. Now let's make a simple sash that we will tie around Tink's waist later. So cut a long strip of fabric 6" wide, fold it in half with right sides facing and sew up the long side with a straight stitch, then trim your edge:
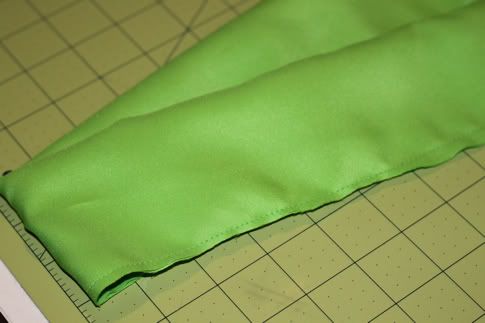
Turn it inside out with a safety pin like we did for the straps in step one. Iron flat with the seam to the center of one side:

Fold the edges of the ends in, making a point, and straight stitch across:

Sash complete:

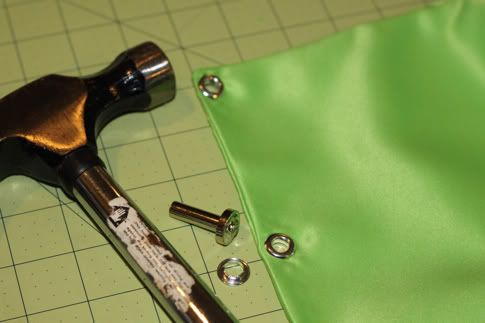
9. Now attache grommets along the back opening of the dress. I used three on either side. Follow the instructions that come with your grommets. It's very simple, you just cut a hole for the grommet, assemble the two pieces and hammer them together. You could also use a zipper, but the grommets are nice because it allows for a little flexibility in your sizing, whereas with a zipper it needs to fit just right.
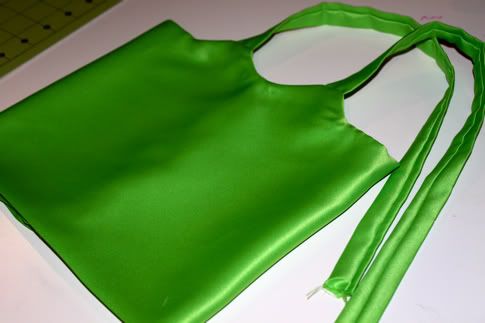
Now cut a strip of fabric about 2" wide, and follow the instructions for the sash above to make a strap to tie your dress on the wearer. You can thread it through after you put it on the girl, but here is what it will look like:

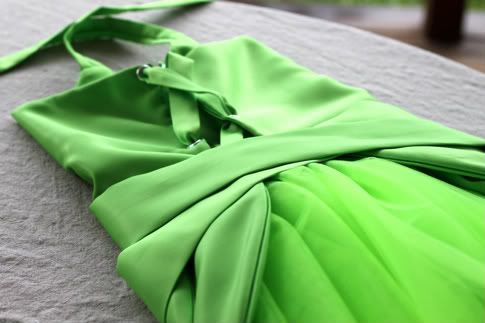
So that's it! Assemble is all so you get an idea of how it will look:

Joy Joy.
So fancy for a little halloween fairy.
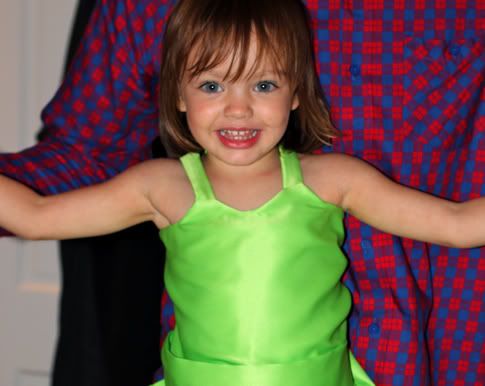
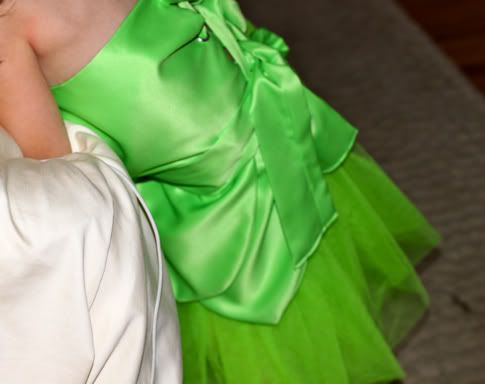
Soooo I didn't have the timing right to do an all-out photo shoot in full costume with daylight and such, but here's a few pics of her prancing around on our bed last night.


So, that's that. Think you might try it? It looks harder then it was, I swear it's totally do-able this weekend if you stay up late Friday and Saturday. Or am I nuts? I might be nuts.
Labels: Clothing, Halloween, In One Evening, Kids, Sewing
posted by Jaime @ 3:30 AM
![]()

39 Comments:
OMG! It's gorgeous! Way to go!
My niece wants to be Tink, too, but we never do store bought costumes. It's worth the late nights to look amazing in costume, so I sent her this link. If I still lived in the same state (boo) I'd so make it for her!
Oh, and the comment about Tink's outfit being a little too, ahem, slutty for these little prudent babies, bahaha! SO true. Thanks for keeping it G rated and still oh so adorable!
That is Beautiful! Maybe you should come over and help me make a Tornado Super hero coustume.
"slutty" - so true! ha ha My two year wanted to be Tinkerbell too! I made the same costume as the homemade one you linked to (it is a Simplicity pattern) :)
aw, it's very sweet! Great job! Okay, now here's another challenge for you. My three year old wants to be a dragon. My three year old girl. She said this based on some strange raggedy colorful adult dress costume, I'm not sure how that's a dragon but obviously this can still be girly as long as it can be declared dragon. Aaaand... go! No? Fine, I have a backup, my SIL has an actual dragon costume. sigh.
Thanks for the final pictures. I LOVE your costume! You are so talented! You are right, the best payment is that huge smile on their faces.
You did an awesome job! That costume is WAY better then anything you find in a store! Plus you inspire me to make more things, thank you!
This is the prettiest costume I have ever seen! I have a granddaughter that would wear this everyday, not just at halloween! She is definitely a girly-girl & green is a great match for her red hair!
Beautiful! Thanks for sharing how you did this!
Just made an Ariel costume for my Maddy girl. SUPER CUTE and way worth the time!
Super cute!!!
That is soooo cute! It makes me want to drop the costume I started making for my daughter and make that one instead! I love it.
So cute! I'll have to bookmark this for when my girl is older. I'm trying to figure out how to make a Dorthy costume for a 9 month old. Her brothers are going as the Lion and Scarecrow. (Oh yeah, how do you make a lion costume for a 9 month old?)
Beautiful! I am up to my eyeballs in Halloween costume sewing right now. Last week, I finished my two-year-old's Purple Pirate costume (per her specific request) and it was a cakewalk compared to my son's choice, an "Evil Dark Night." I'm using Simplicity patterns for both of them, and the pirate was an easy slam-dunk that I made out of purple glittery cotton, purple polka-dot cotton, and dark and light purple ultrasuede. The knight, though? I finally finished making the chain mail hood and the ultrasuede/ chain mail tunic and working with the metallic knit I picked for the chain mail, even with the use of a serger, was such a giant pain in the neck that I am almost sort of thinking that the next step, quilting together cotton broadcloth, batting, and FREAKING TISSUE LAME, will be less of a hassle than easing stretch metallic knit sleeves onto an ultrasuede bodice. Because I must be high. Next year, no carte blanche pattern choices for the kids! I decree that my son must be a vampire instead of anything that involves either lame or metallic knits.
What a beautiful costume! Can't wait to have some little ones to sew costumes for :-)
SO cute! My daughter wanted to be Minnie Mouse for Disneyland and so I could have just bought her a costume....but there is something in me that physically can't buy a licensed costume! Being rational goes out the window completely and is replaced by craft craziness! What is that? My husband would like to find a cure...
I love this(!)- especially the straps and the no toddler cleavage. I can picture this in different colors too.
I love the fabric! I love the bright green!
I actually had a prom dress (a few.....lots of years ago) made out of a satin fabric like that but mine was a pale green/blue color. I actually picked out how I wanted it made and a lady made it for us! Funny story behind it. It had this piece that came down in the front then there was the skirt part. It also had an almost tail part like a man's suit coat in the back. Well, we went out to dinner before prom and I had to use the restroom. Well, I go walking back to the table and realized that OH NO! My skirt part was up around my waste and all that was down was the little portion hanging down in the front! I was MORTIFIED!! I ran back and fixed it....I still wonder if anyone or who saw!
Anyway, I would love to have a dress like that for my little one. She loves to play dress up and this would be something she would love too. Seems like little Miss S really likes it! Oh, it would be pretty in any color I thing too. Red, bright yellow, burgundy, orange, royal blue, purple - simply beautiful. :0)
I love getting your e-mails letting me know what you have created. It makes me miss my sewing machine while I'm working. I dream one day of being at home and getting to create things. It's just awesome what you do. Keep it up because I'm reading. 8^)
Angie
super cute.
So "fairy" cute....awesome costume!
Its the perfect tinkerbell green too!
homemade is so much nicer!
You have surpassed your level of awesomeness by sharing this with us. Thank you so much. You have made this Prudent Mama and her fairy loving babies very happy ladies.
Yeah you could have bought a cheap outfit that might, might last though one night of Halloween parading around, but your dress is amazing! And will be used for dress up until it no longer fits. I've got a princess request from my four year old this year and although I was planning on using one of our old, frumpy Disney-knock off dress, now I'm inspired and tempted to try this. It doesn't seem too complicated.
Oh, and yes, Tinkerbell's outfit is so slutty! My kiddo has a place mat of the fairy and she looks more like Marilyn Monroe in her underwear than a Disney princess!!
Adorable! Have you gotten your daughter to take it off yet? I really really want to send a link on this to a very big Peter Pan/Tink fan who is a dear friend of mine, but I'm scared she will want me to make her a costume. In her (adult) size. I type this as I have yet to start my son's costume. What will he be? A pierogie. Oh my.
Oh my gosh, she looks so happy! That's the best moment, those first moments of putting on a dress that makes you feel so delightfully girly. =D She looks great, and the dress is TOTALLY cute!
Well I think I'll just throw the tinkerbell costume that I bought away now that I see this! I can't have my girl prancing around in something that looks like crap compared to this. Alas I guess I will have to make it doable on my weekend before Halloween...will send pics when its done though!
Should we use your slippers tutorial to make Tink's shoes? I'm thinking it's a must!
This is amazing! I wish it had been around for last Halloween when my daughter decided she wanted to be a sunflower fairy! I just winged it. (pun intended :)
I'm bloody terrified of the idea of sewing a costume but you've broken it down so concisely that I think I might give it a try. Now I just have to turn a tinkerbell costume into a sheep. Clap you hands if you believe!
Hello!
We love your Tinkerbell costume! I’m writing from bulbinblue.com, a new, non-profit website for creative ideas and crafts. Bulbinblue.com provides a space for creative individuals to interact and share ideas, tips, and projects. We’d love to feature your tutorial (text and pictures) in our upcoming costume section. We would also like to translate your tutorial into French and German so that it can be accessible to an even wider audience! We will do all the work of putting the tutorial on the site and translating it, and you will be clearly indicated as the project’s author. If you are interested, please email us at blueteam@bulbinblue.com!
Have a good day!
Olivia from the Blue Team
I made this today and it turned out lovely and WAY more easier than it looks!
This is SO adorable and your little girl looks so happy to be wearing it! I just featured it on my blog's Cutest Handmade DIY Kids Halloween Costumes! Thanks for sharing!
I have a princess loving daughter that would absolutely LOVE this. Think I'm going to have to give it a shot!
Great tutorial! i will make it for my daughter. thanks for sharing.
This comment has been removed by the author.
Made one for my daughter today, and posted pictures too!! Thanks for the great tutorial...
http://pauline-lifewiththeboo.blogspot.com/2011/10/tinkerbell.html
I made this last night for my little Tink and she looks adorable! Just an FYI for anyone reading this- I used a 1/4" seam allowance and 1/4" eyelets for the back. This was trial and error for me so I thought I would share. Jaime, you make sewing with satin look so easy! Maybe it was because I used the cheapy $4.99 satin at Joann's, but man did it shred while I was sewing. Bad words may have been uttered. All and all, I'm glad I did this. My daughter loves it!
AWESOME JOB! And thank you so much for the mention! I have been away from my blog for far too long due to a tough pregnancy, a military move and a deployed spouse. Your compliments/mentions have helped inspire me to get back at it:) Hop over and check out the from scratch mermaid costume I made this year for Halloween...
BTW, I think I will be up ALL night giving MY blog a makeover!
Post a Comment
Subscribe to Post Comments [Atom]
<< Home