Easy Homemade Fairy Wings

Remember last year when s was a zombie for Halloween, and in the zombie costume tutorial I lamented that it was probably the last halloween before she went all princess? I was right (I usually really love to be right, hmm). So this year she has requested a tinkerbell costume.

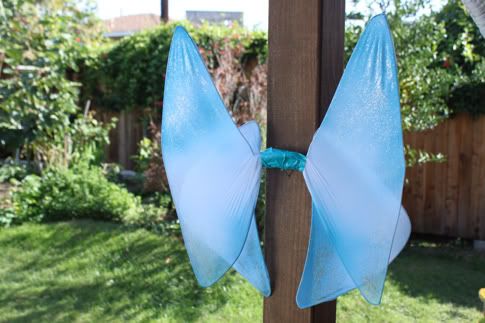
These wings are meant to approximate tinkerbell's wings, but you can make yours a different shape or color to go with your butterflies, bees, dragonflys, fairies, and angels. And you can totally make them with stuff you have laying around the house (I'm just going to go ahead and assume you have glitter in your house). It'll only take maybe 20 minutes. Get to work mama!
Get the full Homemade Fairy Wings Tutorial after the jump...
And remember, any comment you leave this week could win you an entire half yard of nicey jane oil cloth so you can make Jacinda's amazing tote!
How to Make Fairy Wings
You will need:
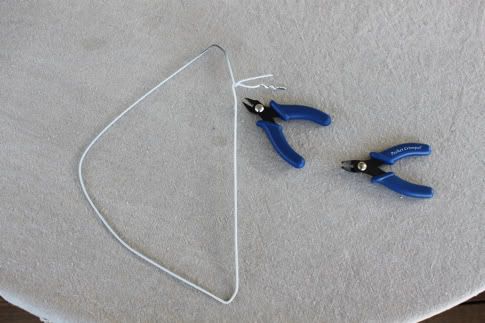
4 wire hangers (white preferably)
Wire cutter (or scissors and determination)
2 pairs of white pantyhose or socks
A little duct tape
Elastic
Spray paint, glitter, feathers or whatever you want to decorate your wings with.

1. Bending the wire. Start by opening up your hangers:
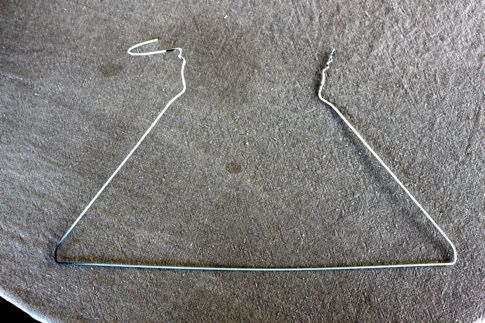
Tinkerbell has four wings, two pointy ones and two rounds ones, but you canmake yours any shape you want or just do two wings (way easier). So I started with the round ones. Unfold your wire hanger and bend it like so:

Twist together and cut off the excess leaving about 2 inches of wire:
Make another one just like that. Now for the pointy ones. I just cut the top off the hangers and stretched the bottom out:

2. Now cut the legs off your tights or grab your knee highs:

Slide them over your wire frames:
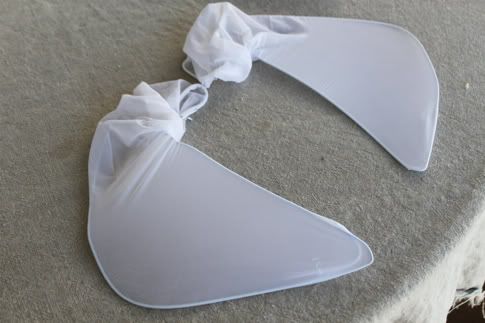

3. Twist the ends of the socks around the ends of the wire and cover with duct tape, covering any pokey wires:
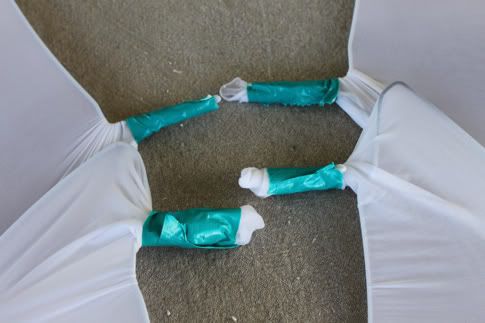
Arrange your wings:

Tape them all together around the center:

4. Now grab your spray paint and go at it. I did the tips and edges in blue, since tinkerbell has blue wings.

I also added glitter by squeezing on some glitter glue:

And smearing it around with a foam brush:

Hang them to dry:
5. Cut a length of elastic twice the width of your kids' chest. Sew it together at the ends in a flat loop like so:

Hot glue the loop in the center of your wings on the side that will be facing your kid's back:

Then wrap another piece of fabric (i used a decorated pantyhose leg) around the center piece, hiding all of the duct tape. Hot glue it into place:

You're done. Put on your little fairy.

Ok maybe they are a little ghetto. I almost didn't post them, seeing as you can buy fairy wings for just a few bucks, but maybe the best idea is to buy fairy wings then decorate them yourself? Either way, she will insist on wearing them all the time.

Thoughts?
Labels: DIY, Halloween, Kids, Under an Hour
posted by Jaime @ 10:00 AM
![]()

23 Comments:
Does any one know if there is a place to buy wire hangers? I don't ever dry clean anything.
Andrea - I'm sure you can go to any dry cleaners, and nab a few. People usually bring back hangers since they accumulate so quickly!
haha - as is the typical crafting dilemma...a lot of effort, for something you can probably buy for a few bucks. but so much better to say you made them! :)
totally cute!
Isn't it funny what we sometimes decide we "need" to make when buying it would be cheaper and easier in the long run? Also, glad that I am not ht only blogger to use the term ghetto in posts!!
PS I wouldn't use the term ghetto to describe these. I think they turned out pretty darn cute!
I love these wings! Authentic Tinkerbell wings for sure! I wish I could convince a 7 month old to wear these.
They are very cute. I think every little girl would love some wings like that. Well, maybe even big girls too :-D
You are right about the wanting to wear them all the time. My daughter has burned through countless pairs of the Dollar Tree variety. Yours look like they might hold up better under the rigors of 4-year-old play.
My husband has learned to stop commenting when I spend $15 and an hour of my time to make something that costs $4 and a 10-minute trip to the store. It's ones of the reasons our marriage works. :)
You might be able to buy then for $4 but can you get EXACTLY what you are looking for? This is awesome for when you want magenta wings with a scalloped edge and a tuft of orange fur and NOTHING ELSE WILL DO. I love them. Perfect tink wings!
I scoured the internet last night looking for a tutorial on making wings....found nothing. I went to Joann's today & purchased some for 60% off that are green (and I wanted purple to match a tutu I had already made my daughter so now I have to make a green tutu)....the wings you made look Great! I am going to march right back to the store, return them and make my purple wings (and not another tutu wahhoo)! Thank-you so much for posting.
Love any tutorial that lists "a little duct tape" as one of the supplies!
I just made my daughter ladybug wings. Yeah, it would have been just as easy to buy a cheap pair, but not as much fun! :)
adorable idea I will try it out for my little niece :)
thanks so much I'm inlove with your site! Im new to it but im always on it!!! :)
Most dry cleaners will gladly give you some hangers if you just ask. I've gotten some when we were going camping and forgot to bring something to roast the hot dogs and marshmallows. I also agree that the wings turned out really cute. You can see from the look on Scarlett's face that she thinks they are really awesome and she is proud to wear them. That is how you can justify spending the extra time to make them.
Dang it! I just realized that I misspelled Scarlet's name. My friend has the same name with 2 t's, so that is what I naturally write. Sorry.
Super cute!
I saw your book featured on ohdeedoh. When I saw it, I smiled and thought, "hey, I know her!" (eventhough I don't really)
My daughter is going as a butterfly this year, so I plan to try my hand at a Monarch butterfly version of this! We'll see how hand painting the wings turns out....it could be great or go horribly wrong really fast :) Guess I'll find out soon!
so adorable. gotta find time to make this for halloween.
My husband often wonders why I make some things that I could buy and use my time for other things... But where's the fun in that?? And it's much better to recycle things laying around the house than buying new (probably made in some other country) things! Love these wings!
So cute, thanks for sharing.
These wings are adorable!
oooooh! i wish halloween was a bigger thing in australia - all the free rein for crafty sewing goodness you can enjoy! then again i think my daughter would love to dress up as tinkerbell all year round lol!
This is great!!With Halloween falling on a Sunday, people around here won't trick or treat. They'll do it on Saturday instead....I'll keep my comments to myself. Sooooo.... I'm inviting kids for a Halloween bash at my house instead. How cute would a house full of fairies be?? Now the trick with be trying to shove my hubby in a pair of these bad boys. lol
Post a Comment
Subscribe to Post Comments [Atom]
<< Home