body { background:#fff url("http://www.blogblog.com/dots/bg_dots.gif") 50% 0; margin:0; padding:0 10px; text-align:center; font:x-small Verdana,Arial,Sans-serif; color:#333; font-size/* */:/**/small; font-size: /**/small; } /* Page Structure ----------------------------------------------- */ @media all { #content { background:url("http://www.blogblog.com/dots/bg_3dots.gif") no-repeat 250px 50px; width:700px; margin:0 auto; padding:50px 0; text-align:left; } #main { width:450px; float:right; padding:50px 0 20px; font-size:85%; } #main2 { background:url("http://www.blogblog.com/dots/bg_dots2.gif") -100px -100px; padding:20px 10px 15px; } #sidebar { width:200px; float:left; font-size:85%; padding-bottom:20px; } #sidebar2 { background:url("http://www.blogblog.com/dots/bg_dots2.gif") 150px -50px; padding:5px 10px 15px; width:200px; width/* */:/**/180px; width: /**/180px; } } @media handheld { #content { width:90%; } #main { width:100%; float:none; } #sidebar { width:100%; float:none; } #sidebar2 { width:100%; } } html>body #main, html>body #sidebar { /* We only give this fade from white to nothing to browsers that can handle 24-bit transparent PNGs */ background/* */:/**/url("http://www.blogblog.com/dots/bg_white_fade.png") repeat-x left bottom; } /* Title & Description ----------------------------------------------- */ @media all { #blog-title { margin:0 0 .5em; font:250%/1.4em Georgia,Serif; color:#353; } #blog-title a { color:#353; text-decoration:none; } #description { margin:0 0 1.75em; color:#996; } #blog-mobile-title { display:none; } #description-mobile { display:none; } } @media handheld { #blog-title { display:none; } #description { display:none; } #blog-mobile-title { display:block; margin:0 0 .5em; font:250%/1.4em Georgia,Serif; color:#353; } #blog-mobile-title a { color:#353; text-decoration:none; } #description-mobile { display:block; margin:0 0 1.75em; color:#996; } } /* Links ----------------------------------------------- */ a:link { color:#488; } a:visited { color:#885; } a:hover { color:#000; } a img { border-width:0; } /* Posts ----------------------------------------------- */ .date-header { margin:0 0 .75em; padding-bottom:.35em; border-bottom:1px dotted #9b9; font:95%/1.4em Georgia,Serif; text-transform:uppercase; letter-spacing:.3em; color:#663; } .post { margin:0 0 2.5em; line-height:1.6em; } .post-title { margin:.25em 0; font:bold 130%/1.4em Georgia,Serif; color:#333; } .post-title a, .post-title strong { background:url("http://www.blogblog.com/dots/bg_post_title.gif") no-repeat 0 .25em; display:block; color:#333; text-decoration:none; padding:0 0 1px 45px; } .post-title a:hover { color:#000; } .post p { margin:0 0 .75em; } p.post-footer { margin:0; text-align:right; } p.post-footer em { display:block; float:left; text-align:left; font-style:normal; color:#996; } a.comment-link { /* IE5.0/Win doesn't apply padding to inline elements, so we hide these two declarations from it */ background/* */:/**/url("http://www.blogblog.com/dots/icon_comment.gif") no-repeat 0 .25em; padding-left:15px; } html>body a.comment-link { /* Respecified, for IE5/Mac's benefit */ background:url("http://www.blogblog.com/dots/icon_comment.gif") no-repeat 0 .25em; padding-left:15px; } .post img { margin:0 0 5px 0; padding:4px; border:1px solid #cca; } /* Comments ----------------------------------------------- */ #comments { margin:0; } #comments h4 { margin:0 0 10px; border-top:1px dotted #9b9; padding-top:.5em; font:bold 110%/1.4em Georgia,Serif; color:#333; } #comments-block { line-height:1.6em; } .comment-poster { background:url("http://www.blogblog.com/dots/icon_comment.gif") no-repeat 2px .35em; margin:.5em 0 0; padding:0 0 0 20px; font-weight:bold; } .comment-body { margin:0; padding:0 0 0 20px; } .comment-body p { margin:0 0 .5em; } .comment-timestamp { margin:0 0 .5em; padding:0 0 .75em 20px; color:#996; } .comment-timestamp a:link { color:#996; } .deleted-comment { font-style:italic; color:gray; } .paging-control-container { float: right; margin: 0px 6px 0px 0px; font-size: 80%; } .unneeded-paging-control { visibility: hidden; } /* More Sidebar Content ----------------------------------------------- */ .sidebar-title { margin:2em 0 .75em; padding-bottom:.35em; border-bottom:1px dotted #9b9; font:95%/1.4em Georgia,Serif; text-transform:uppercase; letter-spacing:.3em; color:#663; } #sidebar p { margin:0 0 .75em; line-height:1.6em; } #sidebar ul { margin:.5em 0 1em; padding:0 0px; list-style:none; line-height:1.5em; } #sidebar ul li { background:url("http://www.blogblog.com/dots/bullet.gif") no-repeat 3px .45em; margin:0; padding:0 0 5px 15px; } #sidebar p { margin:0 0 .6em; } /* Profile ----------------------------------------------- */ .profile-datablock { margin:0 0 1em; } .profile-img { display:inline; } .profile-img img { float:left; margin:0 8px 5px 0; border:4px solid #cc9; } .profile-data { margin:0; line-height:1.5em; } .profile-data strong { display:block; } .profile-textblock { clear:left; } /* Footer ----------------------------------------------- */ #footer { clear:both; padding:15px 0 0; } #footer hr { display:none; } #footer p { margin:0; } /* Feeds ----------------------------------------------- */ #blogfeeds { } #postfeeds { padding-left: 20px }

Prudent Baby

Get sewing how to, sewing tutorials, and sewing help to learn sewing. We offer sewing tutorial for sewing moms.

Wednesday, July 21, 2010

Printing Patterns


Many readers have asked us how to blow up and print our patterns tiled so they can create bigger sizes. I'll show you how to do it on a mac, and maybe some readers can weigh in with PC instructions in the comments.  And while we're talking about printing, I'll remind you that you can print nice, clean Prudent Baby DIYs with none of the web stuff (like ads or sidebars) just by hitting "print this post" on the bottom of each post page. Learn how to tile and print a pattern after the jump...


Tiling and Printing Patterns

1. First you'll want to open up the pdf and choose print. When the print box pops you'll want to be sure you are in the "copies & pages" menu. Here is a screen grab of the print box. Under the copies and pages menus there are several drop downs. The one called "page scaling" is the one you want.


2. Here is a close up of the Page Scaling menu. You'll want to choose "Tile All Pages" as seen here:


3. You will have the option below to fill in the percentage you'd like to scale. I wrote 110%. You can also choose the margin of overlap for the pages (so you can have some space to tape them together). I have it set to .005". here is the picture again so you can see all the options selected:


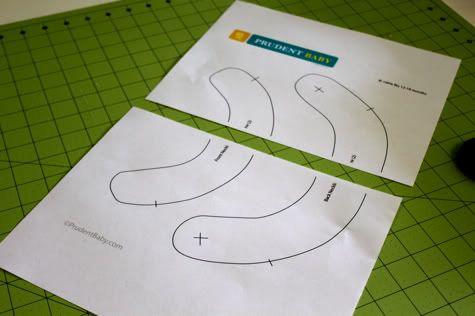
4. Go ahead and print out your pattern. See how it tiled onto two sheets?

Go ahead and tape them together so the pattern lines up:


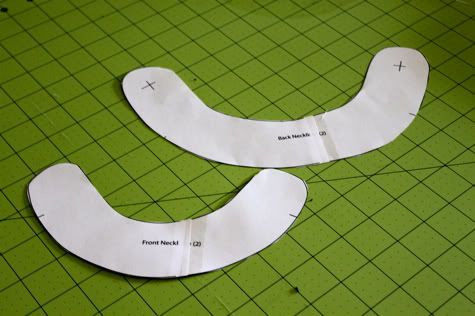
5. Cut those babies out and get to sewing.


Is this how y'all do it or do you have other secrets/tips? Can anyone share how to do this on a PC or a link to a tute? Remember, leave a comment on any post this week for a chance to win a 1/2 yard of Nicey Jane oilcloth from Fabricworm!

Labels: , , ,

16 Comments:

Blogger neubiewaters said...

OHHH...now I can lure my husband to help me with the promise of fiddling around on his Mac. He does so love his little Mac Book - maybe even enough to help me enlarge some patterns!

July 21, 2010 at 1:46 PM  
Blogger Chris said...

But... how do i know how much I need to enlarge the picture?

July 21, 2010 at 1:58 PM  
Blogger Jaime said...

chris- that is going to depend on what size you are trying to make.

July 21, 2010 at 2:07 PM  
Blogger Chris said...

I know, Jaime. For example, if the pattern is for 2 years old and I want to make it for a 5 years old.
How do I know? Maybe it´s a stupid question, I don´t know... but I just started sewing and I'm really lost...

July 21, 2010 at 2:15 PM  
Blogger Jaime said...

chris- i know it's hard! i wish we could have sized patterns made for every project in every size for everyone!! so, unfortunately it's not as simple as just scaling a pattern up or down every time (since most kids get taller much faster than they get wider). the best thing to do is to have an item of clothing that fits your wearer well and use that as a guide.

July 21, 2010 at 2:18 PM  
Blogger RachelDenbow said...

I hate the technical parts to sewing and patterns but this feels less scary. Thanks for the tutorial!!!

July 21, 2010 at 2:21 PM  
Blogger Chris said...

Ahh... So is not that simple! I should have imagined it could not be that easy. :-)))
Thank You, Jaime!

July 21, 2010 at 2:24 PM  
Blogger Jacinda said...

Great post!

July 21, 2010 at 3:50 PM  
Blogger joy said...

I don't have the option to tile under "page scaling"? Also I discovered you have to use Adobe Reader to open the PDF, if you use Mac's Preview, the print option doesn't have page scaling.

July 21, 2010 at 10:29 PM  
Blogger Susan said...

Hi Everyone- Here's the situation (at least on my PC computers). If you have the free Adobe Acrobat, then you do not have the option to do page scaling, but if you have the Adobe Professional that lets you read and write pdf documents, then you can do page scaling.

July 22, 2010 at 6:58 AM  
Blogger Bethany said...

For so long I was tracing your patterns off my laptop screen because I couldn't figure out how to print them.
Bethany

July 22, 2010 at 10:18 AM  
Blogger Sara said...

I've printed a few of your patterns off so they fit a normal 8.5x11 and then went to my local copy center and had it enlarged onto bigger paper!

July 22, 2010 at 10:46 AM  
Blogger Unknown said...

I like that! I normally do it the super hard way, I that the original pattern, eyeball about where it should fall on a larger size, then use the handy dandy tape measure to make it all equally sized... it works for me but take a little time!

July 22, 2010 at 12:24 PM  
Blogger Luch said...

Thank you for this information! Am I crazy though? I have a macbook and seriously, do NOT see tile options in the page scaling menu. I downloaded Adobe, as the other commenter mentioned the issue with Preview. Only see "shrink to fit" etc but no tile. I have no idea what to do. I made this dress as is and it's a bit small for my 18 month and would like to try it for my 3 year old. Any thoughts? I may just wing it...=)

July 23, 2010 at 2:24 PM  
Blogger Unknown said...

I had trouble figuring out how to tile on my Mac too because I didn't have those options! I did a little research and downloaded PosteRazor which works like a charm! Just do a Google search for it and download. It was about a 30 second download and takes about that much time to tile and print. The only extra thing you have to do is save the PDF files as JPGs. Easy peasy!

July 28, 2010 at 2:55 PM  
Blogger Erica said...

There is a helpful tutorial about how to enlarge patterns on Oliver and S blog here that might also be helpful:) http://www.oliverands.com/blog/2010/02/lengthening-and-shortening-a-pattern.html
I adore this dress. Thank you for the free tutorial!

October 24, 2010 at 5:21 PM  

Post a Comment

Subscribe to Post Comments [Atom]

<< Home