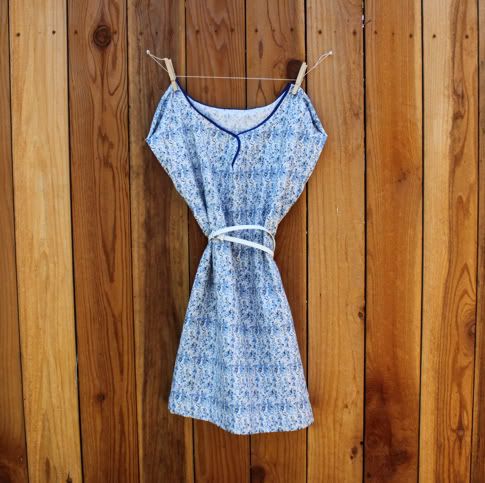
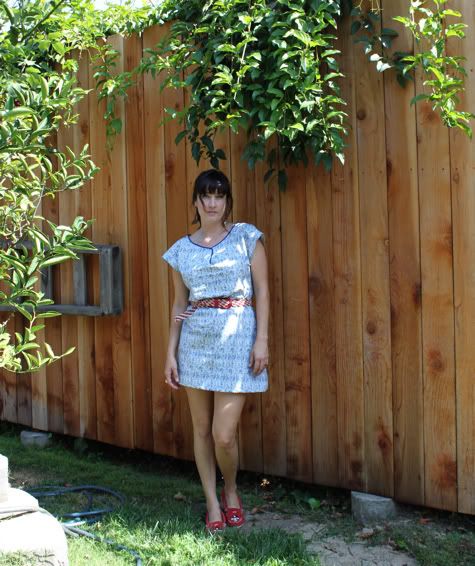
The 1.5 Dress
1.5 yards + 1.5 hours = One New Dress.
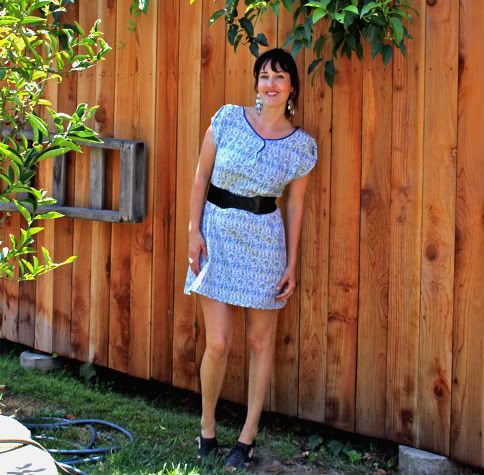
Scarlet and I met the prudent dad for dinner shortly after the completion of this number, and he complimented my new dress! I excitedly exclaimed "Thanks! I made it!" to which he responded: "It's cute!" Then, bubbling over, I effused: "I'm so glad you like it!" To which he replied: "It's not the sexiest thing ever." Oh. Okay.
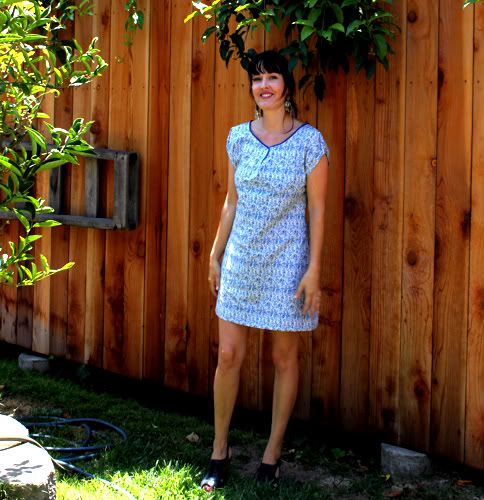
So, if your goal in life is to be as sexy as possible at all times, then I guess this isn't the dress for you. But if you just want a dress that is quick, cheap, and comfy, this one should do.
Not even a little sexy? Hrmph. Get the full 1.5 Dress Tutorial after the jump...
The 1.5 Dress Tutorial
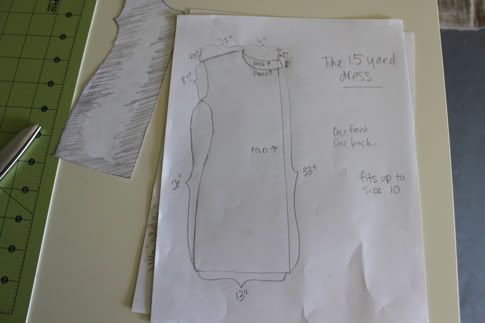
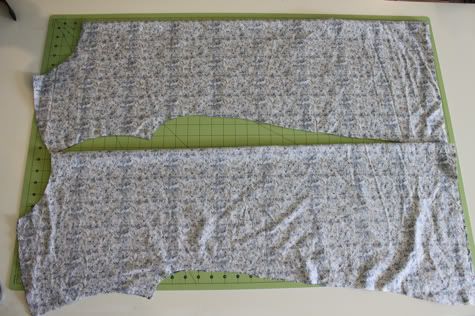
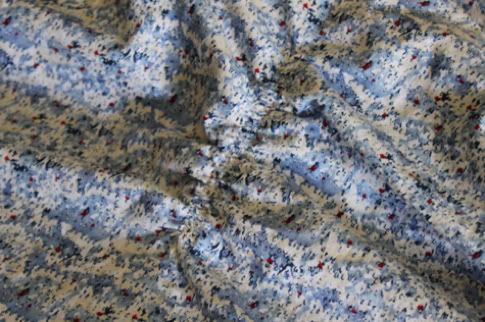
1. Pre-wash and iron your fabric. I used this older Alexander Henry cotton which is luxe and very similar to the new Fulham Road Martine Cerulean Blue. Now you want to cut two pieces, one front and one back. Use my drawing as a guide. If you cheat the back slightly wider (about 3/4" on each side, it'll fit even better).
You'll see the front neckline is lower then the back. So here you are:
2. Pin the front to the back, right sides facing, along the shoulder seams:

Sew in place.
3. Now your two pieces are right sides facing. Note the back being slightly wider than the front:

Align the edges and pin together:

Sew together and finish the edges by serging, sewing with a zig zag stitch, or cutting with pinking shears:
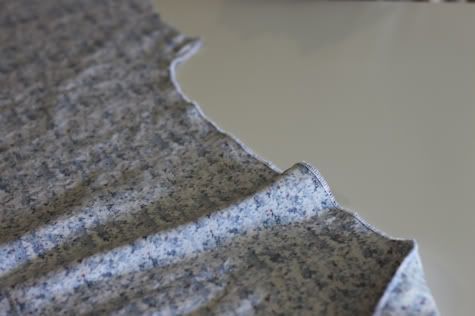
4. Now to finish the sleeves. Fold to the wrong side 1/4" and iron, then another 1/4" and iron:
Sew in place with a straight stitch:
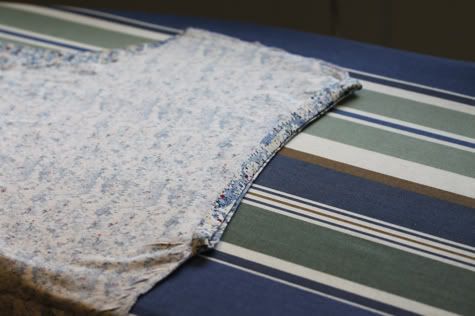
You can leave the sleeve like this, but it will be a bit pointy as in this pic:
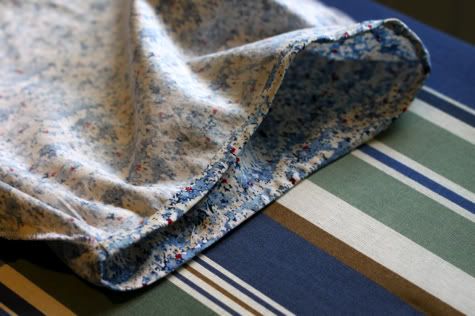
So i made a little tweak. Lay the dress flat:

Fold the tip of the sleeve down about 1":

Secure it in place at both sides of the fold with a few stitches perpendicular to the sleeve:

5. Decide how long you want your dress. Hem by folding 1/2" and ironing, then folding and ironing again (I like a thicker hem so i went 1.5"), then sewing in place with a straight stitch or a blind hem stitch.

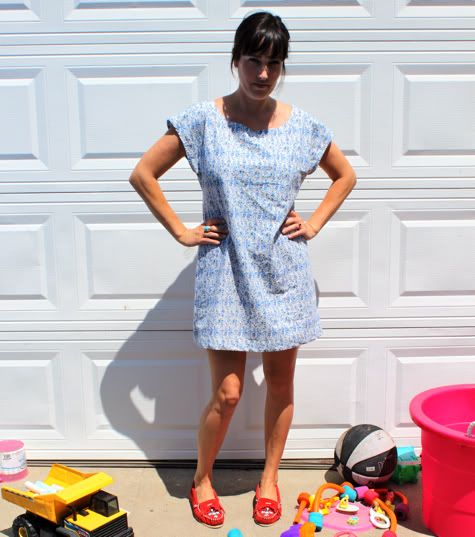
6. OK, now you can get a little customizey with your dress. Try it on. Look at that, looks a bit like a hospital gown at this stage, no?
So you need to finish the neckline. You can fold and iron, use single fold bias tape (like we did for the Most Flattering Shirt Dress), or make matching bias tape. You can cut a v-neck, leave it a boat neck or get creative. I cut a 2" slit right in the middle of the front and finished the whole neckline with skinny store-bought double fold bias tape:

Then I folded one side over the other, and sewed it in place along the previous stitch line:

7. Now try it on again.

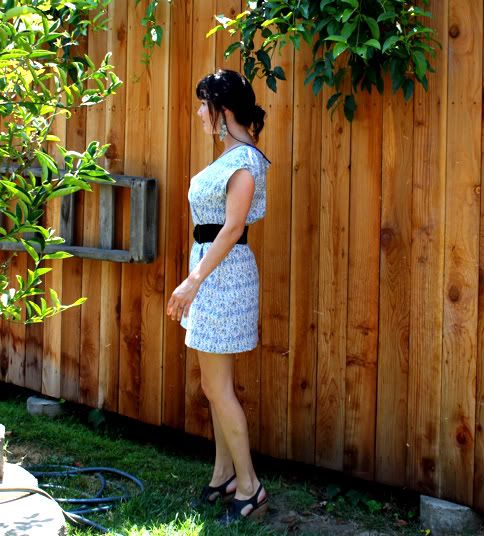
Cuter, and would make a nice shift dress, but it's still a little baggy around the waist for my taste. There are many options for making a waist, just remember you want to be able to fit the dress over your head without adding a zipper or button. The easiest option is to throw on a belt:
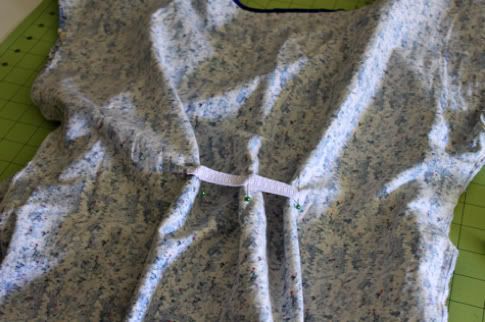
But i decided I'd like to have a little bit more fitted around the waist. I decided to sew a piece of elastic just to the back to get a fit like this (which can now be worn with or without a belt). You could do this or you could use elastic thread to get the same effect. So determine where you want the gathering to fall on the back of your dress and mark it on the wrong side. Cut a piece of elastic half the length between your marks (so my marks were 8 inches apart and my elastic 4" long):

Pin your elastic to one side of the marking. Stretch it out and pin it to the other side. Pin in the middle as well. There will be a gaps in between the pins like this:
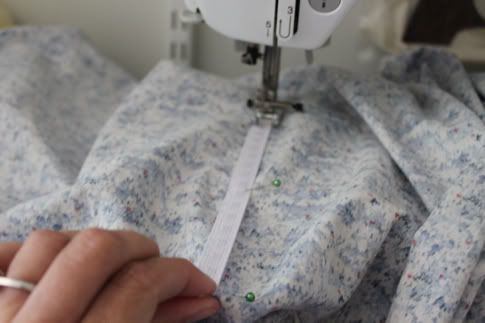
Put one end in the machine and turn the knob a few stitches, ending with the needle down, so it is securely in the elastic. It will look like this:
Stretch the elastic while you sew with a straight stitch. Do as many rows as you like (I did three).
It will look like this from the inside:
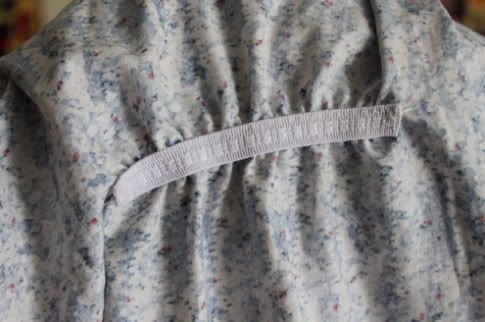
And like this from the outside:
Done!
Labels: Clothing, Hot Mess Mommy, In One Evening, Serging, Sewing, Templates
posted by Jaime @ 3:30 AM
![]()

29 Comments:
How about if you would make this with stretchy fabric? Would it then become sexier perhaps" ;)
Love the tutorial and I am sure gonna give it a try. Thank you so much!
Love the dress! So easy! Can't quite make out the measurements in your drawing though... Could you add them?
this dress is super cute Jaime. I LOVE those red mocassins! What are they?
CUTE CUTE CUTE! And agree with Jessica. Love the red mocs.
really prudent daddy? look at those legs?!?! one hot prudent momma ;)
Awesome dress!! I linked to your tutorial over at Craft Gossip Sewing:
http://sewing.craftgossip.com/tutorial-make-the-1-5-hour-1-5-yard-dress/2010/07/29/
--Anne
Thank you!! I can't wait to try this! Your tutorial is so easy to understand! I'm going to throw some elastic in the sleeves and make them a little puffy!
puhlease. you're smoking! tell prudent daddy that's as sexy as it gets. :)
The dress is cute- the story was hilarious. Maybe you should turn them into sexy hospital gowns- I know Cindy Callas would buy at least 3 dozen for the office. Who knows how high you could set your sights from there!
I know we say this all the time, but we married the same man! Brendon loves to give a compliment about what I am wearing b/c then he feels like he can then give his complaints about what I am wearing. What do they really know? Brendon thinks I should wear heels all day everyday. I mean come on.
I love this dress! The waist belt makes it look very chic. I LOVE the pattern on the material.
great dress!
Okay, not that I was looking, but this dress makes your legs look fabulous from the side view! Tell that to your man!
On a more serious note, I am loving the dress tutorials coming from Prudent Baby. Not alot of material or time involved (1.5!) but excellent results.
I think it looks much sexier with the belt, IMHO. Thanks for the tutorial!
Hey Prudent Ladies, Daddy Downer here. To be fair, I didn't see Jaime with the dark belt on. That definitely increases the sexometer rating. I married Jaime for her curves and without the belt, you can't see anything! Just saying...
What!?! This dress is wicked sexy and you're a stick (a stick with curves...so...perhaps a knobby stick!). Thanks for the tutorial.
awww. sweet dada :)
very cute dress! my pictures are coming soon...promise. i just had to upgrade storage for my google account.... Geez. who knew i'd need more space? anyway, been out of the blogoshere for awhile, now my littlest man is a little more independent and i have a tad more computer time :)
btw, could you do a tutorial on doing a flat fell (sp?) stitch... i have been making my 4 yr old cute baggie shorts and using a flat fell stitch, but i feel like i'm doing something wrong. i have a book, but it's not the same :)
thanks
It is adorable and you are super cute (and sexy) in it! Thanks for the inspiration, lady!
I agree with the legs comment. I want your legs.
Yeeeeaaaahhhh I'm afraid my sexiness went out the window when I pushed a 8.12 pounder out my....well...we don't need to go there. Anyway I think it's adorable and I might just have a yard and half laying around here...
Soooo cute. Can't wait to make one for myself!
I'm amazed at your ability to whip these things up. For what it's worth I think it is a sexy little number since you raised the hemline and showed some leg.
I bet prudent dad isn't always wearing the sexiest thing ever, either.
I think you look TOTALLY sexy! Excellent tutorial. Thanks!
this is totally cute! but my tochas would totally hang out! i suppose i could just make it longer...
Hi,
Such a cute dress! I love the way you did the neckline. I linked to this post on my website. The url is http://craftstew.com/sewing/52-free-dress-patterns if you want to check it out.
That is Sew cute! It would be cute on a little girl too. Saying this because my lil one needs some new dresses and I could lengthen it a bit for her. She is so tall for 2 years old. Just this past week I have had 2 different people ask.....so what grade are you in! LOL She's just 2!!!!!
Thanks for the tutorial. I just found your blog and can't wait to take a look around.
:0)
Adorable. I'm with junoproject I can't read all the measurements could you ppppplease post them?
I thought I'd share that I'm making this dress currently. I'm plus sized and rather tall. I am not much of a seamstress. The edging on the sleeves and neckline make me want to throw something. I frequently say letters of the alphabet instead of cursing. Which tickles my son immensely. I will let you guys know how it turns out, It will take me a couple days to finish I'm sure. I think I will need to change my sleeve.. It just hits strangely under the arm for me, which I dislike. I might make it sleeveless. :) Peace!
great tutorial could you please post the measurements and how you got them so we all can know thanks
Post a Comment
Subscribe to Post Comments [Atom]
<< Home