Snappy Toddler Top & Free Downloadable Pattern
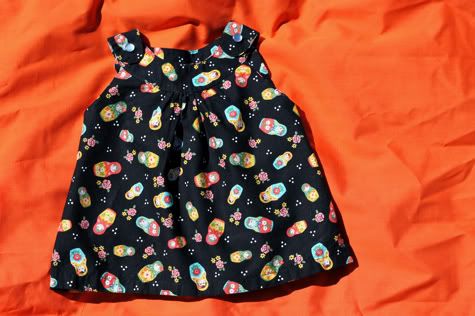
I often make things that don't turn out as planned and never make it to the pages of PB, then gulp a glass of champagne, send Jacinda numerous whiny emails, and stew over the wasted time and my own lameness. But this was not one of those times!
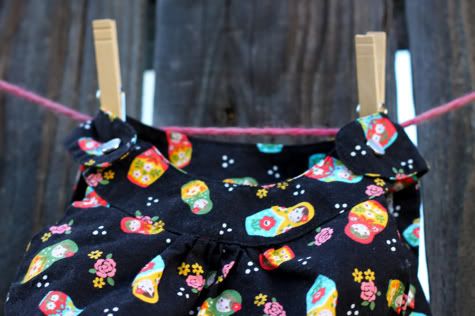
This shirt left me feeling energized and thrilled with the results, so I'm really excited to share the pattern with you! And drink more champagne!
It's a snap collar top, but you can make yours a dress. AND Jacinda styled up one of her beautiful, free downloadable patterns from my ridiculous drawing. I promise, it's much easier then you would think. Get the Snappy Toddler Top free pattern & tutorial after the jump!
Snappy Toddler Top Free Pattern
A half yard or less will do it, depending on what size you're making and whether you want a dress or a shirt. This adorable fabric is Kokka Trefle Cotton Matryoshka Dolls in Black, also available in summery natural. You'll also need a couple snaps. I used pearlized ones ($2 for a pack of 10 on amazon), so simple to attach with a hammer. If you hate snaps, feel free to use buttons and buttonholes!
1. Start by downloading and printing out the Prudent Baby Snappy Toddler Top pattern. Print it at 100% for a 12-18 month size. I printed it tiled at 110%, cut it out, and taped the pieces together to make a size 2T. You want to print on legal size paper (8.5" X 14") or standard 8.5"X11" paper and tape the pieces together. Make sure when printing this or any pattern that your print settings are not set to "shrink to fit". 99% of the time when people say the item turned out too small, it's because it was accidentally set to "shrink to fit".
DOWNLOAD THE PATTERN FOR FREE FROM GOOGLE DOCS: Click here for the Prudent Baby Snappy Toddler Top Pattern
Prudent Baby Snappy Shirt
2. Trace the dress body pattern onto the wrong side of your fabric to create the back piece of the dress:
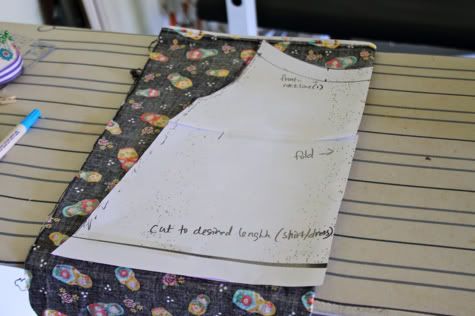
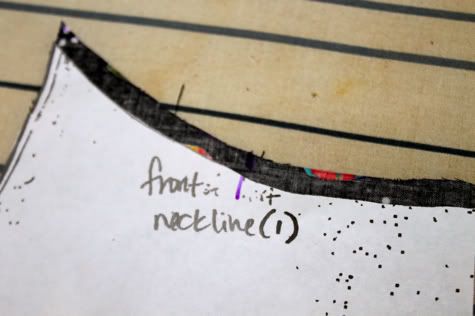
Cut the top of the pattern off at the line labeled "front neckline" and trace another piece that size:
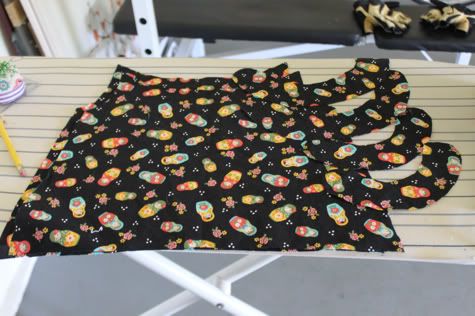
Then cut the neck pieces:
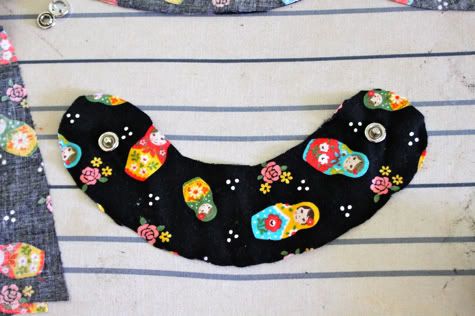
3. Start with the two smaller collar pieces, these will be the front neckline of your shirt. On one of them, the one that will show on the completed shirt, attach a snap front to either side. If you are doing buttons, sew a button on either side instead:
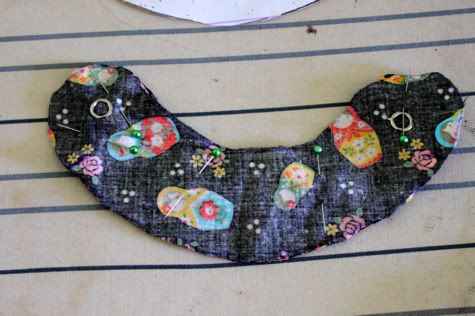
Now take the two pieces and pin them together right sides facing, so the snap is to the inside:
You'll notice on the pattern that there are two little lines, one on each side. Mark those on the wrong side of your fabric. Sew the two pieces together from one line to the other with 1/4" seam allowance, leaving the space between the lines un-sewn:
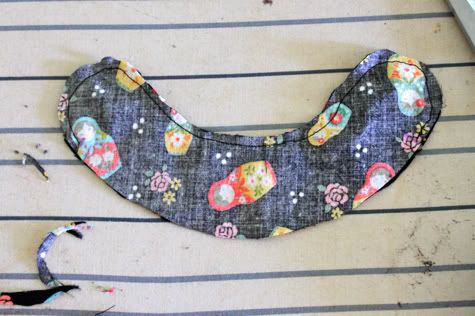
Turn that right side out and iron it flat, with the seam folded in.
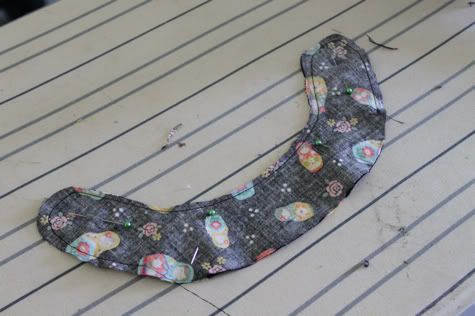
Turn that inside out and iron it flat, folding the un-sewn opening in.
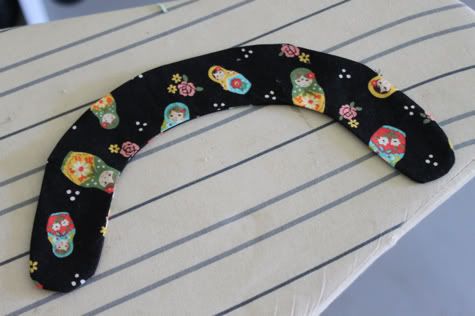
Now attach the other side of the snap, with the pearlized or decorative side on the side of the piece you want showing on your final shirt, the X's on the pattern mark the spot you want to attach at. If you are doing buttons, sew a buttonhole at each mark. Your completed neck pieces will look like this:
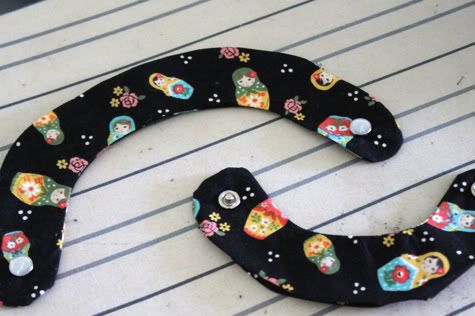
Set those aside.
5. Now take your dress front and back and pin them together right sides facing. Sew up the sides from armhole to the bottom.
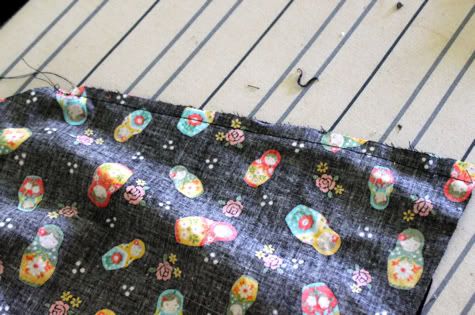
Finish the edges by serging, sewing with a zig zag stitch, or cutting with pinking shears and turn right-side out.
6. To finish the armholes you can use single fold bias tape (like we did for the Most Flattering Shirt Dress), but I didn't have any black bias tape, so I cut a 3/4" strip of matching fabric on the bias (diagonal to the selvedges of the fabric) and serged one long edge. You can do the same and finish one edge by hemming or sewing with a zig zag to simulate serging. Open up the armhole and lay your strip right sides facing and pin:
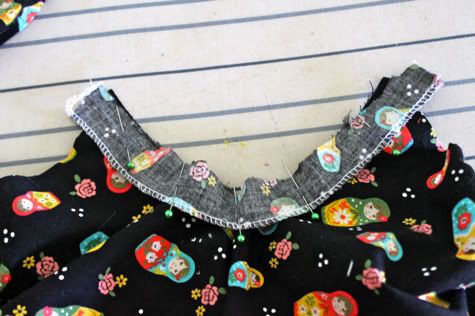
Sew it in place with a 1/8" or 1/4" seam allowance:
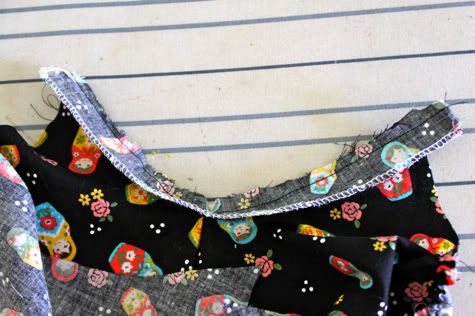
Flip it over to the inside of the dress and iron it flat:
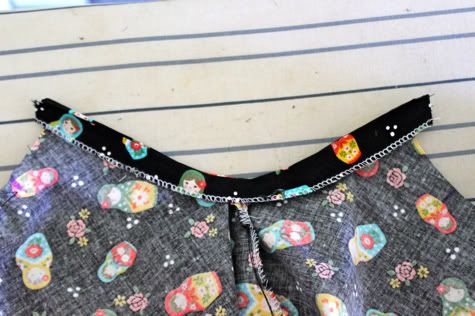
Repeat on the other armhole.
7. Now on the wrong side of the front of your dress, mark the lines from the pattern. Sew a basting stitch in between those lines (a straight stitch set to the longest stitch your machine will allow, usually a 5):
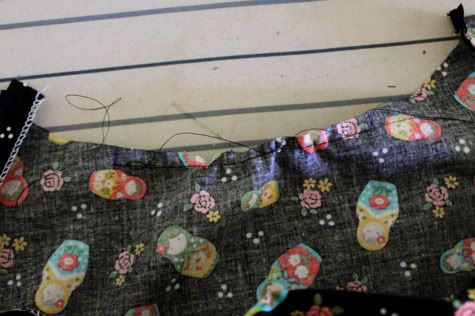
Pull the bobbin thread to gather:
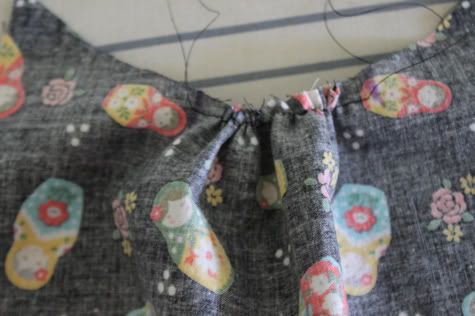
Take your front collar piece and fit the front of the dress into the opening and pin in place. So you just want to gather your basting stitches until it fits:
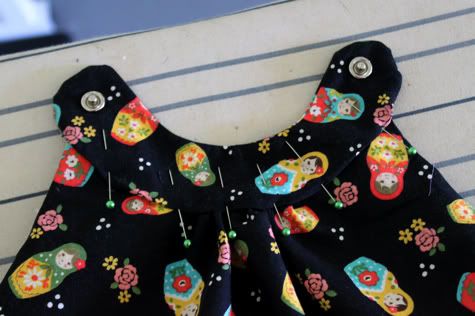
Sew in place all the way around the collar piece right at the edge like so. (make sure you don't forget to set your machine back to a normal stitch length like 2.5):
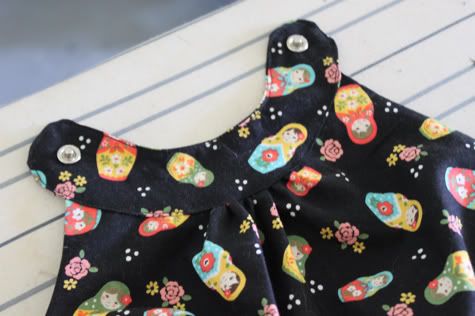
Repeat the gathering on the back piece of your dress, and fit it into the back collar piece. Make sure the decorative side of your snaps is facing up to the right side of the dress:
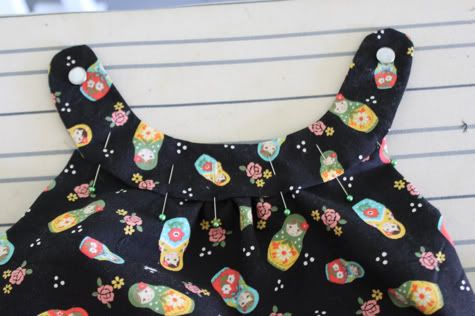
Sew that in place all the way around the collar piece right at the edge:
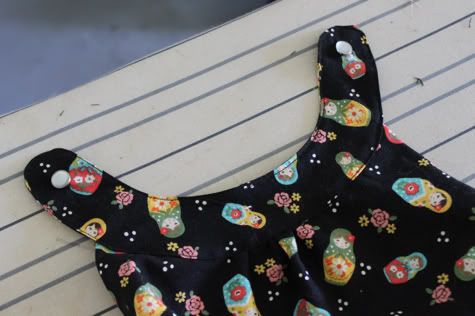
Snap your snaps together, you did it!
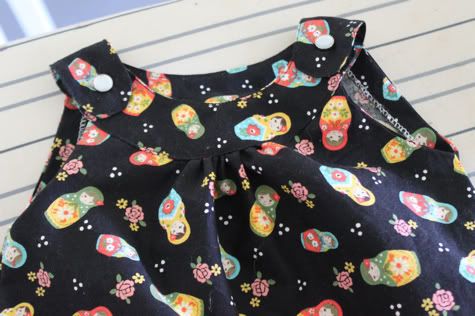
8. Try your top on your model then hem by folding under 1/4" and ironing, then another 1/4" and ironing, and stitching in place with a straight stitch or a blind hem stitch:
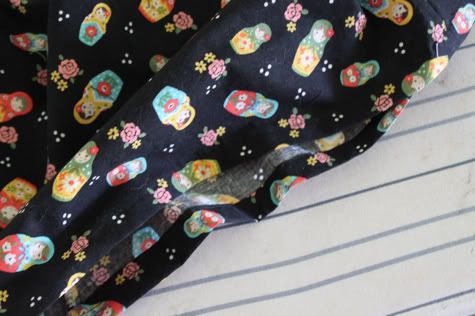
Finito!
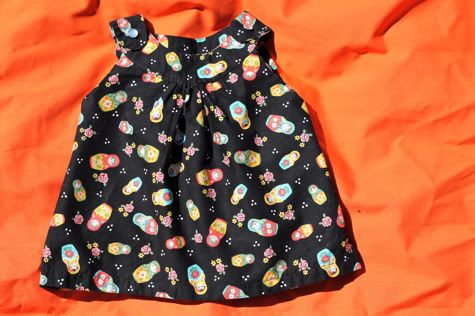
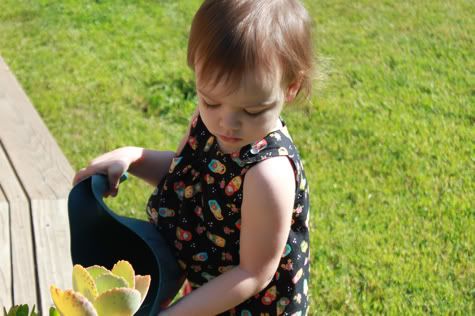
Go play...
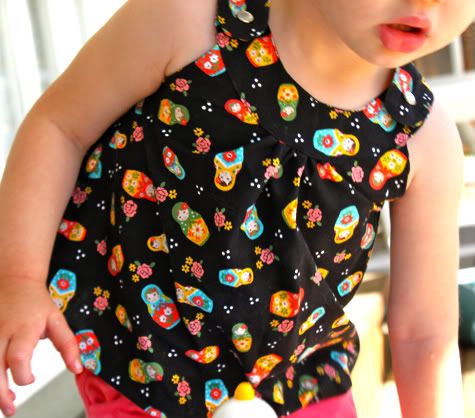
Back view...don't you just want to chomp down on those yummy baby arms??
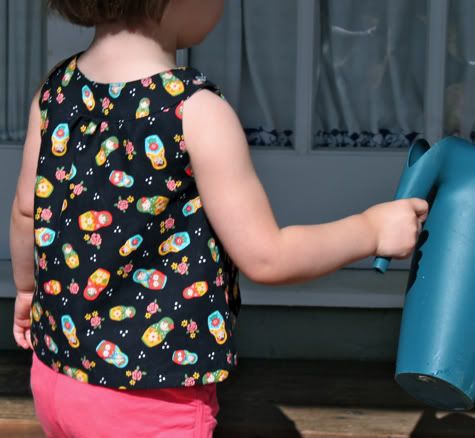
sweetness...
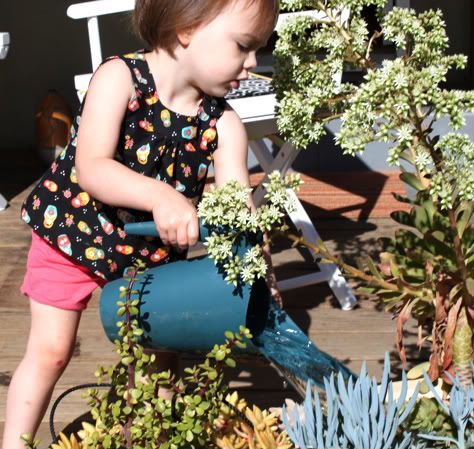
What do you think?? Are you going to try it?? I want picture of this one ASAP ladies!
Labels: Baby, Clothing, Gifts, In One Evening, Kids, Serging, Sewing, Templates

72 Comments:
LOVE it! I tried to do a similar pattern (http://mamaandbabylove.blogspot.com/2010/05/blog-post.html) and totally gave up, because I couldn't understand the stupid pattern directions for the collar, but now I get it! Thank you!!!
What a cute summer top!! I linked to your pattern & tutorial on Craft Gossip Sewing:
http://sewing.craftgossip.com/tutorial-snappy-toddler-top/2010/05/17/
--Anne
So cute! I've made a dress similar to this before. I'm going to use this and make a shirt now! Thanks!
I'm so excited to try this after my sewing machine is fixed!
This is just gorgeous! It's such a finished looking piece and it seems so easy! I'm definitely going to try it! And that fabric!!
This fabric is really cute. I made an almost identical pattern & tutorial for a baby dress last fall:
http://sewcando.blogspot.com/2009/10/little-owl-dress-pattern-is-here.html
http://sewcando.blogspot.com/2009/10/tutorial-how-to-hack-baby-dress.html
Fantastic. I have been seeing that style everywhere and my 18 month old NEEDS some summer stuff- she is tiny but fast outgrowing everything! Can't wait to try it.
I made one today! love the pattern! just send a pic!
sorry, I just senT a pic!
amy! i would blow the pattern up to 105% percent (or sew...heh heh), print it out tiled and tape it together.
jess your top is amazing! i cant believe how fast you did it!
Oh I want to try it! It is so cute!!
Thank you so much for this! Can't wait to give it a go for my little girl!
I can't wait to try this!!! I printed out 3 different sizes. My oldest wears a 4/5, my youngest is in 24m, and my brand new nieces are newborns. I guessed on how much to zoom so hopefully it works out.
Thank you for posting this, love your blog!
This is awesome!
Really cute, I know my little one will love it and it seems perfect and versatile for playing. You gals are truly talented!
Very cute! Now I just need to figure out how to enlarge it to a 4t.
This is so Darling!!! I wanna make one... but first things first CLEAN MY SEWING ROOM LOL!!
Just adorable and it looks easy. I am going to make one to match my baby shoes! Thank you for sharing.
Kathydee
Gorgeous! Must make one. After clicking over here so many times from One Pretty Thing, I'm finally subscribing (what took me so long?) Thanks for the great tutorial.
Can I ask a dumb question?? In the instructions, under 2. it says, "cut the pattern off at the neckline and trace another piece that size". Do you mean the line above where it says "front neckline". Because it looks like you already have the actual "neck" pieces...so I'm confused! Sorry for the dumb question! I enjoy your blog so much and would love to try this shirt!! HELP.
Jenn-
Sorry i wasn't clear! So on the dress part of the pattern you'll see at the top it says back neckline, then under it is another line that says front neckline. You want one piece that is the full size, then you want to cut the dress pattern off at the second line that says "front neckline" and you want one piece that size. The back of the shirt is higher then the front of the shirt, so your front and back pieces are two different sizes. Those neckLines then fit into the rounded collar pieces. Does that make more sense?
Thank you so much for the clarification!! I will definitely be making this and shooting you a pic!
Thank you so much for the pattern!!I've been looking for a pattern for this exact thing for ages!! :)
Thanks for the cute pattern!
I am having an issue with the collars though. I feel like they are much too small. I've double checked that shrink to fit is set to "none" so I'm wondering if you could provide a length measurement so I can double check that its not getting shrinked.
Thanks,
carolyn
Hi Carolyn-From "x" to "x" (in a straight line) on the back collar should be 6.75". Does that help? If it seems to small for your child, definitely enlarge it! This size fits an average 12-18 month old.
Hi Jacinda - that's very helpful. I'll have to check and see how mine is printing out. I guess its not that it just seems small but that it seems small compared to the bodice. Even with the part gathered all the way it is too small to attach to the bodice. I'll have to play with it some more.
And as far as fitting my kid - that's part of the problem. She's not quite here yet - due in August. I'm just making dresses now since I don't think I'll have a ton of time once she is here.
I was so excited when I saw this pattern! Thank you. I have been wanting to try this type of top but couldn't figure it out. I am not sure where to send a picture, but if you would like to see mine you could always check my blog.
craftedbymama.blogspot.com
Okay... so I keep printing this off, looking at it, playing with it, and I'm just not sure about the size issue. My daughter is 26 months, but small for her age. Measuring from armpit to armpit across the pattern, I'm thinking the top would be just right, but the neck hole seems awful small... If I up it to 110%, then the chest measurement seems like it's going to swallow her... What's your lovely model's actual chest measurement? I'm thinking that will give me a better idea of which size to go with for K.
I will measure her when she gets home later, but remember the top gets gathered so it won't be as swallowy once you gather between the two points!
I made this tonight. I used a contrasting fabric for the collar and used snaps for the first time. I love it! I'm a newbie and made some mistakes (putting the snaps too close to the seam on the front piece) but will learn from them and definitely try it again.
Hi!
Awesome dress!
I was wondering at what size I should shrink the pattern for a 6-9 month size...
Can anyone help me?
Cheers!
What a cute little dress/top! I had to make it for my soon-to-be little one...now I just hope he/she is a girl...lol!
http://alessoninlearning.blogspot.com/2010/07/another-adorable-dress.html
I made this in seersucker for my 4-month-old daughter, using white-on-white quilting cotton for the collar and a narrow ruffle at the hem. It is INSANELY cute, and made entirely from stash fabrics, which feels great. :) A couple of things:
I reduced to 85% for a 3-6m size, but I think 90% would have been better (this is going to fit for about nine seconds).
It would also work to stitch and turn the collar pieces, attach them to the dress/top (after sewing side seams and finishing armholes), and only THEN add the snaps. I had a tough time topstitching around the collar pieces with the snaps already in place.
Worth noting: If you scale the pattern up or down, you are also changing the seam allowances by that proportion (i.e. as printed I had 85% of a 1/4" seam). Cut and sew carefully! :)
@annielanglois Try 90% and 95%. Measure your child around the chest, directly under the arms, and compare that number with the width of the pattern piece at the bottom of the armhole. You want the measurement around the garment to be somewhat larger than your child - I'd guess maybe 1.5 to 2" of wearing ease, but don't quote me on that. Roomy looks good on this top. :)
Many, many thanks for posting this pattern! I love it and am hunting through my stash to see what else I can make it with. :)
That was too long. Sorry. Here are some blurry iPhone photos of mine: http://www.christieburke.com/?p=1099 .
christie- thank you thank you! great tips and cute top!
ok, stupid question, but I can't figure out to print it tiled, at 110%, for a 2T. Anyone have step-by-step instructions for that?
I am going to try this! Thanks
How do you up-size it to 2t or 3t? Thanks!
I had success with enlarging the pattern to 125% to make a 3/4 (small 4). I use the free download PosteRazor for mac to tile and print. It turned out cute!
This pattern is no longer free in Scrib - it got moved to the archived section. I read somewhere you can take it out of the archived section so it is free again. Any way you can do this? I would love to try this on my little girl. Thanks!
Hi. This is just the cutest! I am a total newbie at sewing and made this for a friend recently. I made lots of mistakes so decided to give it another shot. Practice makes perfect, right? I am REALLY having a hard time with the collar. I've sewn it together and am ironing it with the seam folded it but it's sooo hard to get the seam right. Is that normal for the pattern or normal for a newbie?!? Will it get easier for me as I get better? People have told me with rounded stuff, the key is to iron, iron, iron. But I have been and still have a hard time getting it to look nice around the edge of the unsewn side. Hopefully this makes sense. Any suggestions anyone? Thanks! I do love it! I did it in pink leopard print. Super cute!
I made a dress for my 10 month old. Thanks for sharing the tut.
http://www.thesellers.net/2010/08/button-collar-dress/
thank goodness I stumbled upon your site ... its amazing and when I saw this cute little top that I can resize to a dress, I knew I just had to do it right there and then ... so here is my take on your cute little top
http://thechefswife.blogspot.com/2010/09/great-girls-summer-topdress.html
thanks so much and looking forward to more projects that I can do from all your tutes
jigi (syd, aus)
Wouldn't you know it - I made this dress once, loved it, but didn't download the pattern!! Now I need to print it again and it's archived on scribd.....I guess I will fork over the $5 to subscribe for the next 24 hours!
don't do it tracy!! i'll move it to google docs right now! tricky scribd.
ok tracy, it's done. sorry about that, we didn't realize they would do that. I added it above, but here is the link to the pattern COMPLETELY FREE from google docs: Prudent Baby Snappy Toddler Top
Thank you!!! I really wouldn't mind paying the $5, but I'd rather it go to the creator!
Thank you for this GORGEOUS dress pattern. Summer time in Australia and these are going to make perfect christmas gifts. .....
nope - not a man doing some sewing..... just his wife. = )
I love this!! I am going to make it when I have some free time for my 3 month old. So girly and adorable. You make me so jealous with your insanely adorable ideas.
Hi! I love this pattern and plan on using it to make my daughter's birthday dress. I just had a quick question, which is probably a silly one! : )
On Step 7, you say to mark the lines from the pattern on the wrong side of the front of the dress. What lines on the pattern are you referring to?
Thanks so much for your help!
Okay, I loved this pattern so much I made three of them! What a gorgeous style with lots of room for pretty variations!
The first one I made ended up juuuust fitting my 10 month old, so I made the second one slightly larger and it will fit her more like a 12-18M size.
I am really loving your tutorials and am SO grateful that you make such nice printable patterns available for free! Thanks so much!!
I will see about photographing the dresses tomorrow so I can share them with y'all!
Best,
Raechel
Alright, photos.
First one, just like the tutorial: http://www.flickr.com/photos/28356121@N06/5431585672/in/photostream/
Second one I made a bit bigger: http://www.flickr.com/photos/28356121@N06/5430942333/in/photostream/
Third one I shirred the top instead of gathering it. I also did bias tape ties instead of the collar (made some bloomers to match, too: http://www.flickr.com/photos/28356121@N06/5431549900/in/photostream/
Love this tutorial and will probably make a few more! Thanks for making lovely things,
Raechel
What percent would you shrink the pattern down to make a newborn size?
I just had to tell you I've made this wonderfull dress! I LOVE it and just had to show you: http://instagr.am/p/Cflzj/
I just made this top/dress, and it turned out beautifully! You can see the finished product (and a very cute baby) at: http://www.patchworkduck.com/2011/04/baby-fashion-show.html
Thanks for the great pattern!
Thankyou so much, your blog has given me my sewing mojo back. I finally finished this top, which started out as a dress for my 8wk old baby. It took me two weeks to make it inbetween feeds, sleep, dealing with bad wind and teaching myself how to sew again. In that time I think she has grown a few centimetres and now it fits her as a top (I dont want to admit that I cut it too short, lol) Thanks for this great pattern! I really enjoyed making it. Amanda
Loved using this pattern for my daughter! I made an outfit from it in leftover baby knit clothes:
http://sparklinbecks.blogspot.com/2011/04/snappy-toddler-repurposed-outfit.html
In the past 4 days I've made 3 of these! 1 as a gift and 2 for my little girl. I love them. The first one was a little more challenging than I expected, but then again I am a beginner. After I got all the kinks figured out the next 2 went very smoothly. Thanks so much for the tutorial and pattern!!
Would it be possible to enlarge the pattern enough to make a site 5T?? I love this so much but my darling girl isn't a toddler anymore. I want to make matching dresses for my 1 month old and my 4 year old, but so many patterns don't include that size range (3-6 mo and 5T). Anyone good with math out there who would be able to tell me what percentage to shrink/enlarge this to?
I love this dress, I think it looks a lot more complicated than it really is (extra impressiveness points!). I made the body a tiny bit longer at the top to make the arm holes a bit bigger so it lasts longer as she has rather chubby arms. Here it is!
http://www.flickr.com/photos/13204478@N06/5782759128/in/photostream
Thanks for sharing! Just made it the other day with shorts to go with it. Super cute and easy.
Thank you for sharing this, it's fun & easy to make. I often have issues understanding sewing instructions but this was so clearly written and pictured. I made one for my niece in kitty print- she loves cats (kitty was her first word!)
http://www.craftster.org/pictures/data/500/104078_06Jun11_kitty_top.JPG
I just found your blog last night and had to try this pattern for my niece. So cute and very easy! I'm still learning and this was perfect. I've done curtains and wrap around skirts. Thank you for awesome instructions!
I created three of these in a week, because I loved them so much! Just posted about it here - http://7craftymamas.blogspot.com/2011/06/fun-summer-clothes.html THANKS for this fantastic tutorial!
I'm really stuck as to how to enlarge this pattern. Can you give me some pointers? Love this pattern and have just bought some beautiful african printed cotton to make it with.
Thank you so much for this great tutorial! I made a top for my 18-month-old and I love it!
Super pattern, thanks! Just made it out of stretchy french terry (yikes) and while my neckline is rather poorly done, the pattern is very forgiving and still looks cute! Did a pleat in front and back instead of gathering.
http://geoknitting.blogspot.com/2011/08/prudent-baby-snappy-top.html
Hope to have pictures on a real model tomorrow....
I made this and was very happy with how adorable and easy it was to make :) However I found the sizing for 12-18mths to be very small for my petite 15mth old :(
Here's a question for ya-- I'd love to try my hand at making two of these, since I'm expecting twin girls, but I was hoping there was a chance that an infant-sized toddler DRESS might become a toddler-sized toddler TOP once they, presumably, leaned out and got a bit taller. Is that something that this pattern would accommodate? Since I have to make two of everything, I'd love to get a little more time out of the things I make!
Absolutely thrilled with how this turned out - I used some fabby Dia de los Muertes mini sugar skulls fabric from Spoonflower to make my daughter's Hallowe'en day dress - she adores it.
http://community.babycentre.co.uk/photos/peretz34/6618735
It won't let me print it without signing into facebook now sending a request from sribd I never had trouble printing the other stuff like the snap wrap dress. Not tech savy enough I guess.
Post a Comment
Subscribe to Post Comments [Atom]
<< Home