body { background:#fff url("http://www.blogblog.com/dots/bg_dots.gif") 50% 0; margin:0; padding:0 10px; text-align:center; font:x-small Verdana,Arial,Sans-serif; color:#333; font-size/* */:/**/small; font-size: /**/small; } /* Page Structure ----------------------------------------------- */ @media all { #content { background:url("http://www.blogblog.com/dots/bg_3dots.gif") no-repeat 250px 50px; width:700px; margin:0 auto; padding:50px 0; text-align:left; } #main { width:450px; float:right; padding:50px 0 20px; font-size:85%; } #main2 { background:url("http://www.blogblog.com/dots/bg_dots2.gif") -100px -100px; padding:20px 10px 15px; } #sidebar { width:200px; float:left; font-size:85%; padding-bottom:20px; } #sidebar2 { background:url("http://www.blogblog.com/dots/bg_dots2.gif") 150px -50px; padding:5px 10px 15px; width:200px; width/* */:/**/180px; width: /**/180px; } } @media handheld { #content { width:90%; } #main { width:100%; float:none; } #sidebar { width:100%; float:none; } #sidebar2 { width:100%; } } html>body #main, html>body #sidebar { /* We only give this fade from white to nothing to browsers that can handle 24-bit transparent PNGs */ background/* */:/**/url("http://www.blogblog.com/dots/bg_white_fade.png") repeat-x left bottom; } /* Title & Description ----------------------------------------------- */ @media all { #blog-title { margin:0 0 .5em; font:250%/1.4em Georgia,Serif; color:#353; } #blog-title a { color:#353; text-decoration:none; } #description { margin:0 0 1.75em; color:#996; } #blog-mobile-title { display:none; } #description-mobile { display:none; } } @media handheld { #blog-title { display:none; } #description { display:none; } #blog-mobile-title { display:block; margin:0 0 .5em; font:250%/1.4em Georgia,Serif; color:#353; } #blog-mobile-title a { color:#353; text-decoration:none; } #description-mobile { display:block; margin:0 0 1.75em; color:#996; } } /* Links ----------------------------------------------- */ a:link { color:#488; } a:visited { color:#885; } a:hover { color:#000; } a img { border-width:0; } /* Posts ----------------------------------------------- */ .date-header { margin:0 0 .75em; padding-bottom:.35em; border-bottom:1px dotted #9b9; font:95%/1.4em Georgia,Serif; text-transform:uppercase; letter-spacing:.3em; color:#663; } .post { margin:0 0 2.5em; line-height:1.6em; } .post-title { margin:.25em 0; font:bold 130%/1.4em Georgia,Serif; color:#333; } .post-title a, .post-title strong { background:url("http://www.blogblog.com/dots/bg_post_title.gif") no-repeat 0 .25em; display:block; color:#333; text-decoration:none; padding:0 0 1px 45px; } .post-title a:hover { color:#000; } .post p { margin:0 0 .75em; } p.post-footer { margin:0; text-align:right; } p.post-footer em { display:block; float:left; text-align:left; font-style:normal; color:#996; } a.comment-link { /* IE5.0/Win doesn't apply padding to inline elements, so we hide these two declarations from it */ background/* */:/**/url("http://www.blogblog.com/dots/icon_comment.gif") no-repeat 0 .25em; padding-left:15px; } html>body a.comment-link { /* Respecified, for IE5/Mac's benefit */ background:url("http://www.blogblog.com/dots/icon_comment.gif") no-repeat 0 .25em; padding-left:15px; } .post img { margin:0 0 5px 0; padding:4px; border:1px solid #cca; } /* Comments ----------------------------------------------- */ #comments { margin:0; } #comments h4 { margin:0 0 10px; border-top:1px dotted #9b9; padding-top:.5em; font:bold 110%/1.4em Georgia,Serif; color:#333; } #comments-block { line-height:1.6em; } .comment-poster { background:url("http://www.blogblog.com/dots/icon_comment.gif") no-repeat 2px .35em; margin:.5em 0 0; padding:0 0 0 20px; font-weight:bold; } .comment-body { margin:0; padding:0 0 0 20px; } .comment-body p { margin:0 0 .5em; } .comment-timestamp { margin:0 0 .5em; padding:0 0 .75em 20px; color:#996; } .comment-timestamp a:link { color:#996; } .deleted-comment { font-style:italic; color:gray; } .paging-control-container { float: right; margin: 0px 6px 0px 0px; font-size: 80%; } .unneeded-paging-control { visibility: hidden; } /* More Sidebar Content ----------------------------------------------- */ .sidebar-title { margin:2em 0 .75em; padding-bottom:.35em; border-bottom:1px dotted #9b9; font:95%/1.4em Georgia,Serif; text-transform:uppercase; letter-spacing:.3em; color:#663; } #sidebar p { margin:0 0 .75em; line-height:1.6em; } #sidebar ul { margin:.5em 0 1em; padding:0 0px; list-style:none; line-height:1.5em; } #sidebar ul li { background:url("http://www.blogblog.com/dots/bullet.gif") no-repeat 3px .45em; margin:0; padding:0 0 5px 15px; } #sidebar p { margin:0 0 .6em; } /* Profile ----------------------------------------------- */ .profile-datablock { margin:0 0 1em; } .profile-img { display:inline; } .profile-img img { float:left; margin:0 8px 5px 0; border:4px solid #cc9; } .profile-data { margin:0; line-height:1.5em; } .profile-data strong { display:block; } .profile-textblock { clear:left; } /* Footer ----------------------------------------------- */ #footer { clear:both; padding:15px 0 0; } #footer hr { display:none; } #footer p { margin:0; } /* Feeds ----------------------------------------------- */ #blogfeeds { } #postfeeds { padding-left: 20px }

Prudent Baby

Get sewing how to, sewing tutorials, and sewing help to learn sewing. We offer sewing tutorial for sewing moms.

Monday, May 10, 2010

Hamptons Hooded Beach Towel
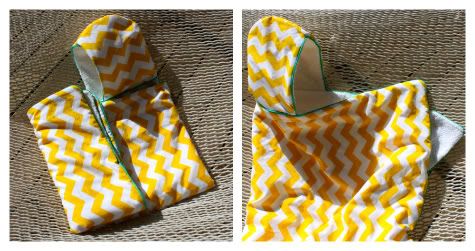

When our friends over at amazing trendy kid magazine Pint Size Social asked us to contribute to their DIYs with VIPs column, we were so excited to be in the company of such awesome ladies as Amy Atlas and Erica Domesek! So we went to work on this luxurious version of the kid's summer staple, the hooded towel.

There's just no reason to spend $45 on one of these if you have a sewing machine and thirty minutes!

For more details and a little interview with yours truly, click over to the column on Pint Size Social. I also highly recommend checking out the Show & Tell section, where they highlight one hot item every day - it's always something I've never seen anywhere else.  Get the full Hamptons Hooded Beach Towel DIY after the jump...

Hamptons Hooded Towel

1.  Assemble your materials.  You'll need one bath sheet (or plain terry cloth if you prefer), 2 packages of piping (2.5 yards each), and a yard of pretty cotton (I used Paula Prass Chevron in Yellow), and our hood template.
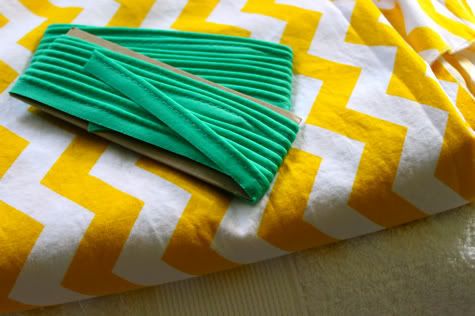

2.  Cut your terry down to 26.5" X 42.5" and do the same with your cotton.  Download the Prudent Baby Hood Template here, then cut it out:
Prudent Baby Towel Hood
3.  Trace it onto your fabrics and cut two pieces in cotton and two in terry.  Align the cotton right sides facing, pin, and sew around the curve with a 1/4" inseam. Do the same with the terry.
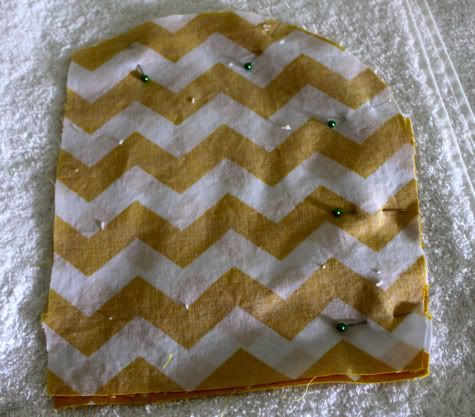

4.  Now take your piping and pin it around the larger opening of the cotton hood, with the edges aligned (piping facing inwards):

Sew in place along the stitches in the piping:
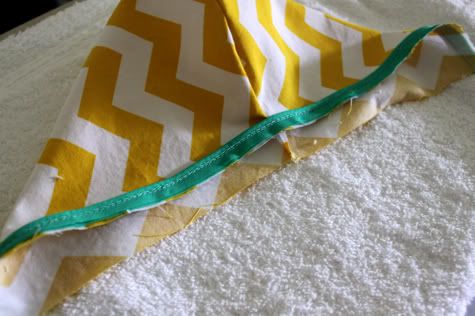

5.  Now fit your terry hood over your cotton one right sides facing (so you see the seam in the terry hood) and pin in place along the piped edge:
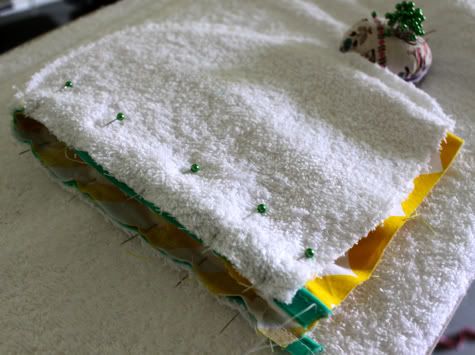
Sew together:
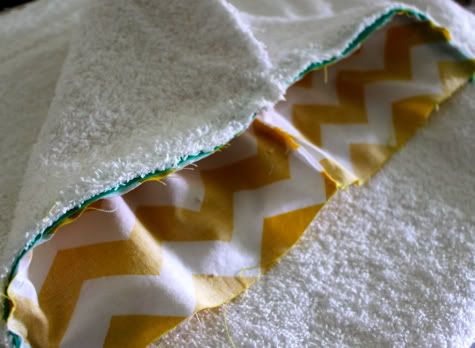
Flip your hood right side out!
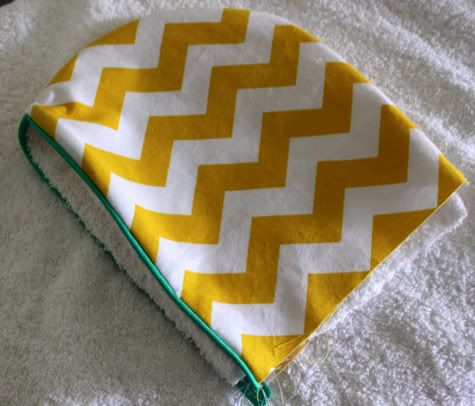

6.  Now take your large cotton rectangle and starting in the center of one long side pin piping all the way around, aligning the edges, with the piping to the inside:
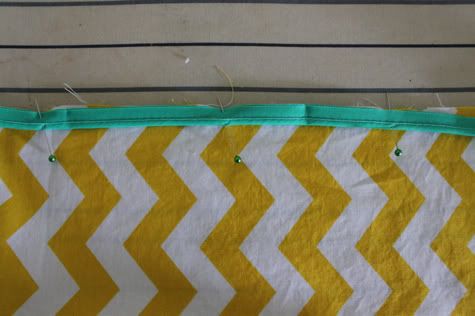
Where the piping meets, pull the cord out about a centimeter and snip it:
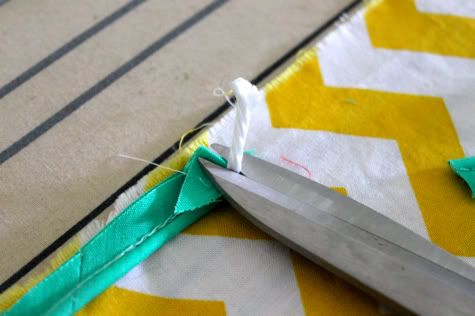
Then fit the other end in the fabric, re-wrap it and pin:
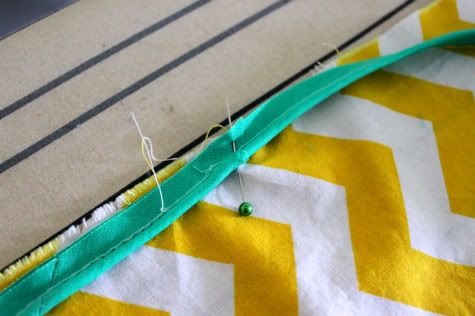
At the corners curve your piping:
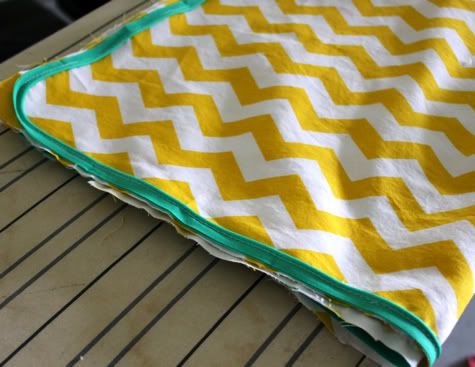
Sew in place along the stitches in the piping.

7. Now find the middle of one wide side of your piped cotton by folding in half and marking with a pin.  Align your hood and pin in place with the opening on top and edges aligned:
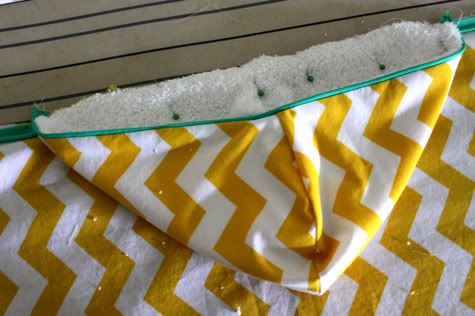
Sew that in place.

8.  Now keeping your hood in the same position, lay your terry (right sides of cotton and terry facing) and pin in place all the way around:
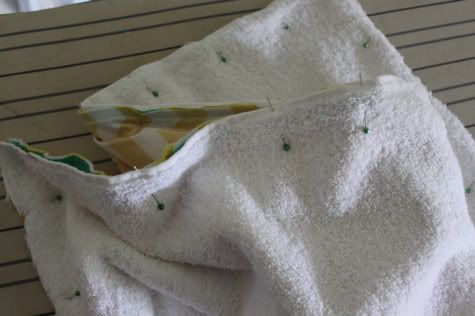
Sew that in place, leaving a 5" opening at the center of the hood (for turning), backstitching at beginning and end.  Trim the curved corners and edges.  Turn your towel right side out through the opening, then slip stitch the opening closed:
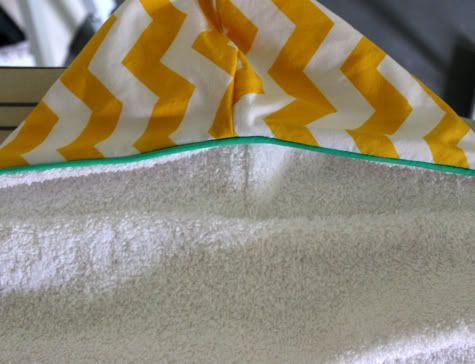
Done!  Look at that luxurious piping!
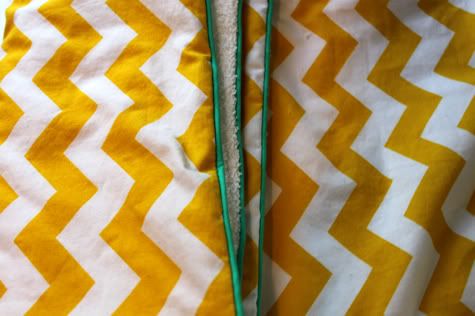

Get the kid wet so you can snuggle 'em up in this!
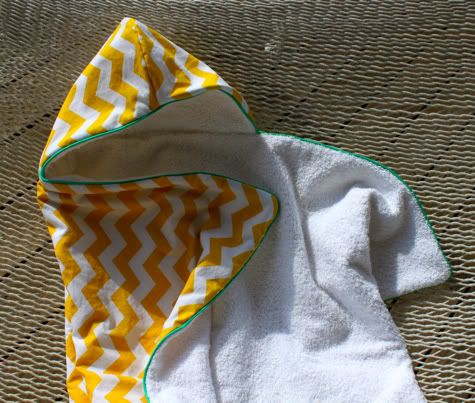
And play!

Labels: , , , , , , , ,

14 Comments:

Blogger Jacinda said...

Ladies, how gorgeous is that photo of Jaime!?! and the towel isn't bad either. : )

May 10, 2010 at 7:19 AM  
Blogger Emily said...

What a lovely interview and tutorial!

May 10, 2010 at 7:33 AM  
Blogger Unknown said...

Love it! Making them :)

May 10, 2010 at 8:55 AM  
Blogger Stacey said...

Oh, that's cute and looks super easy. I'll be adding this to the list of things to make for my daughter this spring.

May 10, 2010 at 9:38 AM  
Blogger JD said...

Love it. Totally awesome...thanks so much!!!!!!!

May 10, 2010 at 5:47 PM  
Blogger Jen @ lil Mop Top said...

looks so easy! I love it! I will have to try this one ASAP! :)

May 13, 2010 at 5:18 PM  
Blogger Zarinaia said...

Thank you for this great tut!! I linked to your tutorial on my blog.
Eleonora, an Italian girl in Sweden

May 14, 2010 at 11:15 PM  
Blogger tada! shop said...

this is fantastic! we just discovered your site. love the stroller cover in the same fabric! hope to work with you through pint size social, we are contributors too.

May 24, 2010 at 7:06 PM  
Blogger Ellen said...

Excellent tutorial on how to make one of these! I'm a moderately beginner seamstress and found your instructions very easy one follow! One question: Did you sew around the perimeter after it was turned right side out to keep it from shifting in the wash? I made an adult sized one of these and with all the fabric I was worried about it shifting...

June 14, 2010 at 4:12 PM  
Blogger Jaime said...

ellen - no i didn't and i haven't had a problem but with a bigger towel i probably would!

June 14, 2010 at 9:20 PM  
Blogger Megan said...

Jaime, I Love Love Love the towel! I made one last night and I am in heaven! Being new to sewing your tutorial was perfect. Thank you!

I was wondering, do you have any advice for trying to make the hood bigger? My older son is super jealous now that he has seen it and while the rectangle for the towel is still a great size, the hood is too small for his big noggin. :) I have tried drafting a new hood but am having trouble. It either looks too big or too small. Any advice?

Thanks again!!

March 30, 2011 at 5:38 PM  
Blogger Jaime said...

megan- thank you! send us a picture! the best thing to do is take a hood that fits your little dude and trace it, adding 1/2" or so all around for the seam allowance! or take ours and make it a little longer and a bunch wider. XOXO

March 30, 2011 at 5:44 PM  
Anonymous Anonymous said...

I made two of these towels for my baby girl, and I love them so much they are my go-to gift for expecting moms because they are so classy and superior in every way to the "bath sets" we can buy here in France. The results are so professional that the recipients are always astounded when they find out I'm the one who made the towels. Thanks for making me look good. ;)

We're visiting friends this weekend, and my husband said we should buy something for their girls. I told him not to worry; I have it covered. :D

So, thanks for this great tutorial. You ladies are so generous with your time and ideas, and I really appreciate it.

April 12, 2011 at 5:46 AM  
Blogger The Unfinished Room said...

I ordered a towel like this just so I could figure out a pattern. Now I don't have to. Thank you!!

August 4, 2011 at 8:49 PM  

Post a Comment

Subscribe to Post Comments [Atom]

<< Home