How to Make Custom Crayons

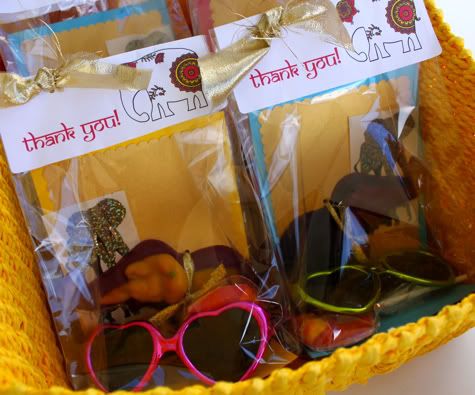
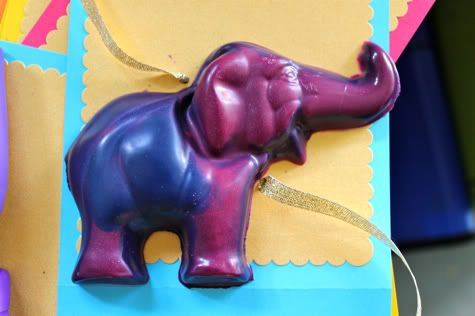
For Scarlet's Indian Elephant Party I made some custom shaped crayons as favors. It's super easy and fun, give it a shot for your next party! Only make them smaller then these, trust me.
I'll give you the full DIY on How to Make Crayons, as well as how to peel crayons without driving yourself insane, after the jump...
DIY Shaped Crayons
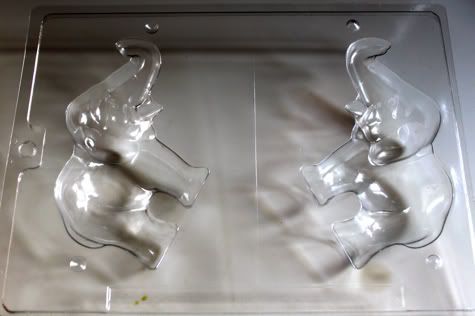
1. To make a custom shape crayon you'll need a bunch of crayons and a mold. You can use silicone ice-cube trays (the bendy kind) but i think it's more fun to use a candy mold. You are never going to be able to make candy in it again though, so keep that in mind. You can find an amazing selection at Bake it Pretty. I got this big elephant one here. However, it takes about ten million crayons to fill one of these big ones, so I advise going for a smaller shape.
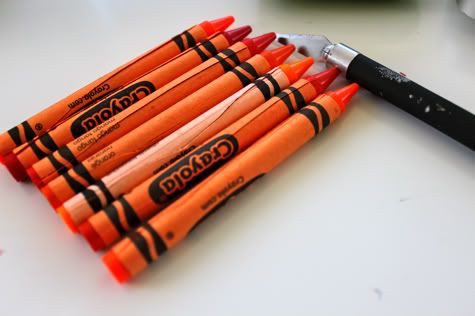
2. Separate your crayons into color piles. Remember that when melted they will end up a single color, created from the mix you put together. Add a few white crayons to make sure the color doesn't get too dark or muddy. Also, if you buy a huge box of crayons, I found you get like 50% brown ones, and I also learned no kid wants a giant brown crayon, so it makes more sense to buy a bunch of smaller cheap boxes (or even better, recycle some crayon scraps). To peel your crayons without losing your mind, slice them with an x-acto knife:
Then pull the wrapper off:
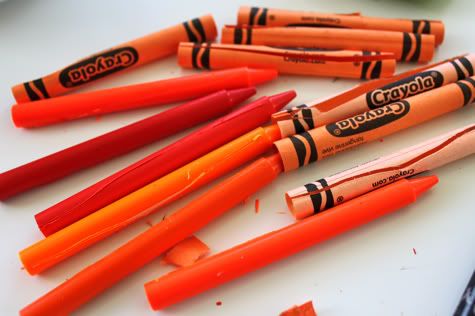
3. Break the crayons into bits and place them in an empty food can:

Then put them in the oven at about 300 degrees and watch them, stirring them up every few minutes with a wooden skewer. Depending on how many you have, it should take about ten minutes for them to melt.
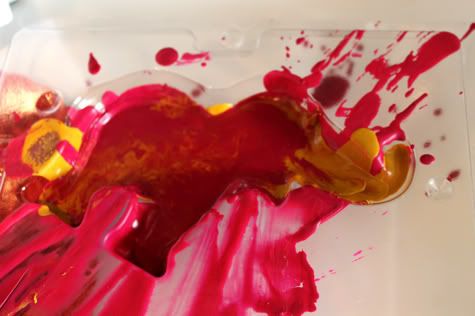
4. Carefully pour the melted wax into your mold. It's very easy to spill, as you can see. Crayon wax is crazy difficult to get out of stuff (try candle wax remover or if that doesn't work, WD-40) so cover your workspace with something you can trash. If you want to mix some colors, you'll need to pour one color in, then the other so they swirl. Any colors you mix before melting will become one color, colors you mix after melting will swirl to a certain degree. Play around with it. For a layered crayon that would be fun to color with you can pour a small layer of one color wax, let it cool, then pour the next layer.
Let the wax cool completely, then gently pop your crayons out of the mold.
Done!
I'll show you how to package them into a cute favor bag soon!
Labels: DIY, Gifts, In One Evening, Kids, Recycle, Tips, Toys, Under $5
posted by Jaime @ 3:00 AM
![]()

14 Comments:
Ikea has some super cheap ice cube molds (the flexible kind) in star, flower, fish and heart shapes. They might work really well!
Such a cute idea - and thanks for the tip on the WD-40 :)
Also, I used silicone cupcake trays to make heart crayons for my students. Instead of melting the crayons and then pouring them in, I put a few crayons in a tray and threw the tray in the oven for 5 minutes. Also, to get them to cool faster, I threw them in the freezer for a minute. If you decide to throw the silicone tray into the oven, make sure it is not an ice cube tray but a baking one (learned that the hard way!!!).
kekubski you're a genius, that would save so much mess!
i love these elephant crayons! we made hearts at valentine's day, and i've been perusing stores for new shapes for year-round crayon molding... fun! here's our method:
http://paintcutpaste.com/valentine-crayons/
i will have to do this!
I made easter egg crayons for all my neices and nephews and had much sucess with the silicone baking pan (and putting the pan straight in the oven). The tip about the xacto knife to take off the paper had me laughing b/c i didn't think of that until about my 56th crayon!
the ikea silicone ice cube trays melted when i poured hot crayon wax into them, just as an FYI to anyone thinking of trying it. the ones from target i had worked MUCH better and could be reused for the same project again.
awesome idea with the candy mold though, i might just have to try that!
amy if it makes you feel any better i tried the microwave just to see if it would work, and my tupperware (and crayon) melted into a waxy molten soup
jaime, you have opened up the door to a world of possibilities! I wonder if I could make cupcake shaped crayons by melting the wax in paper/foil muffin papers,etc., etc., etc.
Working on these for my son's b-day this summer. Tried it out yesterday, the first batch turned out pretty good, didn't get as much of a marble effect as yours but was happy with them.
Nancy - you can find cupcake shaped crayons here: http://www.etsy.com/shop/lilbooandco
I made some crayons using random candy molds we had at school with my first graders a few years ago as part of a science lesson on the states of matter (turning solids into liquids and then back again). Talk about a successful lesson! The kids loved it. I just melted the crayons in a pot on a little hot plate but it totally ruined the pot. Putting them in the oven in empty cans is a great idea. A disposable aluminum baking tray would work well too. I can't wait until my son is old enough to use crayons and not just try to eat them.
If you want more of a swirled effects, either let the wax cool a little before pouring into the molds or splash it in layers in the mold. Like a splash of yellow, let it harden, a splash of purple, let it harden, etc. It's more work, but you have more control over the final product. :)
I've done this TONS of times with my kids! We never throw away a broken crayon in our house! We have a little sandwich baggie that we keep in a low cabinet in the kitchen, and the kids know that whenever a crayon breaks, they put the pieces in the bag! When it fills up, it's crayon-making time! We also figured out the Xacto knife trick (after the 2nd or 3rd crayon, because I bite my nails, so it was impossible to get those silly wrappers off!). I also discovered that you CAN do this in the microwave as well (and it takes about half the time). We used small Gladware containers (the round ones that look like an English muffin will fit in them), and put them in the microwave for 2 minutes on high power. Then mix it up (we used the end of a plastic knife because it's what we had tons of on-hand), and stick it back in for 1 more minute. Depending on how many crayons are in there, you may need to put it in for up to 5 minutes total, but most are done in 3 or 4 minutes. I also advise opening a window, because cooking crayons can get STINKY! We use silicone ice cube trays, silicone cookie trays, and chocolate molds. I suggest letting the melted wax cool for about 30 seconds or so before pouring into the plastic store-bought chocolate molds though, we've distorted a few of them when the wax has been too hot! We made rainbow heart ones this past time. These are SO much fun, and the kids LOVE to use their new crayons!
Post a Comment
Subscribe to Post Comments [Atom]
<< Home