Scarlet and I recently started attending "Messy Art" class and she loves it! So we can do some messier art (like painting) at home, I thought I'd make her a smock to protect her cute clothes from destruction. While I was at it I created this oil cloth smock how-to.
And I've also posted a bonus no-sew version for anyone who wants to whip one out without a sewing machine.

Get the full Kids Art Smock tutorial after the jump...
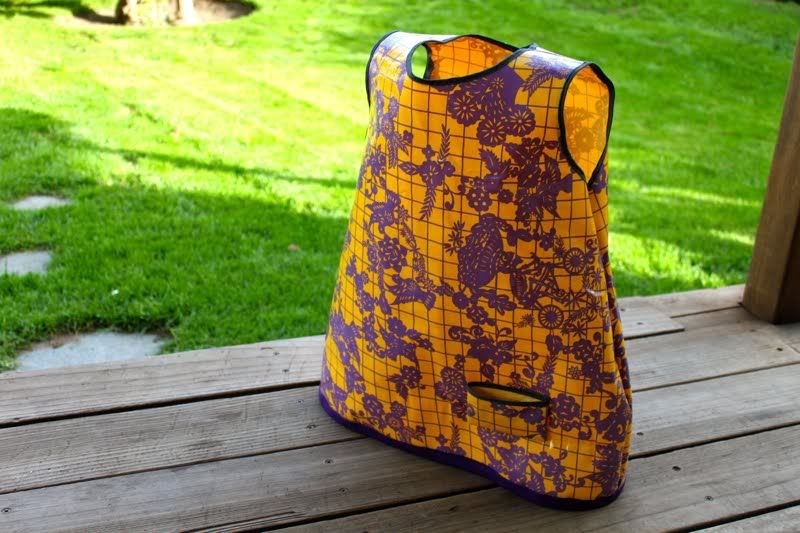
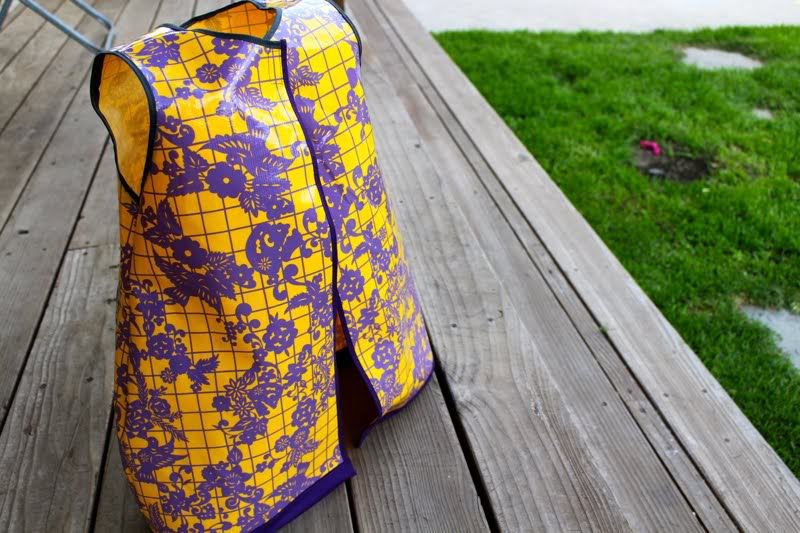
DIY Oilcloth Art Smock
1. Grab your oilcloth. This one is so cute right? I wish I could tell you where to buy it but I picked it up at Lincoln Fabrics and don't know the manufacturer. It's a day-of-the-dead print with birdies and skeletons riding bicycles. I used 1/2 a yard. If you are going to do a no-sew version this is all you need and skip right to the end. For the version I created you also need a package of single fold bias tape and one of double fold bias-tape in contrasting colors.
2. Using an article of clothing that's a little big for your child estimate your shape, then fold the oilcloth in half to cut out the front piece. It should be narrower at the top and pay attention to the size of the neckline and armholes. You want them to fit your child but not be so snug that they're ouchy. Then using the front piece as a template, cut out two pieces for the back:
3. Lay the front of your smock right side up and the two back pieces right side down:
4. Sew them together along the shoulders:
and up the sides:
Now turn it right side out, it will look like this:
5. I decided my neck was too high in the front so i trimmed it down. It should be lower in the front then the back:
6. Now to make it cozier for your child by finishing the edges. Start with the neckhole. Iron and unfold a piece of bias tape and pin it around the neckline like so (one edge of the inside of the bias tape should line up with the neckline):
Pin the shoulder seams open as well:
Sew the bias tape to the neckline in the crease of the bias tape:
Then fold the bias tape over to the inside edge and sew it in place:
7. Now for the back edges. Do the same thing with your bias tape, iron it then unfold and pin with the inside edge lined up to the inside edge of your back pieces:
At the top fold it over and pin:
Sew along the crease:
Fold it to the inside and sew in place:
I missed my inside edge in a few places so I had to sew it twice, but it looks fine. Sewing oilcloth can be a little challenging like that:
8. Now the bottom edge. I used a bigger width of double fold bias tape this time. Iron it, then pin it all the way along the bottom of your smock with an inside edge lined up with the edge of your oilcloth:
Fold it to the inside, then sew in place:
9. Now for the armholes. I tested it out on my model and my armholes were too small so I cut them bigger by folding in half and trimming:
Then iron and unfold your bias tape and pin around the armhole starting at the bottom and over lapping the beginning and end a little bit:
Sew in place along the bias tape fold:
Fold to the inside and sew in place again:
10. Now sew a square of velcro to the back corners of the neckline, with the soft side facing towards the child:
11. I had a little scrap of oilcloth left so I made a pocket. Just fold a scrap in half right sides facing and sew up the sides:
Turn it inside out and cut the top even:
Sew bias tape around the edge as per previous instructions:
Finagle the dress and pocket into your sewing machine and sew in place (or hand sew):
It would be cute with some bigger pockets in the front or maybe some hooks for paint brushes/tools but I was out of fabric.
Done!
So cute:
For a no-sew version:
1. Fold your fabric in half and cut a neckhole on the short side with pinking shears so you can slip it over your child's head.
2. Cut the width of it with pinking shears to your child's shape
3. Use a hole punch or scissors to create holes in each side
4. Knot ribbons and thread through the holes
5. Slip it over your child's head and tie it around his/her sides with the ribbon!
Labels: Baby, Clothing, DIY, Gifts, In One Evening, Kids, Sewing, Toys


6 Comments:
Awesome smock!! Would be a much better alternative to just stripping the child naken when she crafts with messy stuff, which is what we do. We're classy like that. :)
I blogged about your tutorial on Craft Gossip Sewing:
http://sewing.craftgossip.com/tutorial-oilcloth-smock-for-little-crafters/2010/01/11/
--Anne
Ok, I know I'm an idiot but bias tape totally confuses me. Video tutorial perhaps?
Oh, and because I never miss an opportunity to publicly mock Carleton Curtis, check out Jaime's husband's OCD sneaker collection in the closet behind the adorable Miss Scarlet.
if you want Carleton Curtis to edit more videos you better stop mocking his shoe collection. just because he has several pairs of the same shoes in the exact same colors lined up in careful rows doesn't mean he's OCD...does it?
i want one in my size!! so cute!
Just made an art smock for my daughter and I blogged about it with a link back to you: http://howsweeteritis.blogspot.com/2011/07/art-smock.html.
Thanks so much for the tutorial!
Post a Comment
Subscribe to Post Comments [Atom]
<< Home